Vehicle illumination Peugeot Boxer 2018 Owner's Manual
[x] Cancel search | Manufacturer: PEUGEOT, Model Year: 2018, Model line: Boxer, Model: Peugeot Boxer 2018Pages: 232, PDF Size: 9.09 MB
Page 4 of 232
2
.
.
Instrument panels 7
W arning and indicator lamps 8
I
ndic ators
18
Vehicle configuration
2
2
Setting the date and time
2
8
Trip computer
2
8
Tachograph
2
9
Instruments and controls
4
C
entre console
4
K
ey
30
Remote control
3
0
Anti-intrusion security
3
3
Front doors
3
3
Sliding side door
3
3
Rear doors
3
4
Alarm
35
Electric windows
3
6
Driver's seat
3
7
2-seat front bench seat
3
9
Rear seats
4
0
Rear bench seats
4
0
Steering wheel adjustment
4
1
Mirrors
42
H
eating/Manual air conditioning
4
3
Automatic air conditioning
4
4
Additional heating systems
4
6
Rear heating and/or air conditioning
4
6
Programmable additional heating
4
7
Recommendations for ventilation and air
conditioning
5
0
Front demist – defrost
5
1
Defrosting the rear screen and
door mirrors
5
1
Cab layout
5
2
Rear fittings
5
7
Exterior fittings
6
0Lighting controls
6
1
LED daytime running lamps
6
2
Automatic illumination of headlamps
6
2
Guide-me-home lighting
6
2
Adaptive lighting
6
3
Parking lamps
6
4
Headlamp beam height adjustment
6
5
Wiper control stalk
6
5
General safety recommendations
6
7
Hazard warning lamps
6
8
Horn
68
Electronic stability control (ESC)
6
8
Seat belts
7
2
Airbags
75
Child seats
7
7
Deactivating the passenger's front airbag
7
8
ISOFIX mountings and child seats
8
3
Child lock
8
6
Over view
Dashboard instruments Access
Ease of use and comfort Safety
Lighting and visibility
Eco-driving
Contents
Page 10 of 232
8
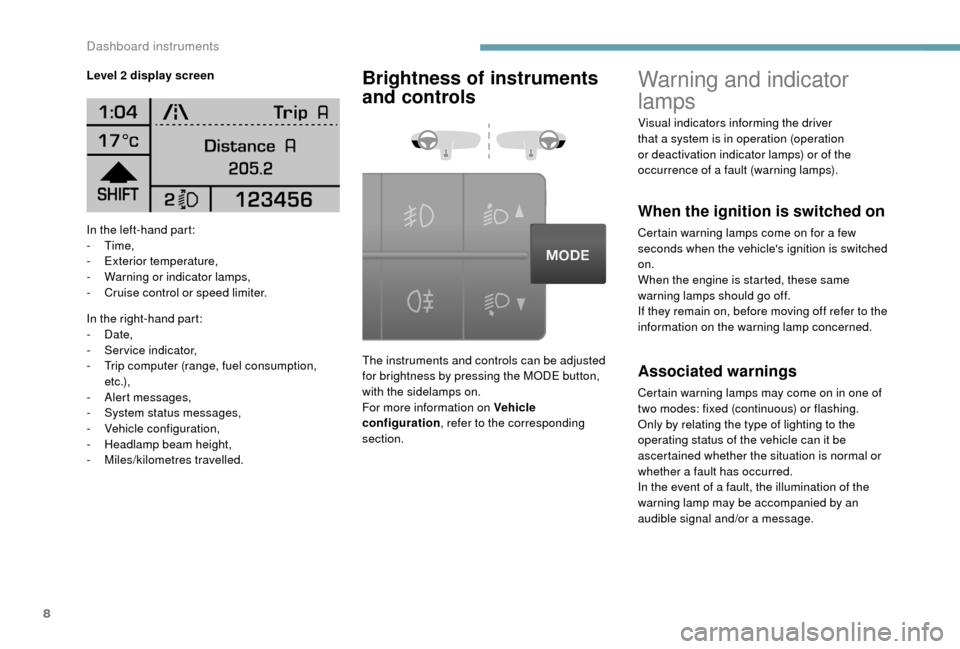
In the left-hand part:
- Time,
-
E
xterior temperature,
-
W
arning or indicator lamps,
-
C
ruise control or speed limiter.
In the right-hand part:
-
Date,
-
S
ervice indicator,
-
T
rip computer (range, fuel consumption,
e t c .),
-
A
lert messages,
-
S
ystem status messages,
-
V
ehicle configuration,
-
H
eadlamp beam height,
-
M
iles/kilometres travelled.
Warning and indicator
lamps
When the ignition is switched on
Certain warning lamps come on for a few
s econds when the vehicle's ignition is switched
on.
When the engine is started, these same
warning lamps should go off.
If they remain on, before moving off refer to the
information on the warning lamp concerned.
Level 2
display screen
Brightness of instruments
and controls
The instruments and controls can be adjusted
for brightness by pressing the MODE button,
with the sidelamps on.
For more information on Vehicle
configuration
, refer to the corresponding
section.Associated warnings
Certain warning lamps may come on in one of
two modes: fixed (continuous) or flashing.
Only by relating the type of lighting to the
operating status of the vehicle can it be
ascertained whether the situation is normal or
whether a
fault has occurred.
In the event of a
fault, the illumination of the
warning lamp may be accompanied by an
audible signal and/or a
message.
Visual indicators informing the driver
that a
system is in operation (operation
or deactivation indicator lamps) or of the
occurrence of a fault (warning lamps).
Dashboard instruments
Page 11 of 232
9
Warning lamps
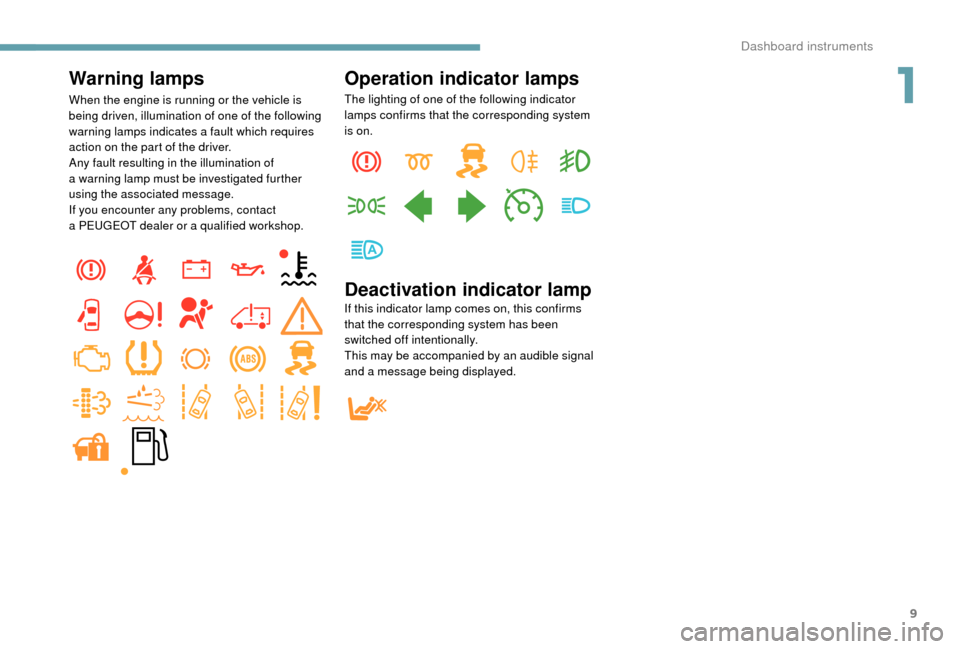
When the engine is running or the vehicle is
being driven, illumination of one of the following
warning lamps indicates a fault which requires
action on the part of the driver.
Any fault resulting in the illumination of
a
warning lamp must be investigated further
using the associated message.
If you encounter any problems, contact
a
PEUGEOT dealer or a qualified workshop.
Operation indicator lamps
The lighting of one of the following indicator
lamps confirms that the corresponding system
is on.
Deactivation indicator lamp
If this indicator lamp comes on, this confirms
that the corresponding system has been
switched off intentionally.
This may be accompanied by an audible signal
and a message being displayed.
1
Dashboard instruments
Page 37 of 232
35
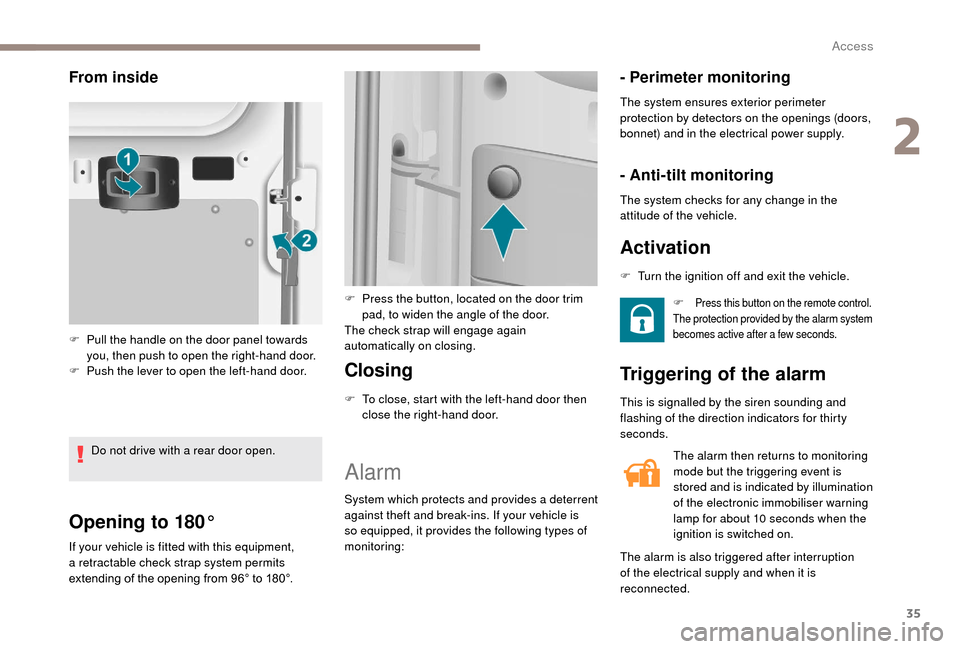
Opening to 180°
If your vehicle is fitted with this equipment,
a retractable check strap system permits
extending of the opening from 96° to 180°.
Closing
F To close, start with the left-hand door then close the right-hand door.
Alarm
System which protects and provides a deterrent
a gainst theft and break-ins. If your vehicle is
so equipped, it provides the following types of
monitoring:
- Perimeter monitoring
The system ensures exterior perimeter
protection by detectors on the openings (doors,
bonnet) and in the electrical power supply.
- Anti-tilt monitoring
The system checks for any change in the
attitude of the vehicle.
Activation
F Press this button on the remote control.
The protection provided by the alarm system
becomes active after a
few seconds.
Triggering of the alarm
The alarm then returns to monitoring
mode but the triggering event is
stored and is indicated by illumination
of the electronic immobiliser warning
lamp for about 10
seconds when the
ignition is switched on.
The alarm is also triggered after interruption
of the electrical supply and when it is
reconnected.
From inside
F Pull the handle on the door panel towards you, then push to open the right-hand door.
F
P
ush the lever to open the left-hand door.
Do not drive with a
rear door open. F
P
ress the button, located on the door trim
pad, to widen the angle of the door.
The check strap will engage again
automatically on closing. F
T
urn the ignition off and exit the vehicle.
This is signalled by the siren sounding and
flashing of the direction indicators for thirty
seconds.
2
Access
Page 63 of 232
61
Lighting controls
In some weather conditions (e.g. low
temperature or humidity), the presence
of misting on the internal sur face of the
glass of the headlamps and rear lamps is
normal; it disappears after the lamps have
been on for a few minutes.
Travelling abroad
If using your vehicle in a
country that
drives on the other side of the road, the
headlamps must be adjusted to avoid
dazzling oncoming drivers.
Contact a
PEUGEOT dealer or a qualified
workshop.
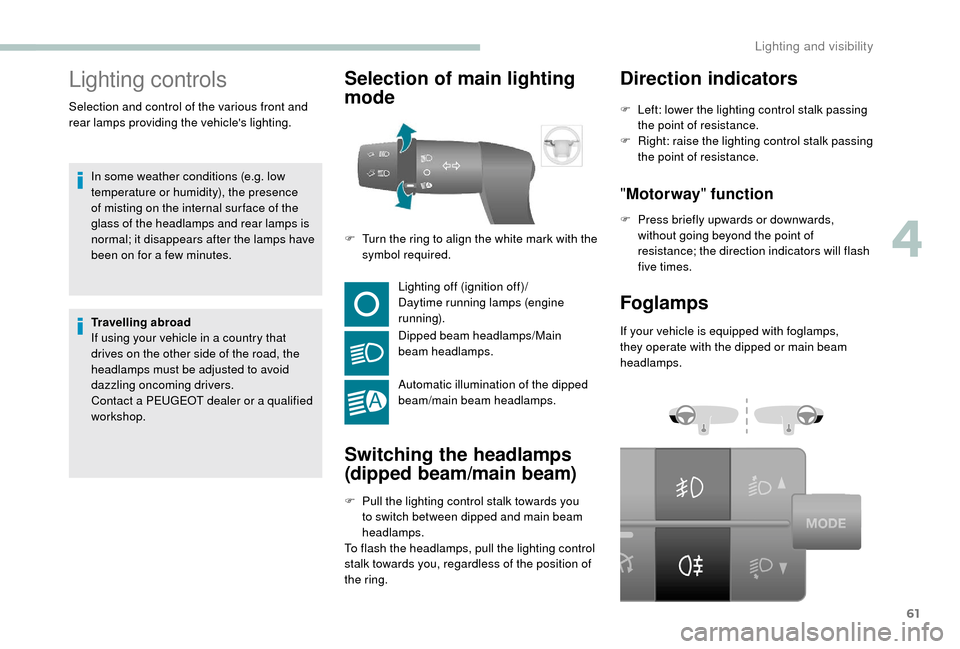
Selection of main lighting
mode
Lighting off (ignition off)/
Daytime running lamps (engine
running).
Dipped beam headlamps/Main
beam headlamps.
Automatic illumination of the dipped
beam/main beam headlamps.
Switching the headlamps
(dipped beam/main beam)
F Pull the lighting control stalk towards you to switch between dipped and main beam
headlamps.
To flash the headlamps, pull the lighting control
stalk towards you, regardless of the position of
the ring.
Direction indicators
F Turn the ring to align the white mark with the symbol required. F
L
eft: lower the lighting control stalk passing
the point of resistance.
F
R
ight: raise the lighting control stalk passing
the point of resistance.
" Motorway " function
F Press briefly upwards or downwards,
without going beyond the point of
resistance; the direction indicators will flash
five times.
Foglamps
If your vehicle is equipped with foglamps,
they operate with the dipped or main beam
headlamps.
Selection and control of the various front and
rear lamps providing the vehicle's lighting.
4
Lighting and visibility
Page 64 of 232
62
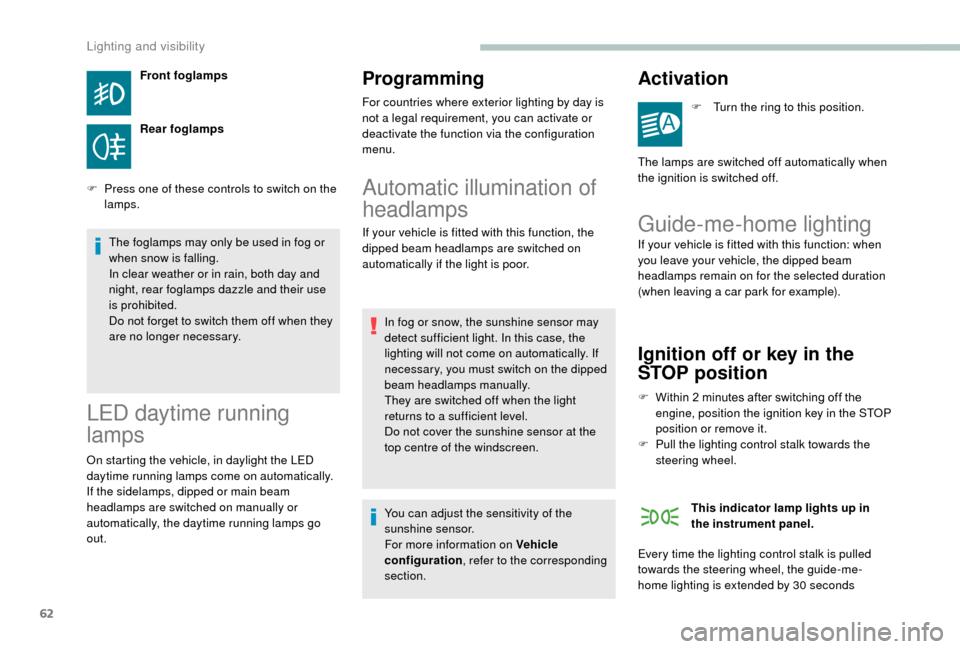
Front foglamps
Rear foglamps
F
P
ress one of these controls to switch on the
lamps.
The foglamps may only be used in fog or
when snow is falling.
In clear weather or in rain, both day and
night, rear foglamps dazzle and their use
is prohibited.
Do not forget to switch them off when they
are no longer necessary.
LED daytime running
lamps
On starting the vehicle, in daylight the LED
daytime running lamps come on automatically.
If the sidelamps, dipped or main beam
headlamps are switched on manually or
automatically, the daytime running lamps go
out.
Programming
For countries where exterior lighting by day is
not a legal requirement, you can activate or
deactivate the function via the configuration
menu.
Automatic illumination of
headlamps
If your vehicle is fitted with this function, the
dipped beam headlamps are switched on
automatically if the light is poor.
In fog or snow, the sunshine sensor may
detect sufficient light. In this case, the
lighting will not come on automatically. If
necessary, you must switch on the dipped
beam headlamps manually.
They are switched off when the light
returns to a
sufficient level.
Do not cover the sunshine sensor at the
top centre of the windscreen.
Activation
F Turn the ring to this position.
The lamps are switched off automatically when
the ignition is switched off.
Guide-me-home lighting
If your vehicle is fitted with this function: when
you leave your vehicle, the dipped beam
headlamps remain on for the selected duration
(when leaving a car park for example).
Ignition off or key in the
STOP position
F Within 2 minutes after switching off the
engine, position the ignition key in the STOP
position or remove it.
F
P
ull the lighting control stalk towards the
steering wheel.
This indicator lamp lights up in
the instrument panel.
Every time the lighting control stalk is pulled
towards the steering wheel, the guide-me-
home lighting is extended by 30
seconds
You can adjust the sensitivity of the
sunshine sensor.
For more information on
Vehicle
configuration , refer to the corresponding
section.
Lighting and visibility
Page 65 of 232
63
up to approximately 3 minutes. When this
t ime has elapsed, the lamps are switched off
automatically.
Deactivate this control by keeping the stalk
pulled towards the steering wheel for more than
2
seconds.
Adaptive lighting
System which automatically changes to main
beam according to the ambient light level and
the driving conditions, using a camera located
at the top of the windscreen.
This system is a
driving aid.
The driver remains responsible for the
vehicle's lighting, its correct use for the
prevailing conditions of light, visibility
and traffic, and obser vation of driving
regulations.
Activation
F Turn the lighting control stalk ring to this position.
F
A
ctivate the function with the MODE button;
in the "Automatic headlamp dipping" menu,
select "ON". For more information on Vehicle
configuration
, refer to the corresponding
section.
F
F
lash the headlamps (going beyond the
point of resistance) to activate the function.
Operation
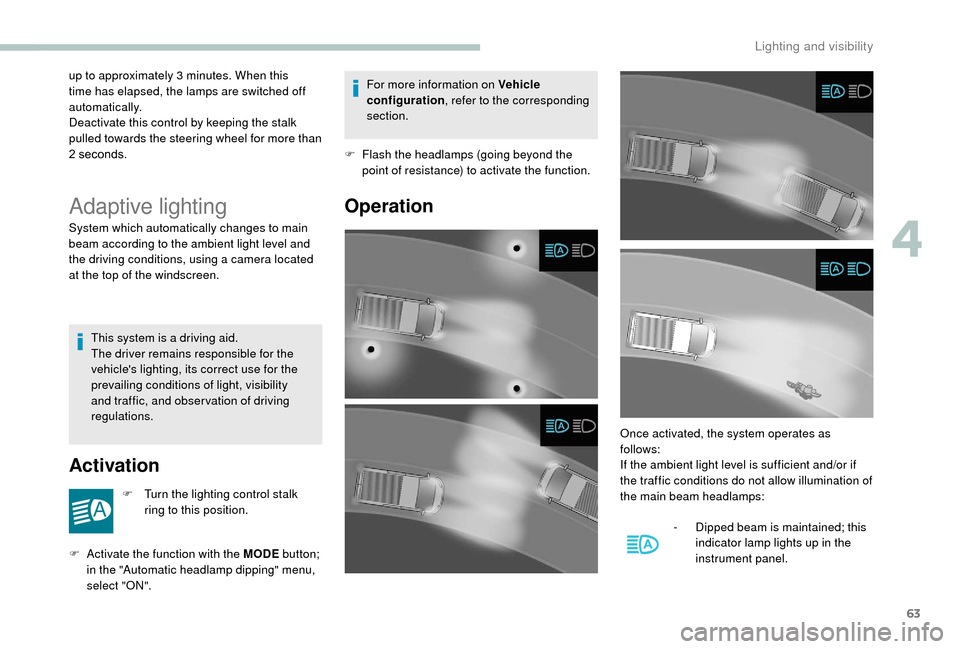
Once activated, the system operates as
follows:
If the ambient light level is sufficient and/or if
the traffic conditions do not allow illumination of
the main beam headlamps:
-
D
ipped beam is maintained; this
indicator lamp lights up in the
instrument panel.
4
Lighting and visibility
Page 66 of 232
64
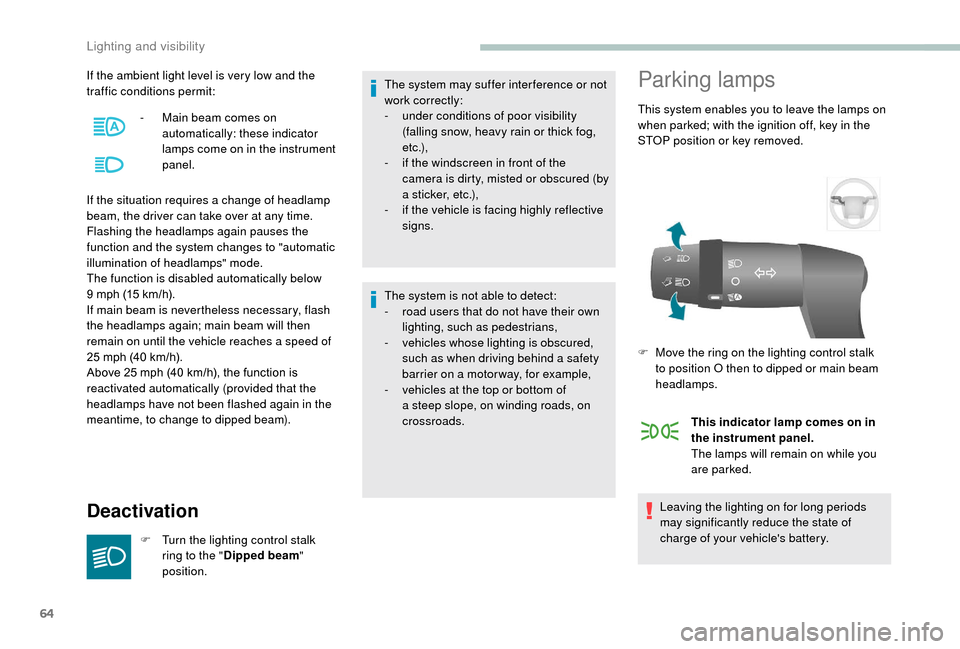
If the ambient light level is very low and the
traffic conditions permit:
If the situation requires a change of headlamp
beam, the driver can take over at any time.
Flashing the headlamps again pauses the
function and the system changes to "automatic
illumination of headlamps" mode.
The function is disabled automatically below
9
mph (15 km/h).
If main beam is nevertheless necessary, flash
the headlamps again; main beam will then
remain on until the vehicle reaches a
speed of
25
mph (40 km/h).
Above 25
mph (40 km/h), the function is
reactivated automatically (provided that the
headlamps have not been flashed again in the
meantime, to change to dipped beam).
Deactivation
F Turn the lighting control stalk ring to the " Dipped beam "
position. The system may suffer inter ference or not
work correctly:
-
u
nder conditions of poor visibility
(falling snow, heavy rain or thick fog,
e t c .),
-
i
f the windscreen in front of the
camera is dirty, misted or obscured (by
a sticker, etc.),
-
i
f the vehicle is facing highly reflective
signs.
The system is not able to detect:
-
r
oad users that do not have their own
lighting, such as pedestrians,
-
v
ehicles whose lighting is obscured,
such as when driving behind a safety
barrier on a motor way, for example,
-
v
ehicles at the top or bottom of
a steep slope, on winding roads, on
crossroads.
Parking lamps
This system enables you to leave the lamps on
when parked; with the ignition off, key in the
STOP position or key removed.
This indicator lamp comes on in
the instrument panel.
The lamps will remain on while you
are parked.
Leaving the lighting on for long periods
may significantly reduce the state of
charge of your vehicle's battery.
-
M
ain beam comes on
automatically: these indicator
lamps come on in the instrument
panel.
F
M
ove the ring on the lighting control stalk
to position O then to dipped or main beam
headlamps.
Lighting and visibility
Page 71 of 232
69
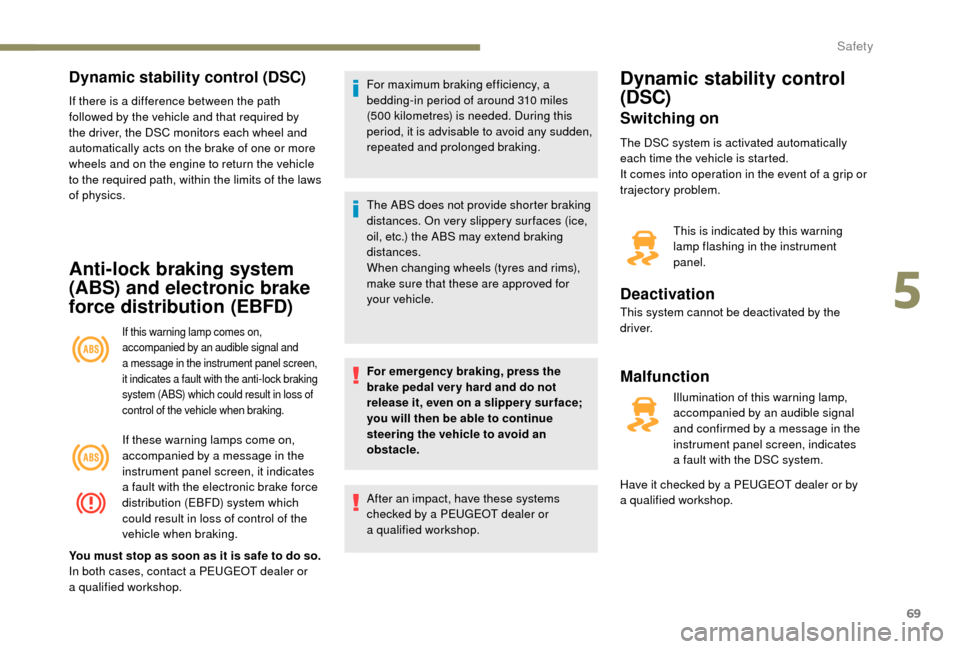
Dynamic stability control (DSC)
If there is a difference between the path
f ollowed by the vehicle and that required by
the driver, the DSC monitors each wheel and
automatically acts on the brake of one or more
wheels and on the engine to return the vehicle
to the required path, within the limits of the laws
of physics.
Anti-lock braking system
(ABS) and electronic brake
force distribution (EBFD)
If this warning lamp comes on,
accompanied by an audible signal and
a
message in the instrument panel screen,
it indicates a
f
ault with the anti-lock braking
system (ABS) which could result in loss of
control of the vehicle when braking.
If these warning lamps come on,
accompanied by a message in the
instrument panel screen, it indicates
a
fault with the electronic brake force
distribution (EBFD) system which
could result in loss of control of the
vehicle when braking.
You must stop as soon as it is safe to do so.
In both cases, contact a
PEUGEOT dealer or
a
qualified workshop. For maximum braking efficiency, a
bedding-in period of around 310
miles
(500 kilometres) is needed. During this
period, it is advisable to avoid any sudden,
repeated and prolonged braking.
The ABS does not provide shorter braking
distances. On very slippery sur faces (ice,
oil, etc.) the ABS may extend braking
distances.
When changing wheels (tyres and rims),
make sure that these are approved for
your vehicle.
For emergency braking, press the
brake pedal ver y hard and do not
release it, even on a slipper y sur face;
you will then be able to continue
steering the vehicle to avoid an
obstacle.
After an impact, have these systems
checked by a
PEUGEOT dealer or
a
qualified workshop.
Dynamic stability control
(DSC)
Switching on
The DSC system is activated automatically
each time the vehicle is started.
It comes into operation in the event of a grip or
trajectory problem.
This is indicated by this warning
lamp flashing in the instrument
panel.
Deactivation
This system cannot be deactivated by the
driver.
Malfunction
Illumination of this warning lamp,
accompanied by an audible signal
and confirmed by a message in the
instrument panel screen, indicates
a
fault with the DSC system.
Have it checked by a
PEUGEOT dealer or by
a
qualified workshop.
5
5
Safety
Page 92 of 232
90
Driving with the doors locked may make
access to the passenger compartment by
the emergency services more difficult in an
emergency.
As a safety precaution (with children on
board), remove the key from the ignition when
leaving the vehicle, even for a
short time.
When purchasing a second-hand
vehicle:
-
e
nsure that you are given the
confidential card,
-
h
ave the keys recorded by
a
PEUGEOT dealer to ensure that the
keys in your possession are the only
ones which can start the vehicle.
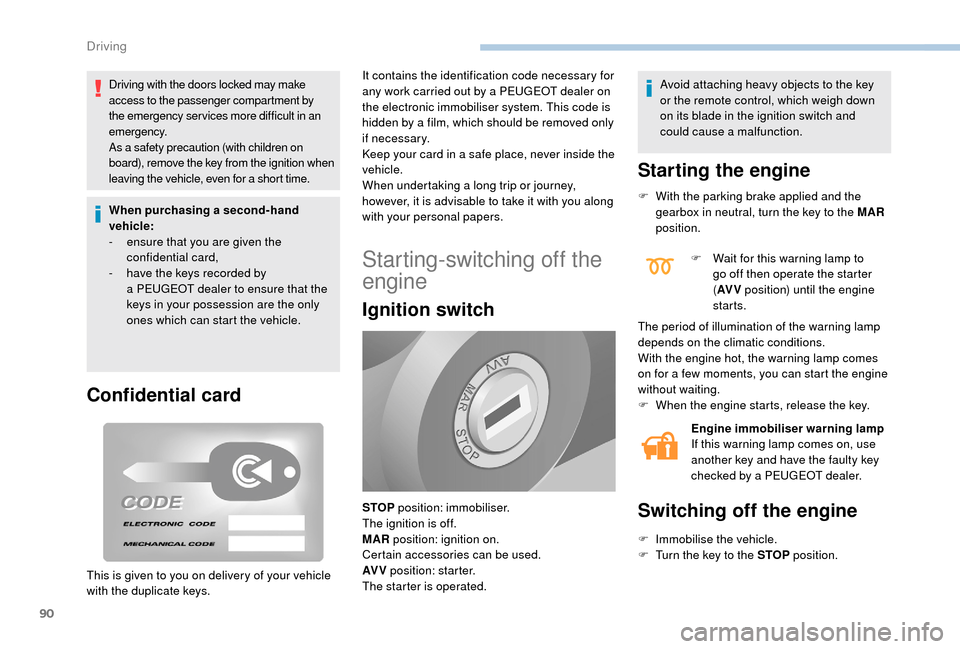
Confidential card
It contains the identification code necessary for
any work carried out by a PEUGEOT dealer on
the electronic immobiliser system. This code is
hidden by a
film, which should be removed only
if necessary.
Keep your card in a
safe place, never inside the
vehicle.
When undertaking a
long trip or journey,
however, it is advisable to take it with you along
with your personal papers.
Starting-switching off the
engine
Ignition switch
Avoid attaching heavy objects to the key
or the remote control, which weigh down
on its blade in the ignition switch and
could cause a
malfunction.
Starting the engine
F With the parking brake applied and the gearbox in neutral, turn the key to the MAR
position.
The period of illumination of the warning lamp
depends on the climatic conditions.
With the engine hot, the warning lamp comes
on for a
few moments, you can start the engine
without waiting.
F
W
hen the engine starts, release the key.Engine immobiliser warning lamp
If this warning lamp comes on, use
another key and have the faulty key
checked by a
PEUGEOT dealer.
Switching off the engine
F Immobilise the vehicle.
F T urn the key to the STOP position.
STOP
position: immobiliser.
The ignition is off.
MAR position: ignition on.
Certain accessories can be used.
AV V position: starter.
The starter is operated. F
W
ait for this warning lamp to
go off then operate the starter
( AV V position) until the engine
starts.
This is given to you on delivery of your vehicle
with the duplicate keys.
Driving