Peugeot Boxer 2018 Owner's Manual
Manufacturer: PEUGEOT, Model Year: 2018, Model line: Boxer, Model: Peugeot Boxer 2018Pages: 232, PDF Size: 9.09 MB
Page 1 of 232
BOXER
HANDBOOK
Page 2 of 232
Access to the Handbook
The Handbook is available on the PEUGEOT website,
in the "Personal space" section or at the following
address:
http://public.servicebox.peugeot.com/ddb/
Direct access to the Handbook .
Select:
-
t
he language,
-
t
he vehicle, its body style,
-
t
he print edition of your handbook corresponding to the date of 1
st
registration of your vehicle.
Then select:
-
t
he vehicle,
-
t
he print edition corresponding to the date of 1
st registration of your
vehicle.
Download the content of the vehicle's Handbook .
From the appropriate Store, download the Scan
MyPeugeot APP smartphone application.
This symbol indicates the latest information
available.
Page 3 of 232
Welcome
Thank you for choosing a Peugeot Boxer.
T his document presents the information and recommendations required
for you to be able to explore your vehicle in complete safety.
Your vehicle will be fitted with only some of the equipment described in
this document, depending on its trim level, model and the specification
for the country in which it was sold.
In this document, you will find all of the instructions and
recommendations on use that will allow you to enjoy your vehicle to the
fullest. It is strongly recommended that you familiarise yourself with it,
as well as the Warranty and Maintenance Record which will provide you
with information about warranties, servicing and roadside assistance
associated with your vehicle. Key
The descriptions and illustrations are given without any obligation.
Automobiles PEUGEOT reser ves the right to modify the technical
specifications, equipment and accessories without having to update this
edition of the guide.
If ownership of your vehicle is transferred, please ensure this Complete
Handbook is passed on to the new owner. Safety warning
Additional information
Contributes to the protection of the environment
Left-hand drive vehicle
Right-hand drive vehicle
Key
This key will enable you to identify the special features of your vehicle:
Van
Double cab
Crew cab
Chassis cab Floor cab
Tipper
Combi, minibus
Page 4 of 232
2
.
.
Instrument panels 7
W arning and indicator lamps 8
I
ndic ators
18
Vehicle configuration
2
2
Setting the date and time
2
8
Trip computer
2
8
Tachograph
2
9
Instruments and controls
4
C
entre console
4
K
ey
30
Remote control
3
0
Anti-intrusion security
3
3
Front doors
3
3
Sliding side door
3
3
Rear doors
3
4
Alarm
35
Electric windows
3
6
Driver's seat
3
7
2-seat front bench seat
3
9
Rear seats
4
0
Rear bench seats
4
0
Steering wheel adjustment
4
1
Mirrors
42
H
eating/Manual air conditioning
4
3
Automatic air conditioning
4
4
Additional heating systems
4
6
Rear heating and/or air conditioning
4
6
Programmable additional heating
4
7
Recommendations for ventilation and air
conditioning
5
0
Front demist – defrost
5
1
Defrosting the rear screen and
door mirrors
5
1
Cab layout
5
2
Rear fittings
5
7
Exterior fittings
6
0Lighting controls
6
1
LED daytime running lamps
6
2
Automatic illumination of headlamps
6
2
Guide-me-home lighting
6
2
Adaptive lighting
6
3
Parking lamps
6
4
Headlamp beam height adjustment
6
5
Wiper control stalk
6
5
General safety recommendations
6
7
Hazard warning lamps
6
8
Horn
68
Electronic stability control (ESC)
6
8
Seat belts
7
2
Airbags
75
Child seats
7
7
Deactivating the passenger's front airbag
7
8
ISOFIX mountings and child seats
8
3
Child lock
8
6
Over view
Dashboard instruments Access
Ease of use and comfort Safety
Lighting and visibility
Eco-driving
Contents
Page 5 of 232
3
.
.
10
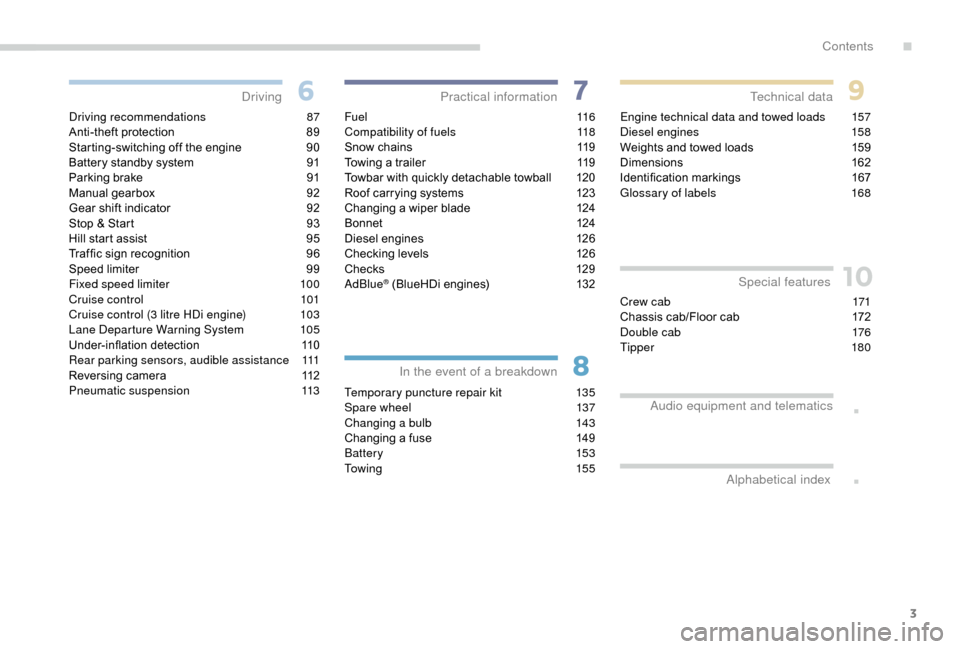
Driving recommendations 87
Anti-theft protection 8 9
Starting-switching off the engine
9
0
Battery standby system
9
1
Parking brake
9
1
Manual gearbox
9
2
Gear shift indicator
9
2
Stop & Start
9
3
Hill start assist
9
5
Traf fic sign recognition
9
6
Speed limiter
9
9
Fixed speed limiter
1
00
Cruise control
1
01
Cruise control (3
litre HDi engine)
1
03
Lane Departure Warning System
1
05
Under-inflation detection
1
10
Rear parking sensors, audible assistance
1
11
Reversing camera
1
12
Pneumatic suspension
1
13F u e l
11 6
Compatibility of fuels 1 18
Snow chains
1
19
Towing a
trailer
1
19
Towbar with quickly detachable towball
1
20
Roof carrying systems
1
23
Changing a
wiper blade
1
24
Bonnet
12
4
Diesel engines
1
26
Checking levels
1
26
Chec ks
12
9
AdBlue
® (BlueHDi engines) 1 32
Temporary puncture repair kit
1
35
Spare wheel
1
37
Changing a
bulb
1
43
Changing a
fuse
1
49
Battery
153
To w i n g
15 5Engine technical data and towed loads
1
57
Diesel engines
1
58
Weights and towed loads
1
59
Dimensions
1
62
Identification markings
1
67
Glossary of labels
1
68
Driving
Practical information
In the event of a breakdown Technical data
Alphabetical index Special features
Crew cab 1
71
Chassis cab/Floor cab 1 72
Double cab
1
76
Tipper
18
0
Audio equipment and telematics
.
Contents
Page 6 of 232
4
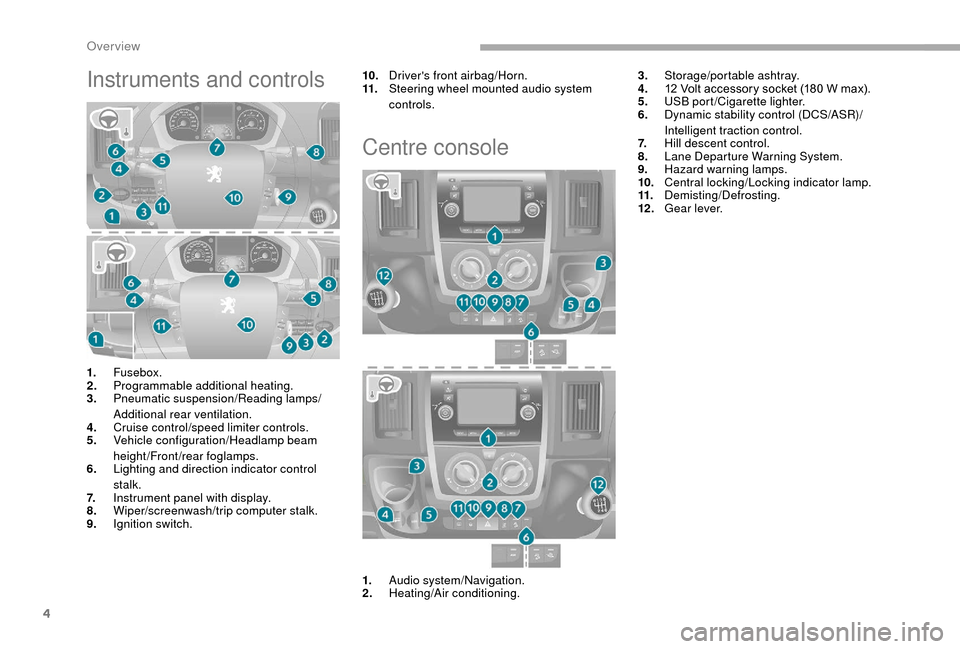
Instruments and controls10.Driver's front airbag/Horn.
11. Steering wheel mounted audio system
controls.
Centre console
3.Storage/portable ashtray.
4. 12
Volt accessory socket (180 W max).
5. USB port/Cigarette lighter.
6. Dynamic stability control (DCS/ASR)/
Intelligent traction control.
7. Hill descent control.
8. Lane Departure Warning System.
9. Hazard warning lamps.
10. Central locking/Locking indicator lamp.
11. Demisting/Defrosting.
12 . Gear lever.
1. Fusebox.
2. Programmable additional heating.
3. Pneumatic suspension/Reading lamps/
Additional rear ventilation.
4. Cruise control/speed limiter controls.
5. Vehicle configuration/Headlamp beam
height/Front/rear foglamps.
6. Lighting and direction indicator control
stalk.
7. Instrument panel with display.
8. Wiper/screenwash/trip computer stalk.
9. Ignition switch.
1.Audio system/Navigation.
2. Heating/Air conditioning.
Over view
Page 7 of 232
5
As a passenger, if you avoid connecting your
m ultimedia devices (film, music, video game,
etc.), you will contribute towards limiting the
consumption of electrical energy, and so of
fuel.
Disconnect your portable devices before
leaving the vehicle.
Eco- driving
Eco-driving is a range of everyday practices that allow the motorist to optimise their fuel consumption and CO2 emissions.
Optimise the use of your
gearbox
With a manual gearbox, move off gently
an d change up without waiting. During
acceleration, change up early.
With an automatic gearbox, give preference
to automatic mode and avoid pressing the
accelerator pedal heavily or suddenly.
The gear shift indicator invites you to engage
the most suitable gear: as soon as the
indication is displayed in the instrument panel,
follow it straight away.
For vehicles fitted with an automatic gearbox,
this indicator appears only in manual mode.
Drive smoothly
Maintain a safe distance between vehicles,
u se engine braking rather than the
brake pedal, and press the accelerator
progressively. These practices contribute
towards a
reduction in fuel consumption and
CO
2 emissions and also help reduce the
b
ackground traffic noise.
If your vehicle has cruise control, make use of
the system at speeds above 25
mph (40 km/h)
when the traffic is flowing well.
Control the use of your electrical
equipment
Before moving off, if the passenger
compartment is too warm, ventilate it by
opening the windows and air vents before
using the air conditioning.
Above 30
mph (50 km/h), close the windows
and leave the air vents open.
Consider using equipment that can help
keep the temperature in the passenger
compartment down (sunroof blind and window
blinds, etc.). Switch off the headlamps and front foglamps
when the ambient light level does not require
their use.
Avoid running the engine before moving off,
particularly in winter; your vehicle will warm up
much faster while driving. Unless it has automatic regulation, switch off
the air conditioning as soon as the desired
temperature has been reached.
Switch off the demisting and defrosting
controls, if these are not automatically
managed.
Switch off the heated seat as soon as
possible.
.
Eco-driving
Page 8 of 232
6
Limit the causes of excess
consumption
Spread loads throughout the vehicle; place
the heaviest items in the bottom of the boot,
as close as possible to the rear seats.
Limit the loads carried in the vehicle and
reduce wind resistance (roof bars, roof rack,
bicycle carrier, trailer, etc.). Preferably, use a
roof box.
Remove roof bars and roof racks after use.
At the end of winter, remove snow tyres and
refit your summer tyres.
Observe the recommendations
on maintenance
Check the tyre pressures regularly, when cold,
referring to the label in the door aperture,
driver's side.
Carry out this check in particular:
-
b
efore a long journey,
-
a
t each change of season,
-
a
fter a long period out of use.
Do not forget the spare wheel and the tyres on
any trailer or caravan. Have your vehicle ser viced regularly (engine
oil, oil filter, air filter, cabin filter, etc.) and
obser ve the schedule of operations in the
manufacturer's service schedule.
When filling the tank, do not continue after the
3
rd cut-off of the nozzle to avoid over flow.
At the wheel of your new vehicle, it is only
after the first 1,900
miles (3,000 kilometres)
that you will see the fuel consumption settle
down to a
consistent average.
With a
BlueHDi Diesel engine, if the SCR
system is faulty, your vehicle becomes
polluting. As soon as possible, visit
a
PEUGEOT dealer or a qualified workshop
to make your vehicle's level of nitrogen oxides
emissions compliant to the standard.
Eco-driving
Page 9 of 232
7
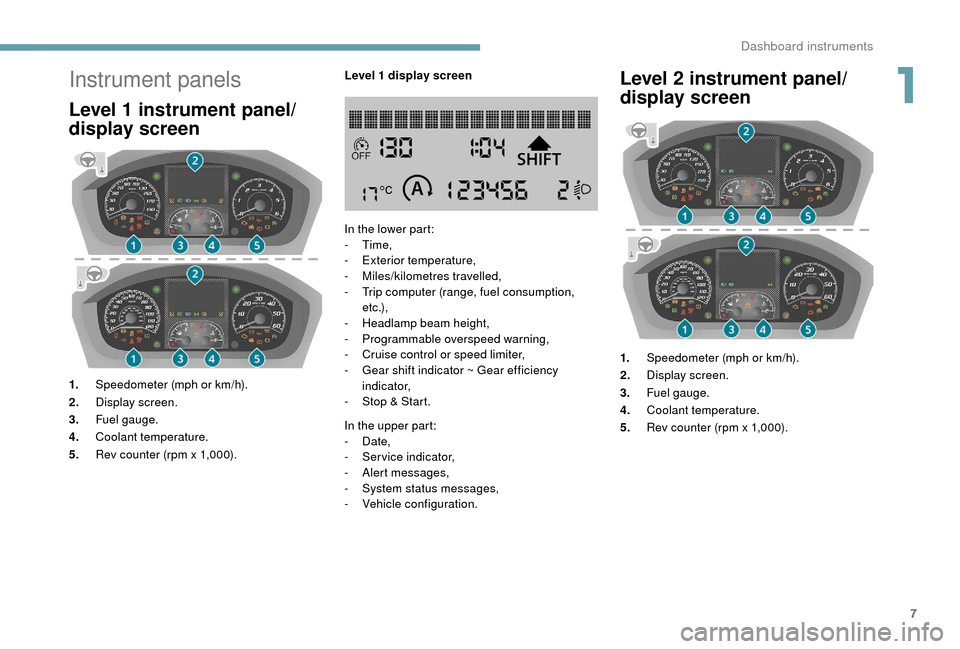
Instrument panels
Level 1 instrument panel/
d isplay screen
1. Speedometer (mph or km/h).
2. Display screen.
3. Fuel gauge.
4. Coolant temperature.
5. Rev counter (rpm x 1,000). Level 1
display screen
In the lower part:
- Time,
-
E
xterior temperature,
-
M
iles/kilometres travelled,
-
T
rip computer (range, fuel consumption,
e t c .),
-
H
eadlamp beam height,
-
P
rogrammable overspeed warning,
-
C
ruise control or speed limiter,
- G ear shift indicator ~ Gear efficiency
i n d i c a t o r,
-
S
top & Start.
In the upper part:
-
Date,
-
S
ervice indicator,
-
A
lert messages,
-
S
ystem status messages,
-
V
ehicle configuration.
Level 2 instrument panel/
d isplay screen
1. Speedometer (mph or km/h).
2. Display screen.
3. Fuel gauge.
4. Coolant temperature.
5. Rev counter (rpm x 1,000).
1
Dashboard instruments
Page 10 of 232
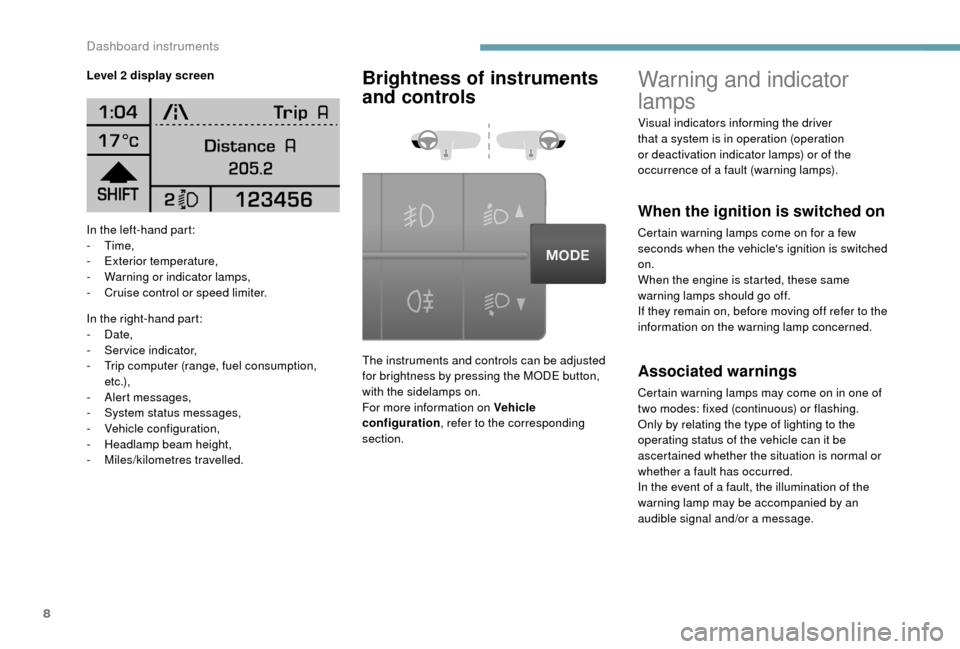
8
In the left-hand part:
- Time,
-
E
xterior temperature,
-
W
arning or indicator lamps,
-
C
ruise control or speed limiter.
In the right-hand part:
-
Date,
-
S
ervice indicator,
-
T
rip computer (range, fuel consumption,
e t c .),
-
A
lert messages,
-
S
ystem status messages,
-
V
ehicle configuration,
-
H
eadlamp beam height,
-
M
iles/kilometres travelled.
Warning and indicator
lamps
When the ignition is switched on
Certain warning lamps come on for a few
s econds when the vehicle's ignition is switched
on.
When the engine is started, these same
warning lamps should go off.
If they remain on, before moving off refer to the
information on the warning lamp concerned.
Level 2
display screen
Brightness of instruments
and controls
The instruments and controls can be adjusted
for brightness by pressing the MODE button,
with the sidelamps on.
For more information on Vehicle
configuration
, refer to the corresponding
section.Associated warnings
Certain warning lamps may come on in one of
two modes: fixed (continuous) or flashing.
Only by relating the type of lighting to the
operating status of the vehicle can it be
ascertained whether the situation is normal or
whether a
fault has occurred.
In the event of a
fault, the illumination of the
warning lamp may be accompanied by an
audible signal and/or a
message.
Visual indicators informing the driver
that a
system is in operation (operation
or deactivation indicator lamps) or of the
occurrence of a fault (warning lamps).
Dashboard instruments