change time Peugeot Boxer 2018 Owner's Manual
[x] Cancel search | Manufacturer: PEUGEOT, Model Year: 2018, Model line: Boxer, Model: Peugeot Boxer 2018Pages: 232, PDF Size: 9.09 MB
Page 7 of 232
5
As a passenger, if you avoid connecting your
m ultimedia devices (film, music, video game,
etc.), you will contribute towards limiting the
consumption of electrical energy, and so of
fuel.
Disconnect your portable devices before
leaving the vehicle.
Eco- driving
Eco-driving is a range of everyday practices that allow the motorist to optimise their fuel consumption and CO2 emissions.
Optimise the use of your
gearbox
With a manual gearbox, move off gently
an d change up without waiting. During
acceleration, change up early.
With an automatic gearbox, give preference
to automatic mode and avoid pressing the
accelerator pedal heavily or suddenly.
The gear shift indicator invites you to engage
the most suitable gear: as soon as the
indication is displayed in the instrument panel,
follow it straight away.
For vehicles fitted with an automatic gearbox,
this indicator appears only in manual mode.
Drive smoothly
Maintain a safe distance between vehicles,
u se engine braking rather than the
brake pedal, and press the accelerator
progressively. These practices contribute
towards a
reduction in fuel consumption and
CO
2 emissions and also help reduce the
b
ackground traffic noise.
If your vehicle has cruise control, make use of
the system at speeds above 25
mph (40 km/h)
when the traffic is flowing well.
Control the use of your electrical
equipment
Before moving off, if the passenger
compartment is too warm, ventilate it by
opening the windows and air vents before
using the air conditioning.
Above 30
mph (50 km/h), close the windows
and leave the air vents open.
Consider using equipment that can help
keep the temperature in the passenger
compartment down (sunroof blind and window
blinds, etc.). Switch off the headlamps and front foglamps
when the ambient light level does not require
their use.
Avoid running the engine before moving off,
particularly in winter; your vehicle will warm up
much faster while driving. Unless it has automatic regulation, switch off
the air conditioning as soon as the desired
temperature has been reached.
Switch off the demisting and defrosting
controls, if these are not automatically
managed.
Switch off the heated seat as soon as
possible.
.
Eco-driving
Page 17 of 232
15
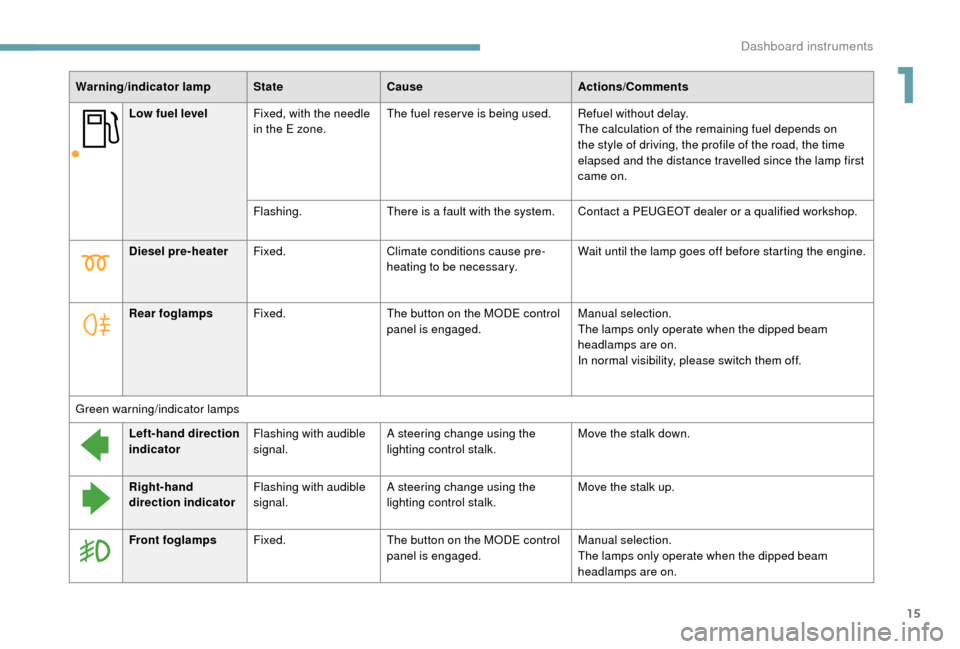
Low fuel levelFixed, with the needle
in the E zone. The fuel reserve is being used.
Refuel without delay.
The calculation of the remaining fuel depends on
the style of driving, the profile of the road, the time
elapsed and the distance travelled since the lamp first
came on.
Flashing. There is a
fault with the system. Contact a PEUGEOT dealer or a qualified workshop.
Warning/indicator lamp
StateCause Actions/Comments
Diesel pre-heater Fixed. Climate conditions cause pre-
heating to be necessary. Wait until the lamp goes off before starting the engine.
Rear foglamps Fixed. The button on the MODE control
panel is engaged. Manual selection.
The lamps only operate when the dipped beam
headlamps are on.
In normal visibility, please switch them off.
Green warning/indicator lamps Left-hand direction
indicator Flashing with audible
signal. A steering change using the
lighting control stalk. Move the stalk down.
Right-hand
direction indicator Flashing with audible
signal. A steering change using the
lighting control stalk. Move the stalk up.
Front foglamps Fixed. The button on the MODE control
panel is engaged. Manual selection.
The lamps only operate when the dipped beam
headlamps are on.
1
Dashboard instruments
Page 21 of 232
19
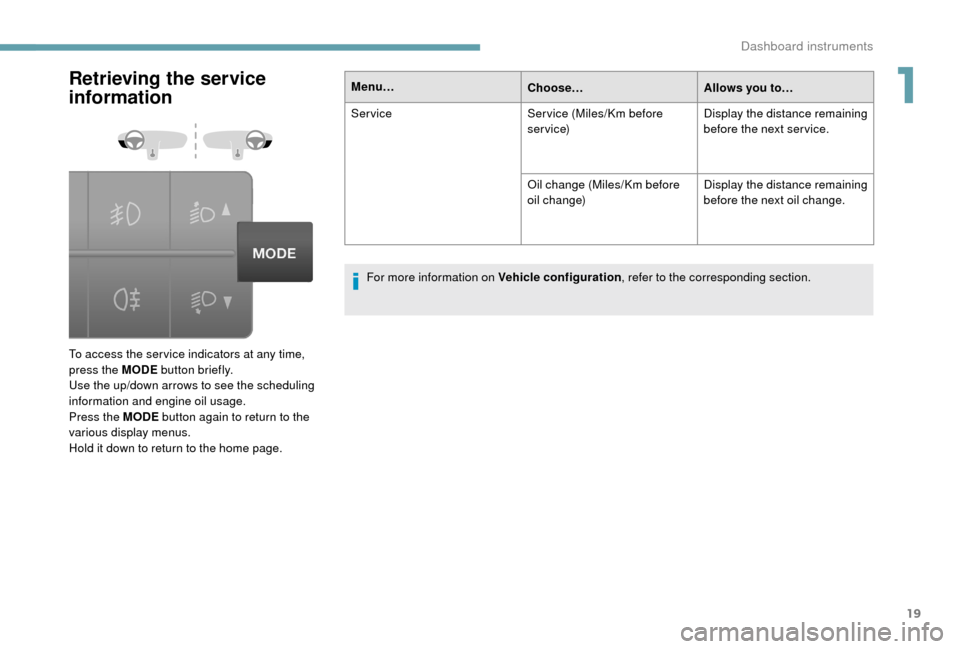
Retrieving the service
information
To access the ser vice indicators at any time,
press the MODE button briefly.
Use the up/down arrows to see the scheduling
information and engine oil usage.
Press the MODE button again to return to the
various display menus.
Hold it down to return to the home page.Menu…
Choose…Allows you to…
Service Ser vice (Miles/Km before
service)Display the distance remaining
before the next ser vice.
Oil change (Miles/Km before
oil change) Display the distance remaining
before the next oil change.
For more information on Vehicle configuration , refer to the corresponding section.
1
Dashboard instruments
Page 28 of 232

26
Menu…Press…Sub-menu… Press…Choose… Confirm
and quitAllows you to…
12
Service Service (Miles/
Km before
service)Display the miles/kilometres remaining
before the next ser vice.
Oil change
(Miles/Km before
oil change)Display the miles/kilometres before the
next oil change.
13
Daytime
running lamps ON
Activate/Deactivate daytime running lamps.
OFF
14
Automatic
headlamp
dipping ON
Activate/Deactivate automatic headlamp
dipping.
OFF
15
Passenger
airbag
(BAG P) ON
Ye sActivate the passenger airbag.
No
OFF Ye sDeactivate the passenger airbag.
No
16
Quit menu Quit the menu.
Press the arrow at the bottom to go to the
first menu.
Dashboard instruments
Page 31 of 232
29
Current fuel consumption A
This is the average fuel consumption during the
last few seconds.
Average speed A
This is the average speed calculated since the
last trip computer zero reset (with the ignition
o n).
Trip duration A
This indicates the total time since the last trip
computer zero reset.
If TRIP B is activated in the MODE menu:
-
D
istance B
-
A
verage fuel consumption B
-
A
verage speed B
-
T
rip duration B
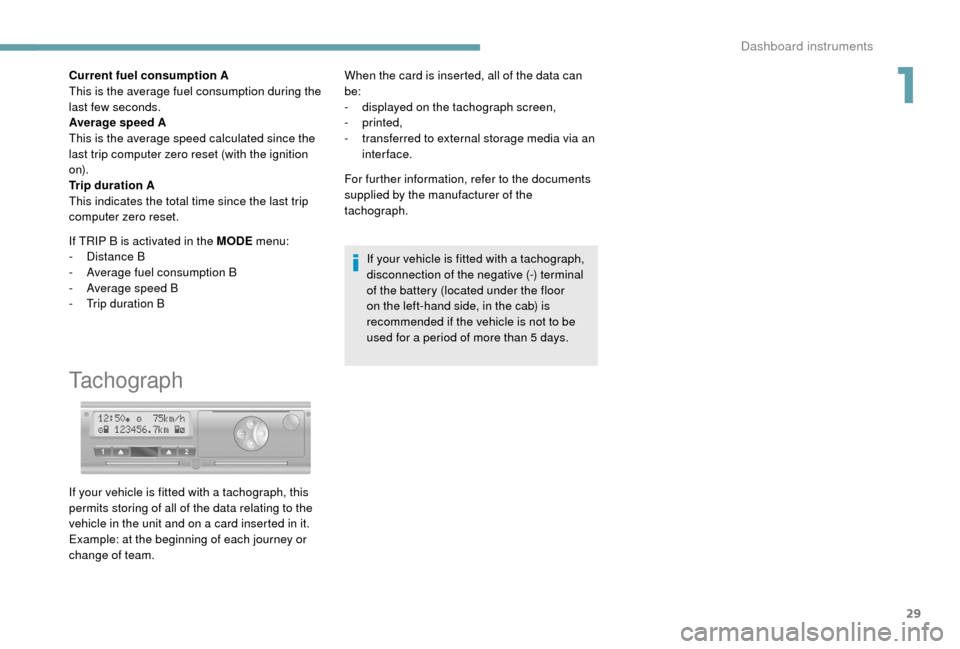
Tachograph
When the card is inserted, all of the data can
be:
-
d
isplayed on the tachograph screen,
-
printed,
-
t
ransferred to external storage media via an
inter face.
For further information, refer to the documents
supplied by the manufacturer of the
tachograph.
If your vehicle is fitted with a
tachograph,
disconnection of the negative (-) terminal
of the battery (located under the floor
on the left-hand side, in the cab) is
recommended if the vehicle is not to be
used for a
period of more than 5 days.
If your vehicle is fitted with a
tachograph, this
permits storing of all of the data relating to the
vehicle in the unit and on a
card inserted in it.
Example: at the beginning of each journey or
change of team.
1
Dashboard instruments
Page 33 of 232
31
If one of the doors is open or not properly
closed, central locking does not take place.
The direction indicators flash once.
If your vehicle has an alarm, pressing this
button sets it.
Folding/Unfolding the key
F Press this button to fold/unfold the key.
If you do not press the button, there is
a
risk of damaging the mechanism.
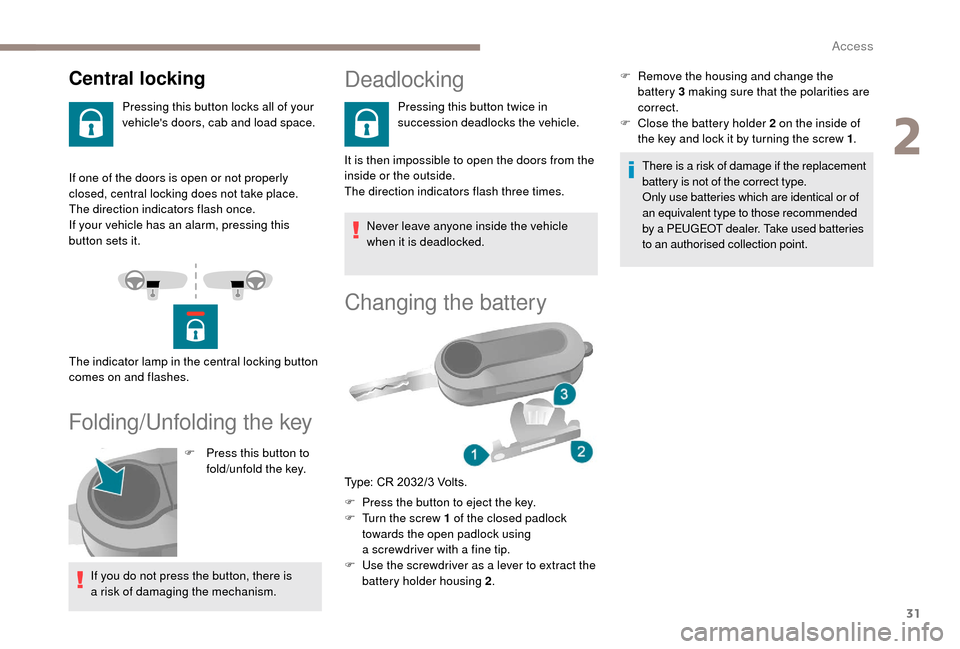
Central locking
Pressing this button locks all of your
vehicle's doors, cab and load space.
The indicator lamp in the central locking button
comes on and flashes.
Deadlocking
Pressing this button twice in
succession deadlocks the vehicle.
It is then impossible to open the doors from the
inside or the outside.
The direction indicators flash three times. Never leave anyone inside the vehicle
when it is deadlocked.
Changing the battery
F Press the button to eject the key.
F T urn the screw 1 of the closed padlock
towards the open padlock using
a
screwdriver with a fine tip.
F
U
se the screwdriver as a lever to extract the
battery holder housing 2 . There is a
risk of damage if the replacement
battery is not of the correct type.
Only use batteries which are identical or of
an equivalent type to those recommended
by a PEUGEOT dealer. Take used batteries
to an authorised collection point.
Type: CR 2032/3 Volts. F
R
emove the housing and change the
battery 3 making sure that the polarities are
correct.
F
C
lose the battery holder 2 on the inside of
the key and lock it by turning the screw 1 .
2
Access
Page 66 of 232
64
If the ambient light level is very low and the
traffic conditions permit:
If the situation requires a change of headlamp
beam, the driver can take over at any time.
Flashing the headlamps again pauses the
function and the system changes to "automatic
illumination of headlamps" mode.
The function is disabled automatically below
9
mph (15 km/h).
If main beam is nevertheless necessary, flash
the headlamps again; main beam will then
remain on until the vehicle reaches a
speed of
25
mph (40 km/h).
Above 25
mph (40 km/h), the function is
reactivated automatically (provided that the
headlamps have not been flashed again in the
meantime, to change to dipped beam).
Deactivation
F Turn the lighting control stalk ring to the " Dipped beam "
position. The system may suffer inter ference or not
work correctly:
-
u
nder conditions of poor visibility
(falling snow, heavy rain or thick fog,
e t c .),
-
i
f the windscreen in front of the
camera is dirty, misted or obscured (by
a sticker, etc.),
-
i
f the vehicle is facing highly reflective
signs.
The system is not able to detect:
-
r
oad users that do not have their own
lighting, such as pedestrians,
-
v
ehicles whose lighting is obscured,
such as when driving behind a safety
barrier on a motor way, for example,
-
v
ehicles at the top or bottom of
a steep slope, on winding roads, on
crossroads.
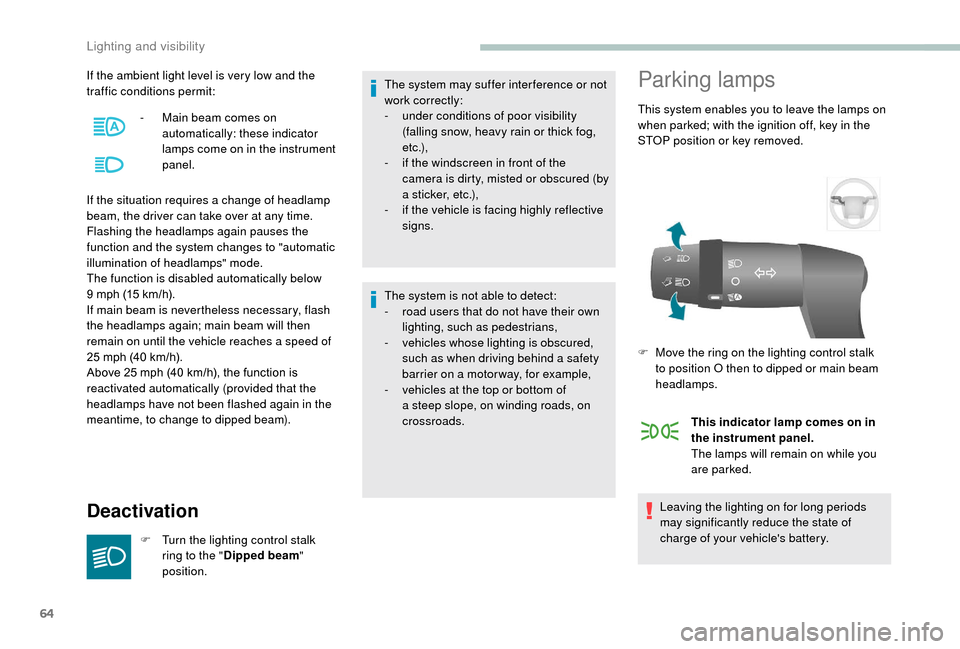
Parking lamps
This system enables you to leave the lamps on
when parked; with the ignition off, key in the
STOP position or key removed.
This indicator lamp comes on in
the instrument panel.
The lamps will remain on while you
are parked.
Leaving the lighting on for long periods
may significantly reduce the state of
charge of your vehicle's battery.
-
M
ain beam comes on
automatically: these indicator
lamps come on in the instrument
panel.
F
M
ove the ring on the lighting control stalk
to position O then to dipped or main beam
headlamps.
Lighting and visibility
Page 68 of 232
66
You can change the wiper blades.
For more information on Changing
a
wiper blade , refer to the corresponding
section.
With Stop & Start, when the wiper control
stalk is in the fast wiping position, STOP
mode is not available.
Screenwash and headlamp
wash
F Pull the wiper control stalk towards you, the screenwash is accompanied by a timed
operation of the wipers.
Depending on the model, the headlamp wash
is coupled with the screenwash, it is triggered if
the dipped beam headlamps are on.
The level of this fluid should be checked
regularly, particularly during winter.
For more information on Checking levels and
in particular the screenwash/headlamp wash
level, refer to the corresponding section.
Lighting and visibility
Page 76 of 232
74
The driver must ensure that passengers use
the seat belts correctly and that they are all
fastened before setting off.
Wherever you are seated in the vehicle,
always fasten your seat belt, even for short
journeys.
Do not interchange the seat belt buckles as
they will not fulfil their role fully.
The seat belts are fitted with an inertia reel
permitting automatic adjustment of the length
of the strap to your size. The seat belt is
stowed automatically when not in use.
Before and after use, ensure that the seat belt
is reeled in correctly.
The lower part of the strap must be positioned
as low as possible on the pelvis.
The upper part must be positioned in the
hollow of the shoulder.
The inertia reels have an automatic locking
device at the time of a collision, during
sudden braking or if the vehicle turns over.
You can release the device by pulling the
strap firmly and then releasing it so that it
reels in slightly.
Advice
In order to be effective, a seat belt must:
- b e tightened as close to the body as
possible,
-
b
e pulled in front of you with a smooth
movement, checking that it does not
twist,
-
b
e used to restrain only one person,
-
n
ot show any signs of cuts or fraying,
-
n
ot be converted or modified to avoid
affecting its performance.
In accordance with current safety
regulations, for all repairs on your vehicle's
seat belts, go to a
qualified workshop with
the skills and equipment needed, which
a
PEUGEOT dealer is able to provide.
Have your seat belts checked regularly by
a
PEUGEOT dealer or a qualified workshop,
particularly if the straps show signs of
damage.
Clean the seat belt straps with soapy
water or a
textile cleaning product, sold by
PEUGEOT dealers.
After folding or moving a
seat or rear bench
seat, ensure that the seat belt is positioned
and reeled in correctly. Recommendations for children
Use a
suitable child seat if the passenger is
less than 12
years old or shorter than one and
a
half metres.
Never use the same seat belt to secure more
than one person.
Never allow a
child to travel on your lap.
For more information on Child seats , refer to
the corresponding section.
In the event of an impact
Depending on the nature and seriousness
of the impact , the pyrotechnic device may
be deployed before and independently of the
airbags. Deployment of the pretensioners
is accompanied by a
slight discharge of
harmless smoke and a
noise, due to the
activation of the pyrotechnic cartridge
incorporated in the system.
In all cases, the airbag warning lamp comes
on.
Following an impact, have the seat belts
system checked and, if necessary, replaced,
by a
PEUGEOT dealer or a qualified
workshop.
Safety
Page 94 of 232
92
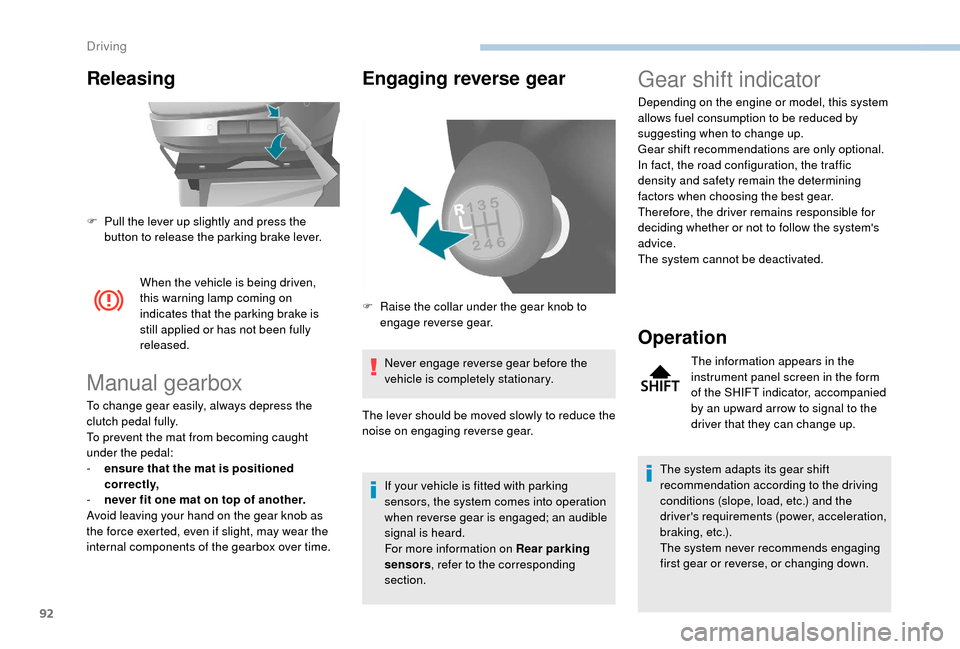
Releasing
When the vehicle is being driven,
this warning lamp coming on
indicates that the parking brake is
still applied or has not been fully
released.
Manual gearbox
To change gear easily, always depress the
clutch pedal fully.
To prevent the mat from becoming caught
under the pedal:
-
e
nsure that the mat is positioned
correctly,
-
n
ever fit one mat on top of another.
Avoid leaving your hand on the gear knob as
the force exerted, even if slight, may wear the
internal components of the gearbox over time.
Engaging reverse gear
Never engage reverse gear before the
vehicle is completely stationary.
If your vehicle is fitted with parking
sensors, the system comes into operation
when reverse gear is engaged; an audible
signal is heard.
For more information on Rear parking
sensors , refer to the corresponding
section.
F
P
ull the lever up slightly and press the
button to release the parking brake lever.
Gear shift indicator
Depending on the engine or model, this system
allows fuel consumption to be reduced by
suggesting when to change up.
Gear shift recommendations are only optional.
In fact, the road configuration, the traffic
density and safety remain the determining
factors when choosing the best gear.
Therefore, the driver remains responsible for
deciding whether or not to follow the system's
advice.
The system cannot be deactivated.
Operation
The information appears in the
instrument panel screen in the form
of the SHIFT indicator, accompanied
by an upward arrow to signal to the
driver that they can change up.
The system adapts its gear shift
recommendation according to the driving
conditions (slope, load, etc.) and the
driver's requirements (power, acceleration,
b r a k i n g , e t c .) .
The system never recommends engaging
first gear or reverse, or changing down.
F
R
aise the collar under the gear knob to
engage reverse gear.
The lever should be moved slowly to reduce the
noise on engaging reverse gear.
Driving