key PEUGEOT BOXER 2021 Owner's Guide
[x] Cancel search | Manufacturer: PEUGEOT, Model Year: 2021, Model line: BOXER, Model: PEUGEOT BOXER 2021Pages: 212, PDF Size: 6.37 MB
Page 173 of 212
171
Touch screen audio and telematics system
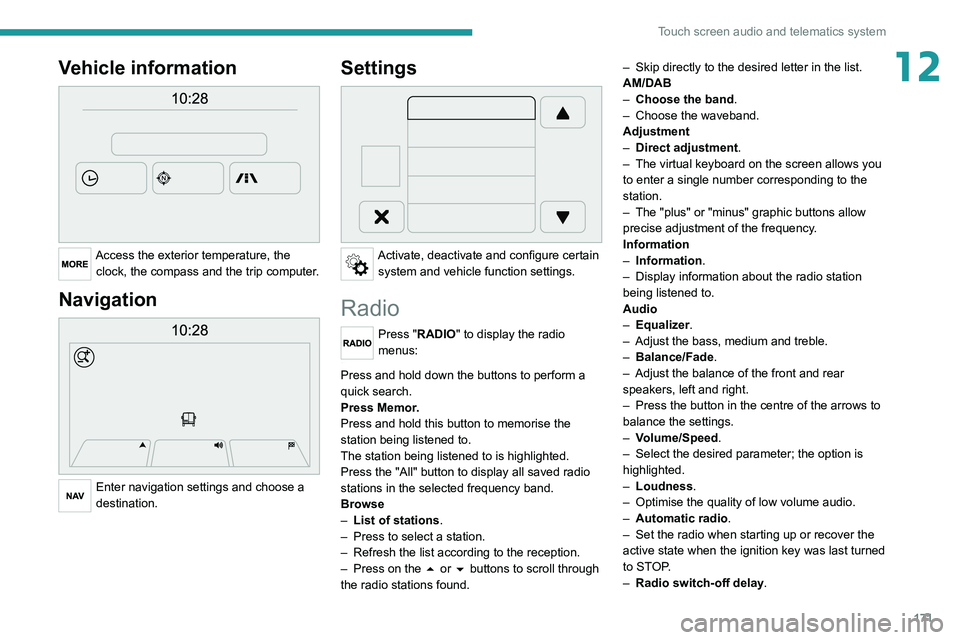
12Vehicle information
Access the exterior temperature, the clock, the compass and the trip computer.
Navigation
Enter navigation settings and choose a
destination.
Settings
Activate, deactivate and configure certain system and vehicle function settings.
Radio
Press "RADIO" to display the radio
menus:
Briefly press on the 9 or : buttons to perform an automatic search.
Press and hold down the buttons to perform a
quick search.
Press Memor.
Press and hold this button to memorise the
station being listened to.
The station being listened to is highlighted.
Press the "All" button to display all saved
radio
stations in the selected frequency band.
Browse
–
List of stations .
–
Press to select a station.
–
Refresh the list according to the reception.
–
Press on the
5 or 6 buttons to scroll through
the radio stations found. –
Skip directly to the desired letter in the list.
AM/DAB
–
Choose the band
.
–
Choose the waveband.
Adjustment
–
Direct adjustment
.
–
The virtual keyboard on the screen allows you
to enter a single number corresponding to the
station.
–
The "plus" or "minus" graphic buttons allow
precise adjustment of the frequency
.
Information
–
Information.
–
Display information about the radio station
being listened to.
Audio
–
Equalizer
.
–
Adjust the bass, medium and treble.
–
Balance/Fade
.
– Adjust the balance of the front and rear
speakers, left and right.
–
Press the button in the centre of the arrows to
balance the settings.
–
V
olume/Speed.
–
Select the desired parameter; the option is
highlighted.
–
Loudness
.
–
Optimise the quality of low volume audio.
–
Automatic radio
.
–
Set the radio when starting up or recover the
active state when the ignition key was last turned
to ST
OP.
–
Radio switch-off delay.
Page 175 of 212
173
Touch screen audio and telematics system
12– Select the desired parameter; the option is
highlighted.
–
Loudness
.
–
Optimise the quality of low volume audio.
–
Automatic radio
.
–
Set the radio when starting up or recover the
active state when the ignition key was last turned
to ST
OP.
–
Radio switch-off delay .
–
Set the parameter
.
–
AUX vol. setting .
–
Set the parameters.
USB socket
Insert the USB memory stick or connect
the device to the USB socket in the
central storage space , provided for transferring
data to the system, using a suitable cable (not
supplied).
To protect the system, do not use a USB hub.
The system builds playlists (in temporary
memory); this operation can take from a
few seconds to several minutes at the first
connection.
Reduce the number of non-music files and the
number of folders to reduce the waiting time.
The playlists are updated every time the ignition
is switched off or a USB memory stick is
connected. The lists are memorised: if they are
not modified, the subsequent loading time will
be shorter.
USB socket
Located on the central console, this
socket is used only to power and
recharge the connected portable device.
Auxiliary socket (AUX)
Connect the portable device (e.g. MP3
player) to the auxiliary jack socket using
an audio cable (not supplied).
First adjust the volume on the portable device
(to a high level). Then adjust the volume of the
audio system.
Controls are managed via the portable device.
The functions of the device connected to the
"AUX" socket are managed directly by this
device: it is therefore not possible to change the
track/folder/playlist or control the start/ending/
pausing of playback using the controls on the
control panel or the steering-mounted controls.
Do not leave the cable of the portable
device plugged into the "AUX" socket after
disconnecting it, in order to avoid possible noise
from the speakers.
Selecting the source
Press on "MEDIA".
Select the "Source" tab to show the
rolling display of audio sources.
Select the source.
Use the play settings on the screen.
Press the "Rand." button and/or the
" Repeat" button to activate them, press again to
deactivate them.
Information and advice
The audio system will only play audio files with
".wav", ".wma" and ".mp3" file extensions, at bit
rates between 32 Kbps and 320 Kbps.
For audio files with ".aac", ".m4a", ".m4b" and
".mp4" file extensions, the supported sampling
rates are 8 - 96 kHz.
".m3u" and ".wpl" types are also supported.
The system does not manage devices with a
capacity greater than 64 GB.
It is advisable to restrict file names to 20
characters, without using special characters (e.g.
" " ? . ; ù) so as to avoid any reading or display
problems.
The system supports USB mass storage devices, BlackBerry® devices or Apple®
players via the USB sockets. The adapter
cable is not supplied.
Devices are managed using the audio system
controls.
Other devices, not recognised by the system
during connection, must be connected to
the auxiliary socket using a Jack cable (not
supplied).
Only use USB memory sticks formatted to FAT
32 (File Allocation Table).
Page 179 of 212
177
Touch screen audio and telematics system
12Before the system starts updating the map, it
warns you that it may take a minimum of 30
minutes to install the map.
Do not remove the USB device or turn off
the system until the update is complete.
You cannot use the system until the update is
complete. If the update is interrupted, restart
the system update.
Once the map is updated, the message below
appears:
"Update complete"
You can now safely remove the USB device.
►
Click on "
Close".
The new map is now available on the system.
Troubleshooting
During an update, the following issues may
occur:
–
The map on the USB device is invalid. If this is
the case, download the map to the USB device
again using "T
omTom HOME".
You may need to prepare the USB device again.
–
The version of the map on the USB device is
the same as the version on the system, or older
.
If this is the case, download the map to the USB
device again using "TomTom HOME".
You may need to prepare the USB device again.
Telephone
Press "PHONE" to display the telephone
menus:
– Mobile phone .
– Display and call the contacts in the mobile
phone directory
.
–
Press on the
5 or 6 buttons to scroll through
the contacts.
–
Skip directly to the desired letter in the list.
Recent calls
–
All calls, In, Out, Missed .
–
Display
and call recent call log contacts.
The system memory contains predefined text
messages, which can be sent to reply to a
received message or as a new message.
Upon receipt of a text message (depending on
the telephone version), the system also relays
the message in question to you.
Settings
–
Connected tels.
Add device, Connected
audio.
–
Combine up to 10 telephones/audio devices to
make it easier and faster to access and connect.
Dial the telephone number using the on-screen
virtual keypad.
Transf.
–
T
ransf..
–
T
ransfer calls from the system to the mobile
phone and vice versa.
– Mute .
– Disable the system microphone's audio for
private conversations.
Pairing a Bluetooth®
telephone
For safety reasons and because it
requires sustained attention by the driver,
the pairing of a Bluetooth
® mobile phone with
the hands-free kit of your audio system must
be done with the vehicle stationary.
Activate the telephone's Bluetooth function
and ensure that it is "visible to all" (telephone
configuration).
Press on "PHONE".
If no mobile phone has yet been paired
with the system, a special page is displayed on
the screen.
Select "Yes" to start the pairing procedure, and
then search for the name of the system on the
mobile phone (on the other hand, by selecting
"No", the main screen page of the Telephone is
displayed).
Select the name of the system and, depending
on the telephone, using the telephone keypad,
enter the PIN displayed on the screen of the
system or confirm the PIN displayed on the
mobile phone.
During pairing, a screen page is displayed
showing the progress of the
operation.
Page 180 of 212
178
Touch screen audio and telematics system
If the pairing procedure fails, it is
recommended that you deactivate and
then reactivate the Bluetooth function on your
telephone.
Once the pairing procedure is complete, a
screen page appears:
–
answer "Y
es" to the question; the mobile
phone is registered as the favourite (the mobile
phone will have priority over other mobile
phones, which may be registered later).
–
if no other device is associated, the system
considers the first associated device as the
favourite.
For mobile phones that are not set as
favourites, priority is determined by the
connection order. The last phone
connected
will have the highest priority.
The services available depend on the
network, the SIM card and the compatibility
of the Bluetooth
® devices used. Refer to your
telephone’s user guide and your service provider
to check which services you are able to access.
When you return to the vehicle, the last
phone
connected reconnects automatically,
within approximately 30 seconds of switching the
ignition on (with
Bluetooth
® activated).
To change the automatic connection profile,
select the phone from the list then select the
desired parameters.
The profiles compatible with the system are:
HFP, OPP, PBAP, A2DP, AVRCP, MAP.
Automatic reconnection
When the ignition is switched on, the telephone
connected when the ignition was last switched
off reconnects automatically, if this connection
mode had been set during the pairing procedure
(see previous pages).
The connection is confirmed by the display of a
message and the name of the telephone.
Managing paired telephones
This function allows a device to be connected or disconnected, as well as a
pairing to be deleted.
Press "Settings".
Select “Telephone/Bluetooth
®” then select the
telephone from the list of paired devices.
Select “Connect” or “Disconnect”, “Delete
device” or “Add device”, “Memorise
Favourite”, “Text on”, “Download ” from the list
of available options.
Receiving a call
An incoming call is announced by a ring and a
display overlaid on the screen.
Make a short press on this steering-
mounted button to accept an incoming
call.
or
Press the "Answer“ button displayed on the
screen.
If two calls are in progress (one in progress and
one on hold), it is possible to switch from one to
the other by pressing the " Call toggle” button or
unite the two calls in a conference by pressing
the "Confer." button.
Ending a call
To refuse a call, press this steering- mounted button.
or
Press the “Ignore” button
displayed on the
screen.
Making a call
Calling a new number
You are strongly advised NOT to use the telephone while driving. We recommend
that you park safely or make use of the
steering-mounted controls.
Press “PHONE".
Press the keypad button.
Enter the telephone number using the keypad,
then press the “Call” button to make the call.
Calling a contact
Press "PHONE".
Page 181 of 212
179
Touch screen audio and telematics system
12Press the "Contacts" button or the
"Recent calls" button.
Select the desired contact from the list offered to
start the call.
Vehicle information
Press "MORE" to display the vehicle
information menus:
Exterior temp.
Display the exterior temperature.
Clock
Display
the clock.
Compass
Display
the direction that you are travelling in.
Trip
–
Current info., T
rip A, Trip B.
Display the trip computer.
Press and hold the "Trip A" or "Trip B" button to
reset the trip concerned.
Settings
Press this button to display the settings
menus:
Display
–
Brightness
.
–
Set the brightness of the screen.
–
Display mode
.
–
Set the display mode.
–
Language
.
–
Choose the desired language.
–
Unit of measurement
. –
Set the display units for consumption,
distance
and temperature.
–
T
ouch screen beep.
–
Activate or deactivate the audible signal when
touching a button on the screen.
–
Display T
rip B.
–
Display
Trip B on the driver's screen.
Voice commands
–
V
oice response time.
–
Set the length of the voice system response.
–
Display list of commands
.
–
Display suggestions with the different options
during a voice session.
Clock and Date
–
T
ime setting and format.
–
Setting the time.
–
Display time mode
.
–
Activate or deactivate the display of the digital
clock on the status bar
.
–
Synchro time
.
–
Activate or deactivate the automatic time
display
.
– Date setting .
– Set the date.
Safety/Assistance
–
Reversing camera.
–
Display the reversing camera in reverse.
–
Camera delay.
–
Maintain the on-screen display of the
reversing camera for a maximum of 10 seconds
or up to 1
1 mph (18 km/h).
Lighting
–
Daytime running lamps
.–
Activate or deactivate the automatic
illumination of the headlamps when starting.
Doors & locking
–
Autoclose
.
–
Activate or deactivate the automatic locking of
the doors
when the vehicle is moving.
Audio
–
Equalizer
.
–
Adjust the bass, medium and treble.
–
Balance/Fade
.
–
Adjust the balance of the front and rear
speakers, left and right.
–
Press the button in the centre of the arrows to
balance the settings.
–
V
olume/Speed.
–
Select the desired parameter; the option is
highlighted.
–
Loudness
.
–
Optimise the quality of low volume audio.
–
Automatic radio
.
–
Set the radio when starting up or recover the
active state when the ignition key was last turned
to ST
OP.
– Radio switch-off delay.
–
Set the parameter
.
–
AUX vol. setting.
–
Set the parameters.
T
elephone/Bluetooth
®
– Connected tels.
– Start the Bluetooth® connection of the selected
mobile device.
–
Delete the selected mobile device.
Page 189 of 212
187
Event data recorders
14Recording event data
Electronic control units are installed in your
vehicle. These control units process data
received from the vehicle's sensors, for example,
or data they generate themselves or exchange
with each other. Some of these control units are
required for the correct operation of your vehicle,
some others assist you while driving (driving or
manoeuvring aids), while others provide comfort
or infotainment functions.
The following contains general information about
how data is processed within the vehicle.
You will find additional information about the
specific data which is downloaded, stored
and transmitted to third parties and what it is
used for in your vehicle under the keyword
"Data protection". This information is directly
associated with the references for the functions
in question contained in the corresponding
vehicle handbook, or in the general terms and
conditions of sale.
This information is also available online.
Vehicle operating data
The control units process the data used for the
operation of the vehicle.
This data includes, for example:
–
Information about the state of the vehicle
(e.g.
speed, travel time, lateral acceleration,
wheel rotation rate, fastened seat belts display).
–
Environmental conditions (e.g.
temperature,
rain sensor, distance sensor). As a general rule, this data is temporary, is
not stored for longer than one operating cycle
and is only used within the vehicle itself. The
control units often record this data (including the
vehicle's key). This function allows either the
temporary or permanent storage of information
about the state of the vehicle, stresses on
components, servicing requirements, as well as
events and technical errors.
Depending on the vehicle's equipment level, the
data stored is as follows:
–
Operating state of system components
(e.g.
filling level, tyre pressures, battery charge
status).
–
Faults and malfunctions in important system
components (e.g.
lamps, brakes).
–
System reactions in specific driving situations
(e.g.
deployment of an airbag, triggering of
stability control and braking systems).
–
Information about events which have
damaged the vehicle.
–
For electric and rechargeable hybrid vehicles,
the traction battery charge level and the
estimated driving range.
In particular circumstances (e.g.
if the vehicle
has detected a malfunction), it may be necessary
to record data which would otherwise simply not
be stored.
When taking your vehicle in for servicing
(e.g.
repairs, maintenance), the stored operating
data may be read along with the vehicle's
identification number and used if necessary.
The personnel working for the servicing network (e.g.
garages, manufacturers) or third parties
(e.g. roadside assistance agents) may read
the vehicle's data. This also applies to work
carried out under warranty and quality assurance
measures.
This data is generally read via the OBD
(On-Board Diagnostics) port fitted by law to
the vehicle. It is used to report on the technical
state of the vehicle or its components and
facilitates the diagnosis of malfunctions, in
compliance with warranty obligations and for
quality improvement. This data, in particular the
information relating to stress on components,
technical events, operator errors and other
malfunctions, is sent to the Manufacturer, if
necessary, along with the vehicle's identification
number. The Manufacturer's liability may also be
engaged. The Manufacturer may also use the
operating data taken from the vehicle for product
recalls. This data may also be used to check the
customer's warranty and any claims made under
warranty.
Any malfunctions stored in the vehicle may be
reset by an after-sales service company during
servicing or repair work, or at your request.
Comfort and infotainment
functions
Comfort settings and personalised settings
may be saved in the vehicle and modified or
reinitialised at any time.
Page 194 of 212
192
Alphabetical index
K
Key with remote control 43
Kit, hands-free
137, 177–178
L
Lane Departure Warning System
(LDWS)
87–88
Level, AdBlue®
83
Level, brake fluid
82
Level, engine coolant
14, 82
Level, engine oil
81
Level, heating system fluid
83
Level, power steering fluid
82
Levels
110–111
Levels and checks
109–111
Lighting dimmer
8
Low fuel level
68
Lumbar
18
M
Mains socket (domestic network) 71
Maintenance (advice)
70, 88
Maintenance, routine
53, 83
Manoeuvring aids (recommendations)
52
Mat
53
Menu
15, 171–172, 146, 149, 151
Menus (audio)
171–172
Mirror, rear view 8
Mirrors, door
22, 61
Motor, electric
81, 109
O
Oil change 81
Oil consumption
81
OIl, engine
109–111
On-board tools
119–124
Opening the bonnet
79
Overhead storage
43–46
P
Pads, brake 85
Paint
89
Parking brake
46, 85
Pedestrian horn (Electric)
29, 42
Player, USB
163–164, 172–173
Port, USB
163–164, 172–173
Power indicator (Electric)
6
Pressures, tyres
85
Pre-tensioning seat belts
33
Protecting children
62–65
Public fast charging station
71
R
Radar (warnings) 53
Radio
135, 143, 145
Radio, digital (Digital Audio
Broadcasting - DAB)
144
Range, AdBlue®
14–15, 83
Recharging the traction battery
(Electric)
69, 101–103
Recovery
104
Regeneration of the particle filter
84
Remote control
13
Replacing bulbs
97
Replacing fuses
101
Replacing the air filter
84
Replacing the oil filter
84
Replacing the passenger compartment filter
84
Resetting the service indicator
13
Reversing camera
53
S
Safety, children 62–65
Screen, colour
143
Screen menu map
171–172, 146, 149, 151
Screenwash fluid
110–111
SCR (Selective Catalytic Reduction)
86
Seat belts
60–61
Seat belts, rear
33
Seats, heated
19
Seats, rear
36