clock setting PEUGEOT BOXER 2021 Owners Manual
[x] Cancel search | Manufacturer: PEUGEOT, Model Year: 2021, Model line: BOXER, Model: PEUGEOT BOXER 2021Pages: 212, PDF Size: 6.37 MB
Page 19 of 212
17
Instruments
1
Menu...
Press... Sub-menu...Press... Select...Validate
and exitAllows you to...
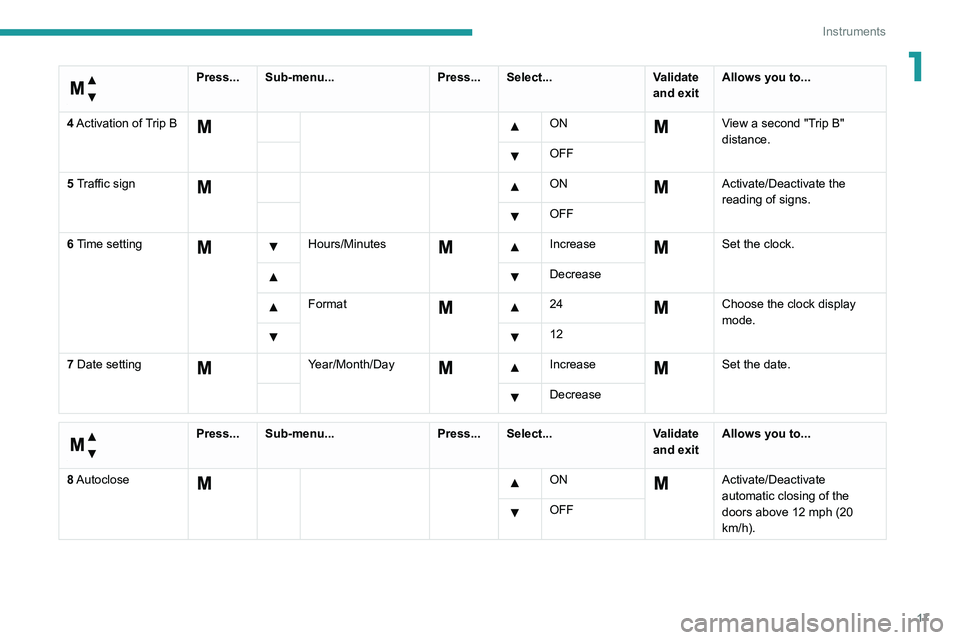
4 Activation of Trip B
ON View a second "Trip B"
distance.
OFF
5 Traffic sign
ON Activate/Deactivate the
reading of signs.
OFF
6 Time setting
Hours/Minutes Increase Set the clock.
Decrease
Format 24Choose the clock display
mode.
12
7 Date setting
Year/Month/Day Increase Set the date.
Decrease
Menu…
Press... Sub-menu... Press... Select...Validate
and exitAllows you to...
8 Autoclose
ON Activate/Deactivate
automatic closing of the
doors above 12 mph (20
km/h).
OFF
Page 23 of 212
21
Instruments
1Touch screen audio and telematics system
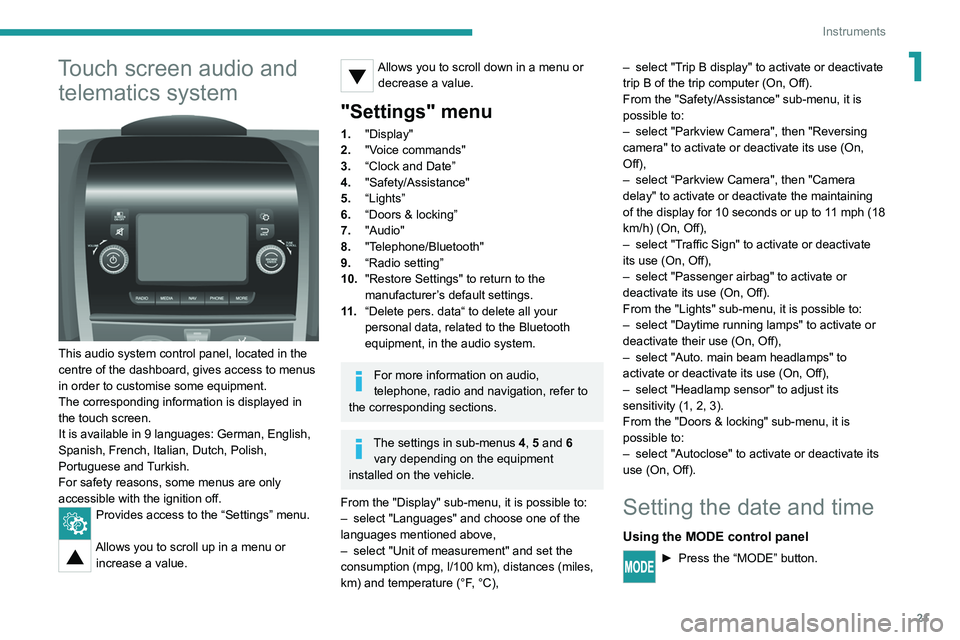
This audio system control panel, located in the
centre of the dashboard, gives access to menus
in order to customise some equipment.
The corresponding information is displayed in
the touch screen.
It is available in 9 languages: German, English,
Spanish, French, Italian, Dutch, Polish,
Portuguese and Turkish.
For safety reasons, some menus are only
accessible with the ignition off.
Provides access to the “Settings” menu.
Allows you to scroll up in a menu or
increase a value.
Allows you to scroll down in a menu or decrease a value.
"Settings" menu
1. "Display"
2. "Voice commands"
3. “Clock and Date”
4. "Safety/Assistance"
5. “Lights”
6. “Doors & locking”
7. "Audio"
8. "Telephone/Bluetooth"
9. “Radio setting”
10. "Restore Settings" to return to the
manufacturer’s default settings.
11 . “Delete pers. data“ to delete all your
personal data, related to the Bluetooth
equipment, in the audio system.
For more information on audio,
telephone, radio and navigation, refer to
the corresponding sections.
The settings in sub-menus 4, 5 and 6
vary depending on the equipment
installed on the vehicle.
From the "Display" sub-menu, it is possible to:
–
select "Languages" and choose one of the
languages mentioned above,
–
select "Unit of measurement" and set the
consumption (mpg, l/100 km), distances (miles,
km) and temperature (°F
, °C), –
select "T
rip B display" to activate or deactivate
trip B of the trip computer (On, Off).
From the "Safety/Assistance" sub-menu, it is
possible to:
–
select "Parkview Camera", then "Reversing
camera" to activate or deactivate its use (On,
Off),
–
select “Parkview Camera", then "Camera
delay" to activate or deactivate the maintaining
of the display for 10 seconds or up to 1
1 mph (18
km/h) (On, Off),
–
select "T
raffic Sign" to activate or deactivate
its use (On, Off),
–
select "Passenger airbag" to activate or
deactivate its use (On, Off).
From the "Lights" sub-menu, it is possible to:
–
select "Daytime running lamps" to activate or
deactivate their use (On, Off),
–
select "Auto. main beam headlamps" to
activate or deactivate its use (On, Off),
–
select "Headlamp sensor" to adjust its
sensitivity (1, 2, 3).
From the "Doors & locking" sub-menu, it is
possible to:
–
select "Autoclose" to activate or deactivate its
use (On, Off).
Setting the date and time
Using the MODE control panel
► Press the “MODE” button.
Page 24 of 212
22
Instruments
► Select the "Time setting" menu to set the time
and the clock format (24h or 12h) or select the
"Date setting" menu to set the day, month and
year.
For more information on Vehicle configuration
(MODE), refer to the corresponding section.
Using the touch screen audio and
telematics system
From the "Clock and Date" sub-menu:
► Select "T ime setting and format" to set the
hour, minutes and seconds and choose the
format (24h, 12h with am or pm).
►
Select "Date setting" to set the day
, month
and year.
To set the time manually, "Time Synchro" must be deactivated (Off).
Trip computer
Information displayed about the current journey
(range, current fuel consumption, average fuel
consumption, etc.).
This function is not available on electric vehicles.
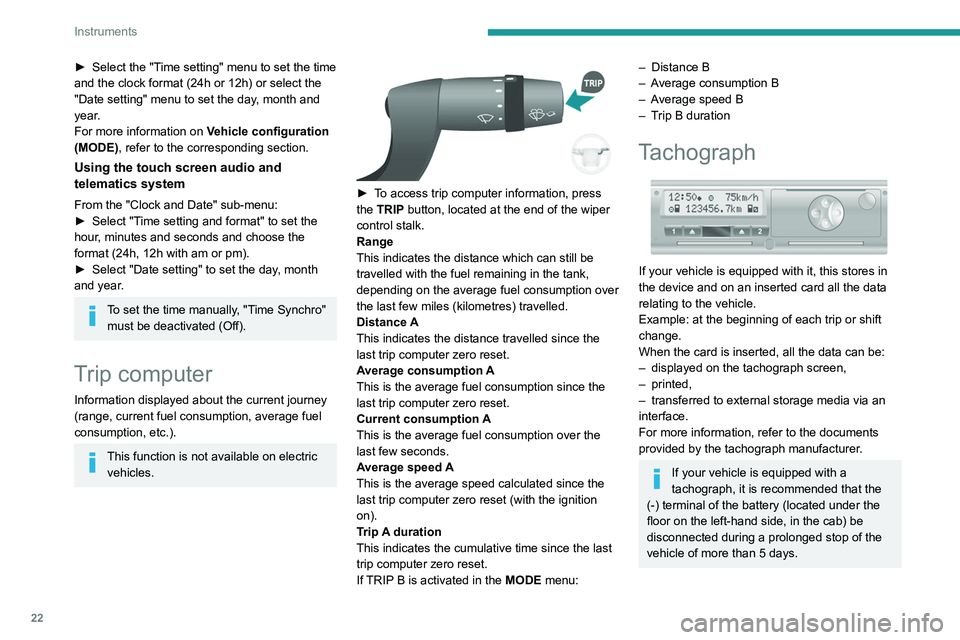
► To access trip computer information, press
the TRIP button, located at the end of the wiper
control stalk.
Range
This indicates the distance which can still be
travelled with the fuel remaining in the tank,
depending on the average fuel consumption over
the last few miles (kilometres) travelled.
Distance A
This
indicates the distance travelled since the
last trip computer zero reset.
Average consumption A
This is the average fuel consumption since the
last trip computer zero reset.
Current consumption A
This is the average fuel consumption over the
last few seconds.
Average speed A
This is the average speed calculated since the
last trip computer zero reset (with the ignition
on).
Trip A duration
This
indicates the cumulative time since the last
trip computer zero reset.
If TRIP B is activated in the MODE menu:
– Distance B
– A verage consumption B
–
A
verage speed B
–
T
rip B duration
Tachograph
If your vehicle is equipped with it, this stores in
the device and on an inserted card all the data
relating to the vehicle.
Example: at the beginning of each trip or shift
change.
When the card is inserted, all the data can be:
–
displayed on the tachograph screen,
–
printed,
–
transferred to external storage media via an
interface.
For more information, refer to the documents
provided by the tachograph manufacturer
.
If your vehicle is equipped with a
tachograph, it is recommended that the
(-) terminal of the battery (located under the
floor on the left-hand side, in the cab) be
disconnected
during a prolonged stop of the
vehicle of more than 5 days.
Page 42 of 212
40
Ease of use and comfort
If the vehicle is equipped with an additional
air conditioning unit, located at the rear of the
vehicle: the distribution rail located in the roof
and the individualised air vents ensure a perfect
diffusion of cold air.
The hot air diffused from the front air conditioning
unit to the floor is distributed at the height of the
rear passengers' feet in rows 2 and 3.
A hot air vent, located on the left-hand rear
wheel arch, may complement the system for the
rear passengers’ feet in row 3.
Activation/Deactivation
► From the driver's seat, press this
button located on the MODE
control panel
to activate the operation of the rear controls. The
indicator lamp comes on.
Pressing again on this button deactivates the
operation of the rear controls. The indicator lamp
goes off.
Setting the comfort
temperature
► Turn control 1 to select a position between
blue (cold) and red (hot) so as to adjust the
temperature to your requirements.
The OFF control on the "Mono-zone" central control panel switches the
function off.
However, a back-up system will automatically
ventilate the rear circuit, even if the control is
in position 0, to avoid the formation of mist.
Air flow
► Set control 2 to the desired position to
increase or decrease the air flow.
Additional programmable heating
The additional programmable heating gradually
brings the engine to a good temperature to
facilitate its starting.
An built-in clock allows the time of its triggering
to be programmed. The passenger compartment
will warm up faster.
The warming-up of the passenger
compartment, de-icing and demisting are
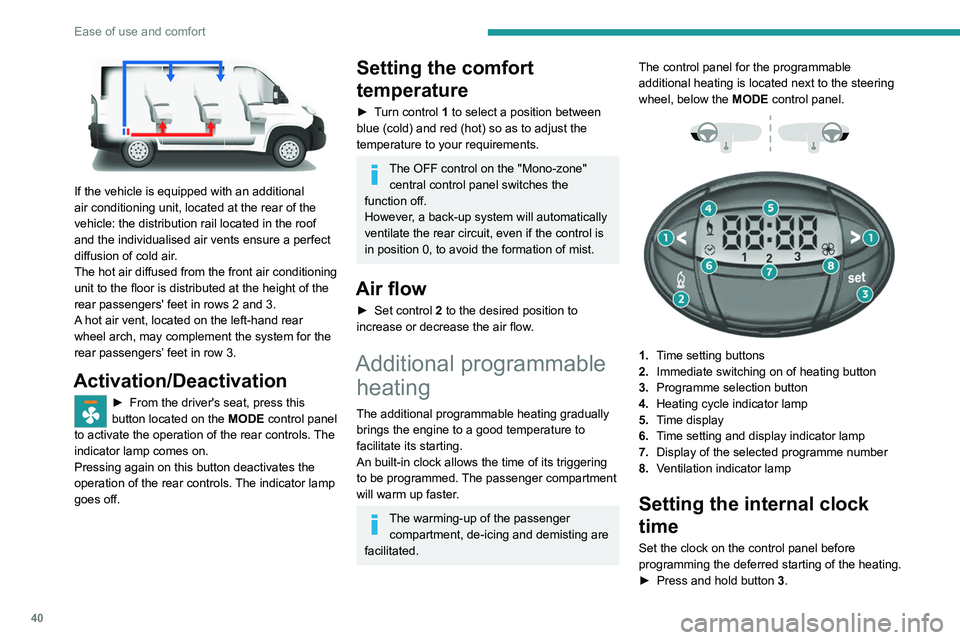
facilitated. The control panel for the programmable
additional heating is located next to the steering
wheel, below the
MODE control panel.
1. Time setting buttons
2. Immediate switching on of heating button
3. Programme selection button
4. Heating cycle indicator lamp
5. Time display
6. Time setting and display indicator lamp
7. Display of the selected programme number
8. Ventilation indicator lamp
Setting the internal clock
time
Set the clock on the control panel before
programming the deferred starting of the heating.
►
Press and hold button 3
.
Page 173 of 212
171
Touch screen audio and telematics system
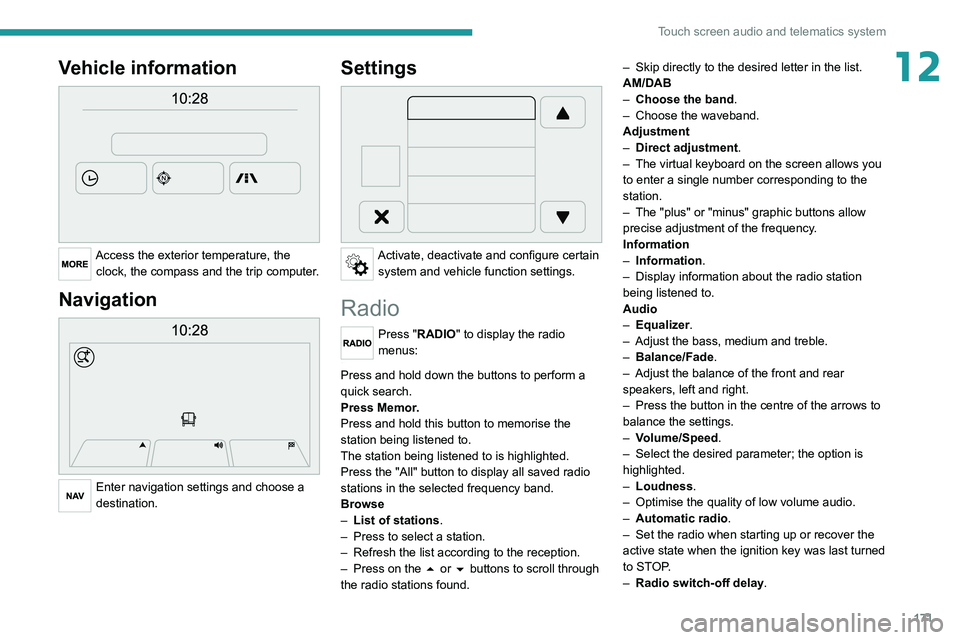
12Vehicle information
Access the exterior temperature, the clock, the compass and the trip computer.
Navigation
Enter navigation settings and choose a
destination.
Settings
Activate, deactivate and configure certain system and vehicle function settings.
Radio
Press "RADIO" to display the radio
menus:
Briefly press on the 9 or : buttons to perform an automatic search.
Press and hold down the buttons to perform a
quick search.
Press Memor.
Press and hold this button to memorise the
station being listened to.
The station being listened to is highlighted.
Press the "All" button to display all saved
radio
stations in the selected frequency band.
Browse
–
List of stations .
–
Press to select a station.
–
Refresh the list according to the reception.
–
Press on the
5 or 6 buttons to scroll through
the radio stations found. –
Skip directly to the desired letter in the list.
AM/DAB
–
Choose the band
.
–
Choose the waveband.
Adjustment
–
Direct adjustment
.
–
The virtual keyboard on the screen allows you
to enter a single number corresponding to the
station.
–
The "plus" or "minus" graphic buttons allow
precise adjustment of the frequency
.
Information
–
Information.
–
Display information about the radio station
being listened to.
Audio
–
Equalizer
.
–
Adjust the bass, medium and treble.
–
Balance/Fade
.
– Adjust the balance of the front and rear
speakers, left and right.
–
Press the button in the centre of the arrows to
balance the settings.
–
V
olume/Speed.
–
Select the desired parameter; the option is
highlighted.
–
Loudness
.
–
Optimise the quality of low volume audio.
–
Automatic radio
.
–
Set the radio when starting up or recover the
active state when the ignition key was last turned
to ST
OP.
–
Radio switch-off delay.
Page 181 of 212
179
Touch screen audio and telematics system
12Press the "Contacts" button or the
"Recent calls" button.
Select the desired contact from the list offered to
start the call.
Vehicle information
Press "MORE" to display the vehicle
information menus:
Exterior temp.
Display the exterior temperature.
Clock
Display
the clock.
Compass
Display
the direction that you are travelling in.
Trip
–
Current info., T
rip A, Trip B.
Display the trip computer.
Press and hold the "Trip A" or "Trip B" button to
reset the trip concerned.
Settings
Press this button to display the settings
menus:
Display
–
Brightness
.
–
Set the brightness of the screen.
–
Display mode
.
–
Set the display mode.
–
Language
.
–
Choose the desired language.
–
Unit of measurement
. –
Set the display units for consumption,
distance
and temperature.
–
T
ouch screen beep.
–
Activate or deactivate the audible signal when
touching a button on the screen.
–
Display T
rip B.
–
Display
Trip B on the driver's screen.
Voice commands
–
V
oice response time.
–
Set the length of the voice system response.
–
Display list of commands
.
–
Display suggestions with the different options
during a voice session.
Clock and Date
–
T
ime setting and format.
–
Setting the time.
–
Display time mode
.
–
Activate or deactivate the display of the digital
clock on the status bar
.
–
Synchro time
.
–
Activate or deactivate the automatic time
display
.
– Date setting .
– Set the date.
Safety/Assistance
–
Reversing camera.
–
Display the reversing camera in reverse.
–
Camera delay.
–
Maintain the on-screen display of the
reversing camera for a maximum of 10 seconds
or up to 1
1 mph (18 km/h).
Lighting
–
Daytime running lamps
.–
Activate or deactivate the automatic
illumination of the headlamps when starting.
Doors & locking
–
Autoclose
.
–
Activate or deactivate the automatic locking of
the doors
when the vehicle is moving.
Audio
–
Equalizer
.
–
Adjust the bass, medium and treble.
–
Balance/Fade
.
–
Adjust the balance of the front and rear
speakers, left and right.
–
Press the button in the centre of the arrows to
balance the settings.
–
V
olume/Speed.
–
Select the desired parameter; the option is
highlighted.
–
Loudness
.
–
Optimise the quality of low volume audio.
–
Automatic radio
.
–
Set the radio when starting up or recover the
active state when the ignition key was last turned
to ST
OP.
– Radio switch-off delay.
–
Set the parameter
.
–
AUX vol. setting.
–
Set the parameters.
T
elephone/Bluetooth
®
– Connected tels.
– Start the Bluetooth® connection of the selected
mobile device.
–
Delete the selected mobile device.
Page 182 of 212
180
Touch screen audio and telematics system
– Memorise the selected mobile device in the
favourites.
–
Set the parameters.
–
Add device
.
–
Add a new mobile device.
–
Connected audio.
–
Connect the mobile device only for audio.
Radio setting
–
DAB announcements
.
–
Activate or deactivate the announcements.
–
Activate or deactivate the options:
Alarm,
Event announc., Stock market newsflash,
Newsflash, Programme info, Special event, Sport
info, Public transp. info. Alarm announcement,
Weather newsflash.
Restore settings
Restore the default settings of the screen, clock,
sound and radio.
Delete personal data
Delete personal data, Bluetooth
® devices and
built-in presets.
Voice commands
Information - Using the
system
Instead of touching the screen, you can
use your voice to control the system.
To ensure that voice commands are always recognised by the system, please
observe the following recommendations:
–
speak in a normal tone of voice,
–
before speaking, always wait for the "beep"
(acoustic signal),
–
the system is able to recognise the voice
commands provided, regardless of gender
,
tone and inflection of the voice of the speaker,
–
if possible, minimise the noise inside the
passenger compartment,
–
before issuing a voice command, ask any
other passengers to refrain from speaking.
Since the system recognises commands
regardless of who is speaking, when several
people are speaking simultaneously
, it
is possible for the system to recognise
commands that are different or additional to
what has been requested,
–
for optimal operation, you are advised to
close the windows and any sunroof present
(on versions/markets where fitted) to avoid
any external source of disturbance.
Steering-mounted controls
This button is used to activate the “Telephone” voice recognition mode that
allows you to make calls, view recent/received/
outgoing calls, display the directory, etc.
This button is used to activate the "Radio/ Media" voice recognition mode that allows
you to tune to a specific radio station or a
specific AM/FM radio frequency, play a track or
an album contained on a USB stick/iPod/MP3/
CD.
Quick voice interaction can be used if
these buttons are depressed during a
voice message from the system; it allows you
to directly say a voice command.
For example, if the system is in the middle
of saying a voice help message and if we
know the command to give the system, by
pressing these buttons, the voice message
is interrupted and it is possible to directly
say the desired voice command (so avoiding
having to listen to the complete voice help
message).
When the system is waiting for a voice
command from the user, pressing these
buttons closes the voice session.
Each time a button is pressed, a "beep"
(acoustic signal) is emitted and the
screen displays a screen page of suggestions
asking the user to say a command.
Global voice commands
These commands can be made from any screen page after
pressing the voice recognition or telephone
button located on the steering wheel, as long as
there is no telephone call in progress.
Help