PEUGEOT EXPERT 2001 Owners Manual
EXPERT 2001
PEUGEOT
PEUGEOT
https://www.carmanualsonline.info/img/29/58370/w960_58370-0.png
PEUGEOT EXPERT 2001 Owners Manual
Trending: fuel cap, heating, CD player, stop start, interior lights, light, height adjustment
Page 101 of 127
REPLACING BULBSV- 3
82
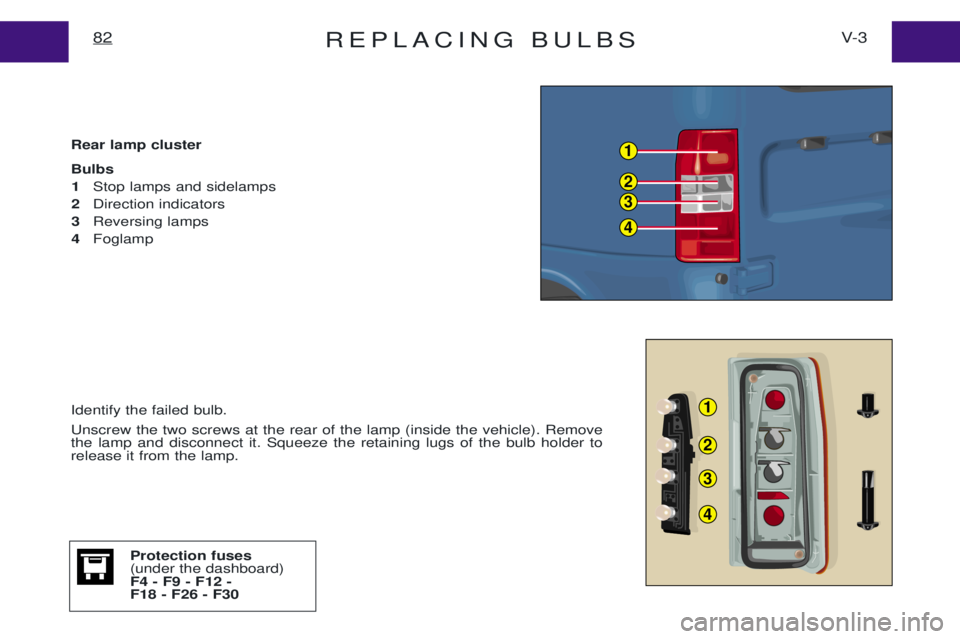
Identify the failed bulb. Unscrew the two screws at the rear of the lamp (inside the vehicle). Remove the lamp and disconnect it. Squeeze the retaining lugs of the bulb holder torelease it from the lamp.
Rear lamp cluster Bulbs
1 Stop lamps and sidelamps
2 Direction indicators
3 Reversing lamps
4 Foglamp
Protection fuses (under the dashboard)F4 - F9 - F12 -F18 - F26 - F30
1
2
3
4
1
2
3
4
Page 102 of 127
REPLACING BULBS83V- 3
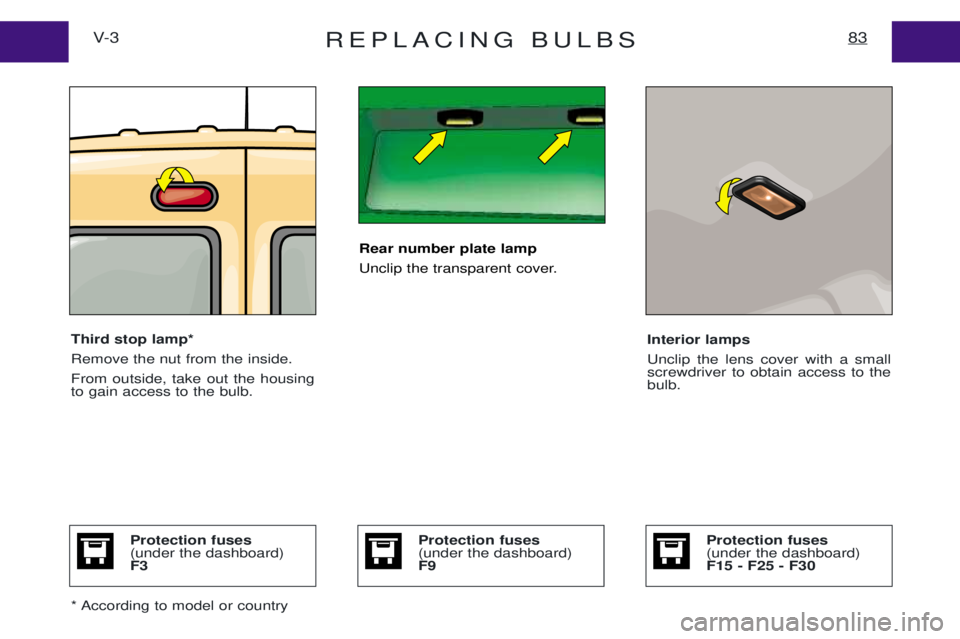
Third stop lamp* Remove the nut from the inside.From outside, take out the housing to gain access to the bulb. Interior lamps Unclip the lens cover with a small screwdriver to obtain access to thebulb.
Rear number plate lamp
Unclip the transparent cover.
* According to model or country
Protection fuses (under the dashboard)F3Protection fuses (under the dashboard)F15 - F25 - F30Protection fuses (under the dashboard)F9
Page 103 of 127
ROOF BARS85V- 4
Always keep within the load capacity.
Maximum load spread evenly: 100 kg.
Roof bars
The design of your vehicle is such that only roof bars approved by the manufacturer should be used. The use of such roof bars will ensure your safety and will avoid damaging your vehicle. Follow the fitting instructions. Recommendations:
¥ Spread the load evenly, avoid overloading one side.
¥ Keep heavy objects at the bottom of the load.
¥ Strap the load securely, and signal any overhanging load.
¥ Drive gently, the effect of side winds will be increased.
The stability of your vehicle may be affected.
¥ Remove the roof rack or roof bars when not in use.
Page 104 of 127
CHANGING A WHEELV- 5
86
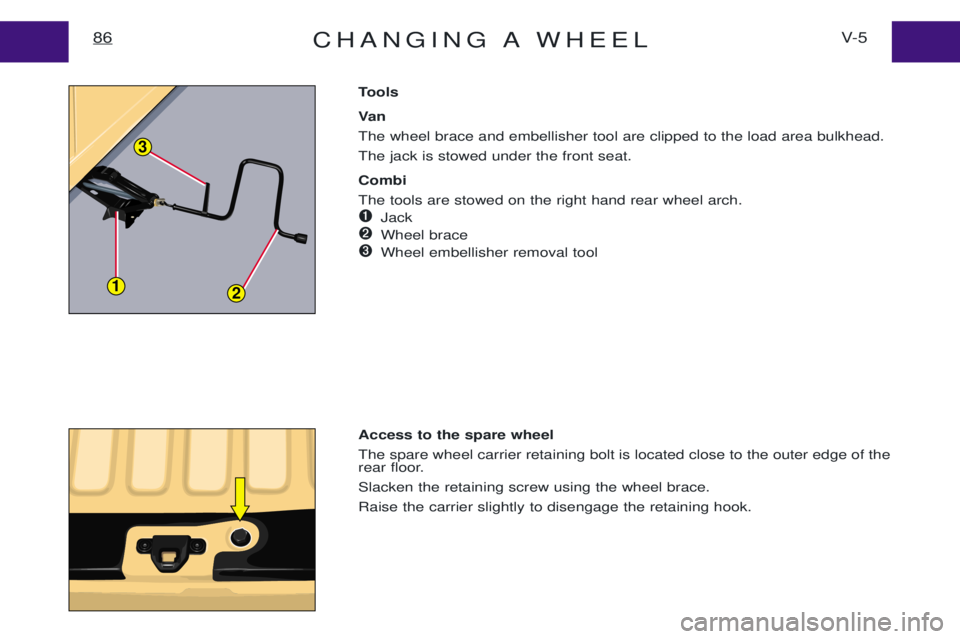
Tools
Va n The wheel brace and embellisher tool are clipped to the load area bulkhead.The jack is stowed under the front seat. Combi The tools are stowed on the right hand rear wheel arch.
�Jack
�Wheel brace
�Wheel embellisher removal tool
Access to the spare wheelThe spare wheel carrier retaining bolt is located close to the outer edge of the
rear floor. Slacken the retaining screw using the wheel brace.Raise the carrier slightly to disengage the retaining hook.
3
12
Page 105 of 127
CHANGING A WHEEL87V- 5
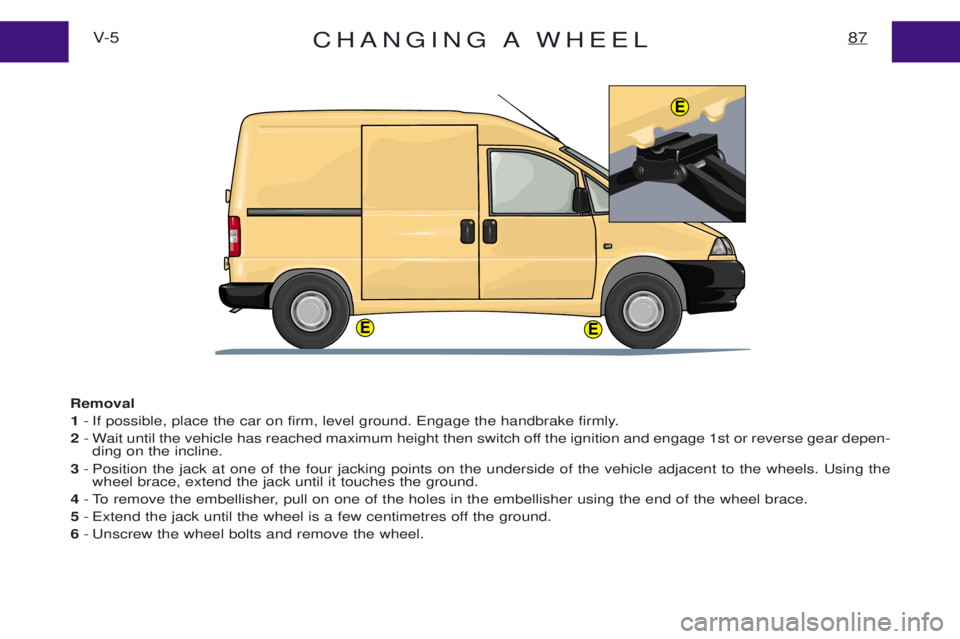
Removal 1 - If possible, place the car on firm, level ground. Engage the handbrake firmly.
2 - Wait until the vehicle has reached maximum height then switch off the ignition and engage 1st or reverse gear depen-
ding on the incline.
3 - Position the jack at one of the four jacking points on the underside of the vehicle adjacent to the wheels. Using the
wheel brace, extend the jack until it touches the ground.
4 - To remove the embellisher, pull on one of the holes in the embellisher using the end of the wheel brace.
5 - Extend the jack until the wheel is a few centimetres off the ground.
6 - Unscrew the wheel bolts and remove the wheel.
EE
E
Page 106 of 127
CHANGING A WHEELV- 5
88
WARNING
Never get under a jacked up vehicle
unless it is correctly supported by axle stands.
To refit
1 - Fit the wheel onto the hub, making sure that it is correctly positioned.
2 - Screw in the bolts but do not fully tighten them.
3 - Lower the jack and remove it.
4 - Using the wheel brace, fully tighten the wheel bolts.
5 - Refit the wheel embellisher, aligning the tyre valve aperture with the valve, then pressing it home around its circum-
ference.
6 - Refit the repaired original wheel as soon as possible.
7 - Ensure the tyre pressure is corrrect (see Ç Tyres È) and have the balance checked.
Page 107 of 127
CHANGING A WHEEL89V- 5
The jack is designed specifically for your vehicle,do not use it for other applications.
Replacing the spare wheel in the carrier
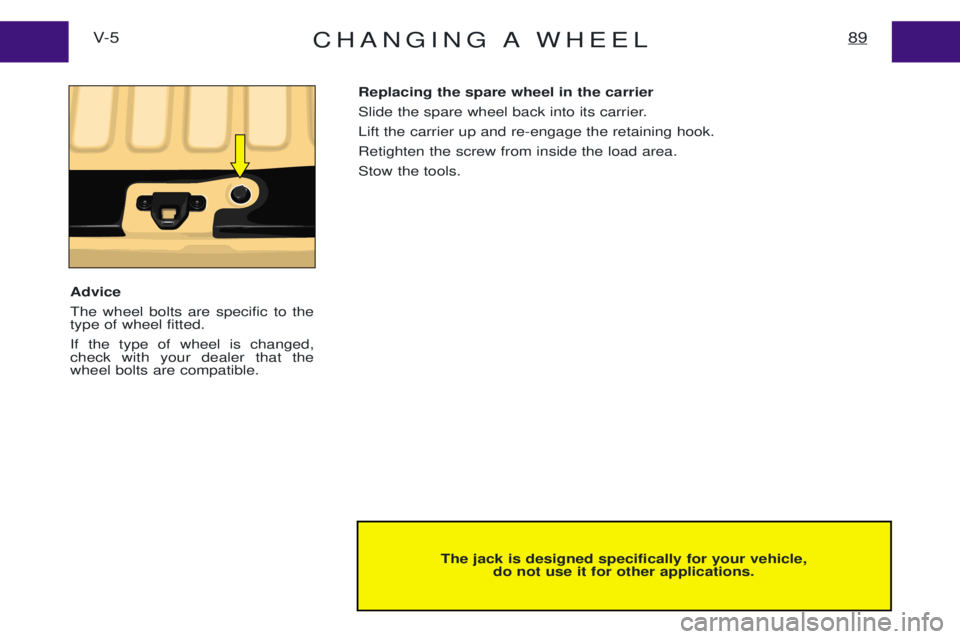
Slide the spare wheel back into its carrier.Lift the carrier up and re-engage the retaining hook.Retighten the screw from inside the load area.Stow the tools.
AdviceThe wheel bolts are specific to the type of wheel fitted. If the type of wheel is changed, check with your dealer that thewheel bolts are compatible.
Page 108 of 127
TOWING - LIFTINGV- 6
90
BEWARE
If the engine is not running,
the steering and braking systems will not be power-assisted.
Towing with the front or rear wheels lifted Use special towing equipment with a rigid bar and straps.Attach the hooks to each of the suspension arms.
Take the necessary precautions to protect the bumper and the front or rear of the vehicle.
NEVER TOW THE VEHICLE WITH THE FRONT OR REAR ENDS LIFTED AND THE WHEELS HANGING FREE. Towing with all wheels on theground
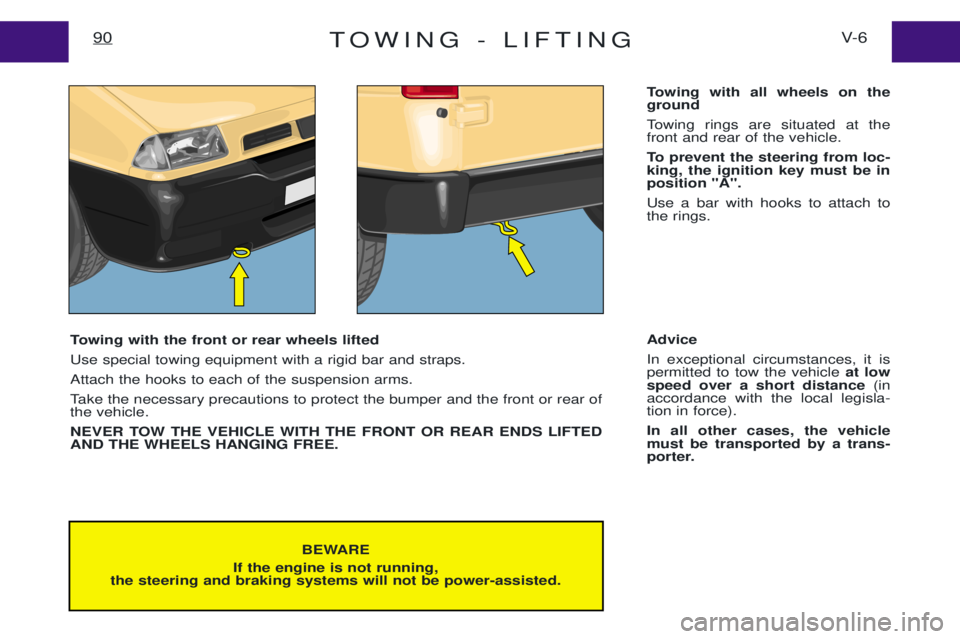
Towing rings are situated at the front and rear of the vehicle.
To prevent the steering from loc- king, the ignition key must be inposition "A". Use a bar with hooks to attach to the rings. Advice In exceptional circumstances, it is permitted to tow the vehicle
at low
speed over a short distance (in
accordance with the local legisla-tion in force). In all other cases, the vehicle must be transported by a trans-
porter.
Page 109 of 127
FRONT AIRBAG112
IMPORTANT:
For your safety, it is essential that you always sit with your back fully against the backrest.
Front airbags - Precautions ¥
The wearing of seat belts is obligatory.
¥ Never fix nor attach anything to the steering wheel boss; this could cause facial injuries should the airbag be activated.
¥ Do not stow nor allow objects to rest between your body and the airbag.
¥ Never drive with your hands on the centre boss of the steering wheel or holding the branches of the wheel.
¥ Do not smoke in the vehicle (risk of burns or injury should the airbag be deployed).
¥ Do not leave objects on the dashboard which could interfere with the operation of the airbag or cause injury to the passenger when activated.
¥ Make sure that the passenger does not place his feet on the dashboard when the vehicle is in motion.
¥ Children under ten years of age should use the rear seats with appropriate child restraints (see "Child restraints").
Page 110 of 127
FRONT AIRBAG113
Replacing the airbag pyrotechnic systems
They must be replaced following deployment or within ten years after first
registration of the vehicle. This must be done by the dealer network. In accordance with the strict security regulations in force, any repairs or checks must be performed exclusively by the dealer network. Any repairs that have not been carried out in strict compliance with the regulations could prevent the systems from operating correctly or couldcause their premature deployment, with the risk of bodily injuries.
Warning When the airbag(s) is(are) deployed, there is a light discharge of harmless smoke and a loud noise; both are due to the detonation of the explosive cartridge(s) forming part of the airbag system.
This smoke is not toxic but may cause irritation to people suffering from respiratory problems.As a precaution therefore, vacate the vehicle as soon as possible after deployment of an airbag (provided it is safe to do so). If this is not possible, open the windows or doors. The noise associated with the detonation may cause a temporary loss of hearing.These devices can only operate once and cannot provide further protection in the event of a second impact (either during the same collision or in any further collision). It is imperative that the system be repaired by the dealer network.
Trending: maintenance schedule, fuel pressure, roof, fuse, air conditioning, dashboard warning lights, radio controls
