4 wheel drive lock Peugeot Landtrek 2021 Owner's Manual
[x] Cancel search | Manufacturer: PEUGEOT, Model Year: 2021, Model line: Landtrek, Model: Peugeot Landtrek 2021Pages: 176, PDF Size: 6.04 MB
Page 4 of 176
2
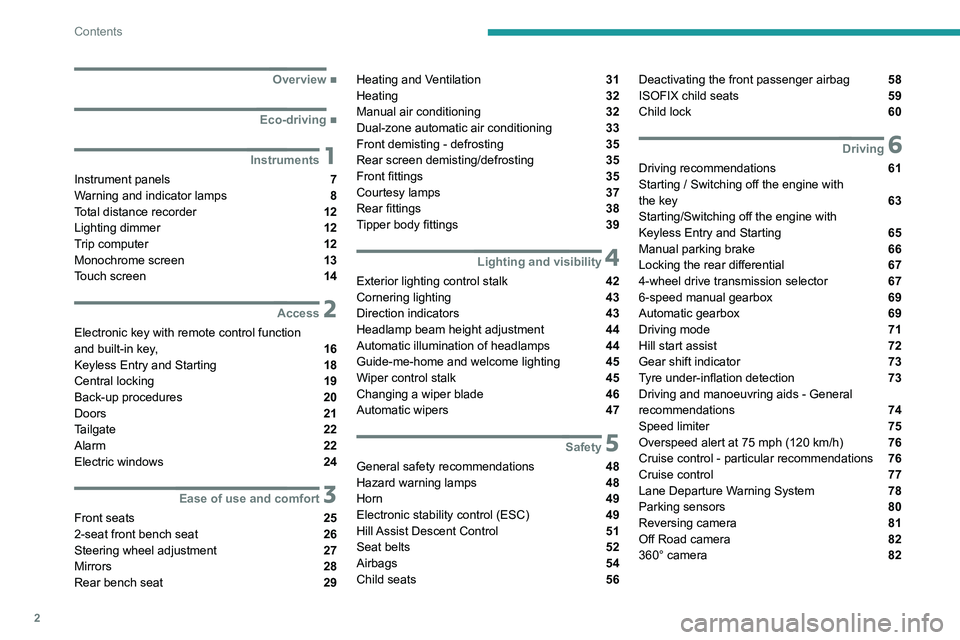
Contents
■
Overview
■
Eco-driving
1Instruments
Instrument panels 7
Warning and indicator lamps 8
Total distance recorder 12
Lighting dimmer
12
Trip computer 12
Monochrome screen 13
Touch screen 14
2Access
Electronic key with remote control function
and built-in key, 16
Keyless Entry and Starting 18
Central locking 19
Back-up procedures 20
Doors 21
Tailgate 22
Alarm 22
Electric windows 24
3Ease of use and comfort
Front seats 25
2-seat front bench seat 26
Steering wheel adjustment 27
Mirrors 28
Rear bench seat 29
Heating and Ventilation 31
Heating 32
Manual air conditioning 32
Dual-zone automatic air conditioning 33
Front demisting - defrosting 35
Rear screen demisting/defrosting 35
Front fittings 35
Courtesy lamps 37
Rear fittings 38
Tipper body fittings
39
4Lighting and visibility
Exterior lighting control stalk 42
Cornering lighting 43
Direction indicators 43
Headlamp beam height adjustment 44
Automatic illumination of headlamps 44
Guide-me-home and welcome lighting 45
Wiper control stalk 45
Changing a wiper blade 46
Automatic wipers 47
5Safety
General safety recommendations 48
Hazard warning lamps 48
Horn 49
Electronic stability control (ESC) 49
Hill Assist Descent Control 51
Seat belts 52
Airbags 54
Child seats 56
Deactivating the front passenger airbag 58
ISOFIX child seats 59
Child lock 60
6Driving
Driving recommendations 61
Starting / Switching off the engine with
the key
63
Starting/Switching off the engine with
Keyless Entry and Starting
65
Manual parking brake 66
Locking the rear differential 67
4-wheel drive transmission selector 67
6-speed manual gearbox 69
Automatic gearbox 69
Driving mode 71
Hill start assist 72
Gear shift indicator 73
Tyre under-inflation detection 73
Driving and manoeuvring aids - General
recommendations
74
Speed limiter 75
Overspeed alert at 75 mph (120
km/h) 76
Cruise control - particular recommendations 76
Cruise control 77
Lane Departure Warning System 78
Parking sensors 80
Reversing camera 81
Off Road camera 82
360° camera 82
Page 12 of 176
10
Instruments
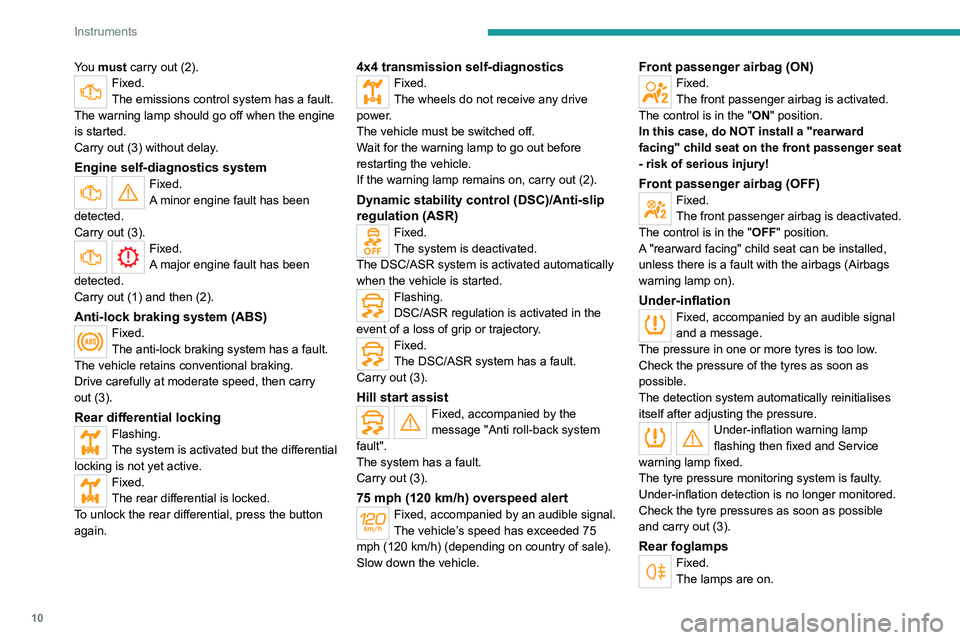
You must carry out (2).Fixed.
The emissions control system has a fault.
The warning lamp should go off when the engine
is started.
Carry out (3) without delay.
Engine self-diagnostics systemFixed.
A minor engine fault has been
detected.
Carry out (3).
Fixed.
A major engine fault has been
detected.
Carry out (1) and then (2).
Anti-lock braking system (ABS)Fixed.
The anti-lock braking system has a fault.
The vehicle retains conventional braking.
Drive carefully at moderate speed, then carry
out (3).
Rear differential locking
Flashing.
The system is activated but the differential
locking is not yet active.
Fixed.
The rear differential is locked.
To unlock the rear differential, press the button
again.
4x4 transmission self-diagnosticsFixed.
The wheels do not receive any drive
power.
The vehicle must be switched off.
Wait for the warning lamp to go out before
restarting the vehicle.
If the warning lamp remains on, carry out (2).
Dynamic stability control (DSC)/Anti-slip
regulation (ASR)
Fixed.
The system is deactivated.
The DSC/ASR system is activated automatically
when the vehicle is started.
Flashing.
DSC/ASR regulation is activated in the
event of a loss of grip or trajectory.
Fixed.
The DSC/ASR system has a fault.
Carry out (3).
Hill start assistFixed, accompanied by the
message "Anti roll-back system
fault".
The system has a fault.
Carry out (3).
75 mph (120 km/h) overspeed alertFixed, accompanied by an audible signal.
The vehicle’s speed has exceeded 75
mph (120 km/h) (depending on country of sale).
Slow down the vehicle.
Front passenger airbag (ON)Fixed.
The front passenger airbag is activated.
The control is in the "ON" position.
In this case, do NOT install a "rearward
facing" child seat on the front passenger seat
- risk of serious injury!
Front passenger airbag (OFF)Fixed.
The front passenger airbag is deactivated.
The control is in the "OFF" position.
A "rearward facing" child seat can be installed,
unless there is a fault with the airbags (Airbags
warning lamp on).
Under-inflationFixed, accompanied by an audible signal
and a message.
The pressure in one or more tyres is too low.
Check the pressure of the tyres as soon as
possible.
The detection system automatically reinitialises
itself
after adjusting the pressure.
Under-inflation warning lamp
flashing then fixed and Service
warning lamp fixed.
The tyre pressure monitoring system is faulty.
Under-inflation detection is no longer monitored.
Check the tyre pressures as soon as possible
and carry out (3).
Rear foglampsFixed.
The lamps are on.
Page 14 of 176
12
Instruments
Total distance recorder
The total distance recorder measures the total
distance travelled by the vehicle since its initial
registration.
With the ignition on, the total distance is
displayed at all times. It remains displayed for
30 seconds after switching off the ignition. It is
displayed when the driver's door is opened, and
when the vehicle is locked or unlocked.
When travelling abroad, you may have to
change the distance units (km or miles):
the road speed must be displayed in the local
country’s official unit (km/h or mph).
The unit is changed via the screen
configuration menu, with the vehicle
stationary.
Instrument panel lighting
dimmer
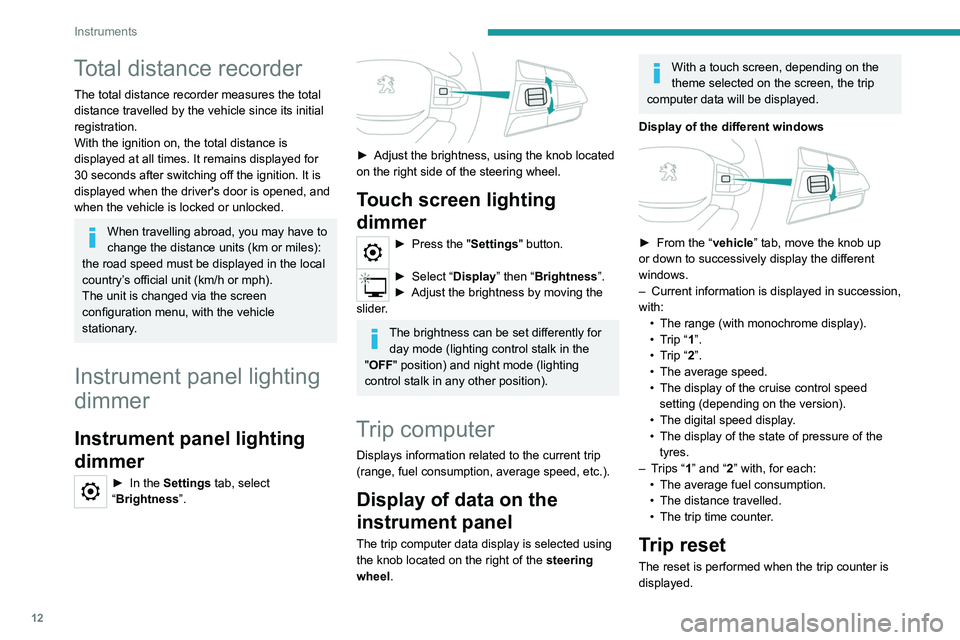
Instrument panel lighting
dimmer
► In the Settings tab, select
“Brightness”.
► Adjust the brightness, using the knob located
on the right side of the steering wheel.
Touch screen lighting
dimmer
► Press the " Settings" button.
► Select “Display” then “Brightness”.
► Adjust the brightness by moving the
slider
.
The brightness can be set differently for day mode (lighting control stalk in the
"OFF " position) and night mode (lighting
control stalk in any other position).
Trip computer
Displays information related to the current trip
(range, fuel consumption, average speed, etc.).
Display of data on the
instrument panel
The trip computer data display is selected using
the knob located on the right of the steering
wheel.
With a touch screen, depending on the
theme selected on the screen, the trip
computer data will be displayed.
Display of the different windows
► From the “ vehicle” tab, move the knob up
or down to successively display the different
windows.
–
Current information is displayed in succession,
with: •
The range (with monochrome display).
•
T
rip “1”.
•
T
rip “2”.
•
The average speed.
•
The display of the cruise control speed
setting (depending on the version).
•
The digital speed display
.
•
The display of the state of pressure of the
tyres.
–
T
rips “1” and “2” with, for each:
•
The average fuel consumption.
•
The distance travelled.
•
The trip time counter
.
Trip reset
The reset is performed when the trip counter is
displayed.
Page 20 of 176
18
Access
Anti-theft protection
Do not modify the electronic vehicle
immobiliser, as this might result in
malfunctions.
For vehicles with a key ignition switch,
remember to remove the key and turn the
steering wheel to engage the steering lock.
Locking the vehicle
Driving with the doors locked could make
it more difficult for the emergency services
to enter the passenger compartment in an
emergency.
As a safety precaution, remove the key from
the ignition or take the electronic key with you
when leaving the vehicle, even for a short
time.
Purchasing a second-hand vehicle
Have the key codes memorised by a
PEUGEOT dealer, to ensure that the keys
in your possession are the only ones able to
start the vehicle.
Keyless Entry and
Starting
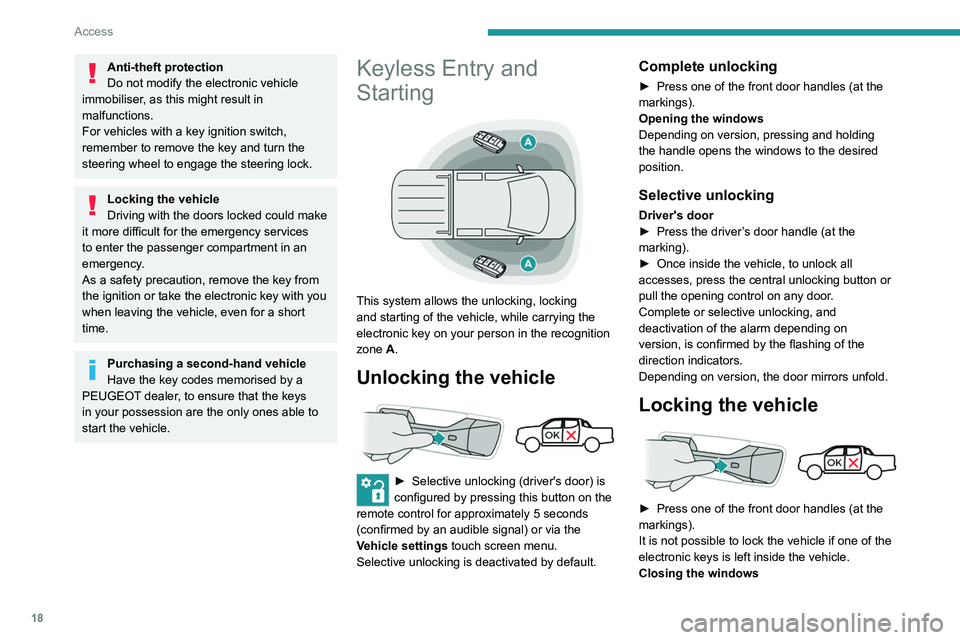
This system allows the unlocking, locking
and starting of the vehicle, while carrying the
electronic key on your person in the recognition
zone A.
Unlocking the vehicle
► Selective unlocking (driver's door) is
configured by pressing this button on the
remote control for approximately 5 seconds
(confirmed by an audible signal) or via the
Vehicle settings touch screen menu.
Selective unlocking is deactivated by default.
Complete unlocking
► Press one of the front door handles (at the
markings).
Opening the windows
Depending on version, pressing and holding
the handle opens the windows to the desired
position.
Selective unlocking
Driver's door
► Press the driver ’s door handle (at the
marking).
►
Once inside the vehicle, to unlock all
accesses, press the central unlocking button or
pull the opening control on any door
.
Complete or selective unlocking, and
deactivation of the alarm
depending on
version,
is confirmed by the flashing of the
direction indicators.
Depending on version, the door mirrors unfold.
Locking the vehicle
► Press one of the front door handles (at the
markings).
It is not possible to lock the vehicle if one of the
electronic keys is left inside the vehicle.
Closing the windows
Pressing and holding the handle closes the
windows.
When closing windows, ensure that no
person or object could prevent their
correct closure.
The locking, and the activation of the alarm
depending on version, is confirmed by the
temporary lighting of the direction indicators.
Depending on version, the door mirrors fold.
If one of the doors or the boot is still open
or if the electronic key for the Keyless
Entry and Starting system has been left inside
the vehicle, central locking will not take place.
However, if the vehicle is fitted with an alarm,
it will be activated after 45 seconds.
If the vehicle is unlocked but the doors
are not subsequently opened, the vehicle
will automatically lock itself again after
approximately 30 seconds. If the vehicle is
fitted with an alarm, it will also be reactivated
automatically.
The automatic relocking function is configured
via the touch screen’s vehicle configuration
menu.
The automatic door mirror folding/ unfolding function is configured by
pressing the button for the mirror folding/
unfolding control.
Page 29 of 176
27
Ease of use and comfort
3The backrest of the seat located next to the
driver, once in the table position, can also be
used as an armrest and has 2 cup/can holders
and a support strap.
For more information on the Seat belts,
refer to the corresponding section.
Folding the backrests
The backrests must only be operated with the vehicle stationary.
While driving, having a passenger in the rear,
behind the front benchseat is prohibited if the
benchseat backrests are tilted.
When sharp deceleration occurs, objects
placed on the folded backrest can turn into
projectiles.
Preliminary operations:
►
Lower the head restraints.
►
Check that no person or object will interfere
with folding down the backrests (clothing,
luggage, etc.).
►
Check that the outer seat belt is properly
tensioned along the pillars, the central belt is
stowed and the tongues of the belts are correctly
in the stowed position.
Deactivation of the front passenger
airbag is recommended.
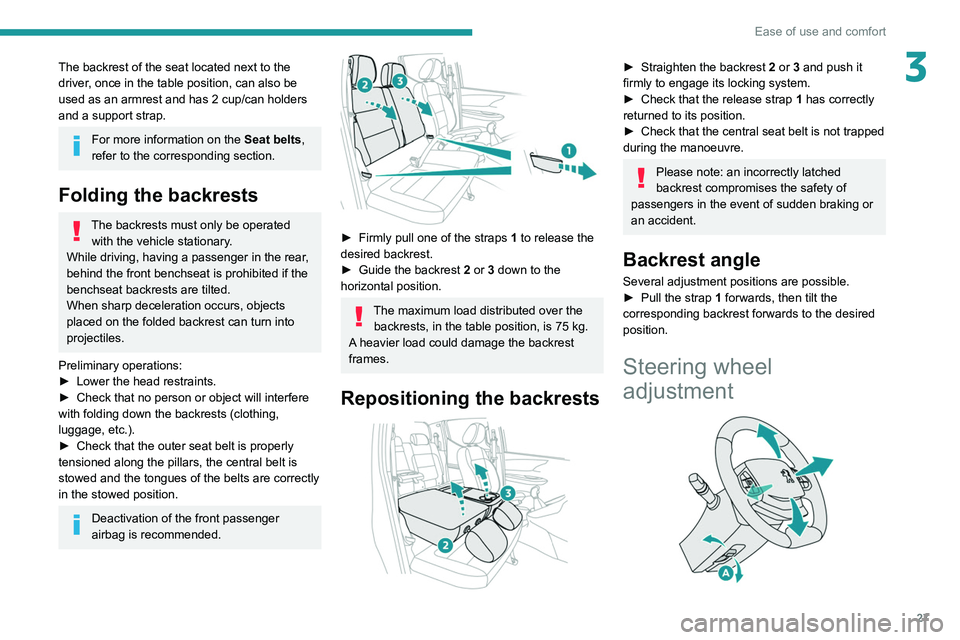
► Firmly pull one of the straps 1 to release the
desired backrest.
►
Guide the backrest
2 or 3 down to the
horizontal position.
The maximum load distributed over the backrests, in the table position, is 75 kg.
A heavier load could damage the backrest
frames.
Repositioning the backrests
► Straighten the backrest 2 or 3 and push it
firmly to engage its locking system.
►
Check that the release strap 1
has correctly
returned to its position.
►
Check that the central seat belt is not trapped
during the manoeuvre.
Please note: an incorrectly latched
backrest compromises the safety of
passengers in the event of sudden braking or
an accident.
Backrest angle
Several adjustment positions are possible.
► Pull the strap 1 forwards, then tilt the
corresponding backrest forwards to the desired
position.
Steering wheel
adjustment
Page 30 of 176
28
Ease of use and comfort
Manual model
Day/night position
► Pull the lever to change to the anti-dazzle
"night” position.
► Push the lever to change to the normal "day"
position.
Adjustment
► Set the mirror to the normal “day” position.
Rear bench seat
Bench seat with folding cushions (giving access
to storage compartments) and split folding
backrests (2/3-1/3).
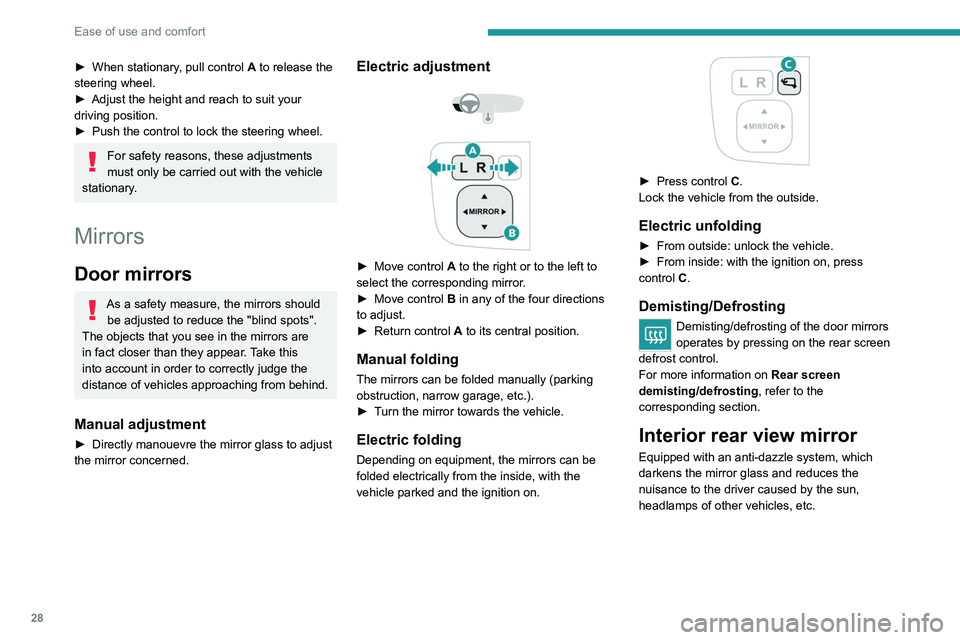
► When stationary , pull control A to release the
steering wheel.
►
Adjust the height and reach to suit your
driving position.
►
Push the control to lock the steering wheel.
For safety reasons, these adjustments
must only be carried out with the vehicle
stationary.
Mirrors
Door mirrors
As a safety measure, the mirrors should be adjusted to reduce the "blind spots".
The objects that you see in the mirrors are
in fact closer than they appear. Take this
into account in order to correctly judge the
distance of vehicles approaching from behind.
Manual adjustment
► Directly manouevre the mirror glass to adjust
the mirror concerned.
Electric adjustment
► Move control A to the right or to the left to
select the corresponding mirror.
►
Move control
B in any of the four directions
to adjust.
►
Return control A
to its central position.
Manual folding
The mirrors can be folded manually (parking
obstruction, narrow garage, etc.).
►
T
urn the mirror towards the vehicle.
Electric folding
Depending on equipment, the mirrors can be
folded electrically from the inside, with the
vehicle parked and the ignition on.
► Press control C.
Lock the vehicle from the outside.
Electric unfolding
► From outside: unlock the vehicle.
► From inside: with the ignition on, press
control
C.
Demisting/Defrosting
Demisting/defrosting of the door mirrors
operates by pressing on the rear screen
defrost control.
For more information on Rear screen
demisting/defrosting , refer to the
corresponding section.
Interior rear view mirror
Equipped with an anti-dazzle system, which
darkens the mirror glass and reduces the
nuisance to the driver caused by the sun,
headlamps of other vehicles, etc.
Page 42 of 176
40
Ease of use and comfort
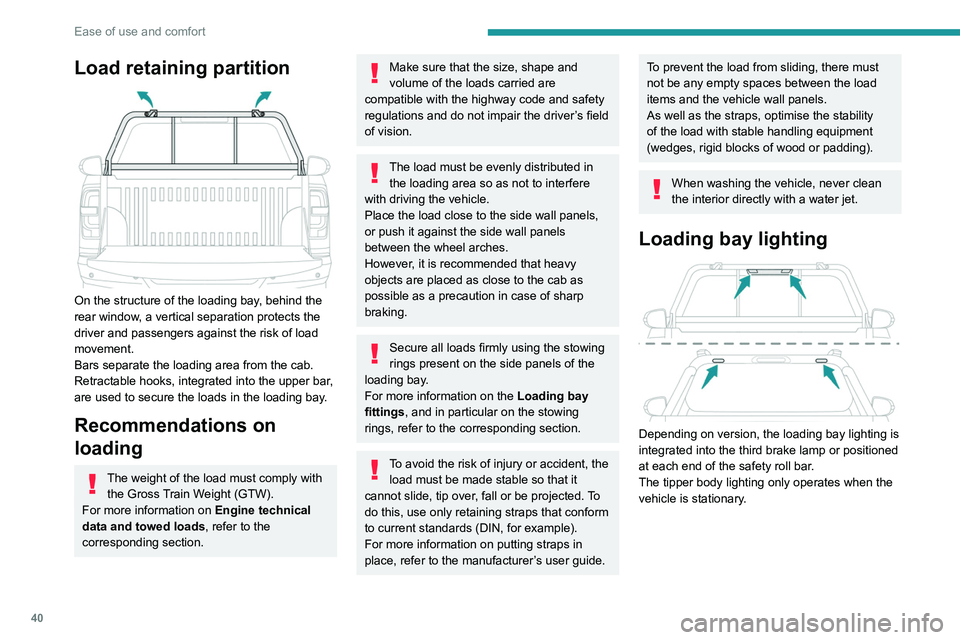
Load retaining partition
On the structure of the loading bay, behind the
rear window, a vertical separation protects the
driver and passengers against the risk of load
movement.
Bars separate the loading area from the cab.
Retractable hooks, integrated into the upper bar,
are used to secure the loads in the loading bay.
Recommendations on
loading
The weight of the load must comply with the Gross Train Weight (GTW).
For more information on Engine technical
data and towed loads , refer to the
corresponding section.
Make sure that the size, shape and
volume of the loads carried are
compatible with the highway code and safety
regulations and do not impair the driver’s field
of vision.
The load must be evenly distributed in the loading area so as not to interfere
with driving the vehicle.
Place the load close to the side wall panels,
or push it against the side wall panels
between the wheel arches.
However, it is recommended that heavy
objects are placed as close to the cab as
possible as a precaution in case of sharp
braking.
Secure all loads firmly using the stowing
rings present on the side panels of the
loading bay.
For more information on the Loading bay
fittings, and in particular on the stowing
rings, refer to the corresponding section.
To avoid the risk of injury or accident, the load must be made stable so that it
cannot slide, tip over, fall or be projected. To
do this, use only retaining straps that conform
to current standards (DIN, for example).
For more information on putting straps in
place, refer to the manufacturer’s user guide.
To prevent the load from sliding, there must
not be any empty spaces between the load
items and the vehicle wall panels.
As well as the straps, optimise the stability
of the load with stable handling equipment
(wedges, rigid blocks of wood or padding).
When washing the vehicle, never clean
the interior directly with a water jet.
Loading bay lighting
Depending on version, the loading bay lighting is
integrated into the third brake lamp or positioned
at each end of the safety roll bar.
The tipper body
lighting only operates when the
vehicle is stationary.
Page 50 of 176
48
Safety
General safety
recommendations
On and off-road driving
This commercial and all-terrain type
vehicle can be driven on roads and rough
terrain. The higher ground clearance and
centre of gravity make this vehicle more
likely to tip over. Refer to the Driving
recommendations.
Do not remove the labels attached in
different places on your vehicle. They
include safety warnings as well as
identification information for the vehicle.
For all work on your vehicle, use a
qualified workshop that has the technical
information, skills and equipment required, all
of which a PEUGEOT dealer is able to
provide.
Depending on country regulations,
certain safety equipment may be
mandatory: high visibility safety vests,
warning triangles, breathalysers, spare bulbs,
spare fuses, fire extinguisher, first aid kit, mud
flaps at the rear of the vehicle, etc.
Installing electrical accessories:
– The fitting of electrical equipment or
accessories not approved by PEUGEOT
may
cause excessive current consumption and
faults and failures with the electrical system
of your vehicle. Contact a PEUGEOT dealer
for information on the range of approved
accessories.
–
As a safety measure, access to the
diagnostic socket, used for the vehicle's
electronic systems, is reserved strictly for
PEUGEOT
dealers or qualified workshops,
equipped with the special tools required (risk
of malfunctions of the vehicle's electronic
systems that could cause breakdowns or
serious accidents). The Manufacturer cannot
be held responsible if this advice is not
followed.
–
Any modification or adaptation not intended
or authorised by PEUGEOT
or carried out
without meeting the technical requirements
defined by the Manufacturer will result in the
suspension of the commercial warranty.
Installation of accessory radio
communication transmitters
Before installing a radio communication
transmitter with an external aerial, you must
without fail contact a PEUGEOT dealer for
the specification of transmitters which can
be fitted (frequency, maximum power, aerial
position, specific installation requirements),
in line with the Vehicle Electromagnetic
Compatibility Directive (2004/104/EC).
Declarations of conformity for radio
equipment
The relevant certificates are available on the
http://public.servicebox.peugeot.com/APddb/
website.
Operating speed thresholds
The speed threshold values, for the
operation of certain systems, are given for
information purposes only. The thresholds
may be different under actual conditions of
use of the vehicle.
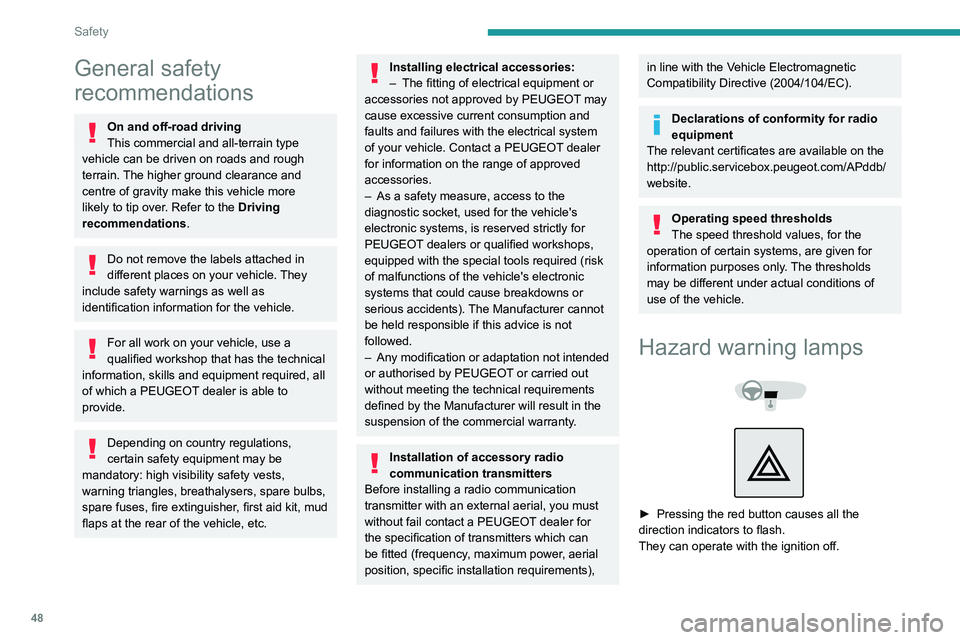
Hazard warning lamps
► Pressing the red button causes all the
direction indicators to flash.
They can operate with the ignition off.
Automatic operation of hazard warning lamps
When braking in an emergency, depending on
the rate of deceleration, the hazard warning
lamps come on automatically. They switch off
automatically when you next accelerate.
They can be turned off by pressing the button
again.
Horn
► Press the central part of the steering wheel.
Electronic stability control
(ESC)
(Depending on version)
The electronic stability control programme
includes the following systems:
– Anti-lock braking system (ABS) and Electronic
brake force distribution (EBFD).
– Emergency braking assistance (EBA).
– Anti-slip regulation (ASR).
– Dynamic stability control (DSC).
Page 51 of 176
49
Safety
5Automatic operation of hazard warning lamps
When braking in an emergency, depending on
the rate of deceleration, the hazard warning
lamps come on automatically. They switch off
automatically when you next accelerate.
They can be turned off by pressing the button
again.
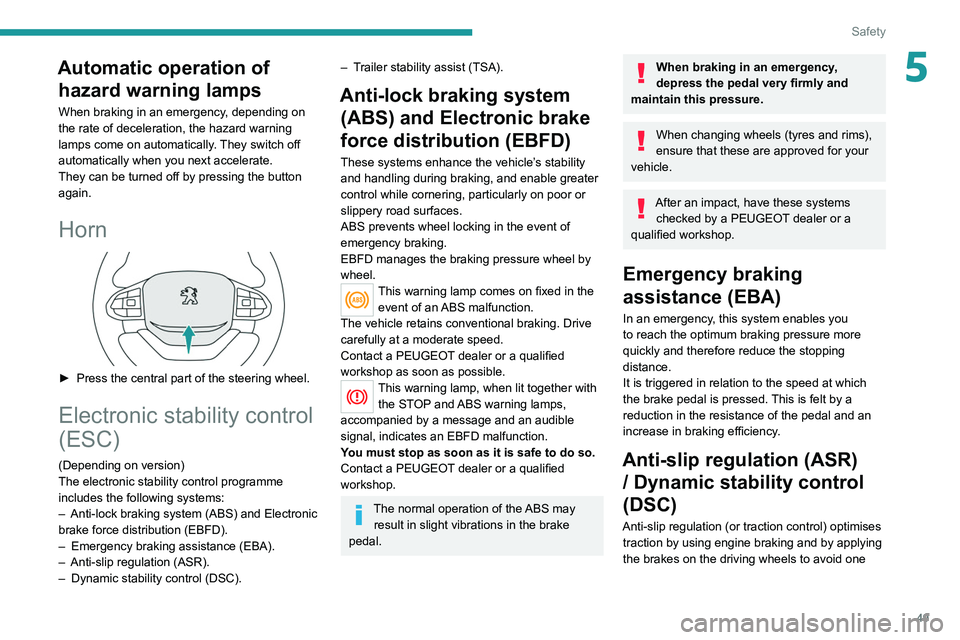
Horn
► Press the central part of the steering wheel.
Electronic stability control
(ESC)
(Depending on version)
The electronic stability control programme
includes the following systems:
–
Anti-lock braking system (ABS) and Electronic
brake force distribution (EBFD).
–
Emergency braking assistance (EBA).
–
Anti-slip regulation (ASR).
–
Dynamic stability control (DSC).
– Trailer stability assist (TSA).
Anti-lock braking system (ABS) and Electronic brake
force distribution (EBFD)
These systems enhance the vehicle’s stability
and handling during braking, and enable greater
control while cornering, particularly on poor or
slippery road surfaces.
ABS prevents wheel locking in the event of
emergency braking.
EBFD manages the braking pressure wheel by
wheel.
This warning lamp comes on fixed in the
event of an ABS malfunction.
The vehicle retains conventional braking. Drive
carefully at a moderate speed.
Contact a PEUGEOT dealer or a qualified
workshop as soon as possible.
This warning lamp, when lit together with the STOP and ABS warning lamps,
accompanied by a message and an audible
signal, indicates an EBFD malfunction.
You must stop as soon as it is safe to do so.
Contact a PEUGEOT dealer or a qualified
workshop.
The normal operation of the ABS may result in slight vibrations in the brake
pedal.
When braking in an emergency,
depress the pedal very firmly and
maintain this pressure.
When changing wheels (tyres and rims),
ensure that these are approved for your
vehicle.
After an impact, have these systems checked by a PEUGEOT dealer or a
qualified workshop.
Emergency braking
assistance (EBA)
In an emergency, this system enables you
to reach the optimum braking pressure more
quickly and therefore reduce the stopping
distance.
It is triggered in relation to the speed at which
the brake pedal is pressed. This is felt by a
reduction in the resistance of the pedal and an
increase in braking efficiency.
Anti-slip regulation (ASR) / Dynamic stability control
(DSC)
Anti-slip regulation (or traction control) optimises
traction by using engine braking and by applying
the brakes on the driving wheels to avoid one
Page 66 of 176
64
Driving
To switch the ignition back on, turn the key to
position 1, then back to position 3.
Starting/Switching off the
engine with Keyless Entry
and Starting
The electronic key must be present in the
passenger compartment.
If it is not detected, a message is displayed.
Move the electronic key so that the engine
can be started or switched off.
If there is still a problem, refer to the "Key
not detected - Back-up starting or Back-up
switch-off" section.
Starting
► With a manual gearbox, place the gear lever
in neutral and fully depress the clutch pedal.
Once the state of charge of the battery drops to
the reserve level, the system switches to energy
economy mode : the power supply is cut off
automatically to preserve the remaining battery
charge.
Starting the engine
With the parking brake applied:
► With a manual gearbox, place the gear lever
in neutral then fully depress the clutch pedal.
►
With an
automatic gearbox, place the gear
selector in mode N or P then depress the brake
pedal.
►
Insert the key into the ignition switch; the
system recognises the code.
►
Unlock
the steering column by simultaneously
turning the steering wheel and the key.
In certain cases, you may have to apply
significant force to move the steering
wheel (wheels on full lock, for example).
►
With a
petrol engine , operate the starter
motor by turning the key to position 4 without
pressing the accelerator pedal, until the engine
starts. As soon as the engine starts, release the
key.
With petrol engines , after a cold start,
preheating the catalytic converter can
cause
noticeable engine vibrations for
anything up to 2 minutes while stationary with
the engine running (accelerated idle speed).
► With a Diesel engine, turn the key to position
3, to activate the engine preheating system.
Wait until this warning lamp goes off on
the instrument panel, then turn the key to
position 4 without pressing the accelerator pedal,
to operate the starter motor. As soon as the
engine starts, release the key.
In wintry conditions, the warning lamp
may stay on for a longer period. When
the engine is hot, the warning lamp does not
come on.
In mild conditions, do not leave the engine
to warm up while stationary, but move off
straight away and drive at moderate speed.
If the engine does not start straight away,
switch off the ignition. Wait a few
seconds before operating the starter motor
again. If the engine does not start after a few
attempts, do not keep trying - risk of
damaging the starter motor and the engine.
Contact a PEUGEOT dealer or a qualified
workshop.
If the wheels are not straight, a message
appears prompting the driver to
straighten the wheels by turning the steering
wheel.
Switching off the engine
► Immobilise the vehicle.
► With the engine at idle, turn the key to
position 2
.
►
Press the key against the ignition switch and
turn it to position
1, then remove the key from the
ignition switch.
►
T
o lock the steering column, turn the steering
wheel until it locks.
To facilitate unlocking of the steering column, it is recommended that the
wheels be returned to the straight ahead
position before switching off the engine.
Never switch off the ignition before the
complete immobilisation of the vehicle.
With the engine off, the braking and steering
assistance systems are also cut off - risk of
loss of control of the vehicle!
Check that the parking brake is correctly
applied, particularly on sloping ground.
When leaving the vehicle, keep the key in
your possession and lock the vehicle.
Key left in
When the driver's door is opened, a
message is displayed, accompanied by an
audible signal, if the key has been left in the
ignition switch in position 1.
If the key has been left in the ignition switch
in position 3, the ignition will be switched off
automatically after one hour.