battery Peugeot Partner 2011 Owner's Manual - RHD (UK, Australia)
[x] Cancel search | Manufacturer: PEUGEOT, Model Year: 2011, Model line: Partner, Model: Peugeot Partner 2011Pages: 200, PDF Size: 7.41 MB
Page 5 of 200
3
Contents
CONTENT
S
Emergencyor assistance 9.1
Peugeot Connect Navigation 9.3
Bluetooth telephone 9.23
Peugeot Connect Sound 9.35
Peugeot Connect USB 9.42
Bluetooth 9.45
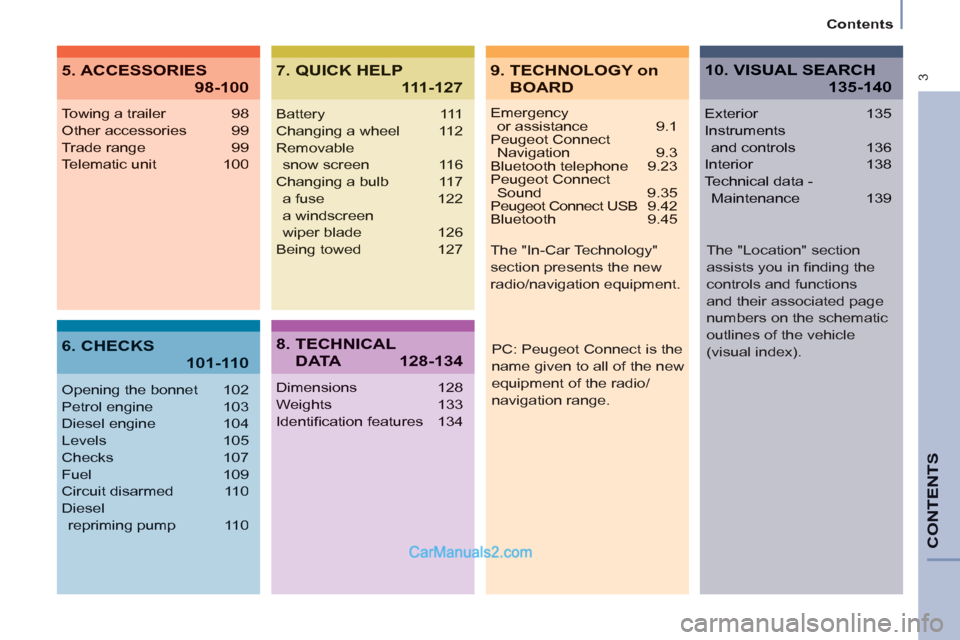
Towing a trailer 98
Other accessories 99
Trade range 99
Telematic unit 100
Opening the bonnet 102
Petrol engine 103
Diesel engine 104
Levels 105
Checks 107
Fuel 109
Circuit disarmed 110
Diesel
repriming pump 110
Battery 111
Changing a wheel 112
Removable
snow screen 116
Changing a bulb 117
a fuse 122
a windscreen
wiper blade 126
Being towed 127
Dimensions 128
Weights 133
Identifi cation features 134
Exterior 135
Instruments
and controls 136
Interior 138
Technical data -
Maintenance 139
9. TECHNOLOGY on
BOARD
5. ACCESSORIES
98-100
7. QUICK HELP
111-127
10. VISUAL SEARCH
135-140
6. CHECKS
101-110
8. TECHNICAL
D ATA128-134
PC: Peugeot Connect is the
name given to all of the new
equipment of the radio/
navigation range. The "In-Car Technology"
section presents the new
radio/navigation equipment.
The "Location" section
assists you in fi nding the
controls and functions
and their associated page
numbers on the schematic
outlines of the vehicle
(visual index).
Page 18 of 200

16
Access
Good practice
Take care not to allow the remote
control to come into contact with
grease, dust, rain or a damp
environment.
A heavy object attached to the key
(keyring, ...) weighing on the shaft of
the key in the switch, may cause a
malfunction.
REMOTE CONTROL
Programming the remote
control
Following changing of the remote
control battery or disconnection of the
vehicle battery, the remote control may
have to be reprogrammed.
Wait at least one minute before using
the remote control.
Insert the key in the ignition switch with
the buttons (padlocks) of the remote
control facing you.
Switch on the ignition.
Press the locking padlock for at
least fi ve seconds within the next
ten seconds.
Switch off the ignition.
Wait at least one minute before using
the remote control.
The remote control is now working
again. Use only identical batteries or
batteries of an equivalent type to those
recommended by PEUGEOT dealers.
Do not discard the remote control
batteries, they contain metals which
are harmful to the environment.
Deposit them at a PEUGEOT
dealership, or at any other approved
collection point.
Folding/unfolding the key
Changing the battery
Battery ref.: CR1620/3 volts.
The information "battery fl at" is given
by an audible signal, accompanied by
a message on the display.
To replace the battery, unclip the
casing using a coin at the ring.
If the remote control does not work
after the battery has been changed,
re-programme the remote control.
There is a risk of damage if the
replacement battery does not conform. Press this button to release
the key from its housing.
To fold the key, press this
chromed button then fold
the key into the housing.
If you do not press the button, the
mechanism may be damaged.
Page 21 of 200

19
Access
READY TO SET OFF
2
From the inside
Unlock and open the side door using
this handle, guiding the rearward
sliding to the point of resistance. Pass
this point to hold the door open.
Good practice
Take care not to block the guide space
on the fl oor to allow the door to slide
correctly.
If your vehicle is parked on a slope,
guide the sliding of the side door. In
fact, the door could open or close more
rapidly due to the slope of the ground
and could cause injury.
For safety and operation reasons, do
not drive with the sliding side door open.
SLIDING SIDE DOOR
From the outside
Pull the handle towards you then
towards the rear and open the side
door, guiding the rearward sliding to
beyond the point of resistance to hold
it open.
Operation in the event of a
battery failure
Front and side passenger doors
In the event of a malfunction of the
battery or of the central locking, use
the lock to lock the doors mechanically.
)
To open the door and get out of the
vehicle, pull the interior control.
)
To lock the door, insert the key in the
lock, located on the edge of the door,
then turn it one eighth of a turn
.
Driver’s door
)
Insert the key in the lock, then turn
it to the right to lock or to the left to
unlock.
Page 31 of 200
29
READY TO SET OFF
22
Instruments and controls
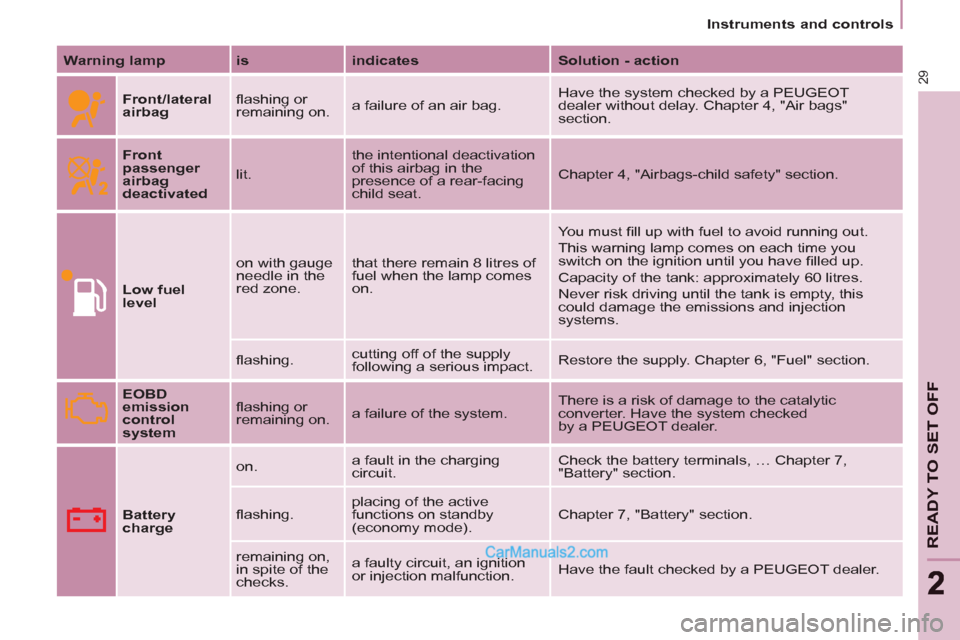
Warning lamp
is
indicates
Solution - action
Front/lateral
airbag
fl ashing or
remaining on. a failure of an air bag. Have the system checked by a PEUGEOT
dealer without delay. Chapter 4, "Air bags"
section.
Front
passenger
airbag
deactivated
lit. the intentional deactivation
of this airbag in the
presence of a rear-facing
child seat. Chapter 4, "Airbags-child safety" section.
Low fuel
level
on with gauge
needle in the
red zone. that there remain 8 litres of
fuel when the lamp comes
on. You must fi ll up with fuel to avoid running out.
This warning lamp comes on each time you
switch on the ignition until you have fi lled up.
Capacity of the tank: approximately 60 litres.
Never risk driving until the tank is empty, this
could damage the emissions and injection
systems.
fl ashing. cutting off of the supply
following a serious impact. Restore the supply. Chapter 6, "Fuel" section.
EOBD
emission
control
system
fl ashing or
remaining on. a failure of the system. There is a risk of damage to the catalytic
converter. Have the system checked
by a PEUGEOT dealer.
Battery
charge
on. a fault in the charging
circuit. Check the battery terminals, … Chapter 7,
"Battery" section.
fl ashing. placing of the active
functions on standby
(economy mode). Chapter 7, "Battery" section.
remaining on,
in spite of the
checks. a faulty circuit, an ignition
or injection malfunction. Have the fault checked by a PEUGEOT dealer.
Page 38 of 200

36
Instruments and controls
Trip recorder zero
reset button
After this operation, if you wish
to disconnect the battery, lock
the vehicle and wait for at least
fi ve minutes, otherwise the zero re-set
will not be registered.
Zero re-set
Your PEUGEOT dealer carries out this
operation after each service.
However, if you carry out the service
yourself, the re-set procedure is as
follows:
- switch off the ignition,
- press and hold the trip recorder
reset button,
- switch on the ignition.
The display begins a countdown.
When the display shows "=0"
, release
the button; the spanner disappears.
Engine oil level indicator
When the ignition is switched on, the
engine oil level is indicated for a few
seconds, after the service information.
Oil level correct
Lack of oil
Flashing of "OIL"
,
linked with the
service warning light,
accompanied by an
audible signal and a message on the
display, indicates a lack of oil which
could damage the engine.
If the lack of oil is confi rmed by a check
using the dipstick, it is essential that
the level is topped up.
Oil level gauge fault
Flashing of "OIL--"
indicates a
malfunction of the
engine oil level
gauge. Consult a PEUGEOT dealer.
The level read will only be correct
if the vehicle is on level ground
and the engine has been off for
more than 15 minutes.
Dipstick
A
= maximum, never exceed
this level as a surplus of oil
may damage the engine.
Contact a PEUGEOT dealer
without delay.
B
= minimum, top up the level
via the oil fi ller cap, using
the type of oil suited to your
engine.
With the lights on, press
the button to vary the
intensity of the lighting
of the instruments and
controls. When the lighting
reaches the minimum
(or maximum) setting,
release the button then press it again
to increase (or reduce) the brightness.
As soon as the lighting is of the
required brightness, release the button. With the ignition on, press
the button until the zeros
appear.
Lighting rheostat
Page 43 of 200
41
Stop & Start
READY TO SET OFF
2
STOP & START
The Stop & Start system puts the
engine temporarily on standby - STOP
mode - during stops in the traffi c (red
lights, traffi c jams, or other...). The
engine restarts automatically - START
mode - as soon as you want to move
off. The restart takes place instantly,
quickly and silently.
Perfect for urban use, the Stop & Start
system reduces fuel consumption and
exhaust emissions as well as the noise
level when stationary.
Operation
Going into engine STOP mode
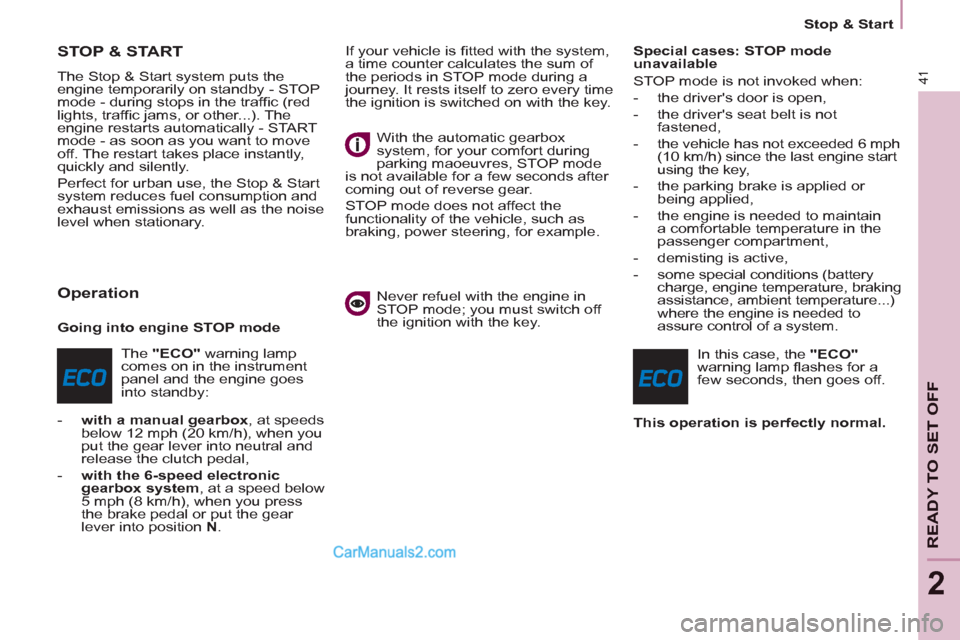
The "ECO"
warning lamp
comes on in the instrument
panel and the engine goes
into standby:
- with a manual gearbox
, at speeds
below 12 mph (20 km/h), when you
put the gear lever into neutral and
release the clutch pedal,
- with the 6-speed electronic
gearbox system
, at a speed below
5 mph (8 km/h), when you press
the brake pedal or put the gear
lever into position N
. If your vehicle is fi tted with the system,
a time counter calculates the sum of
the periods in STOP mode during a
journey. It rests itself to zero every time
the ignition is switched on with the key.
With the automatic gearbox
system, for your comfort during
parking maoeuvres, STOP mode
is not available for a few seconds after
coming out of reverse gear.
STOP mode does not affect the
functionality of the vehicle, such as
braking, power steering, for example.
Never refuel with the engine in
STOP mode; you must switch off
the ignition with the key.
Special cases: STOP mode
unavailable
STOP mode is not invoked when:
- the driver's door is open,
- the driver's seat belt is not
fastened,
- the vehicle has not exceeded 6 mph
(10 km/h) since the last engine start
using the key,
- the parking brake is applied or
being applied,
- the engine is needed to maintain
a comfortable temperature in the
passenger compartment,
- demisting is active,
- some special conditions (battery
charge, engine temperature, braking
assistance, ambient temperature...)
where the engine is needed to
assure control of a system.
In this case, the "ECO"
warning lamp fl ashes for a
few seconds, then goes off.
This operation is perfectly normal.
Page 44 of 200

Stop & Start
Going into engine START mode
The "ECO"
warning lamp
goes off and the engine
starts:
- with a manual gearbox
, when you
depress the clutch pedal,
- with the 6-speed electronic
gearbox system
:
●
gear lever in position A
or M
,
when you release the brake
pedal,
●
or gear lever in position N
and
the brake pedal released, when
you move the gear lever to
position A
or M
,
●
or when you engage reverse
gear.
Special cases: START invoked
automatically
START is invoked automatically when:
- you open the driver's door,
- you unfasten the driver's seat belt,
- the speed of the vehicle exceeds
15 mph (25 km/h) with a manual
gearbox or 7 mph (11 km/h) with
the 6-speed electronic gearbox
system,
- the parking brake is being applied,
- some special conditions (battery
charge, engine temperature,
braking assistance, ambient
temperature...) where the engine
is needed to assure control of a
system.
In this case the "ECO"
warning lamp fl ashes for
few seconds, then goes off.
This operation is perfectly normal.
With a manual gearbox in STOP
mode, if a gear is engaged without
fully depressing the clutch pedal, a
warning lamp comes on or a message
is displayed asking you to depress the
clutch pedal to restart the engine.
Deactivation
At any time, press the "ECO
OFF"
switch to deactivate the
system.
This is confi rmed by the switch warning
lamp coming on accompanied by a
message on the screen.
If the system has been deactivated
in STOP mode, the engine restarts
immediately.
Page 45 of 200

43
Stop & Start
READY TO SET OFF
2
Reactivation
Press the "ECO OFF"
switch again.
The system is active again; this is
confi rmed by the switch warning
lamp going off and a message in the
instrument panel.
The system is reactivated
automatically at every new start
using the key.
Operating fault
In the event of a malfunction
with the system, the "ECO
OFF"
switch warning lamp
fl ashes, then comes on
continuously.
Have it checked by a PEUGEOT
dealer or a qualifi ed workshop.
In the event of a fault in STOP
mode, the vehicle may stall. It is then
necessary to switch off the ignition and
start the engine again using the key.
Maintenance
Before working under the bonnet,
deactivate the Stop & Start system
to avoid any risk of injury resulting
from automatic operation of START
mode.
This system requires a specifi c
battery with a special specifi cation
and technology (reference numbers
available from a PEUGEOT dealer or a
qualifi ed workshop).
Fitting a battery not listed by
PEUGEOT introduces the risk of
malfunction of the system.
The Stop & Start system makes
use of advanced technology. All
work on this type of battery must
be done only by a PEUGEOT dealer or
a qualifi ed workshop.
Page 49 of 200

47
Steering mounted controls
EASE OF USE and COMFOR
T
3
Daytime lights
Depending on the country in which
the vehicle is sold, the vehicle may
be equipped with daytime lights. The
dipped headlamps come on when the
vehicle is started.
Rear foglamps (amber,
2nd rotation of the ring
forwards). Front foglamps (green,
1st rotation of the ring
forwards).
Front and rear foglamps
Rotate ring B
forwards to switch on
and rearwards to switch off. The
status is confi rmed by the lamp on the
instrument panel.
These operate with the sidelamps and
the dipped beam headlamps. Do not forget to switch them off
when they are no longer needed.
Operation of the utomatic lighting
switches off the rear foglamps, but the
front foglamps remain on.
This warning light comes on
on the instrument panel.
The instruments and controls
(instrument panel, display, air
conditioning control panel, ...) are
only lit on switching to the automatic
switching on of the lights mode or
when the lights are switched on
manually.
To switch off the front and rear
foglamps, turn the ring rearwards twice
in succession.
In clear weather or in rain, both day
and night, rear foglamps dazzle and
their use is prohibited.
Automatic switching on of the lights
In foggy weather or in snow,
the brightness sensor can
detect suffi cient light. As a
consequence, the lights will not come
on automatically. If necessary, you
must switch on the dipped headlamps
manually.
Do not cover the brightness
sensor located on the windscreen,
behind the mirror. It is used for
the automatic switching on of the lights
and for the automatic wipers.
Activation
Turn the ring to the AUTO
position.
The activation of this function is
accompanied by a message on the
display.
Deactivation
Turn the ring forwards or rearwards.
The deactivation of this function
is accompanied by a message on
the display.
The function is deactivated temporarily
when you use the manual lights stalk. The side lights
and dipped beam
headlamps switch
on automatically if
the light is poor, or
during operation of the windscreen
wipers. They switch off as soon as the
light becomes bright enough or the
windscreen wipers stop.
This function is not compatible with the
daytime lights. If the user does not operate any
equipment for 30 minutes, the
Economy mode engages to avoid
discharging the battery (see "Battery"
in section 7). Electrical functions are
put on standby and the battery warning
lamp fl ashes.
Sidelamp operation is not affected by
Economy mode.
Page 76 of 200
74
Practical information
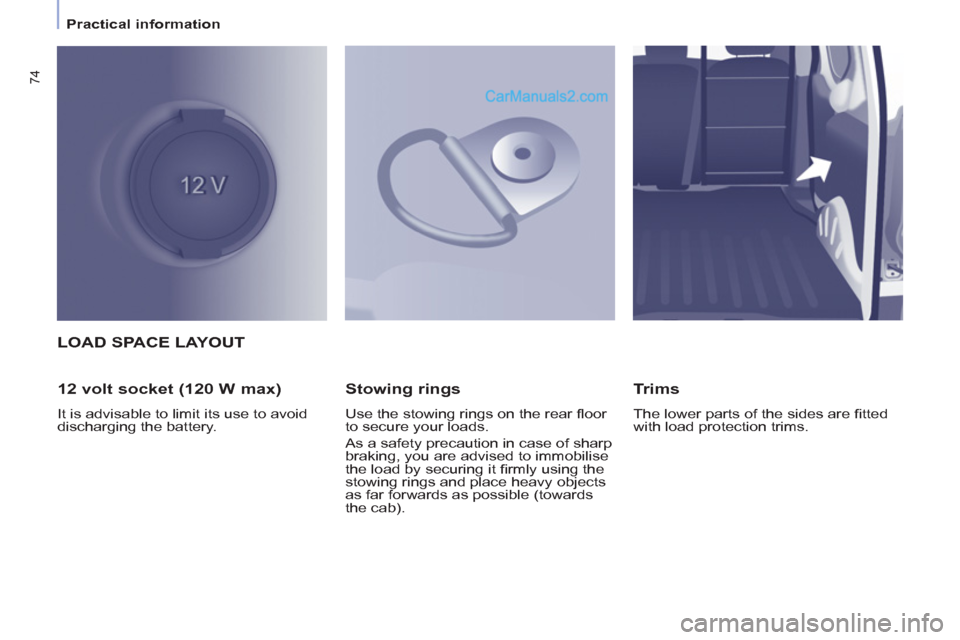
LOAD SPACE LAYOUT
12 volt socket (120 W max)
It is advisable to limit its use to avoid
discharging the battery.
Stowing rings
Use the stowing rings on the rear fl oor
to secure your loads.
As a safety precaution in case of sharp
braking, you are advised to immobilise
the load by securing it fi rmly using the
stowing rings and place heavy objects
as far forwards as possible (towards
the cab).
Trims
The lower parts of the sides are fi tted
with load protection trims.