tow Peugeot Partner 2011 Owner's Manual - RHD (UK, Australia)
[x] Cancel search | Manufacturer: PEUGEOT, Model Year: 2011, Model line: Partner, Model: Peugeot Partner 2011Pages: 200, PDF Size: 7.41 MB
Page 5 of 200
3
Contents
CONTENT
S
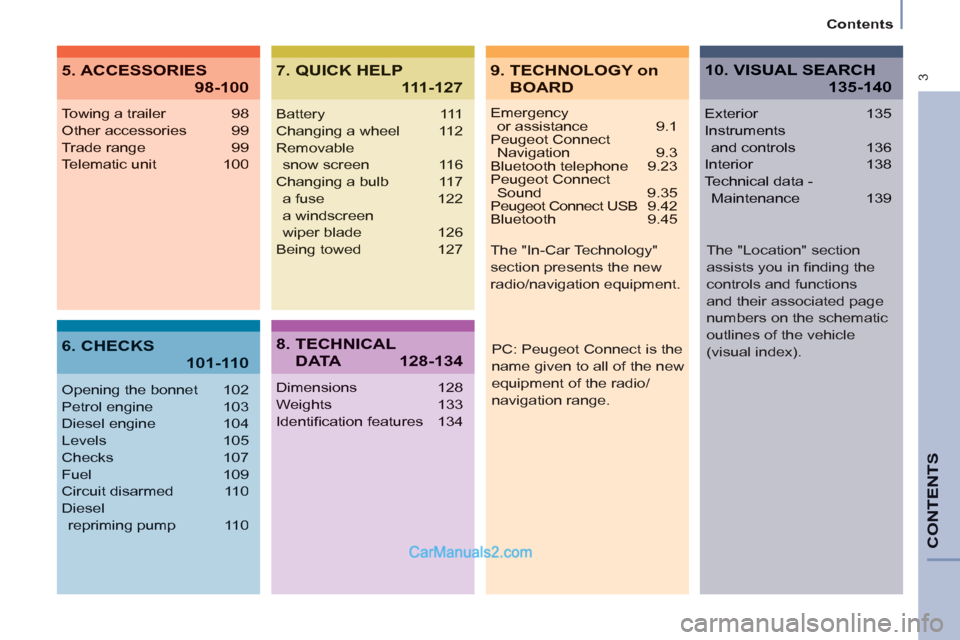
Emergencyor assistance 9.1
Peugeot Connect Navigation 9.3
Bluetooth telephone 9.23
Peugeot Connect Sound 9.35
Peugeot Connect USB 9.42
Bluetooth 9.45
Towing a trailer 98
Other accessories 99
Trade range 99
Telematic unit 100
Opening the bonnet 102
Petrol engine 103
Diesel engine 104
Levels 105
Checks 107
Fuel 109
Circuit disarmed 110
Diesel
repriming pump 110
Battery 111
Changing a wheel 112
Removable
snow screen 116
Changing a bulb 117
a fuse 122
a windscreen
wiper blade 126
Being towed 127
Dimensions 128
Weights 133
Identifi cation features 134
Exterior 135
Instruments
and controls 136
Interior 138
Technical data -
Maintenance 139
9. TECHNOLOGY on
BOARD
5. ACCESSORIES
98-100
7. QUICK HELP
111-127
10. VISUAL SEARCH
135-140
6. CHECKS
101-110
8. TECHNICAL
D ATA128-134
PC: Peugeot Connect is the
name given to all of the new
equipment of the radio/
navigation range. The "In-Car Technology"
section presents the new
radio/navigation equipment.
The "Location" section
assists you in fi nding the
controls and functions
and their associated page
numbers on the schematic
outlines of the vehicle
(visual index).
Page 8 of 200

6
5
2b
2a
4
2a
6
2b
5
4
6
Exterior
15
102 99
Key
:
chapter identifi cation
: page identifi cation
19
Key - Remote control
Selective unlocking of the cab
and load space.
Locking of the load space only.
Complete locking of the vehicle.
Opening the bonnet
Take care when working under
the bonnet.
Raise the bonnet slightly by
reaching in with a fl at hand, palm
down, to make access to the
lever easier. Engage the base of
the stay in the hole provided to
hold the bonnet open.
Fix the stay in its location,
identifi ed by a sticker on the left-
hand side panel of the vehicle.
Sliding side door
Pull the handle towards you
then towards the rear and open
the door, guiding the rearward
movement until the point of
resistance has been passed.
Professional equipment -
Accessories 85
Grip control
The Grip control anti-slip system
improves the road-holding of
your vehicle in snow, mud and
sand.
Page 15 of 200

3
3
3
3
13
1
FAMILIARISATION
Interior
LOAD SPACE
We recommend that the load is
properly secured using the stowing
rings on the fl oor and that heavy
objects are placed at the front (towards
the cab). Fitted in the wall, this illuminates
the boot and can be removed when
changing a wheel, ...
74 71 75
Maximum loads
Overhead storage compartment: 5 kg.
Folding seat, in the seat back folded
onto seat cushion position: 50 kg.
Transverse roof bars: 75 kg.
Roof rack: 120 kg.
Rear roof fl ap: 100 kg vertically.
Partitions
Torch
Stowing rings
Removable fl ap
This can be removed for the loading of
long objects.
75
Page 21 of 200

19
Access
READY TO SET OFF
2
From the inside
Unlock and open the side door using
this handle, guiding the rearward
sliding to the point of resistance. Pass
this point to hold the door open.
Good practice
Take care not to block the guide space
on the fl oor to allow the door to slide
correctly.
If your vehicle is parked on a slope,
guide the sliding of the side door. In
fact, the door could open or close more
rapidly due to the slope of the ground
and could cause injury.
For safety and operation reasons, do
not drive with the sliding side door open.
SLIDING SIDE DOOR
From the outside
Pull the handle towards you then
towards the rear and open the side
door, guiding the rearward sliding to
beyond the point of resistance to hold
it open.
Operation in the event of a
battery failure
Front and side passenger doors
In the event of a malfunction of the
battery or of the central locking, use
the lock to lock the doors mechanically.
)
To open the door and get out of the
vehicle, pull the interior control.
)
To lock the door, insert the key in the
lock, located on the edge of the door,
then turn it one eighth of a turn
.
Driver’s door
)
Insert the key in the lock, then turn
it to the right to lock or to the left to
unlock.
Page 22 of 200

Access
Practice
It is possible to drive with the right-hand
door open to make the transportation of
long loads easier. The left-hand door is
kept closed by the distinctive "yellow"
lock, positioned at the base of the door.
This closed door must not be used as a
load retainer.
Driving with the right-hand door open
is a special dispensation. Comply with
the usual safety indications to attract
the attention of other drivers.
HINGED REAR DOORS
From outside
Pull the lever to open the right-hand
door.
To close, start with the right-hand door
then close the left-hand door.
To open, pull the handle towards you. The hinged rear doors are
asymmetrical (2/3 - 1/3), with the
smaller door on the right.
They are fi tted with a central lock.
With the roof rear fl ap, the rear
bumper has been strengthened to
serve as a footrest on accessing
the vehicle.
Page 23 of 200

21
Access
READY TO SET OFF
2
From inside
Pull the handle towards you to open
the left-hand door.
Opening to approximately 180°
A check strap system permits extension
of the opening from approximately 90°
to approximately 180°.
Pull the yellow control when the door
is open.
The check strap will re-attach
automatically on closing.
Page 33 of 200

31
READY TO SET OFF
22
Instruments and controls
Warning lamp
is
indicates
Solution - action
Particle
emission fi lter
on. a fault with the particle
emission fi lter (Diesel
additive level, risk of
blockage, ...). Have the fi lter checked by a PEUGEOT dealer.
Chapter 6, "Levels" section.
Dipped beam
headlamps/
Daytime
running lams
on. a manual selection or
automatic illumination of
headlamps. Turn the ring on the lighting control stalk to the
second position.
illumination of the dipped beam
headlamps from the time the
ignition is switched on: daytime
running lamps (depending on the
country in which the vehicle is sold).
Chapter 3, "Steering mounted controls" section.
Main beam
headlamps
pulling of the stalk towards
you. Pull the stalk to return to dipped beam headlamps.
Direction
indicators
fl ashing with
audible signal. a change of direction via the
lighting stalk, to the left of
the steering wheel. To the Right: control to be pushed upwards.
To the Left: control to be pushed downwards.
Front
foglamps
on. a manual selection. The fog amps only operate if the sidelamps or
dipped beam headlamps are on.
Rear
foglamps
on. a manual selection. The foglamps only operate if the sidelamps or
dipped beam headlamps are on. In conditions of
normal visibility, switch them off to avoid breaking
the law. "This lamp is a dazzling red."
Page 48 of 200

46
Steering mounted controls
DIRECTION INDICATORS
"Motorway" function
Press the control up or down to fl ash
the corresponding direction indicator
three times.
LIGHTING CONTROL
Left
: downwards passing the
point of resistance.
Right
: upwards passing the
point of resistance.
Front and rear lighting
Selection is by turning ring A
. Lighting off
Automatic lighting
Sidelamps
Dipped beam (green)
Main beam (blue)
Dipped beam/main beam change
Pull the stalk fully towards you.
Lighting-on buzzer
On switching of the ignition, all of the
lamps turn off, except dipped beam if
automatic guide-me-home lighting has
been activated.
To activate the lighting control, turn
ring A
to the lighting off position "0"
then to the selection of your choice.
On opening the driver's door, a warning
buzzer sounds if you have left the
lighting on. Checking by means of the
indicator lamps on the instrument
panel is described in the
"Instruments and controls" section of
chapter 2.
Direction indicators
Page 52 of 200

50
Steering mounted controls
Wash-wipe and headlamp wash
Pull the stalk towards you, the wash-
wipe is accompanied by a timed sweep
of the wipers.
The headlamp wash is linked with the
wash-wipe, it is triggered if the dipped
headlamps are on.
Turn the ring past the fi rst
notch: the windscreen wash
then the windscreen wiper
operate for a fi xed time.
In winter, in the event of a
considerable amount of snow
or ice, switch on the rear screen
demister. Once de-icing is complete,
remove the snow or ice which has
accumulated on the rear wiper
blade. You can then operate the rear
windscreen wiper. To top up the levels, refer to the
"Levels" section of chapter 6.
Special position of the
windscreen wipers
Refer to the "Changing a
windscreen wiper blade" section
of chapter 7.
To park the wipers in their normal
position after this has been done,
switch on the ignition and move
the stalk. Turn the ring to the fi rst notch.
Rear windscreen wash
Rear windscreen wiper
In the minute following switching
off of the ignition, any action on
the stalk positions the wipers
against the windscreen uprights.
This action enables you to position
the wiper blades for winter parking,
cleaning or replacement.
Page 62 of 200

60
Ventilation
Manual operation
You can, according to your
requirements, make a different selection
from that offered by the system by
changing a setting. The other functions
will still be controlled automatically.
Pressing the AUTO
button restores fully
automatic operation.
Air distribution
Pressing this button several
times in succession directs
the air fl ow towards:
- the windscreen,
- the windscreen and footwells,
- the footwells,
- the side vents, central vents and
footwells,
- the side vents and central vents.
Air fl ow
Press the small fan
button to
reduce the fl ow or the large
fan
button to increase the
fl ow.
On the display, the blades of the fan fi ll
when the fl ow is increased.
Switching the air
conditioning On/Off
Press this button, the A/C
symbol is displayed and the
air conditioning is activated.
Deactivating the system
Press the air fl ow small fan
button until the fan symbol
disappears from the display.
This action deactivates all
of the system's functions, with the
exception of the air recirculation and
rear screen demisting (if fi tted on your
vehicle). Your comfort setting is no
longer maintained and is switched off.
Intake of exterior air/
Recirculation of interior air
Press this button to
recirculate the interior air.
The recirculation symbol is
displayed.
For your comfort, do not
deactivate the system for
long periods. Pressing the
large fan
button or the AUTO
button reactivates the system
with the values set before it was
deactivated. Recirculation prevents exterior odours
and smoke from entering the passenger
compartment. Avoid prolonged operation
in interior air recirculation mode (risk of
condensation, odour and humidity).
Pressing this button again activates the
intake of exterior air.
Pressing this button again switches off
the air conditioning.
The ventilation outlet, located in
the glove box, diffuses cool air
(if the air conditioning is on)
regardless of the reference
temperature requested in the
passenger compartment and
regardless of the exterior temperature.