Centre console Peugeot Partner 2013 Owner's Manual
[x] Cancel search | Manufacturer: PEUGEOT, Model Year: 2013, Model line: Partner, Model: Peugeot Partner 2013Pages: 236, PDF Size: 9.04 MB
Page 4 of 236

2
Contents
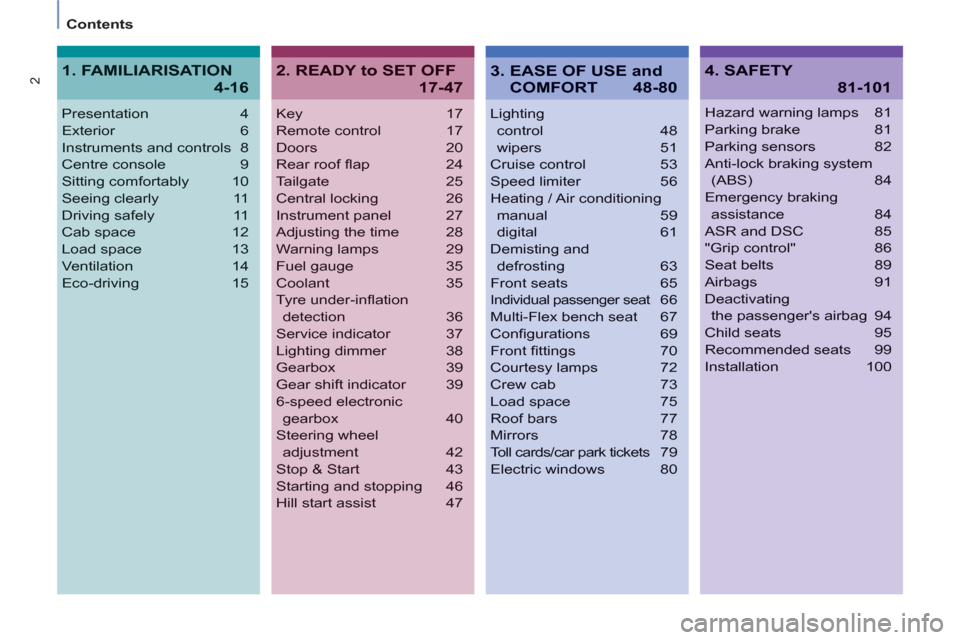
Key 17
Remote control 17
Doors 20
Rear roof fl ap 24
Tailgate 25
Central locking 26
Instrument panel 27
Adjusting the time 28
Warning lamps 29
Fuel gauge 35
Coolant 35
Tyre under-infl ation
detection 36
Service indicator 37
Lighting dimmer 38
Gearbox 39
Gear shift indicator 39
6-speed electronic
gearbox 40
Steering wheel
adjustment 42
Stop & Start 43
Starting and stopping 46
Hill start assist 47
Lighting
control 48
wipers 51
Cruise control 53
Speed limiter 56
Heating / Air conditioning
manual 59
digital 61
Demisting and
defrosting 63
Front seats 65
Individual passenger seat 6t6
Multi-Flex bench seat 67
Confi gurations 69
Front fi ttings 70
Courtesy lamps 72
Crew cab 73
Load space 75
Roof bars 77
Mirrors 78
Toll cards/car park tickets 79
Electric windows 80
Presentation4
Exterior 6
Instruments and controls 8
Centre console9
Sitting comfortably 10
Seeing clearly 11
Driving safely 11
Cab space 12
Load space 13
Ventilation 14
Eco-driving 15
Hazard warning lamps 81
Parking brake 81
Parking sensors 82
Anti-lock braking system
(ABS) 84
Emergency braking
assistance 84
ASR and DSC 85
"Grip control" 86
Seat belts 89
Airbags 91
Deactivating
the passenger's airbag 94
Child seats 95
Recommended seats 99
Installation 100
2. READY to SET OFF
17-47
4. SAFETY
81-101
1. FAMILIARISATION
4-16
3. EASE OF USE and
COMFORT 48-80
Page 11 of 236

4
2
9
9
1
FAMILIARISATIO
N
Interior
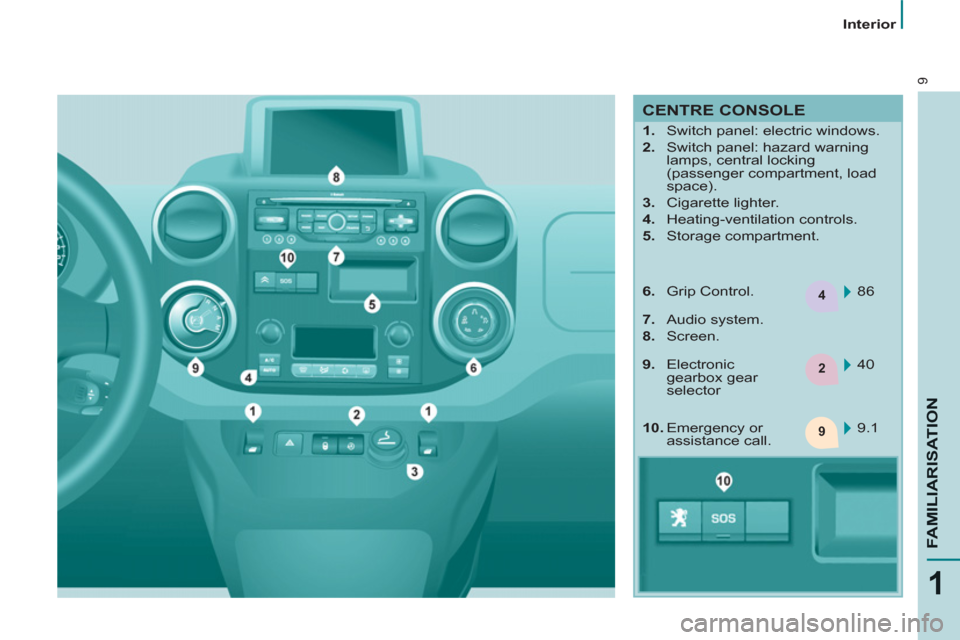
CENTRE CONSOLE
1.
Switch panel: electric windows.
2.
Switch panel: hazard warning
lamps, central locking
(passenger compartment, load
space).
3.
Cigarette lighter.
4.
Heating-ventilation controls.
5.
Storage compartment.
86
6.
Grip Control.
7.
Audio system.
8.
Screen.
40
9.1
10.
Emergency or
assistance call.
9.
Electronic
gearbox gear
selector
Page 30 of 236

Instruments and controls
28
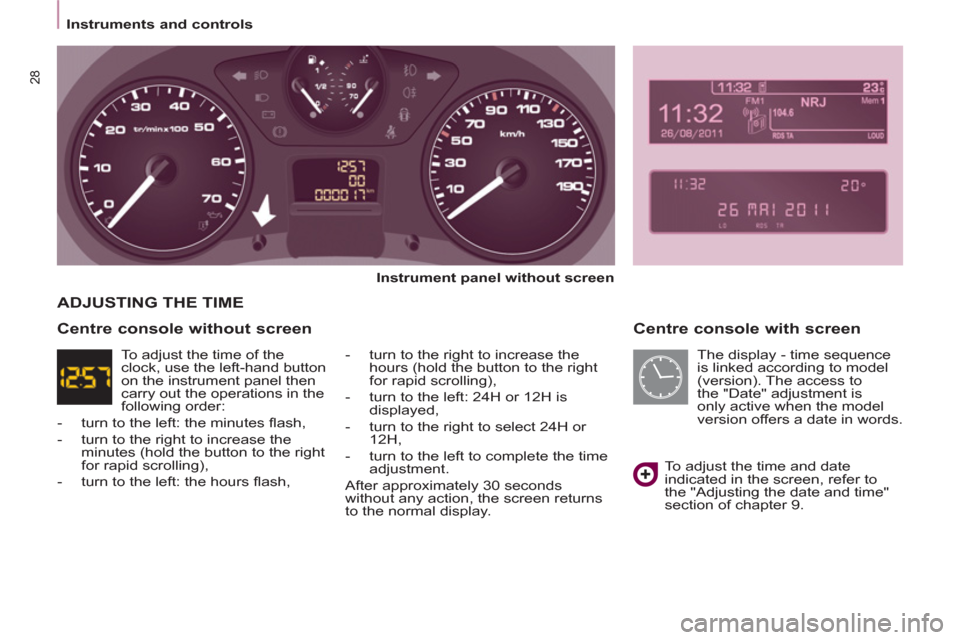
Centre console with screen
Instrument panel without screen
- turn to the right to increase the
hours (hold the button to the right
for rapid scrolling),
- turn to the left: 24H or 12H is
displayed,
- turn to the right to select 24H or
12H,
- turn to the left to complete the time
adjustment.
After approximately 30 seconds
without any action, the screen returns
to the normal display.
ADJUSTING THE TIME
To adjust the time and date
indicated in the screen, refer to
the "Adjusting the date and time"
section of chapter 9.
Centre console without screen
To adjust the time of the
clock, use the left-hand button
on the instrument panel then
carry out the operations in the
following order:
- turn to the left: the minutes fl ash,
- turn to the right to increase the
minutes (hold the button to the right
for rapid scrolling),
- turn to the left: the hours fl ash, The display - time sequence
is linked according to model
(version). The access to
the "Date" adjustment is
only active when the model
version offers a date in words.
Page 73 of 236

3
Comfort and safety
71
EASE OF USE and COMFOR
T
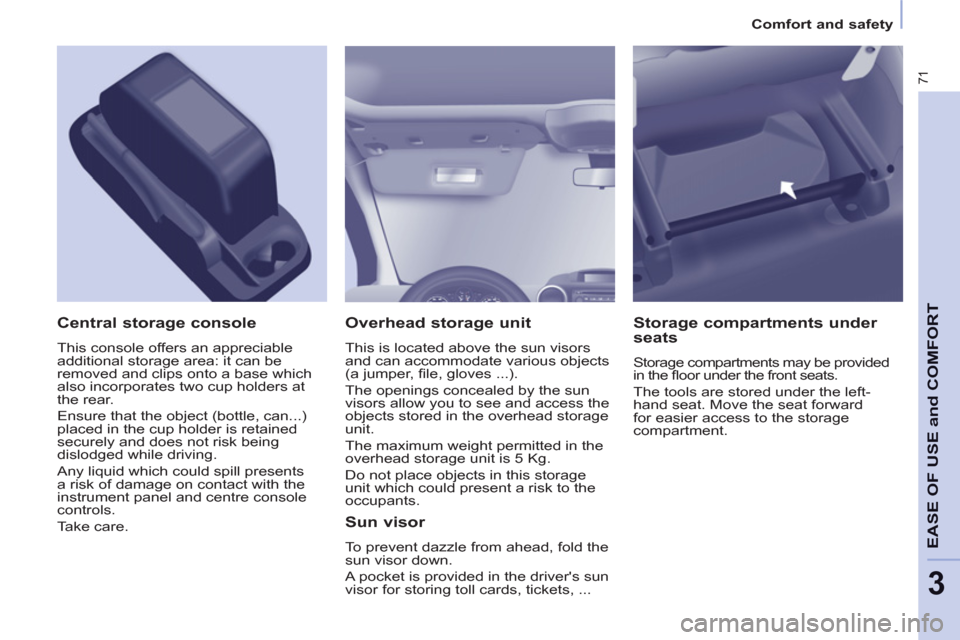
Overhead storage unit
This is located above the sun visors
and can accommodate various objects
(a jumper, fi le, gloves ...).
The openings concealed by the sun
visors allow you to see and access the
objects stored in the overhead storage
unit.
The maximum weight permitted in the
overhead storage unit is 5 Kg.
Do not place objects in this storage
unit which could present a risk to the
occupants.
Central storage console
This console offers an appreciable
additional storage area: it can be
removed and clips onto a base which
also incorporates two cup holders at
the rear.
Ensure that the object (bottle, can...)
placed in the cup holder is retained
securely and does not risk being
dislodged while driving.
Any liquid which could spill presents
a risk of damage on contact with the
instrument panel and centre console
controls.
Take care.
Sun visor
To prevent dazzle from ahead, fold the
sun visor down.
A pocket is provided in the driver's sun
visor for storing toll cards, tickets, ...
Storage compartments under
seats
Storage compartments may be provided
in the fl oor under the front seats.
The tools are stored under the left-
hand seat. Move the seat forward
for easier access to the storage
compartment.