wheel Peugeot Partner 2019 User Guide
[x] Cancel search | Manufacturer: PEUGEOT, Model Year: 2019, Model line: Partner, Model: Peugeot Partner 2019Pages: 312, PDF Size: 9.56 MB
Page 56 of 312
54
If an opening (door, boot or bonnet) is not
closed properly, the vehicle is not locked
but the exterior perimeter monitoring will
be activated after 45 seconds at the same
time as the interior volumetric and anti-tilt
monitoring.Locking the vehicle
with exterior perimeter
monitoring only
Deactivate the interior volumetric and anti-tilt
monitoring to avoid unwanted triggering of the
alarm in certain cases such as:
-
l
eaving a pet in the vehicle,
-
l
eaving a window or sunroof partially open,
-
w
ashing your vehicle,
-
c
hanging a wheel,
-
h
aving your vehicle towed,
-
t
ransport by ship.
Triggering of the alarm
This is indicated by sounding of the siren
and flashing of the direction indicators for
30
seconds.
Depending on the country of sale, certain
monitoring functions remain active until the alarm
has been triggered eleven times consecutively.
When the vehicle is unlocked using the remote
control or the "
K
eyless Entry and Starting"
system, rapid flashing of the red indicator lamp
in the button informs you that the alarm was
triggered during your absence. When the ignition
is switched on, the flashing stops immediately.
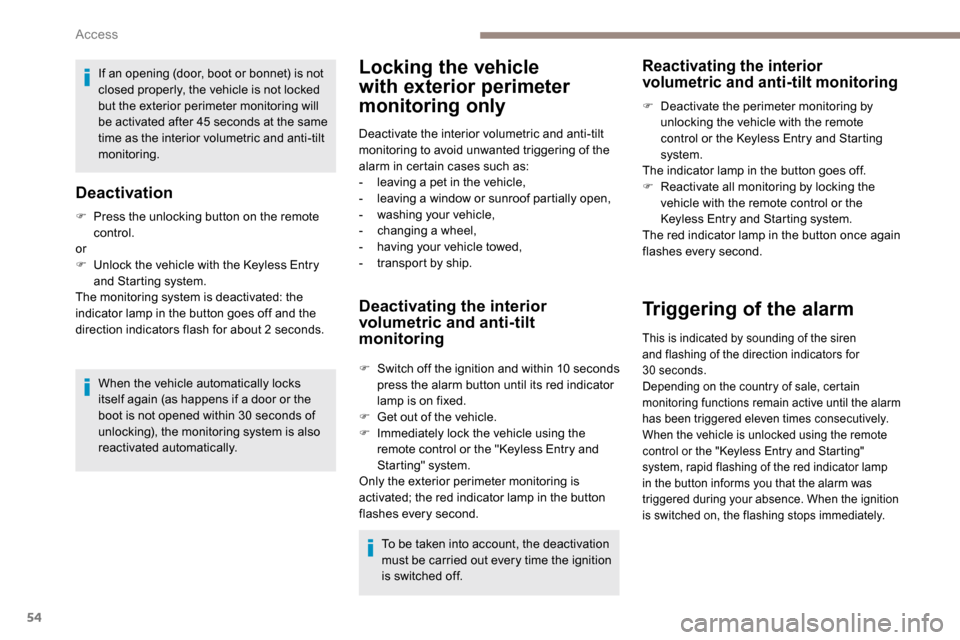
Deactivation
F Press the unlocking button on the remote control.
or
F
U
nlock the vehicle with the Keyless Entry
and Starting system.
The monitoring system is deactivated: the
indicator lamp in the button goes off and the
direction indicators flash for about 2
seconds.
When the vehicle automatically locks
itself again (as happens if a door or the
boot is not opened within 30
seconds of
unlocking), the monitoring system is also
reactivated automatically.
Deactivating the interior
volumetric and anti-tilt
monitoring
F Switch off the ignition and within 10 s econds
press the alarm button until its red indicator
lamp is on fixed.
F
G
et out of the vehicle.
F
I
mmediately lock the vehicle using the
remote control or the "Keyless Entry and
Starting" system.
Only the exterior perimeter monitoring is
activated; the red indicator lamp in the button
flashes every second.
To be taken into account, the deactivation
must be carried out every time the ignition
is switched off.
Reactivating the interior
volumetric and anti-tilt monitoring
F Deactivate the perimeter monitoring by unlocking the vehicle with the remote
control or the Keyless Entry and Starting
system.
The indicator lamp in the button goes off.
F
R
eactivate all monitoring by locking the
vehicle with the remote control or the
Keyless Entry and Starting system.
The red indicator lamp in the button once again
flashes every second.
Access
Page 59 of 312
57
Steering wheel adjustment
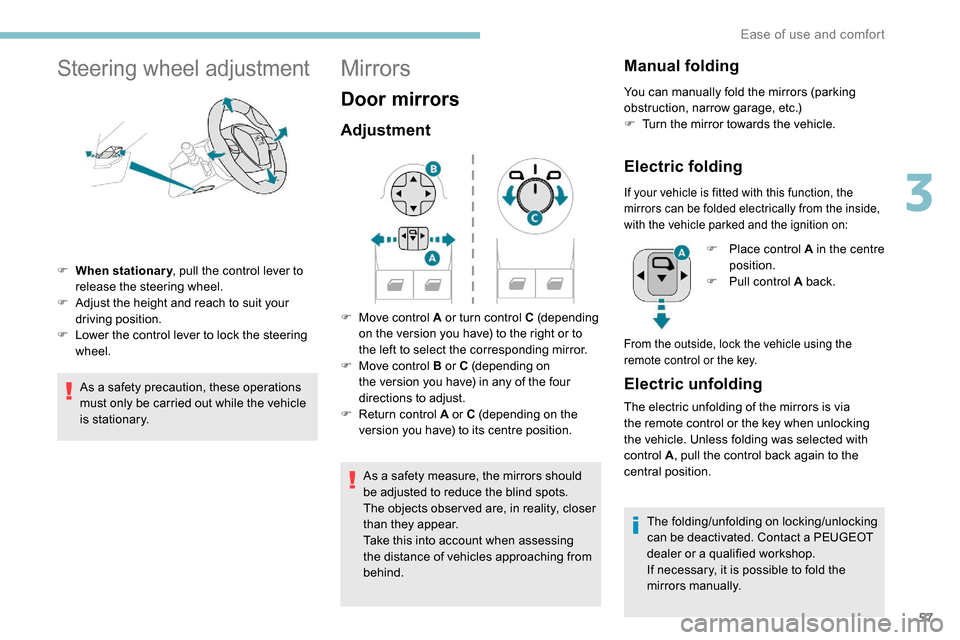
F When stationary, pull the control lever to
release the steering wheel.
F
A
djust the height and reach to suit your
driving position.
F
L
ower the control lever to lock the steering
wheel.
As a safety precaution, these operations
must only be carried out while the vehicle
is stationary.
Mirrors
Door mirrors
Adjustment
As a safety measure, the mirrors should
be adjusted to reduce the blind spots.
The objects obser ved are, in reality, closer
than they appear.
Take this into account when assessing
the distance of vehicles approaching from
behind.
Manual folding
You can manually fold the mirrors (parking
obstruction, narrow garage, etc.)
F
T
urn the mirror towards the vehicle.
Electric folding
F Move control A or turn control C (depending on the version you have) to the right or to
the left to select the corresponding mirror.
F
M
ove control B or C (depending on
the version you have) in any of the four
directions to adjust.
F
R
eturn control A or C (depending on the
version you have) to its centre position.
If your vehicle is fitted with this function, the
mirrors can be folded electrically from the inside,
with the vehicle parked and the ignition on:
Electric unfolding
The electric unfolding of the mirrors is via
the remote control or the key when unlocking
the vehicle. Unless folding was selected with
control A , pull the control back again to the
central position.
The folding/unfolding on locking/unlocking
can be deactivated. Contact a PEUGEOT
dealer or a qualified workshop.
If necessary, it is possible to fold the
mirrors manually. F
P
lace control A in the centre
position.
F
P
ull control A back.
From the outside, lock the vehicle using the
remote control or the key.
3
Ease of use and comfort
Page 61 of 312
59
Front seats
PEUGEOT i-Cockpit
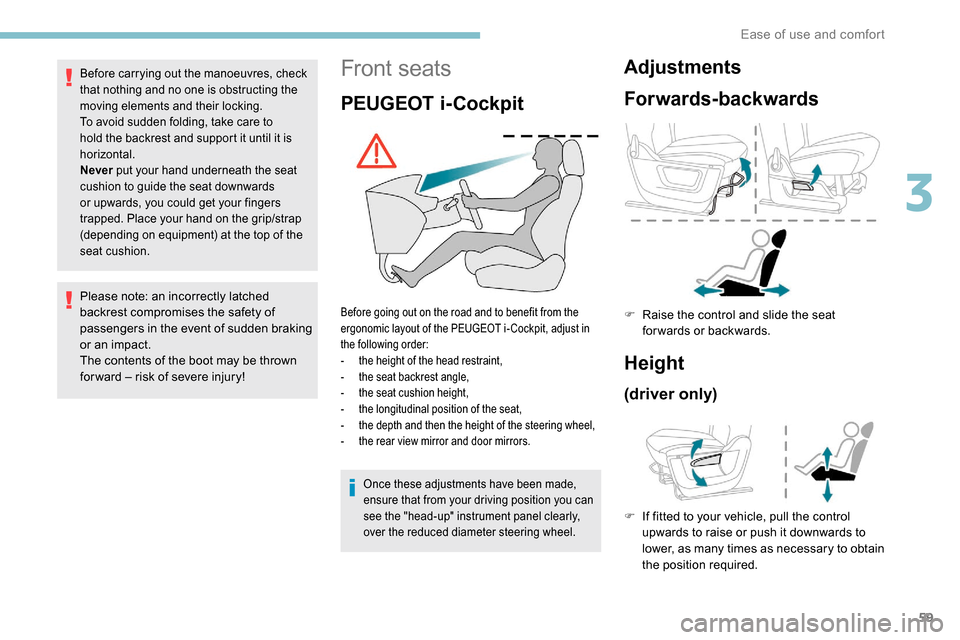
Before going out on the road and to benefit from the
ergonomic layout of the PEUGEOT i- Cockpit, adjust in
the following order:
-
t
he height of the head restraint,
-
t
he seat backrest angle,
-
t
he seat cushion height,
-
t
he longitudinal position of the seat,
-
t
he depth and then the height of the steering wheel,
-
t
he rear view mirror and door mirrors.
Before carrying out the manoeuvres, check
that nothing and no one is obstructing the
moving elements and their locking.
To avoid sudden folding, take care to
hold the backrest and support it until it is
horizontal.
Never put your hand underneath the seat
cushion to guide the seat downwards
or upwards, you could get your fingers
trapped. Place your hand on the grip/strap
(depending on equipment) at the top of the
seat cushion.
Please note: an incorrectly latched
backrest compromises the safety of
passengers in the event of sudden braking
or an impact.
The contents of the boot may be thrown
for ward – risk of severe injury!
Adjustments
Forwards-backwards
Height
(driver only)
F If fitted to your vehicle, pull the control upwards to raise or push it downwards to
lower, as many times as necessary to obtain
the position required.
F
Ra
ise the control and slide the seat
forwards or backwards.
Once these adjustments have been made,
ensure that from your driving position you can
see the "head-up" instrument panel clearly,
over the reduced diameter steering wheel.
3
Ease of use and comfort
Page 71 of 312
69
Firmly secure all parts of the load using
the stowing rings on the floor of the
loading area.
For more information on the Interior
fittings and in particular on the stowing
rings, refer to the corresponding section. To avoid the risk of injury or accident,
the load must be made stable so that it
cannot slide, tip over, fall or be projected.
To do this, use only retaining straps that
conform to the current standards (DIN, for
example).
For more information on putting straps
in place, refer to the manufacturer’s user
guide.
There must not be any open space
between the components of the load.
When there is the risk of the load sliding,
there must not be any open space
between the load and the panels of the
vehicle.
As well as the straps, optimise the stability
of the load with stable handling equipment
(wedges, rigid blocks of wood or padding).
When washing your vehicle, never clean
the inside directly using a water jet.
For the Multi-Flex bench
seat and the Crew cab
Do not place sharp or pointed objects in
the protective cover to avoid damaging it.Do not place objects on the dashboard.
Avoid placing short or heavy loads in the
protective cover; use the loading area
whenever possible.
The load must be evenly distributed in the
loading area so as not to inter fere with
driving the vehicle.
Place the load close to the side panels,
or even push it against the side panels
between the wheel arches.
However, it is recommended that heavy
objects are placed as close to the cab as
possible as a precaution in case of sharp
braking.
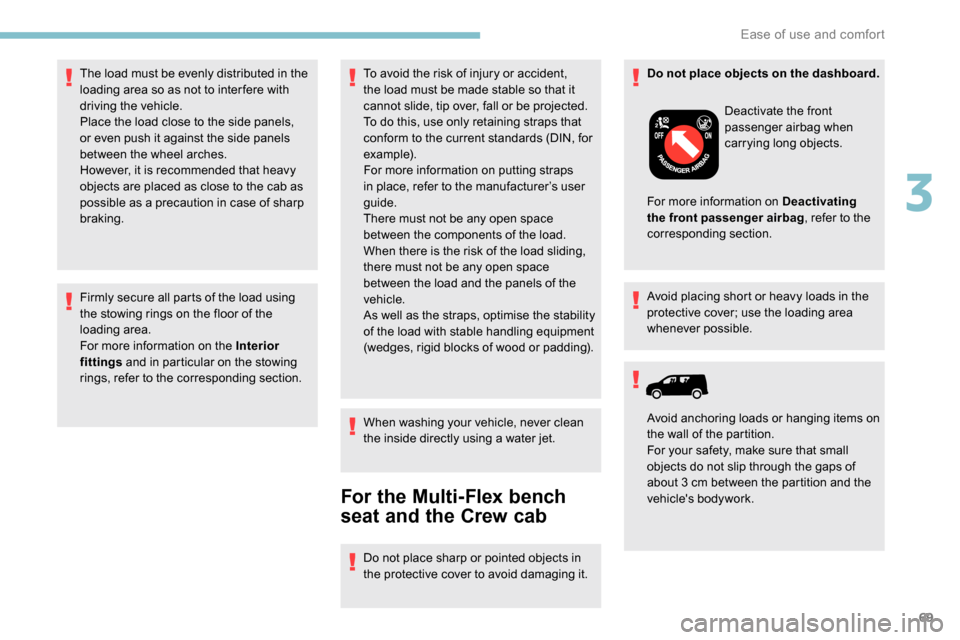
Deactivate the front
passenger airbag when
carrying long objects.
For more information on Deactivating
the front passenger airbag , refer to the
corresponding section.
Avoid anchoring loads or hanging items on
the wall of the partition.
For your safety, make sure that small
objects do not slip through the gaps of
about 3 cm between the partition and the
vehicle's bodywork.
3
Ease of use and comfort
Page 77 of 312
75
Heating
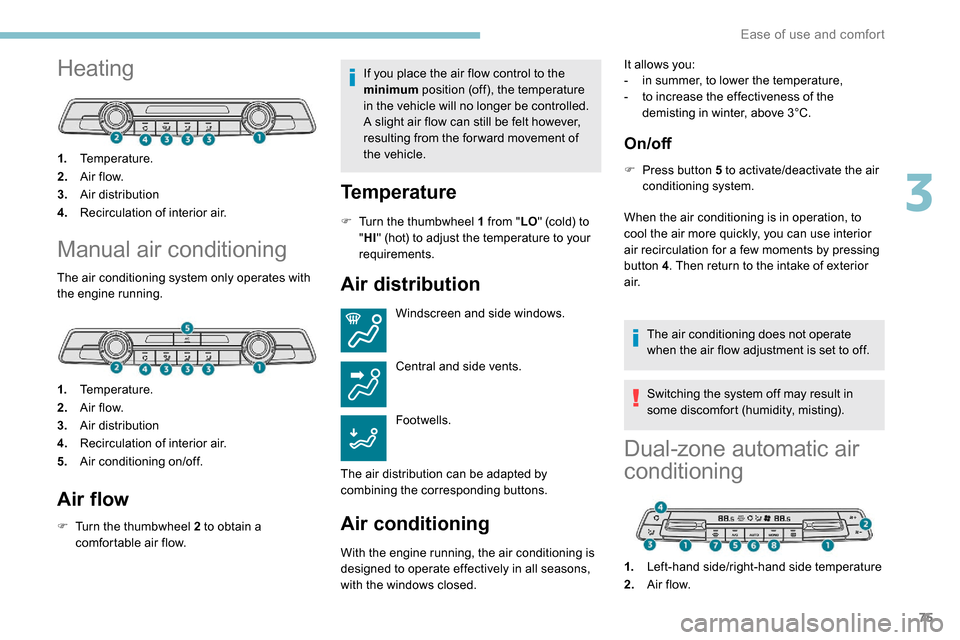
1.Temperature.
2. A ir f low.
3. Air distribution
4. Recirculation of interior air.
Manual air conditioning
The air conditioning system only operates with
the engine running.
1.Temperature.
2. A ir f low.
3. Air distribution
4. Recirculation of interior air.
5. Air conditioning on/off.
Air flow
F Turn the thumbwheel 2 to obtain a
comfortable air flow. If you place the air flow control to the
minimum
position (off), the temperature
in the vehicle will no longer be controlled.
A slight air flow can still be felt however,
resulting from the for ward movement of
the vehicle.
Temperature
F Turn the thumbwheel 1 from " LO" (cold) to
" HI " (hot) to adjust the temperature to your
requirements.
Air distribution
Windscreen and side windows.
Central and side vents.
Footwells.
The air distribution can be adapted by
combining the corresponding buttons.
Air conditioning
With the engine running, the air conditioning is
designed to operate effectively in all seasons,
with the windows closed. It allows you:
-
i
n summer, to lower the temperature,
-
t
o increase the effectiveness of the
demisting in winter, above 3°C.
On/off
F Press button 5 to activate/deactivate the air conditioning system.
When the air conditioning is in operation, to
cool the air more quickly, you can use interior
air recirculation for a few moments by pressing
button 4 . Then return to the intake of exterior
a i r.
The air conditioning does not operate
when the air flow adjustment is set to off.
Switching the system off may result in
some discomfort (humidity, misting).
Dual-zone automatic air
conditioning
1.Left-hand side/right-hand side temperature
2. A ir f low.
3
Ease of use and comfort
Page 92 of 312
90
The system may suffer inter ference or not
work correctly:
-
u
nder poor visibility conditions (snow,
heavy rain, etc.),
-
i
f the windscreen is dirty, misted or
obscured (by a sticker, etc.) in front of
the camera,
-
i
f the vehicle is facing highly reflective
signs.
When the system detects thick fog, it
temporarily deactivates the function.
The system is not able to detect:
-
r
oad users that do not have their own
lighting, such as pedestrians,
-
v
ehicles whose lighting is obscured
(for example: vehicles running behind a
safety barrier on a motor way),
-
v
ehicles at the top or bottom of a
steep slope, on winding roads, on
crossroads.Cornering lighting
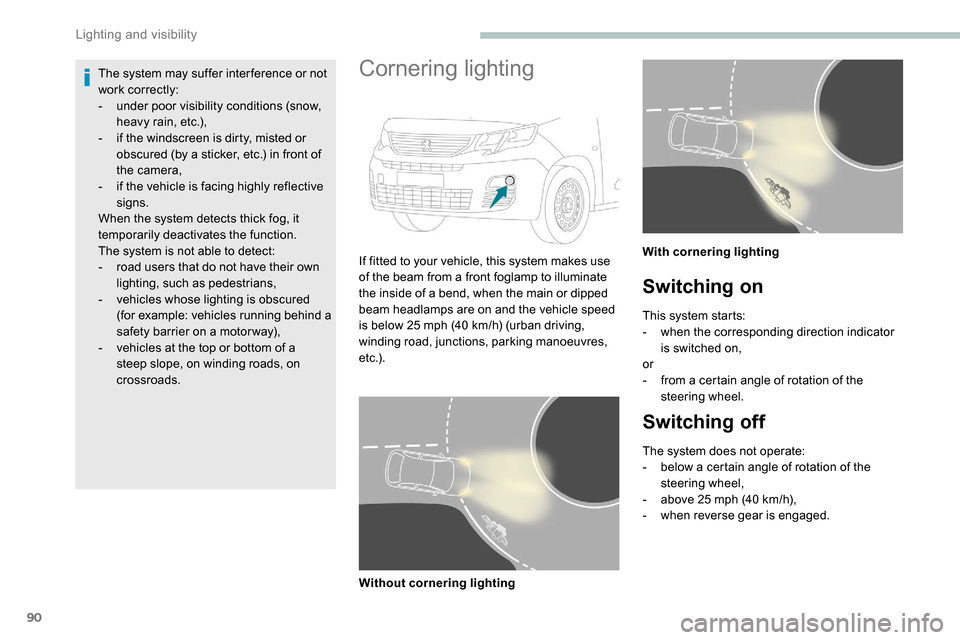
If fitted to your vehicle, this system makes use
of the beam from a front foglamp to illuminate
the inside of a bend, when the main or dipped
beam headlamps are on and the vehicle speed
is below 25
mph (40 km/h) (urban driving,
winding road, junctions, parking manoeuvres,
e t c .) .
Without cornering lighting With cornering lighting
Switching on
This system starts:
-
w hen the corresponding direction indicator
is switched on,
or
-
f
rom a certain angle of rotation of the
steering wheel.
Switching off
The system does not operate:
- b elow a certain angle of rotation of the
steering wheel,
-
a
bove 25 mph (40 km/h),
-
w
hen reverse gear is engaged.
Lighting and visibility
Page 99 of 312
97
To reactivate geolocation, simultaneously press
the "Peugeot Connect SOS" and "Peugeot
Connect Assistance" buttons again, followed
by a press on "Peugeot Connect Assistance"
to confirm.If you purchased your vehicle outside the
PEUGEOT dealer network, we invite you
to have a dealer check the configuration of
these ser vices and, if desired, modify it to
suit your wishes. In a multilingual country,
configuration is possible in the official
national language of your choice.
For technical reasons and, in particular,
to improve the quality of PEUGEOT
CONNECT ser vices to customers, the
manufacturer reser ves the right to carry
out updates to the vehicle's on-board
telematic system.
You can deactivate geolocation by
simultaneously pressing the "Peugeot Connect
SOS" and "Peugeot Connect Assistance"
buttons, followed by pressing "Peugeot
Connect Assistance" to confirm.
If you benefit from the Peugeot Connect
Packs offer with the SOS and assistance
pack included, there are additional
ser vices available to you in your personal
space, via the website for your country.
Hazard warning lamps
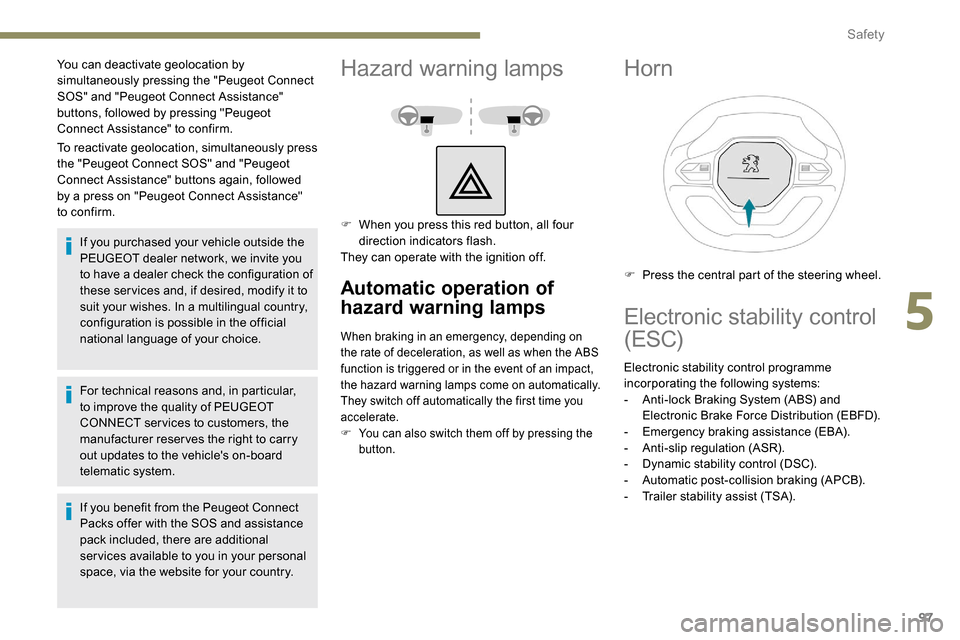
F When you press this red button, all four direction indicators flash.
They can operate with the ignition off.
Automatic operation of
hazard warning lamps
When braking in an emergency, depending on
the rate of deceleration, as well as when the ABS
function is triggered or in the event of an impact,
the hazard warning lamps come on automatically.
They switch off automatically the first time you
accelerate.
F
Y
ou can also switch them off by pressing the
button.
Horn
F Press the central part of the steering wheel.
Electronic stability control
(ESC)
Electronic stability control programme
incorporating the following systems:
-
A
nti-lock Braking System (ABS) and
Electronic Brake Force Distribution (EBFD).
-
E
mergency braking assistance (EBA).
-
A
nti-slip regulation (ASR).
-
D
ynamic stability control (DSC).
-
A
utomatic post-collision braking (APCB).
-
T
railer stability assist (TSA).
5
Safety
Page 100 of 312
98
Definitions
Anti-lock braking system (ABS)
and electronic brake force
distribution (EBFD)
These systems improve the stability and
manoeuvrability of your vehicle when braking
and contribute towards improved control in
corners, in particular on poor or slippery road
surfaces.
The ABS prevents wheel lock in the event of
emergency braking.
The electronic brake force distribution system
manages the braking pressure wheel by wheel.
Emergency braking assistance
(EBA)
In an emergency, this system enables you to
reach the optimum braking pressure more
quickly and therefore reduce the stopping
distance.
It is triggered in relation to the speed at which
the brake pedal is pressed. This is felt by a
reduction in the resistance of the pedal and an
increase in braking efficiency.
Anti-slip regulation (ASR)
This system optimises traction in order to
avoid wheel slip by acting on the brakes of
the driving wheels and on the engine. It also
improves the directional stability of the vehicle
on acceleration.
Dynamic stability control (DSC)
If there is a difference between the path
followed by the vehicle and that required by the
driver, this system monitors each wheel and
automatically acts on the brake of one or more
wheels and on the engine to return the vehicle
to the required path, within the limits of the laws
of physics.
Trailer stability assist (TSA)
This system allows control of the vehicle to be
retained when towing a trailer, so as to avoid
the risk of snaking.
Anti-lock braking system
(ABS) and electronic brake
force distribution (EBFD)
The fixed illumination of this warning
lamp signals that there is a fault with
the ABS.Illumination of this warning lamp,
coupled with the STOP
and ABS
warning lamps, accompanied by
the display of a message and an
audible signal, signals that there is a
fault with the electronic brake force
distribution (EBFD).
Normal operation of the ABS may make
itself felt by slight vibrations of the brake
pedal.
When braking in an emergency, press
very firmly and maintain this pressure.
When changing wheels (tyres and rims),
ensure that these are approved for your
vehicle.
After an impact, have these systems
checked by a PEUGEOT dealer or a
qualified workshop.
The vehicle retains conventional braking. Drive
carefully at moderate speed.
Contact a PEUGEOT dealer or a qualified
workshop as soon as possible.
You must stop as soon as it is safe to do so.
Call a PEUGEOT dealer or a qualified
workshop.
Safety
Page 101 of 312
99
Dynamic stability control
(DSC) and anti-slip
regulation (ASR)
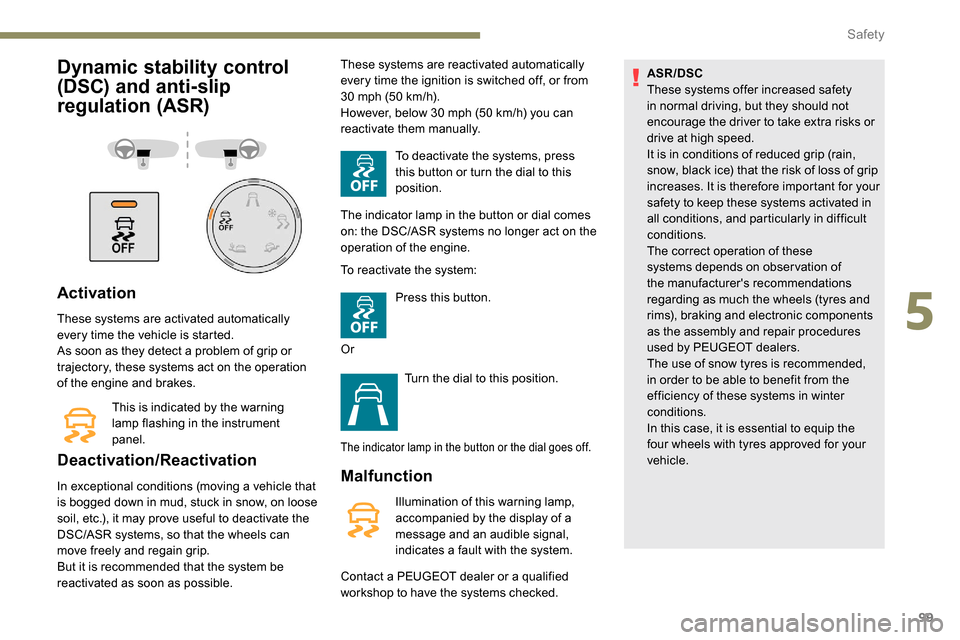
Activation
These systems are activated automatically
every time the vehicle is started.
As soon as they detect a problem of grip or
trajectory, these systems act on the operation
of the engine and brakes.This is indicated by the warning
lamp flashing in the instrument
panel.
Deactivation/Reactivation
In exceptional conditions (moving a vehicle that
is bogged down in mud, stuck in snow, on loose
soil, etc.), it may prove useful to deactivate the
DSC/ASR systems, so that the wheels can
move freely and regain grip.
But it is recommended that the system be
reactivated as soon as possible. These systems are reactivated automatically
every time the ignition is switched off, or from
30
mph (50 km/h).
However, below 30 mph (50 km/h) you can
reactivate them manually.
To deactivate the systems, press
this button or turn the dial to this
position.
The indicator lamp in the button or dial comes
on: the DSC/ASR systems no longer act on the
operation of the engine.
To reactivate the system:
Press this button.
Or Turn the dial to this position.
The indicator lamp in the button or the dial goes off.
Malfunction
Illumination of this warning lamp,
accompanied by the display of a
message and an audible signal,
indicates a fault with the system.
Contact a PEUGEOT dealer or a qualified
workshop to have the systems checked. ASR/DSC
These systems offer increased safety
in normal driving, but they should not
encourage the driver to take extra risks or
drive at high speed.
It is in conditions of reduced grip (rain,
snow, black ice) that the risk of loss of grip
increases. It is therefore important for your
safety to keep these systems activated in
all conditions, and particularly in difficult
conditions.
The correct operation of these
systems depends on obser vation of
the manufacturer's recommendations
regarding as much the wheels (tyres and
rims), braking and electronic components
as the assembly and repair procedures
used by PEUGEOT dealers.
The use of snow tyres is recommended,
in order to be able to benefit from the
efficiency of these systems in winter
conditions.
In this case, it is essential to equip the
four wheels with tyres approved for your
vehicle.
5
Safety
Page 103 of 312
101
The trailer stability assist system
offers increased safety in normal
driving conditions, provided that the
recommendations on towing a trailer are
obser ved. It must not encourage the driver
to take additional risks, such as towing
a trailer in adverse operating conditions
(overloading, failure to obser ve the trailer
nose weight, worn or under-inflated tyres,
faulty braking system, etc.) or drive at too
high a speed.
In certain cases, the swaying of the trailer
may not be detected by the ESC system,
particularly with a light trailer.
When driving on slippery or poor sur faces,
the system may not be able to prevent
sudden swaying of the trailer.
Advanced Grip Control
Special patented traction control system which
improves driveability on snow, mud and sand.
This system, the operation of which has been
optimised for each situation, allows you to
manoeuvre in most conditions of poor grip
(encountered during passenger vehicle use).Associated with all-season M+S (Mud and
Snow) tyres, this system offers a compromise
between safety, grip and driveability.
The accelerator pedal should be pressed
sufficiently to allow the system to use the power
of the engine. Operation at high engine speeds
is completely normal.
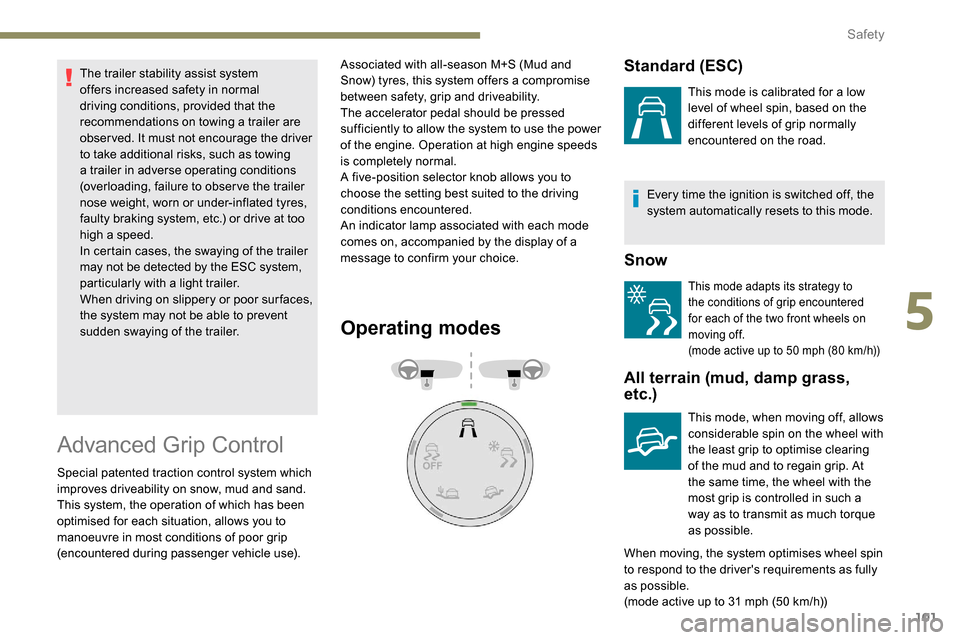
A five-position selector knob allows you to
choose the setting best suited to the driving
conditions encountered.
An indicator lamp associated with each mode
comes on, accompanied by the display of a
message to confirm your choice.
Operating modes
Every time the ignition is switched off, the
system automatically resets to this mode.
Snow
This mode adapts its strategy to
the conditions of grip encountered
for each of the two front wheels on
moving off.
(mode active up to 50
mph (80 km/h))
All terrain (mud, damp grass,
etc.)
This mode, when moving off, allows
considerable spin on the wheel with
the least grip to optimise clearing
of the mud and to regain grip. At
the same time, the wheel with the
most grip is controlled in such a
way as to transmit as much torque
as possible.
When moving, the system optimises wheel spin
to respond to the driver's requirements as fully
as possible.
(mode active up to 31
mph (50 km/h))
Standard (ESC)
This mode is calibrated for a low
level of wheel spin, based on the
different levels of grip normally
encountered on the road.
5
Safety