tow bar Peugeot Partner 2019 Owner's Manual
[x] Cancel search | Manufacturer: PEUGEOT, Model Year: 2019, Model line: Partner, Model: Peugeot Partner 2019Pages: 312, PDF Size: 9.56 MB
Page 5 of 312
3
bit.ly/helpPSA
.
.
Driving recommendations 115
Starting/switching off the engine 1 16
Anti-theft protection
1
20
Manual parking brake
1
21
Automatic electronic parking brake
1
21
Hill start assist
1
24
5-speed manual gearbox
1
25
6-speed manual gearbox
1
26
Automatic gearbox
1
26
Gear efficiency indicator
1
30
Stop & Start
1
30
Speed Limit recognition and
recommendation
133
Speed limiter
1
37
Programmable cruise control
1
39
Dynamic cruise control
1
42
Memorising speeds
1
49
Active Safety Brake with Distance Alert
and Intelligent emergency braking
assistance
150
Active Lane Departure Warning System
1
53
Blind Spot Detection
1
57
Fatigue detection system
1
59
Parking sensors
1
60
Reversing camera
1
63
Surround Rear Vision
1
64
Under-inflation detection
1
67Compatibility of fuels 1
70
Fuel tank 1 71
Diesel misfuel prevention
1
72
Snow chains
1
73
Towing device
1
73
Overload indicator
1
75
Energy economy mode
1
76
Roof bars/Roof rack
1
77
B o n n et
17 7
Engines
1
78
Checking levels
1
79
Checks
181
AdBlue
® (BlueHDi) 1 83
Advice on care 1 86
Running out of fuel (Diesel)
1
87
Tool kit
1
87
Temporary puncture repair kit
1
89
Spare wheel
1
91
Changing a bulb
1
95
Changing a fuse
2
01
12
V battery
2
03
To w i n g
2 0 6Dimensions
208
Engine technical data and towed loads
2
10
Identification markings
2
17
Driving
Practical information
In the event of a breakdown Technical data
Access to additional videos
Alphabetical index
Audio equipment and telematics
Bluetooth audio system
PEUGEOT Connect Radio
PEUGEOT Connect Nav
.
Contents
Page 62 of 312
60
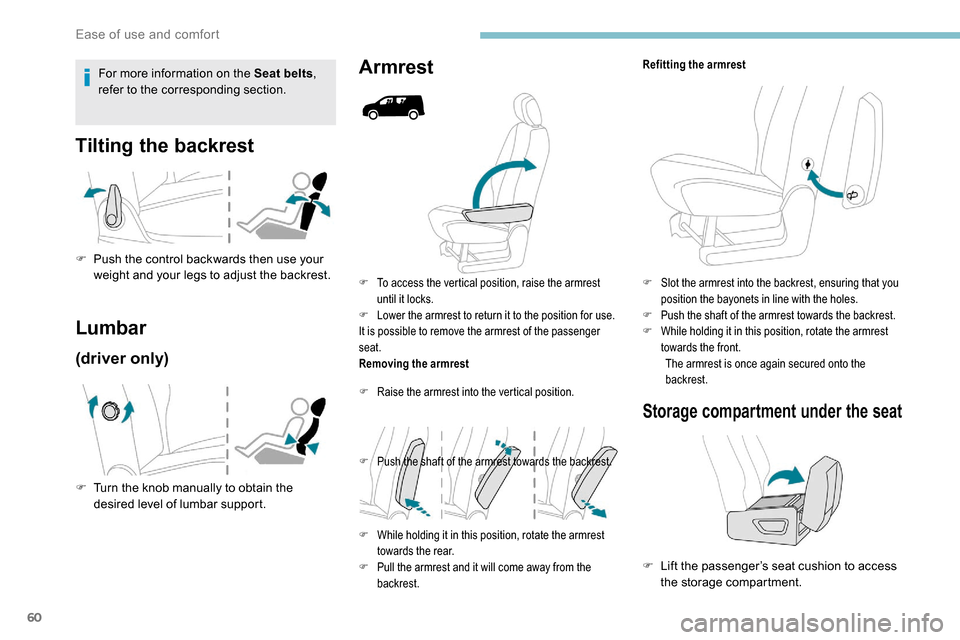
F To access the vertical position, raise the armrest until it locks.
F
L
ower the armrest to return it to the position for use.
It is possible to remove the armrest of the passenger
seat.
Removing the armrest
F
R
aise the armrest into the vertical position.
F
P
ush the shaft of the armrest towards the backrest.
F
W
hile holding it in this position, rotate the armrest
towards the rear.
F
P
ull the armrest and it will come away from the
backrest.
Tilting the backrest
Lumbar
(driver only)
F Turn the knob manually to obtain the desired level of lumbar support.
Armrest
F Push the control backwards then use your weight and your legs to adjust the backrest.
Storage compartment under the seat
Refitting the armrest
F
S
lot the armrest into the backrest, ensuring that you
position the bayonets in line with the holes.
F
P
ush the shaft of the armrest towards the backrest.
F
W
hile holding it in this position, rotate the armrest
towards the front. The armrest is once again secured onto the
backrest.For more information on the Seat belts ,
refer to the corresponding section.
F
L
ift the passenger’s seat cushion to access
the storage compartment.
Ease of use and comfort
Page 70 of 312
68
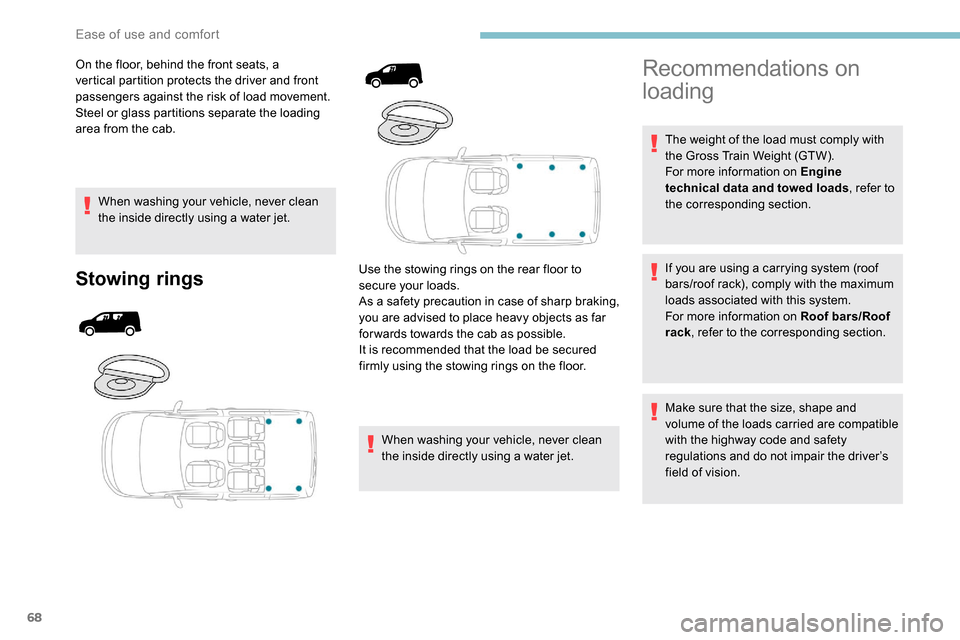
On the floor, behind the front seats, a
vertical partition protects the driver and front
passengers against the risk of load movement.
Steel or glass partitions separate the loading
area from the cab.When washing your vehicle, never clean
the inside directly using a water jet.
Stowing ringsUse the stowing rings on the rear floor to
secure your loads.
As a safety precaution in case of sharp braking,
you are advised to place heavy objects as far
for wards towards the cab as possible.
It is recommended that the load be secured
firmly using the stowing rings on the floor.
When washing your vehicle, never clean
the inside directly using a water jet.
Recommendations on
loading
The weight of the load must comply with
the Gross Train Weight (GTW).
For more information on Engine
technical data and towed loads , refer to
the corresponding section.
If you are using a carrying system (roof
bars/roof rack), comply with the maximum
loads associated with this system.
For more information on Roof bars/Roof
rack , refer to the corresponding section.
Make sure that the size, shape and
volume of the loads carried are compatible
with the highway code and safety
regulations and do not impair the driver’s
field of vision.
Ease of use and comfort
Page 102 of 312
100
Post Collision Safety Brake
(APCB)
With automatic post-collision braking, in the
event of an accident, the ESC system triggers
an automatic braking action in order to reduce
the risk of cumulative collisions by rebound, for
example, if the driver does not react.
Automatic braking inter venes after a frontal,
lateral or rear impact.
Conditions for operation
The impact has resulted in the deployment
of the airbags or seat belt pyrotechnic
pretensioners.
The braking systems and electric functions of
the vehicle must remain operational after the
collision.Automatic braking is accompanied by
illumination of the vehicle's brake lamps.
The system does not inter vene if driver
action is detected:
-
A
ccelerator pedal pressed.
-
B
rake pedal pressed.
The system works within the limits of the
laws of physics.
It is the driver's responsibility to
continuously adapt the vehicle's speed to
the driving and road conditions.
Malfunctions
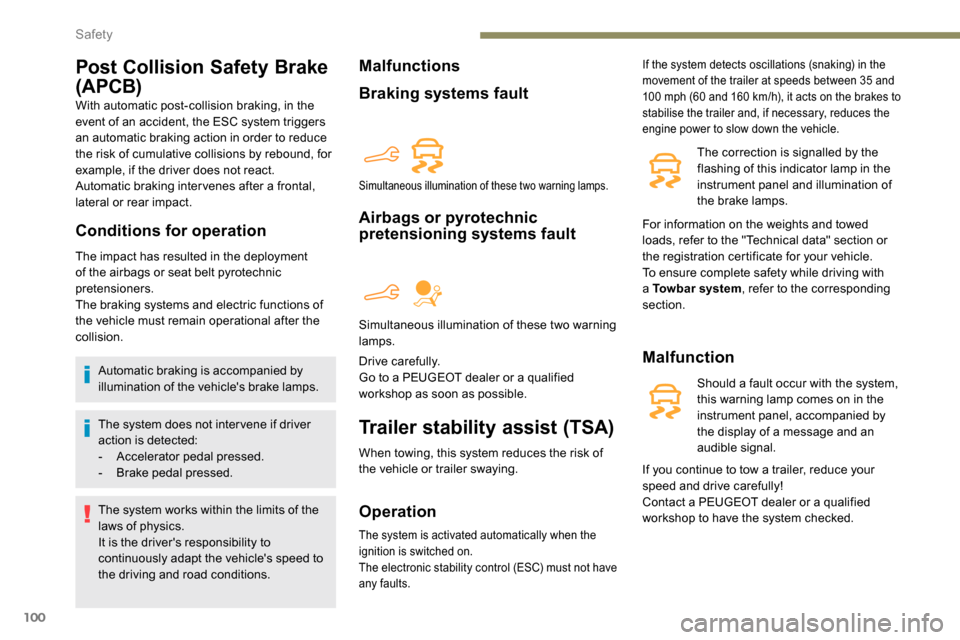
Braking systems fault
Airbags or pyrotechnic
pretensioning systems fault
Drive carefully.
Go to a PEUGEOT dealer or a qualified
workshop as soon as possible.
Trailer stability assist (TSA)
When towing, this system reduces the risk of
the vehicle or trailer swaying.
Operation
If the system detects oscillations (snaking) in the
movement of the trailer at speeds between 35 and
100 mph (60 and 160 km/h), it acts on the brakes to
stabilise the trailer and, if necessary, reduces the
engine power to slow down the vehicle.
The correction is signalled by the
flashing of this indicator lamp in the
instrument panel and illumination of
the brake lamps.
Malfunction
Should a fault occur with the system,
this warning lamp comes on in the
instrument panel, accompanied by
the display of a message and an
audible signal.
Simultaneous illumination of these two warning lamps.
Simultaneous illumination of these two warning
lamps.
The system is activated automatically when the
ignition is switched on.
The electronic stability control (ESC) must not have
any faults.
For information on the weights and towed
loads, refer to the "Technical data" section or
the registration certificate for your vehicle.
To ensure complete safety while driving with
a Towbar system , refer to the corresponding
section.
If you continue to tow a trailer, reduce your
speed and drive carefully!
Contact a PEUGEOT dealer or a qualified
workshop to have the system checked.
Safety
Page 118 of 312
116
Side wind
F Take into account the increased sensitivity to wind.
Cooling
Towing a trailer on a slope increases the
temperature of the coolant.
As the fan is electrically controlled, its cooling
capacity is not dependent on the engine speed.
F
T
o lower the engine speed, reduce your
speed.
The maximum towable load on an incline
depends on the gradient and the exterior
temperature.
In all cases, keep a check on the coolant
temperature.
F
I
f this warning lamp and the STOP
warning lamp come on, stop the
vehicle and switch off the engine
as soon as possible.
New vehicle
Do not pull a trailer before having
driven at least approximately 620
miles
(1,000
kilometres).
Braking
Towing a trailer increases the braking distance.
To avoid overheating of the brakes, the use of
engine braking is recommended.
Ty r e s
F Check the tyre pressures of the towing vehicle and of the trailer, observing the
recommended pressures.
Lighting
F Check the electrical lighting and signalling on the trailer and the headlamp beam height
of your vehicle.
For more information on Headlamp
beam height adjustment , refer to the
corresponding section.
Certain driving or manoeuvring aids are
automatically disabled if an approved
towbar is used.
If the exterior temperature is high, it is
recommended that the engine is allowed
to idle for 1 to 2
minutes after the vehicle
comes to a stop, to facilitate its cooling.
Starting/switching off the
engine
Starting
The parking brake must be applied.
F
W
ith a manual gearbox, shift the gear lever
into neutral, press the clutch pedal to the
floor and keep the pedal down until the
engine runs.
F
W
ith an automatic gearbox, select position
P, then firmly press the brake pedal.
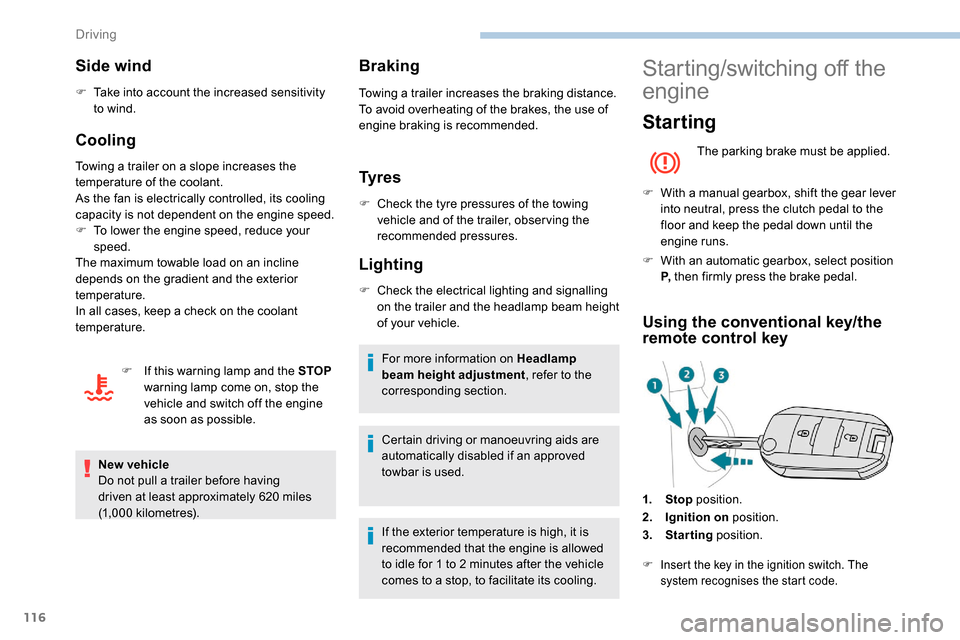
Using the conventional key/the
remote control key
1. Stop position.
2. Ignition on position.
3. Starting position.
F Insert the key in the ignition switch. The
system recognises the start code.
Driving
Page 159 of 312
157
A warning lamp appears in the door mirror on
the side in question:
-
f
ixed , immediately, when being overtaken,
-
f
lashing , after a delay of about one second,
when overtaking a vehicle slowly, and when
the direction indicator is used. This system is designed to improve safety
when driving and is in no circumstances
a substitute for the use of the interior rear
view mirror and door mirrors. It is the
driver's responsibility to constantly check
the traffic, to assess the distances and
relative speeds of other vehicles and to
predict their movements before deciding
whether to change lane.
The alert is given by a warning lamp which
comes on in the door mirror on the side in
question as soon as a vehicle – car, lorry,
bicycle – is detected and the following
conditions are fulfilled:
-
a
ll the vehicles must be moving in the same
direction and in adjacent lanes,
-
t
he speed of the vehicle must be between 7
and 87 mph (12 and 140 km/h),
-
y
ou overtake a vehicle with a speed
difference of less than 6 mph (10 km/h),
-
a v
ehicle overtakes you with a speed
difference of less than 15 mph (25 km/h),
-
t
he traffic must be flowing normally,
-
i
n the case of an overtaking manoeuvre,
if this is prolonged and the vehicle being
overtaken returns to the blind spot,
-
y
ou are driving on a straight or slightly
curved road,
-
y
our vehicle is not towing a trailer, a
caravan, etc.
Blind Spot Detection
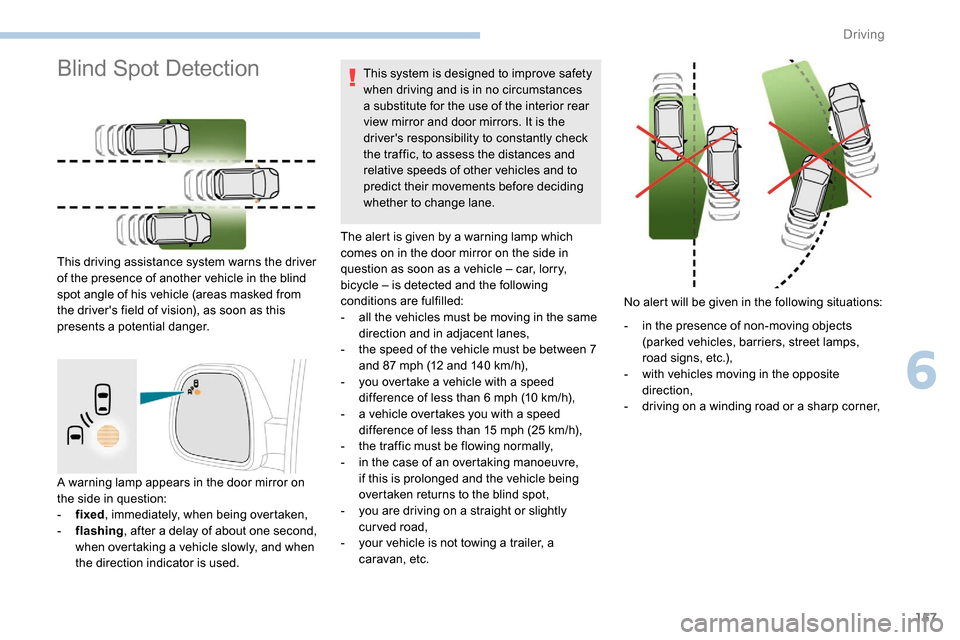
This driving assistance system warns the driver
of the presence of another vehicle in the blind
spot angle of his vehicle (areas masked from
the driver's field of vision), as soon as this
presents a potential danger. No alert will be given in the following situations:
-
i
n the presence of non-moving objects
(parked vehicles, barriers, street lamps,
road signs, etc.),
-
w
ith vehicles moving in the opposite
direction,
-
d
riving on a winding road or a sharp corner,
6
Driving
Page 160 of 312
158
Activation/Deactivation
Activation or deactivation is set via
the vehicle configuration menu.
The system state remains in memory
when the ignition is switched off.
The system is automatically deactivated
when towing with a towbar approved by
P E U G E O T.
Malfunction
The system may suffer temporary
interference in certain weather conditions
(rain, hail, etc.).
In particular, driving on a wet sur face
or moving from a dry area to a wet area
can cause false alerts (for example, the
presence of a fog of water droplets in
the blind spot angle is interpreted as a
vehicle).
In bad or wintry weather, ensure that the
sensors are not covered by mud, ice or
snow.
Take care not to cover the warning zone in
the door mirrors or the detection zones on
the front and rear bumpers with adhesive
labels or other objects; they may hamper
correct operation of the system.
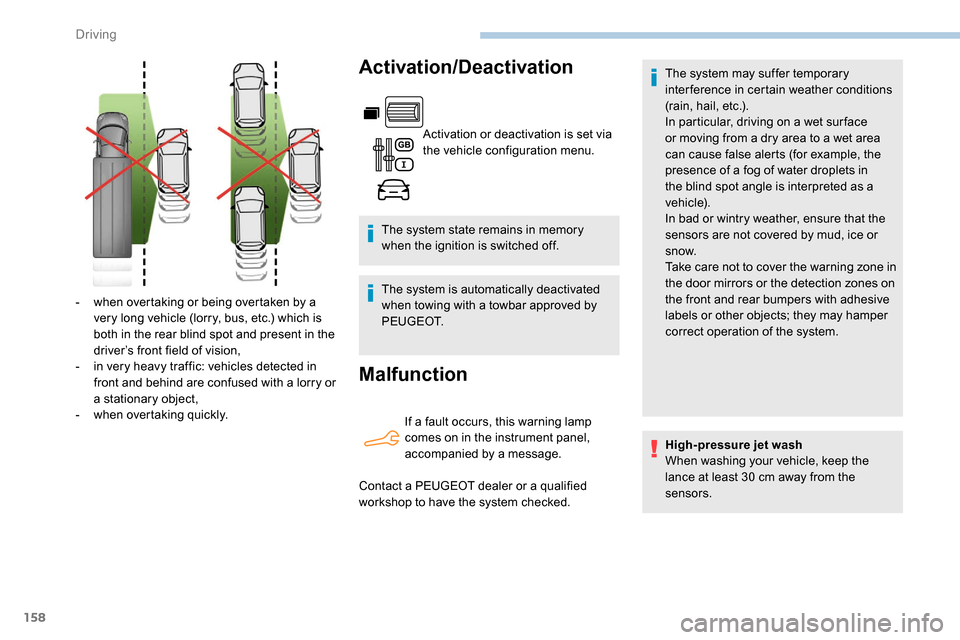
-
w
hen overtaking or being overtaken by a
very long vehicle (lorry, bus, etc.) which is
both in the rear blind spot and present in the
driver’s front field of vision,
-
i
n very heavy traffic: vehicles detected in
front and behind are confused with a lorry or
a stationary object,
-
w
hen overtaking quickly. If a fault occurs, this warning lamp
comes on in the instrument panel,
accompanied by a message.
Contact a PEUGEOT dealer or a qualified
workshop to have the system checked. High-pressure jet wash
When washing your vehicle, keep the
lance at least 30
cm away from the
sensors.
Driving
Page 169 of 312
167
If a trailer is attached to the towball,
when reverse gear is engaged the visual
reversing aid will no longer work until the
trailer is disconnected. The monitoring
rear view becomes the default view.
If the system develops a malfunction, go
to a PEUGEOT dealer to avoid any safety
problems.
Maintenance
recommendations
In bad or wintry weather, ensure that the
sensors and cameras are not covered with
mud, ice or snow.
Check the cleanliness of the camera lenses
regularly.
If necessary, clean the cameras with a soft, dry
cloth.
When washing your vehicle at high-pressure,
direct the spray from at least 30
cm away from
the cameras and parking sensors.
Under-inflation detection
This system automatically monitors the tyre
pressure while driving.
The system monitors the pressure in all four
tyres, once the vehicle is moving.
It compares the information given by the
wheel speed sensors with reference values,
which must be reinitialised after ever y tyre
pressure adjustment or wheel change .
The system triggers an alert as soon as it
detects a drop in the pressure of one or more
tyres.
The tyre under-inflation detection system
does not replace the need for vigilance on
the part of the driver.
This system still requires you to check
the tyre inflation pressures (including
the spare wheel) every month as well as
before a long journey.
Driving with under-inflated tyres impairs
handling, extends braking distances and
causes early tyre wear, particularly in
adverse conditions (heavy loads, high
speeds, long journeys). Driving with under-inflated tyres
increases fuel consumption.
The tyre pressure specifications for your
vehicle can be found on the tyre pressure
label.
For more information on the
Identification markings , refer to the
corresponding section.
Tyre pressures should be checked when
the tyres are "cold" (vehicle stopped for
1
hour or after a journey of less than
6
miles (10 km) at moderate speeds).
Other wise (when hot), add 0.3
bar to the
pressures shown on the label.
Snow chains
The system does not have to be
reinitialised after fitting or removing snow
chains.
Under-inflation alert
This warning is indicated by fixed
illumination of the warning lamp, an
audible signal and, depending on
the equipment installed, a message
displayed on the screen.
6
Driving
Page 175 of 312
173
Snow chains
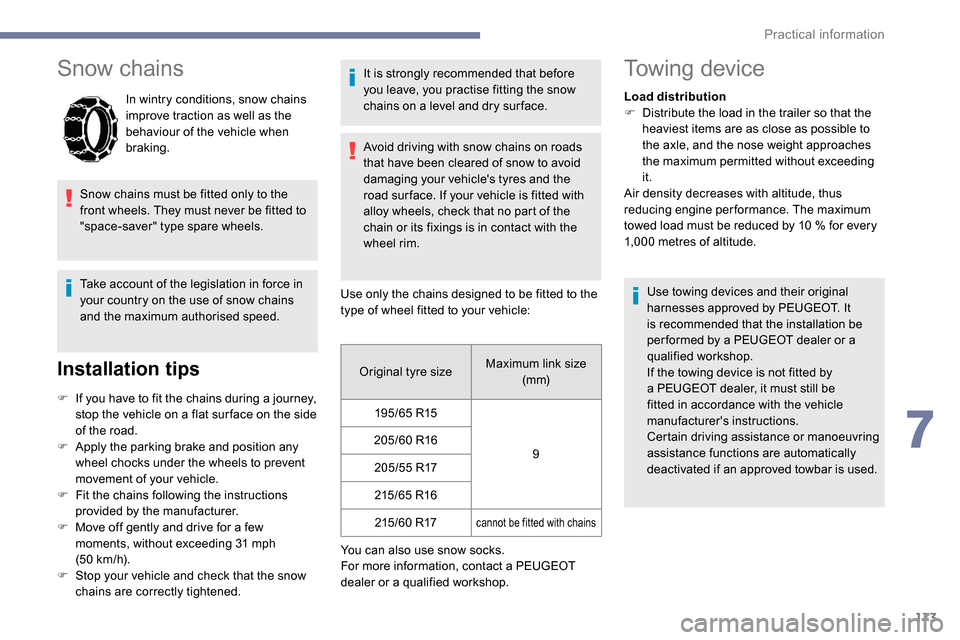
In wintry conditions, snow chains
improve traction as well as the
behaviour of the vehicle when
braking.
Snow chains must be fitted only to the
front wheels. They must never be fitted to
"space-saver" type spare wheels.
Take account of the legislation in force in
your country on the use of snow chains
and the maximum authorised speed.
Installation tips
F If you have to fit the chains during a journey, stop the vehicle on a flat sur face on the side
of the road.
F
A
pply the parking brake and position any
wheel chocks under the wheels to prevent
movement of your vehicle.
F
F
it the chains following the instructions
provided by the manufacturer.
F
M
ove off gently and drive for a few
moments, without exceeding 31
mph
(50
km/h).
F
S
top your vehicle and check that the snow
chains are correctly tightened. It is strongly recommended that before
you leave, you practise fitting the snow
chains on a level and dry sur face.
Avoid driving with snow chains on roads
that have been cleared of snow to avoid
damaging your vehicle's tyres and the
road sur face. If your vehicle is fitted with
alloy wheels, check that no part of the
chain or its fixings is in contact with the
wheel rim.
Use only the chains designed to be fitted to the
type of wheel fitted to your vehicle:
Original tyre size Maximum link size
(m m)
195/65 R15
9
205/60 R16
205/55 R17 215/65 R16215/60 R17
cannot be fitted with chains
You can also use snow socks.
For more information, contact a PEUGEOT
dealer or a qualified workshop.
Towing device
Load distribution
F D istribute the load in the trailer so that the
heaviest items are as close as possible to
the axle, and the nose weight approaches
the maximum permitted without exceeding
it.
Air density decreases with altitude, thus
reducing engine performance. The maximum
towed load must be reduced by 10
% for every
1,000
metres of altitude.
Use towing devices and their original
harnesses approved by PEUGEOT. It
is recommended that the installation be
per formed by a PEUGEOT dealer or a
qualified workshop.
If the towing device is not fitted by
a PEUGEOT dealer, it must still be
fitted in accordance with the vehicle
manufacturer's instructions.
Certain driving assistance or manoeuvring
assistance functions are automatically
deactivated if an approved towbar is used.
7
Practical information
Page 192 of 312
190
The speed limit sticker must be secured
to the interior of the vehicle in the driver's
field of vision, to remind you that a wheel
is in temporary use.F
S
witch on the ignition.
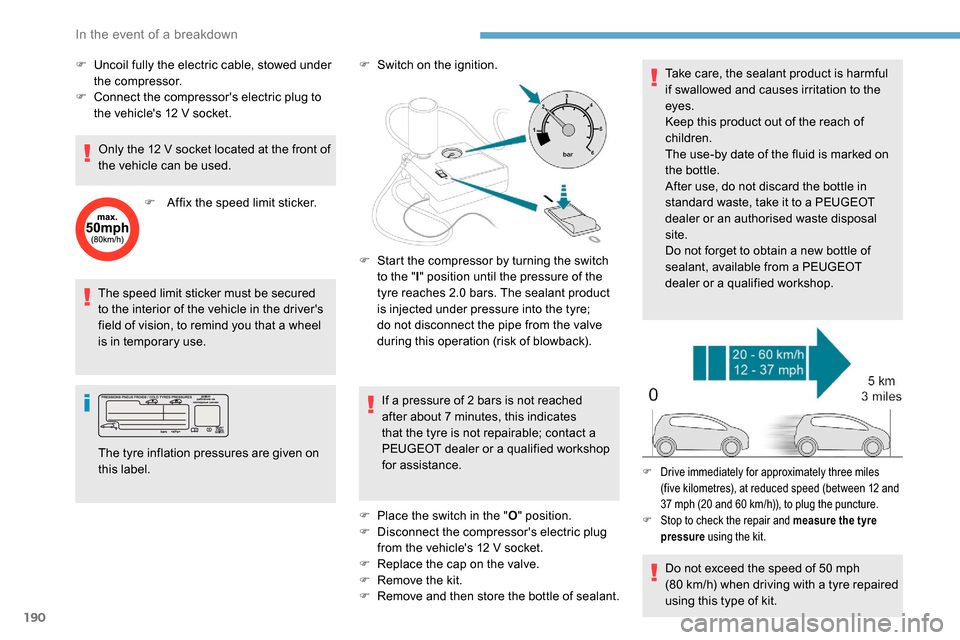
If a pressure of 2 bars is not reached
after about 7
minutes, this indicates
that the tyre is not repairable; contact a
PEUGEOT dealer or a qualified workshop
for assistance.
F
P
lace the switch in the "O" position.
F
D
isconnect the compressor's electric plug
from the vehicle's 12
V socket.
F
R
eplace the cap on the valve.
F
R
emove the kit.
F
R
emove and then store the bottle of sealant.Take care, the sealant product is harmful
if swallowed and causes irritation to the
eyes.
Keep this product out of the reach of
children.
The use-by date of the fluid is marked on
the bottle.
After use, do not discard the bottle in
standard waste, take it to a PEUGEOT
dealer or an authorised waste disposal
site.
Do not forget to obtain a new bottle of
sealant, available from a PEUGEOT
dealer or a qualified workshop.
The tyre inflation pressures are given on
this label. F
S
tart the compressor by turning the switch
to the " l" position until the pressure of the
tyre reaches 2.0 bars. The sealant product
is injected under pressure into the tyre;
do not disconnect the pipe from the valve
during this operation (risk of blowback).
Do not exceed the speed of 50
mph
(80
km/h) when driving with a tyre repaired
using this type of kit.
F Drive immediately for approximately three miles (five kilometres), at reduced speed (between 12 and
37
mph (20 and 60 km/h)), to plug the puncture.
F
S
top to check the repair and measure the tyre
pressure using the kit.
F Uncoil fully the electric cable, stowed under
the compressor.
F
C
onnect the compressor's electric plug to
the vehicle's 12
V socket.
Only the 12
V socket located at the front of
the vehicle can be used.
F
A
ffix the speed limit sticker.
In the event of a breakdown