reset Peugeot Partner 2019 Owner's Manual
[x] Cancel search | Manufacturer: PEUGEOT, Model Year: 2019, Model line: Partner, Model: Peugeot Partner 2019Pages: 312, PDF Size: 9.56 MB
Page 12 of 312
10
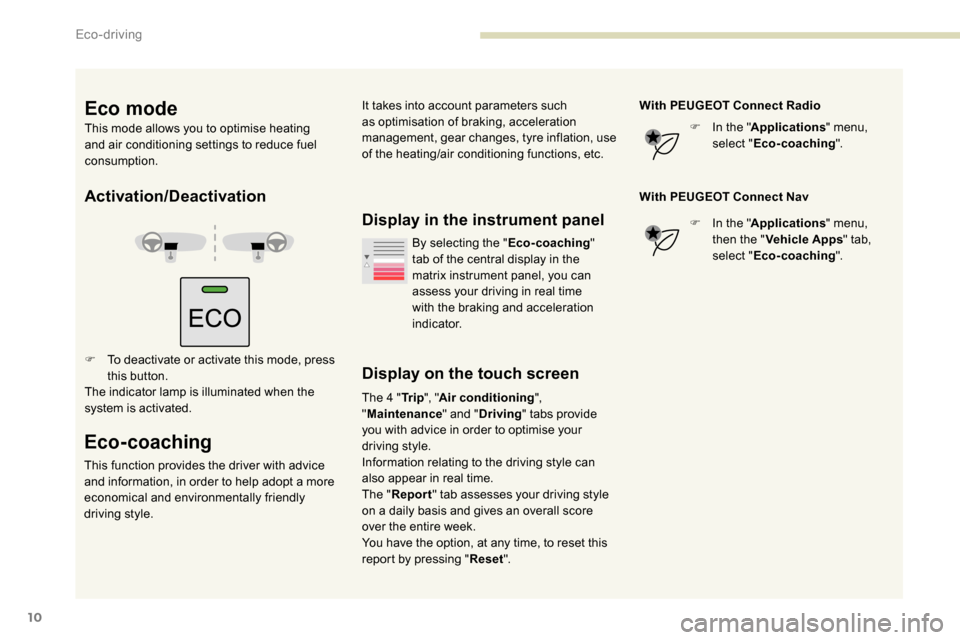
Activation/Deactivation
F To deactivate or activate this mode, press this button.
The indicator lamp is illuminated when the
system is activated.
Eco-coaching
This function provides the driver with advice
and information, in order to help adopt a more
economical and environmentally friendly
driving style.
Display in the instrument panel
Display on the touch screen
The 4 " Tr i p", "Air conditioning ",
" Maintenance " and "Driving " tabs provide
you with advice in order to optimise your
driving style.
Information relating to the driving style can
also appear in real time.
The " Report " tab assesses your driving style
on a daily basis and gives an overall score
over the entire week.
You have the option, at any time, to reset this
report by pressing " Reset". With PEUGEOT Connect Radio
F
I
n the "
Applications " menu,
select " Eco-coaching ".
With PEUGEOT Connect Nav F
I
n the "
Applications " menu,
then the " Vehicle Apps " tab,
select " Eco-coaching ".
By selecting the "
Eco-coaching"
tab of the central display in the
matrix instrument panel, you can
assess your driving in real time
with the braking and acceleration
i n d i c a t o r.
Eco mode
This mode allows you to optimise heating
and air conditioning settings to reduce fuel
consumption. It takes into account parameters such
as optimisation of braking, acceleration
management, gear changes, tyre inflation, use
of the heating/air conditioning functions, etc.
Eco-driving
Page 14 of 312
12
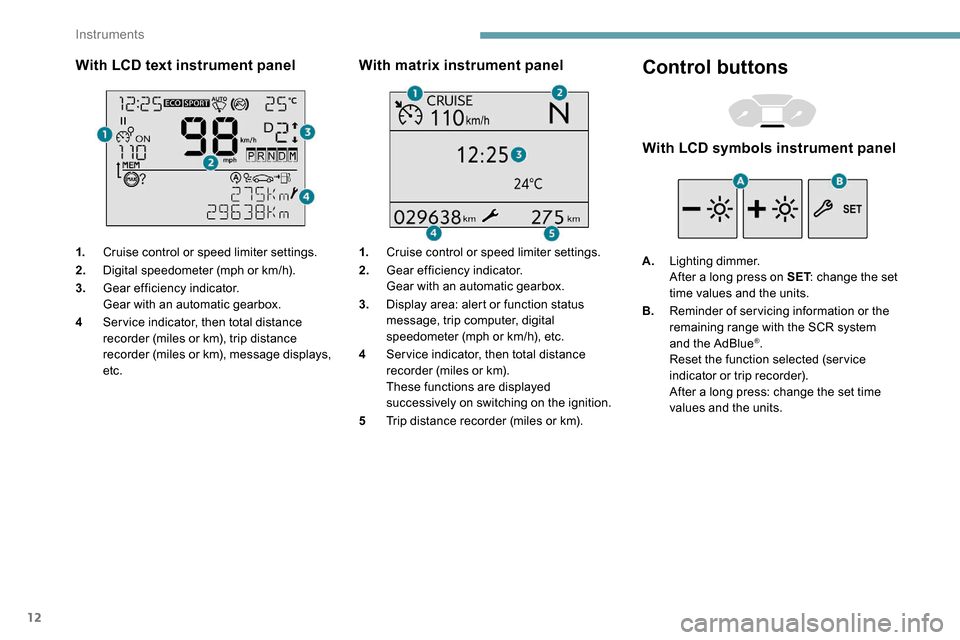
With LCD text instrument panel
1.Cruise control or speed limiter settings.
2. Digital speedometer (mph or km/h).
3. Gear efficiency indicator.
Gear with an automatic gearbox.
4 Ser vice indicator, then total distance
recorder (miles or km), trip distance
recorder (miles or km), message displays,
etc.
With matrix instrument panel
1.Cruise control or speed limiter settings.
2. Gear efficiency indicator.
Gear with an automatic gearbox.
3. Display area: alert or function status
message, trip computer, digital
speedometer (mph or km/h), etc.
4 Ser vice indicator, then total distance
recorder (miles or km).
These functions are displayed
successively on switching on the ignition.
5 Trip distance recorder (miles or km).
Control buttons
With LCD symbols instrument panel
A.Lighting dimmer.
After a long press on SET : change the set
time values and the units.
B. Reminder of servicing information or the
remaining range with the SCR system
and the AdBlue
®.
Reset the function selected (ser vice
indicator or trip recorder).
After a long press: change the set time
values and the units.
Instruments
Page 15 of 312
13
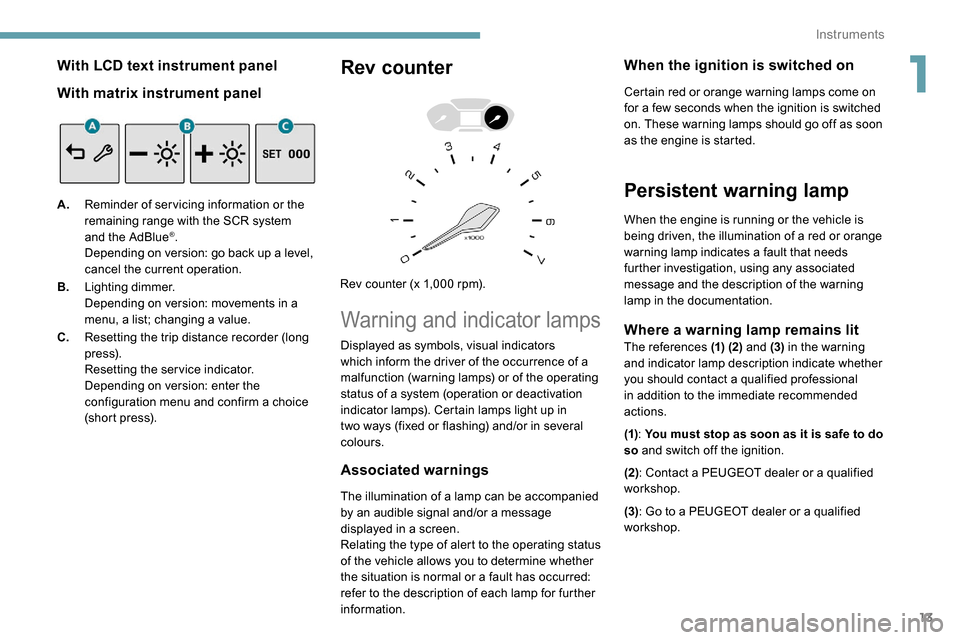
With LCD text instrument panel
With matrix instrument panel
A.Reminder of servicing information or the
remaining range with the SCR system
and the AdBlue
®.
Depending on version: go back up a level,
cancel the current operation.
B. Lighting dimmer.
Depending on version: movements in a
menu, a list; changing a value.
C. Resetting the trip distance recorder (long
p r e s s).
Resetting the service indicator.
Depending on version: enter the
configuration menu and confirm a choice
(short press).
Rev counter
Rev counter (x 1,000 rpm).
Warning and indicator lamps
Associated warnings
The illumination of a lamp can be accompanied
by an audible signal and/or a message
displayed in a screen.
Relating the type of alert to the operating status
of the vehicle allows you to determine whether
the situation is normal or a fault has occurred:
refer to the description of each lamp for further
information.
When the ignition is switched on
Certain red or orange warning lamps come on
for a few seconds when the ignition is switched
on. These warning lamps should go off as soon
as the engine is started.
Persistent warning lamp
When the engine is running or the vehicle is
being driven, the illumination of a red or orange
warning lamp indicates a fault that needs
further investigation, using any associated
message and the description of the warning
lamp in the documentation.
Where a warning lamp remains litThe references (1) (2) and (3) in the warning
and indicator lamp description indicate whether
you should contact a qualified professional
in addition to the immediate recommended
actions.
Displayed as symbols, visual indicators
which inform the driver of the occurrence of a
malfunction (warning lamps) or of the operating
status of a system (operation or deactivation
indicator lamps). Certain lamps light up in
two ways (fixed or flashing) and/or in several
colours.
(1)
: You must stop as soon as it is safe to do
so and switch off the ignition.
(2): Contact a PEUGEOT dealer or a qualified
workshop.
(3) : Go to a PEUGEOT dealer or a qualified
workshop.
1
Instruments
Page 30 of 312
28
Indicators
Service indicator
The ser vice indicator is displayed on the
instrument panel. Depending on the vehicle
version:
-
t
he distance recorder display line indicates
the distance remaining before the next
ser vice is due, or the distance travelled
since it was due preceded by the sign “-”.
Warning/indicator lamp StateCauseActions/
Observations
The distance indicated (in miles or
kilometres) is calculated according to the
distance covered and the time elapsed
since the last ser vice.
The alert may be triggered close to a due
date.
Service spanner Lights up temporarily
when the ignition is
switched on.
Between 1,800 miles
( 3,000 km) and
600
miles (1,000 km)
remain before the
next ser vice is due.
Fixed, when the
ignition is switched on. The service
is due in less
than 600
miles
(1,000
km).Have your vehicle
serviced very soon.
+ Service spanner
flashing
Flashing then fixed,
when the ignition is
switched on.
(For BlueHDi Diesel
versions, associated
with the ser vice
warning lamp). The servicing
inter val has been
exceeded.
Have your vehicle
ser viced as soon
as possible.
-
a
n alert message indicates the distance
remaining, as well as the period before the
next ser vice is due or how long it is overdue.
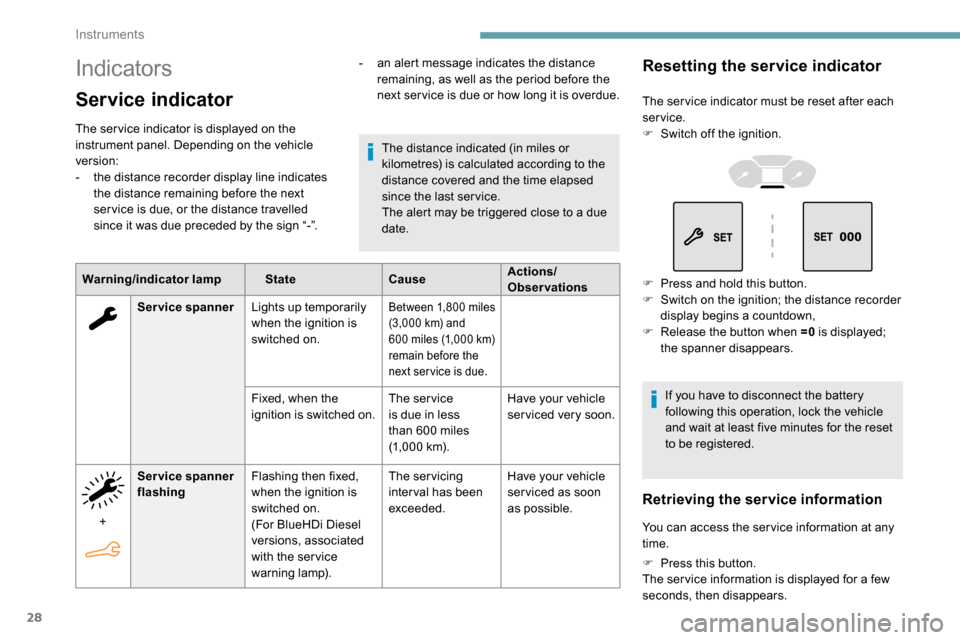
Resetting the service indicator
The ser vice indicator must be reset after each
service.
F
S
witch off the ignition.
F
P
ress and hold this button.
F
S
witch on the ignition; the distance recorder
display begins a countdown,
F
R
elease the button when =0 is displayed;
the spanner disappears.
If you have to disconnect the battery
following this operation, lock the vehicle
and wait at least five minutes for the reset
to be registered.
Retrieving the service information
You can access the ser vice information at any
time.
F
P
ress this button.
The ser vice information is displayed for a few
seconds, then disappears.
Instruments
Page 31 of 312
29
Instrument panel display screen
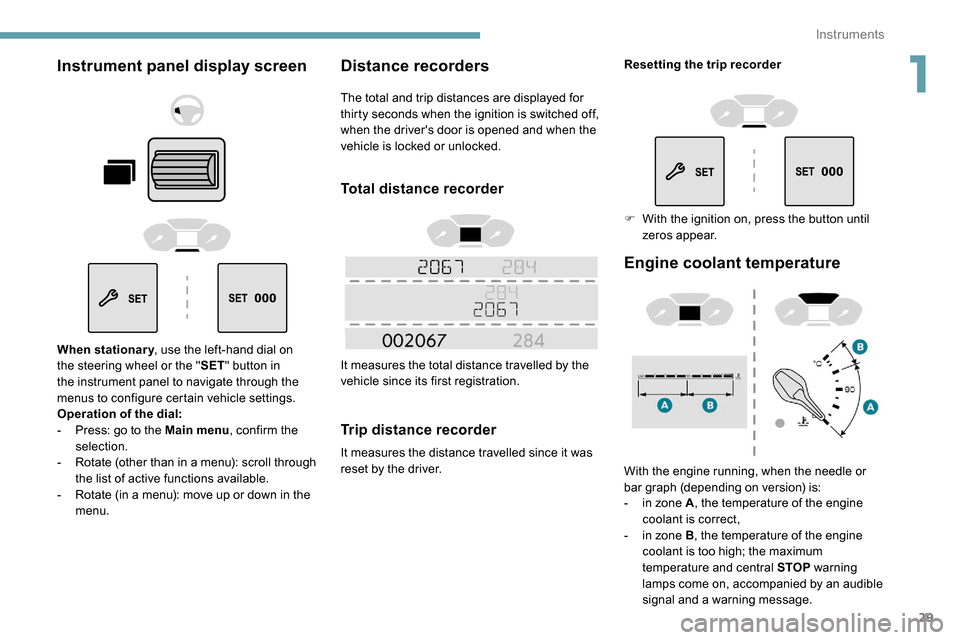
When stationary, use the left-hand dial on
the steering wheel or the " SET" button in
the instrument panel to navigate through the
menus to configure certain vehicle settings.
Operation of the dial:
-
P
ress: go to the Main menu , confirm the
selection.
-
R
otate (other than in a menu): scroll through
the list of active functions available.
-
R
otate (in a menu): move up or down in the
menu.
Distance recorders
The total and trip distances are displayed for
thirty seconds when the ignition is switched off,
when the driver's door is opened and when the
vehicle is locked or unlocked.
Total distance recorder
It measures the total distance travelled by the
vehicle since its first registration.
Trip distance recorder
It measures the distance travelled since it was
reset by the driver.
Engine coolant temperature
With the engine running, when the needle or
bar graph (depending on version) is:
-
i
n zone A , the temperature of the engine
coolant is correct,
-
i
n zone B , the temperature of the engine
coolant is too high; the maximum
temperature and central STOP warning
lamps come on, accompanied by an audible
signal and a warning message.
Resetting the trip recorder
F
W
ith the ignition on, press the button until
zeros appear.
1
Instruments
Page 36 of 312
34
Display of information
It is displayed successively.
- T rip mileage.
-
Range.
-
C
urrent fuel consumption.
-
A
verage speed.
-
S
top & Start time counter.
-
I
nformation from the speed limit recognition
system.
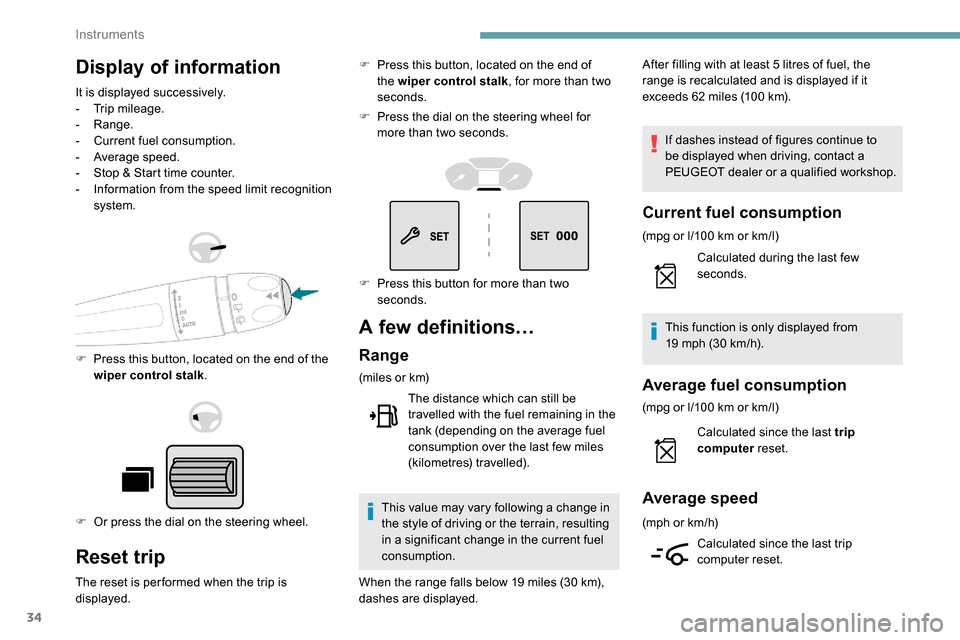
F
P
ress this button, located on the end of the
wiper control stalk .
F
O
r press the dial on the steering wheel.
Reset trip
The reset is per formed when the trip is
displayed. F
P
ress this button, located on the end of
the wiper control stalk , for more than two
seconds.
F
P
ress the dial on the steering wheel for
more than two seconds.
A few definitions…
Range
(miles or km)
The distance which can still be
travelled with the fuel remaining in the
tank (depending on the average fuel
consumption over the last few miles
(kilometres) travelled).
This value may vary following a change in
the style of driving or the terrain, resulting
in a significant change in the current fuel
consumption. After filling with at least 5
litres of fuel, the
range is recalculated and is displayed if it
exceeds 62 miles (100 km).
If dashes instead of figures continue to
be displayed when driving, contact a
PEUGEOT dealer or a qualified workshop.
Current fuel consumption
(mpg or l/100 km or km/l)
C alculated during the last few
seconds.
This function is only displayed from
19
mph (30 km/h).
Average fuel consumption
(mpg or l/100 km or km/l)
C alculated since the last trip
computer reset.
Average speed
(mph or km/h)
Calculated since the last trip
computer reset.
F
P
ress this button for more than two
seconds.
When the range falls below 19
miles (30
km),
dashes are displayed.
Instruments
Page 37 of 312
35
Distance travelled
(miles or km)Calculated since the last trip
computer reset.
Stop & Start time counter
(minutes/seconds or hours/minutes)
If your vehicle is fitted with Stop & Start, a time
counter calculates the time spent in STOP mode
during a journey.
It resets to zero every time the ignition is switched on.
Setting the time and date
Without audio system
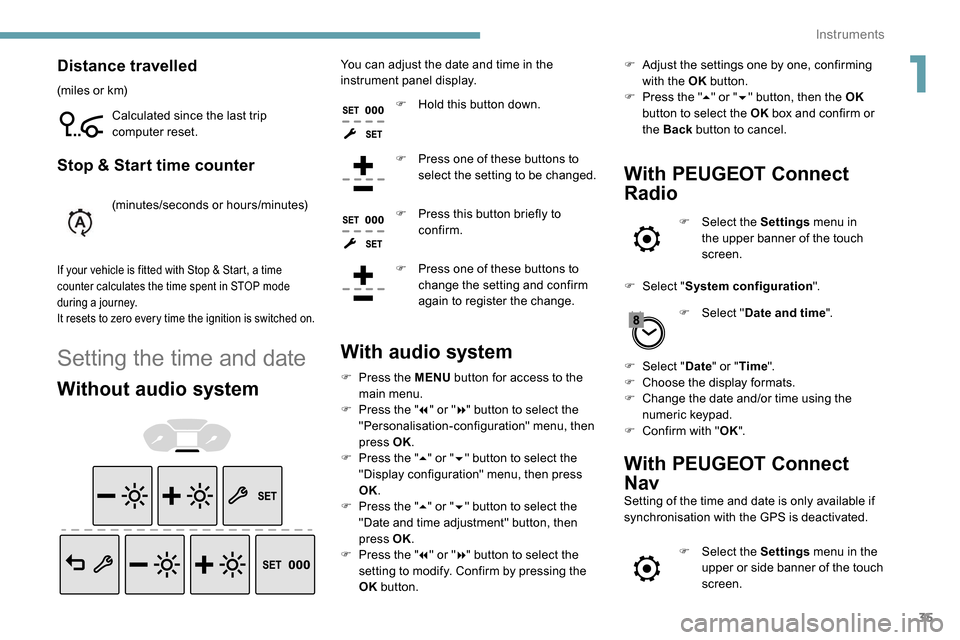
You can adjust the date and time in the
instrument panel display.F
H
old this button down.
F
P
ress one of these buttons to
select the setting to be changed.
F
P
ress this button briefly to
confirm.
F
P
ress one of these buttons to
change the setting and confirm
again to register the change.
With audio system
F Press the MENU button for access to the
main menu.
F
P
ress the " 7" or " 8" button to select the
"Personalisation-configuration" menu, then
press OK.
F
P
ress the " 5" or " 6" button to select the
"Display configuration" menu, then press
OK.
F
P
ress the " 5" or " 6" button to select the
"Date and time adjustment" button, then
press OK.
F
P
ress the " 7" or " 8" button to select the
setting to modify. Confirm by pressing the
OK button. F
A
djust the settings one by one, confirming
with the OK button.
F
P
ress the "
5" or " 6" button, then the OK
button to select the OK box and confirm or
the Back button to cancel.
With PEUGEOT Connect
Radio
F Select the Settings menu in
the upper banner of the touch
screen.
F
Sel
ect " System configuration ".
F
Sel
ect "Date and time ".
F
Sel
ect " Date " or "Time ".
F
C
hoose the display formats.
F
C
hange the date and/or time using the
numeric keypad.
F
C
onfirm with " OK".
With PEUGEOT Connect
Nav
Setting of the time and date is only available if
synchronisation with the GPS is deactivated.
F
Sel
ect the Settings menu in the
upper or side banner of the touch
screen.
1
Instruments
Page 82 of 312
80
12:13
1 12:00 AM12:00 AM
2
23 °C
12:13
23 °C
OFF
OK
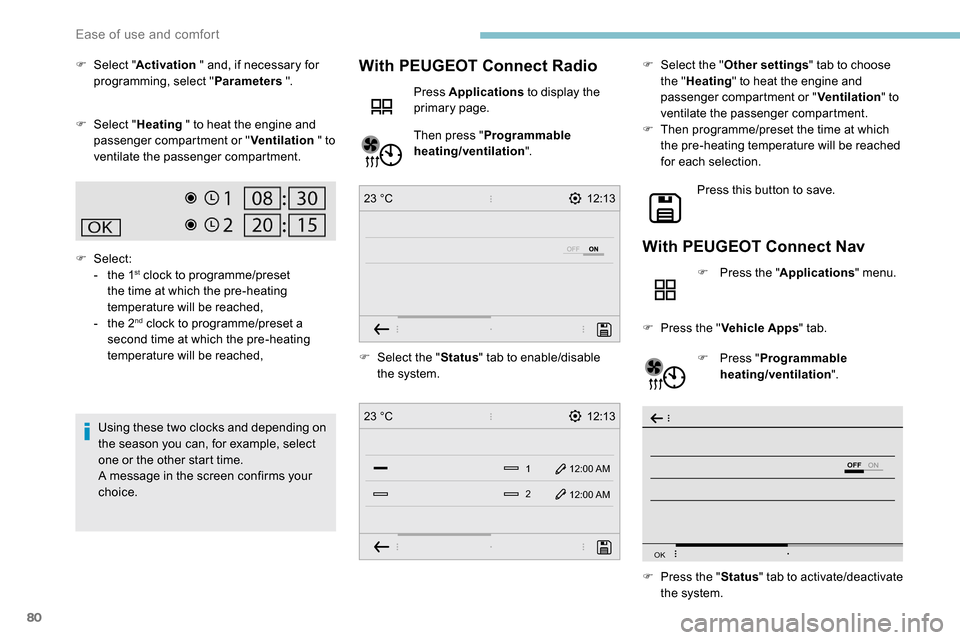
F Select " Activation " and, if necessary for
programming, select " Parameters ".
F
Sel
ect "Heating " to heat the engine and
passenger compartment or " Ventilation " to
ventilate the passenger compartment.
F
Select:
-
t
he 1
st clock to programme/preset
the time at which the pre-heating
temperature will be reached,
-
t
he 2
nd clock to programme/preset a
second time at which the pre-heating
temperature will be reached,
Using these two clocks and depending on
the season you can, for example, select
one or the other start time.
A message in the screen confirms your
choice. F
Sel
ect the "Status" tab to enable/disable
the system.
With PEUGEOT Connect Radio
Press Applications to display the
primary page.
Then press " Programmable
heating/ventilation ". F
Sel
ect the "
Other settings " tab to choose
the " Heating " to heat the engine and
passenger compartment or " Ventilation" to
ventilate the passenger compartment.
F
T
hen programme/preset the time at which
the pre-heating temperature will be reached
for each selection.
Press this button to save.
With PEUGEOT Connect Nav
F Press the " Applications" menu.
F
P
ress the " Vehicle Apps " tab.
F
P
ress " Programmable
heating/ventilation ".
F
P
ress the " Status" tab to activate/deactivate
the system.
Ease of use and comfort
Page 83 of 312
81
OK
00 00
00 00
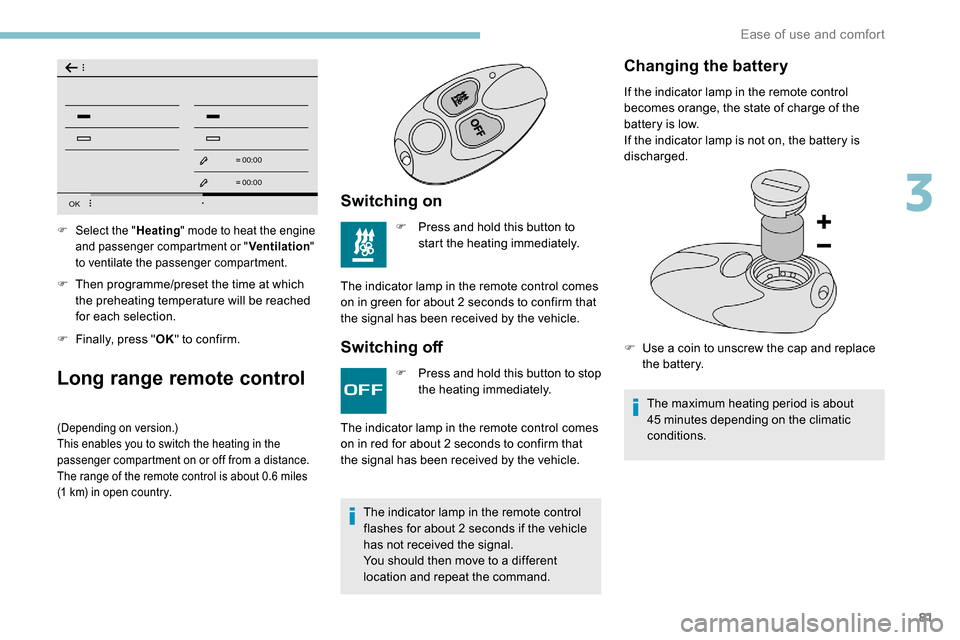
F Then programme/preset the time at which the preheating temperature will be reached
for each selection.
F
F
inally, press " OK" to confirm.
Long range remote control
(Depending on version.)
This enables you to switch the heating in the
passenger compartment on or off from a distance.
The range of the remote control is about 0.6
miles
(1
km) in open country.
Switching on
F Press and hold this button to start the heating immediately.
The indicator lamp in the remote control comes
on in green for about 2
seconds to confirm that
the signal has been received by the vehicle.
Switching off
F Select the " Heating" mode to heat the engine
and passenger compartment or " Ventilation"
to ventilate the passenger compartment.
F Press and hold this button to stop the heating immediately.
The indicator lamp in the remote control
flashes for about 2
seconds if the vehicle
has not received the signal.
You should then move to a different
location and repeat the command.
The indicator lamp in the remote control comes
on in red for about 2
seconds to confirm that
the signal has been received by the vehicle.
Changing the battery
If the indicator lamp in the remote control
becomes orange, the state of charge of the
battery is low.
If the indicator lamp is not on, the battery is
discharged.
F
U
se a coin to unscrew the cap and replace
the battery.
The maximum heating period is about
45
minutes depending on the climatic
conditions.
3
Ease of use and comfort
Page 103 of 312
101
The trailer stability assist system
offers increased safety in normal
driving conditions, provided that the
recommendations on towing a trailer are
obser ved. It must not encourage the driver
to take additional risks, such as towing
a trailer in adverse operating conditions
(overloading, failure to obser ve the trailer
nose weight, worn or under-inflated tyres,
faulty braking system, etc.) or drive at too
high a speed.
In certain cases, the swaying of the trailer
may not be detected by the ESC system,
particularly with a light trailer.
When driving on slippery or poor sur faces,
the system may not be able to prevent
sudden swaying of the trailer.
Advanced Grip Control
Special patented traction control system which
improves driveability on snow, mud and sand.
This system, the operation of which has been
optimised for each situation, allows you to
manoeuvre in most conditions of poor grip
(encountered during passenger vehicle use).Associated with all-season M+S (Mud and
Snow) tyres, this system offers a compromise
between safety, grip and driveability.
The accelerator pedal should be pressed
sufficiently to allow the system to use the power
of the engine. Operation at high engine speeds
is completely normal.
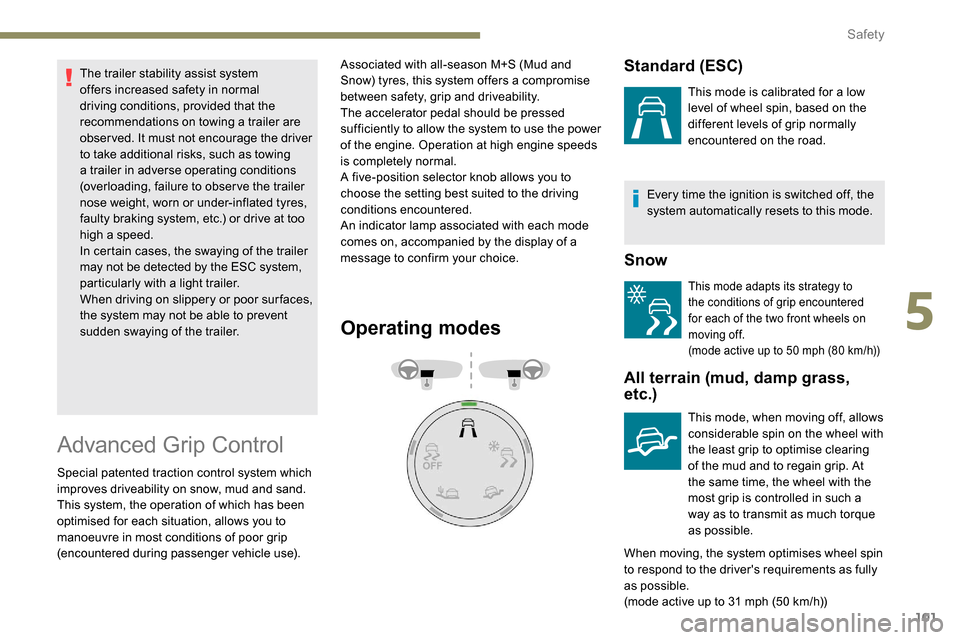
A five-position selector knob allows you to
choose the setting best suited to the driving
conditions encountered.
An indicator lamp associated with each mode
comes on, accompanied by the display of a
message to confirm your choice.
Operating modes
Every time the ignition is switched off, the
system automatically resets to this mode.
Snow
This mode adapts its strategy to
the conditions of grip encountered
for each of the two front wheels on
moving off.
(mode active up to 50
mph (80 km/h))
All terrain (mud, damp grass,
etc.)
This mode, when moving off, allows
considerable spin on the wheel with
the least grip to optimise clearing
of the mud and to regain grip. At
the same time, the wheel with the
most grip is controlled in such a
way as to transmit as much torque
as possible.
When moving, the system optimises wheel spin
to respond to the driver's requirements as fully
as possible.
(mode active up to 31
mph (50 km/h))
Standard (ESC)
This mode is calibrated for a low
level of wheel spin, based on the
different levels of grip normally
encountered on the road.
5
Safety