Distribution Peugeot Partner 2020 Owner's Manual
[x] Cancel search | Manufacturer: PEUGEOT, Model Year: 2020, Model line: Partner, Model: Peugeot Partner 2020Pages: 260, PDF Size: 7.76 MB
Page 13 of 260
11
Instruments
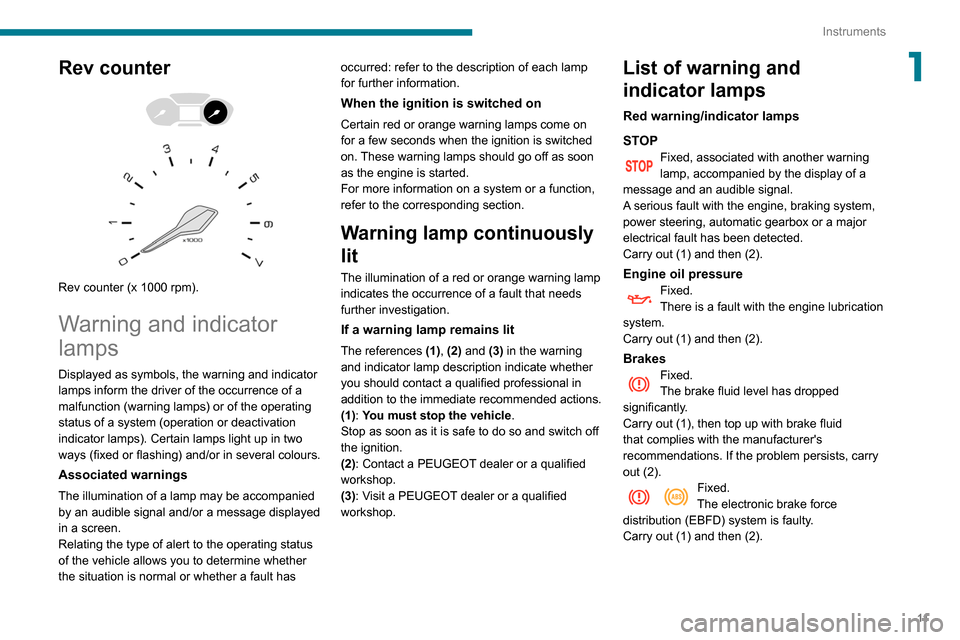
1Rev counter
Rev counter (x 1000 rpm).
Warning and indicator
lamps
Displayed as symbols, the warning and indicator
lamps inform the driver of the occurrence of a
malfunction (warning lamps) or of the operating
status of a system (operation or deactivation
indicator lamps). Certain lamps light up in two
ways (fixed or flashing) and/or in several colours.
Associated warnings
The illumination of a lamp may be accompanied
by an audible signal and/or a message displayed
in a screen.
Relating the type of alert to the operating status
of the vehicle allows you to determine whether
the situation is normal or whether a fault has occurred: refer to the description of each lamp
for further information.
When the ignition is switched on
Certain red or orange warning lamps come on
for a few seconds when the ignition is switched
on. These warning lamps should go off as soon
as the engine is started.
For more information on a system or a function,
refer to the corresponding section.
Warning lamp continuously
lit
The illumination of a red or orange warning lamp
indicates the occurrence of a fault that needs
further investigation.
If a warning lamp remains lit
The references (1), (2) and (3) in the warning
and indicator lamp description indicate whether
you should contact a qualified professional in
addition to the immediate recommended actions.
(1): You must stop the vehicle
.
Stop as soon as it is safe to do so and switch off
the ignition.
(2): Contact a PEUGEOT dealer or a qualified
workshop.
(3): Visit a PEUGEOT dealer or a qualified
workshop.
List of warning and
indicator lamps
Red warning/indicator lamps
STOP
Fixed, associated with another warning
lamp, accompanied by the display of a
message and an audible signal.
A serious fault with the engine, braking system,
power steering, automatic gearbox or a major
electrical fault has been detected.
Carry out (1) and then (2).
Engine oil pressureFixed.
There is a fault with the engine lubrication
system.
Carry out (1) and then (2).
BrakesFixed.
The brake fluid level has dropped
significantly.
Carry out (1), then top up with brake fluid
that complies with the manufacturer's
recommendations. If the problem persists, carry
out (2).
Fixed.
The electronic brake force
distribution
(EBFD) system is faulty.
Carry out (1) and then (2).
Page 58 of 260
56
Ease of use and comfort
Heating
Manual air conditioning
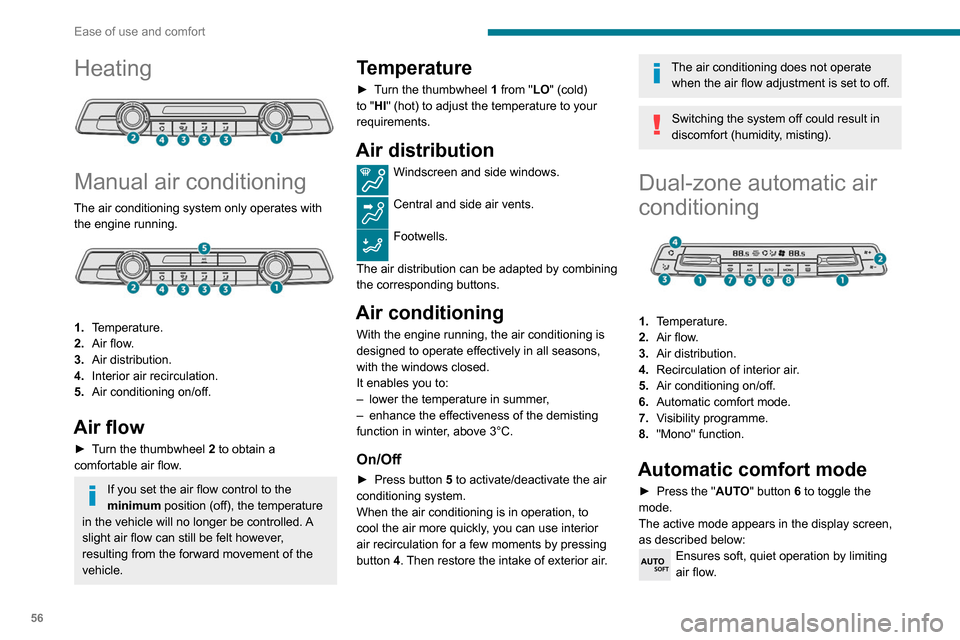
The air conditioning system only operates with the engine running.
1. Temperature.
2. Air flow.
3. Air distribution.
4. Interior air recirculation.
5. Air conditioning on/off.
Air flow
► Turn the thumbwheel 2 to obtain a
comfortable air flow.
If you set the air flow control to the
minimum position (off), the temperature
in the vehicle will no longer be controlled. A
slight air flow can still be felt however,
resulting from the forward movement of the
vehicle.
Temperature
► Turn the thumbwheel 1 from "LO" (cold)
to "HI" (hot) to adjust the temperature to your
requirements.
Air distribution
Windscreen and side windows.
Central and side air vents.
Footwells.
The air distribution can be adapted by combining
the corresponding buttons.
Air conditioning
With the engine running, the air conditioning is
designed to operate effectively in all seasons,
with the windows closed.
It enables you to:
–
lower the temperature in summer
,
–
enhance the effectiveness of the demisting
function in winter
, above 3°C.
On/Off
► Press button 5 to activate/deactivate the air
conditioning system.
When the air conditioning is in operation, to
cool the air more quickly, you can use interior
air recirculation for a few moments by pressing
button 4. Then restore the intake of exterior air.
The air conditioning does not operate when the air flow adjustment is set to off.
Switching the system off could result in
discomfort (humidity, misting).
Dual-zone automatic air
conditioning
1. Temperature.
2. Air flow.
3. Air distribution.
4. Recirculation of interior air.
5. Air conditioning on/off.
6. Automatic comfort mode.
7. Visibility programme.
8. "Mono" function.
Automatic comfort mode
► Press the " AUTO" button 6 to toggle the
mode.
The active mode appears in the display screen,
as described below:
Ensures soft, quiet operation by limiting
air flow.
Offers the best compromise between a
comfortable temperature and quiet
operation.
Provides dynamic, effective air flow.
When the engine is cold, the air flow will
only increase to its optimum level
gradually, to avoid distributing too much cold
air.
In cold weather, it prioritises the distribution of
warm air to the windscreen, the side windows
and the footwells only.
Manual mode
If you wish, you can make a different choice from
that suggested by the system, by changing a
setting. The other functions will still be controlled
automatically.
The "AUTO" symbol disappears if you change
a setting.
Deactivating the system
► Press button 2 "-" until the fan symbol
disappears.
This disables all functions of the dual-zone
automatic air conditioning system.
The temperature is no longer regulated. A slight
flow of air can still be felt, due to the forward
movement of the vehicle.
► Press button 2 "+" to switch the system on
again.
Page 59 of 260
57
Ease of use and comfort
3Offers the best compromise between a
comfortable temperature and quiet
operation.
Provides dynamic, effective air flow.
When the engine is cold, the air flow will
only increase to its optimum level
gradually, to avoid distributing too much cold
air.
In cold weather, it prioritises the distribution of
warm air to the windscreen, the side windows
and the footwells only.
Manual mode
If you wish, you can make a different choice from
that suggested by the system, by changing a
setting. The other functions will still be controlled
automatically.
The "AUTO" symbol disappears if you change
a setting.
Deactivating the system
► Press button 2 "-" until the fan symbol
disappears.
This disables all functions of the dual-zone
automatic air conditioning system.
The temperature is no longer regulated. A slight
flow of air can still be felt, due to the forward
movement of the vehicle.
►
Press button
2 "+" to switch the system on
again.
Temperature
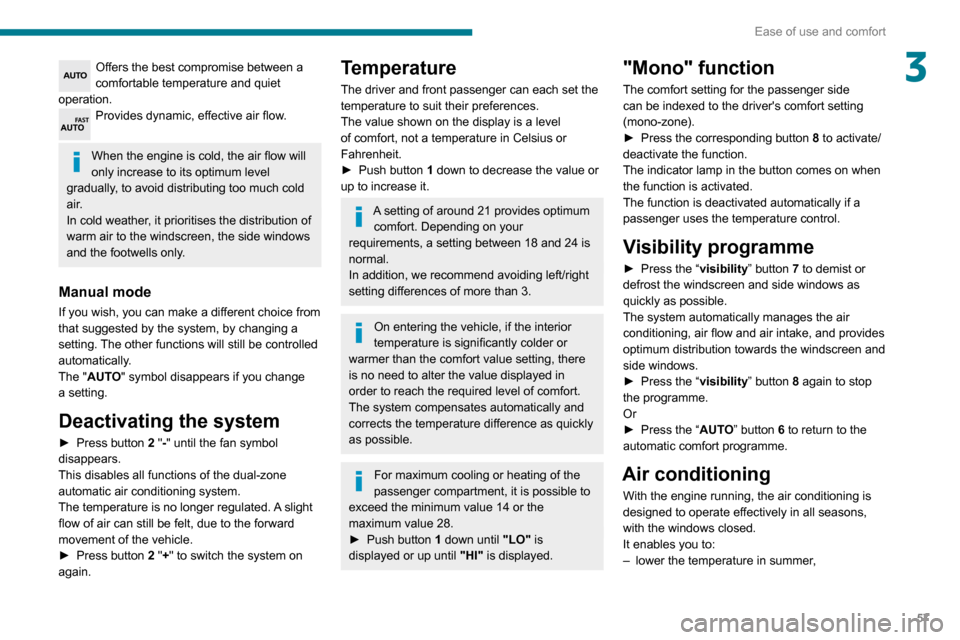
The driver and front passenger can each set the
temperature to suit their preferences.
The value shown on the display is a level
of comfort, not a temperature in Celsius or
Fahrenheit.
►
Push button
1 down to decrease the value or
up to increase it.
A setting of around 21 provides optimum comfort. Depending on your
requirements, a setting between 18 and 24 is
normal.
In addition, we recommend avoiding left/right
setting differences of more than 3.
On entering the vehicle, if the interior
temperature is significantly colder or
warmer than the comfort value setting, there
is no need to alter the value displayed in
order to reach the required level of comfort.
The system compensates automatically and
corrects the temperature difference as quickly
as possible.
For maximum cooling or heating of the
passenger compartment, it is possible to
exceed the minimum value 14 or the
maximum value 28.
►
Push button
1 down until "LO" is
displayed or up until "HI" is displayed.
"Mono" function
The comfort setting for the passenger side
can be indexed to the driver's comfort setting
(mono-zone).
►
Press the corresponding button 8
to activate/
deactivate the function.
The indicator lamp in the button comes on when
the function is activated.
The function is deactivated automatically if a
passenger uses the temperature control.
Visibility programme
► Press the “ visibility” button 7 to demist or
defrost the windscreen and side windows as
quickly as possible.
The system automatically manages the air
conditioning, air flow and air intake, and provides
optimum distribution towards the windscreen and
side windows.
►
Press the “
visibility” button 8 again to stop
the programme.
Or
►
Press the “
AUTO” button 6 to return to the
automatic comfort programme.
Air conditioning
With the engine running, the air conditioning is
designed to operate effectively in all seasons,
with the windows closed.
It enables you to:
–
lower the temperature in summer
,
Page 60 of 260
58
Ease of use and comfort
– enhance the effectiveness of the demisting
function in winter , above 3°C.
On/Off
► Press button 5 to activate/deactivate the air
conditioning system.
When the air conditioning is in operation, to
cool the air more quickly, you can use interior
air recirculation for a few moments by pressing
button 4. Then restore the intake of exterior air.
The air conditioning does not operate when the air flow adjustment is set to off.
Switching the system off could result in
discomfort (humidity, misting).
Air distribution
► Pressing button 3 successively directs the air
flow towards:
–
windscreen, side windows and footwells,
–
footwells,
–
central vents, side vents and footwells,
–
windscreen, side windows, central vents, side
vents and footwells,
–
central and side vents,
–
windscreen and side windows (demisting or
defrosting).
Air flow
► Press the buttons 2 to increase/decrease the
air flow.
The air flow symbol (a fan) appears. It is filled in
or emptied gradually, according to the value set.
Recirculation of interior air
The intake of exterior air helps avoid and
eliminate misting of the windscreen and side
windows.
Recirculating the interior air isolates the
passenger compartment from exterior odours
and fumes.
When required, this function also allows
faster heating or cooling of the air in the
passenger compartment.
►
Press button
4 to recirculate the interior air or
allow the intake of exterior air.
Avoid prolonged use of interior air recirculation (due to the risk of misting
and deteriorating air quality).
Front demisting
- defrosting
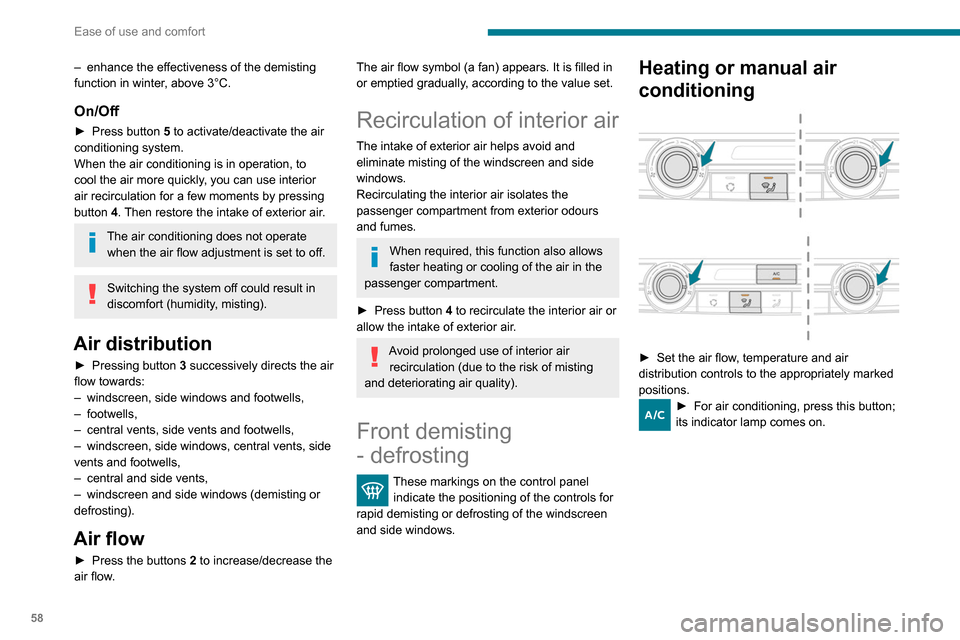
These markings on the control panel indicate the positioning of the controls for
rapid demisting or defrosting of the windscreen
and side windows.
Heating or manual air
conditioning
► Set the air flow , temperature and air
distribution controls to the appropriately marked
positions.
► For air conditioning, press this button;
its indicator lamp comes on.
Dual-zone automatic air
conditioning
► Press this button to demist or defrost
the windscreen and side windows more
quickly.
The system automatically manages the air
conditioning, air flow and air intake, and provides
optimum distribution towards the windscreen and
side windows.
► To turn it off, press this button
again or press " AUTO".
The system restarts with the values in use before
it was deactivated.
Heated windscreen and washer jets
For more information on the Wiper
control stalk and in particular the heated
windscreen and washer jets, refer to the
corresponding section.
With Stop & Start, when demisting
- defrosting has been activated, STOP
mode is not available.
Page 61 of 260

59
Ease of use and comfort
3Dual-zone automatic air
conditioning
► Press this button to demist or defrost
the windscreen and side windows more
quickly
.
The system automatically manages the air
conditioning, air flow and air intake, and provides
optimum distribution towards the windscreen and
side windows.
► To turn it off, press this button
again or press " AUTO".
The system restarts with the values in use before
it was deactivated.
Heated windscreen and washer jets
For more information on the Wiper
control stalk and in particular the heated
windscreen and washer jets, refer to the
corresponding section.
With Stop & Start, when demisting
- defrosting has been activated, STOP
mode is not available.
Heated windscreen
Depending on country of sale.
This function heats the windscreen in cold
weather.
In area 1, the heating melts ice, enabling you to
free the wiper blades.
In area 2, the heating enhances visibility by
preventing the build-up of snow while the wipers
are operating.
On/Off
► With the engine running, press this button to
activate/deactivate the function (confirmed by an
indicator lamp).
The period of operation depends on the exterior
temperature.
Rear screen and/or
door mirrors demisting
- defrosting
On/Off
► Press this button to switch on/off rear
screen and door mirror defrosting (if fitted
to the vehicle).
► Press this button to switch on/off door
mirror defrosting.
Page 76 of 260
74
Safety
Horn
► Press the central part of the steering wheel.
Electronic stability control
(ESC)
The electronic stability control programme
includes the following systems:
– Anti-lock braking system (ABS) and Electronic
brake force distribution (EBFD).
– Emergency braking assistance (EBA).
– Anti-slip regulation (ASR).
– Dynamic stability control (DSC).
– Trailer stability assist (TSA).
Anti-lock braking system
(ABS) and Electronic brake
force distribution (EBFD)
These systems enhance the vehicle’s stability
and handling during braking, and enable greater
2016/679 (GDPR). Third parties to which data
has been communicated shall be notified of
any rectification, erasure or restriction carried
out in accordance with the aforementioned
Directive, unless doing so would be
impossible or require a disproportionate effort.
You also have the right to lodge a complaint
with the relevant data protection authority.
Peugeot Connect
Assistance
► If the vehicle breaks down, press button 2
for more than 2 seconds to request assistance
(confirmed by a voice message*).
►
Pressing again immediately cancels the
request.
Privacy mode allows you to manage the
level of sharing (data and/or position)
between your vehicle and the PEUGEOT
brand.
It can be configured in the Settings menu on
the touch screen.
By default, depending on equipment,
deactivate/reactivate geolocation by
simultaneously pressing the 2 buttons, then
press the "Peugeot Connect Assistance"
button to confirm.
* According to the geographic coverage of ‘Peugeot Connect SOS’, ‘Peugeot Connect Assistance’ and the official national language chosen by the owner
of the vehicle.
The list of countries covered and telematic services provided is availab\
le from dealers or on the website for your country
.
If you purchased your vehicle outside the
PEUGEOT dealer network, we invite you
to have a dealer check the configuration of
these services and, if desired, modify them to
suit your wishes. In a multilingual country,
configuration is possible in the official national
language of your choice.
For technical reasons, in particular to
improve the quality of telematic services
for customers, the Manufacturer reserves the
right to carry out updates to the vehicle's
on-board telematic system at any time.
If you benefit from the Peugeot Connect
Packs offer with the SOS and Assistance
Pack included, there are additional services
available to you in your personal space, via
the website for your country.
For information about the SOS and
Assistance Pack, please refer to the general
conditions for these services.
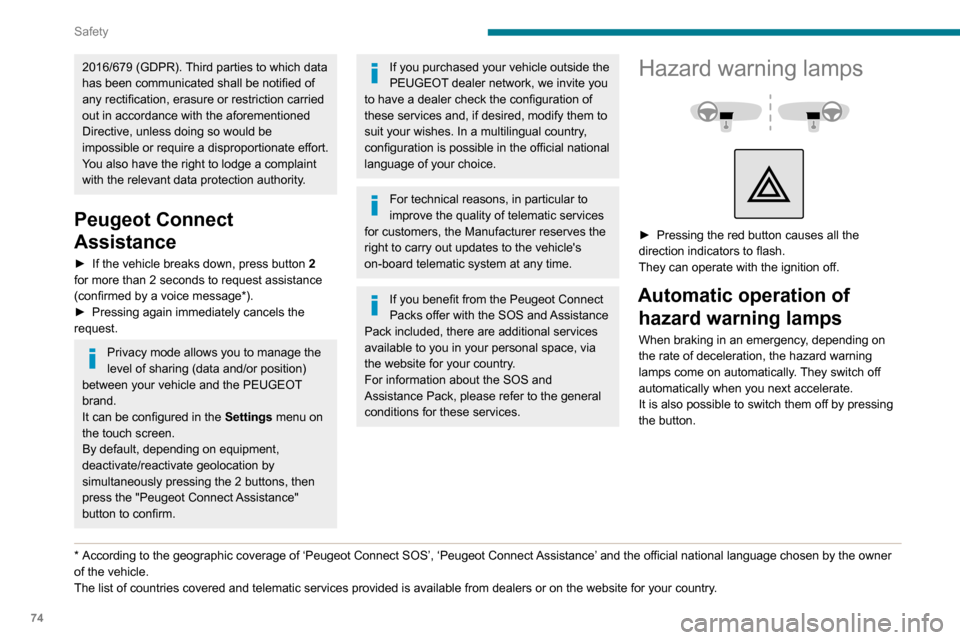
Hazard warning lamps
► Pressing the red button causes all the
direction indicators to flash.
They can operate with the ignition off.
Automatic operation of hazard warning lamps
When braking in an emergency, depending on
the rate of deceleration, the hazard warning
lamps come on automatically. They switch off
automatically when you next accelerate.
It is also possible to switch them off by pressing
the button.
Page 77 of 260
75
Safety
5Horn
► Press the central part of the steering wheel.
Electronic stability control
(ESC)
The electronic stability control programme includes the following systems:
–
Anti-lock braking system (ABS) and Electronic
brake force distribution (EBFD).
–
Emergency braking assistance (EBA).
–
Anti-slip regulation (ASR).
–
Dynamic stability control (DSC).
–
T
railer stability assist (TSA).
Anti-lock braking system (ABS) and Electronic brake
force distribution (EBFD)
These systems enhance the vehicle’s stability
and handling during braking, and enable greater
control while cornering, particularly on poor or
slippery road surfaces.
ABS prevents wheel locking in the event of
emergency braking.
EBFD manages the braking pressure wheel by
wheel.
This warning lamp comes on fixed in the
event of an ABS malfunction.
The vehicle retains conventional braking. Drive
carefully at a moderate speed.
Contact a PEUGEOT dealer or a qualified
workshop as soon as possible.
This warning lamp, when lit together with the STOP and ABS warning lamps,
accompanied by a message and an audible
signal, indicates an EBFD malfunction.
You must stop as soon as it is safe to do so.
Contact a PEUGEOT dealer or a qualified
workshop.
The normal operation of the ABS may result in slight vibrations in the brake
pedal.
When braking in an emergency, press
very firmly and maintain this pressure.
When changing wheels (tyres and rims),
ensure that these are approved for your
vehicle.
After an impact, have these systems checked by a PEUGEOT dealer or a
qualified workshop.
Emergency braking
assistance (EBA)
In an emergency, this system enables you
to reach the optimum braking pressure more
quickly and therefore reduce the stopping
distance.
It is triggered in relation to the speed at which
the brake pedal is pressed. This is felt by a
reduction in the resistance of the pedal and an
increase in braking efficiency.
Anti-slip regulation (ASR) / Dynamic stability control
(DSC)
Anti-slip regulation optimises traction using
engine braking and by applying the brakes on
the driving wheels to avoid wheel spinning. It
also enhances the vehicle's directional stability
while accelerating.
If there is a difference between the vehicle’s
trajectory and the path desired by the driver, the
dynamic stability control system automatically
uses engine braking and the brakes on one or
more wheels to return the vehicle to the desired
path, within the limits of the laws of physics.
These systems are activated automatically every
time the vehicle is started.
Page 138 of 260
136
Practical information
Towing devices
Depending on equipment, the vehicle can be fitted with one of the following towing devices:
Approval No.: E1 R55 (reference 2)Mounting position then towing device reference
Type of towing device
Plate fixed at the bottom and
towing device fixed at the top
Plate fixed at the bottom and
towing device fixed at the bottom
Plate
+
G1 towball –
LCV std (standard) L1
– LCV std (standard) L2 –
LCV cross (worksite) L1
– LCV cross (heavy-duty) L2
Operation
When a petrol filler nozzle is inserted into the
fuel filler neck of a Diesel vehicle, it comes into
contact with the flap. The system remains closed
and prevents filling.
Do not persist but introduce a Diesel type
filler nozzle.
It remains possible to use a fuel jerrycan
to fill the tank.
Travelling abroad
As Diesel fuel pump nozzles may be
different in other countries, the presence
of the misfuel prevention device may make
refuelling impossible.
Before travelling abroad, it is advisable to
check with a PEUGEOT dealer if the vehicle
is suitable for the distribution equipment of the
countries visited.
Snow chains
In wintry conditions, snow chains improve
traction as well as the behaviour of the vehicle
when braking.
The snow chains must be fitted only to the front wheels. They must never be
fitted to "space-saver" type spare wheels.
Take account of the legislation specific to each country on the use of snow chains
and the maximum authorised speed.
Installation tips
► If you have to fit the chains during a journey ,
stop the vehicle on a flat surface on the side of
the road.
►
Apply the parking brake and position any
wheel chocks under the wheels to prevent
movement of your vehicle.
►
Fit the chains following the instructions
provided by the manufacturer
.
►
Move off gently and drive for a few moments,
without exceeding 31 mph (50 km/h).
►
Stop your vehicle and check that the snow
chains are correctly tightened.
It is strongly recommended that before
you leave, you practise fitting the snow
chains on a level and dry surface.
Avoid driving with snow chains on roads that have been cleared of snow to avoid
damaging your vehicle's tyres and the road
surface. If your vehicle is fitted with alloy
wheels, check that no part of the chain or its
fixings is in contact with the wheel rim.
Use only the chains designed to be fitted to the
type of wheel fitted to your vehicle:
Original tyre size Maximum link size (mm)
195/65 R15 9
205/60 R16
205/55 R17
215/65 R16
215/60 R17 cannot be fitted with
chains
You can also use snow socks.
For more information, contact a PEUGEOT
dealer or a qualified workshop.
Towing device
Load distribution
► Distribute the load in the trailer so that the
heaviest items are as close as possible to
the axle and the nose weight approaches the
maximum permitted without exceeding it.
Air density decreases with altitude, thus reducing
engine performance.
The maximum towed load
Page 196 of 260
194
PEUGEOT Connect Radio
Playlists are updated whenever the ignition
is switched off or a USB memory stick is
connected. The audio system memorises these
lists, which will subsequently load faster if they
have not been changed.
Auxiliary (AUX) jack socket
Depending on equipmentConnect a portable device (MP3 player,
etc.) to the auxiliary jack socket using an
audio cable (not supplied).
This source is only available if "Auxiliary input"
has been selected in the audio settings.
First adjust the volume on the portable device
(to a high level). Then adjust the volume of the
audio system.
Controls are managed via the portable device.
Selecting the source
Press Radio Media to display the main
page.
Press the "SOURCES" button.
Select the source.
BluetoothStreaming®
Streaming allows you to listen to the audio feed
from your smartphone.
The Bluetooth profile must be activated.
First adjust the volume on the portable device
(to a high level). Then adjust the volume of the
system.
Select the "Tone", "Balance", "Sound ",
"Voice" or "Ringtones" tab to configure
the sound settings.
Press the back arrow to confirm.
In the "Tone" tab, the Ambience, Bass ,
Medium and Treble sound settings are
different and independent for each audio
source.
In the "Balance” tab, the All passengers,
Driver and Front only settings are common
to all sources.
In the "Sound ” tab, activate or deactivate
"Volume linked to speed ", "Auxiliary input"
and "Touch tones ".
The balance/distribution (or spatialisation
with the Arkamys© system) uses audio
processing to adjust the sound quality
according to the number of passengers in the
vehicle.
Onboard audio: Arkamys Sound Staging©
optimises the sound distribution inside
the passenger compartment.
DAB (Digital Audio
Broadcasting) radio
Terrestrial Digital Radio
Digital radio provides higher quality sound.
The various "multiplexes/ensembles" offer a
choice of radio stations organised in alphabetical
order.
Press Radio Media to display the main
page.
Press the "OPTIONS " button to access the
secondary page.
Press "Band" to select "DAB band".
Press in the shaded area to confirm.
FM-DAB Follow-up
"DAB" does not cover 100 % of the country.
When the digital radio signal is poor , the
"FM-DAB Follow-up" enables you to continue
listening to the same station by automatically
switching to the corresponding "FM" analogue
station (if there is one).
Press Radio Media to display the main
page.
Press the "OPTIONS " button to access the
secondary page.
Activate/deactivate "FM-DAB Follow-up ".
Press in the shaded area to confirm.
If "FM-DAB Follow-up" is activated, there
may be a time offset of a few seconds
when the system switches to "FM" analogue
radio, and in some cases a change in volume.
When the digital signal quality is restored, the
system automatically changes back to "DAB".
If the "DAB" station being listened to is
not available on "FM", or if "FM-DAB
Follow-up" is not activated, the sound will cut
out while the digital signal is too weak.
Media
USB port
Insert the USB memory stick into the USB
port or connect the USB device to the
USB port using a suitable cable (not supplied).
To protect the system, do not use a USB hub.
The system builds playlists (in temporary
memory); this operation can take from a
few seconds to several minutes at the first
connection.
Reduce the number of non-music files and the
number of folders to reduce the waiting time.
Page 204 of 260
202
PEUGEOT Connect Radio
Some telephones offer display options.
Depending on the settings chosen, contacts can
be transferred in a specific order.
►
Modify the telephone directory display
settings.
Settings
When the treble and bass settings are
changed, the ambience is deselected.
When the ambience is changed, the treble
and bass settings are reset.
Selecting an ambience imposes the treble and
bass settings, and vice versa.
►
Modify the treble and bass or ambience
settings to obtain the desired musical ambience.
When the balance settings are changed, the
distribution is deselected.
When the distribution setting is changed, the
balance settings are deselected.
Selecting a distribution setting imposes the
balance settings, and vice versa.
►
Modify the balance setting or the distribution
setting to obtain the desired sound quality
.
There is a difference in sound quality
between audio sources.
To allow for optimal listening quality, the sound
settings can be tailored to different audio
sources, which can generate audible differences
when changing source.
►
Check that the sound settings are appropriate
to the sources listened to.
Adjust the sound
functions to the middle position. When the engine is off, the system switches
off after several minutes of use.
When the engine is switched off, the system's
operating time depends on the state of charge of
the battery.
The switch-off is normal: the system
automatically goes into energy economy mode
and switches off to maintain an adequate charge
in the battery.
►
Start the vehicle’
s engine to increase the
charge of the battery.