phone Peugeot Partner 2020 Owner's Manual
[x] Cancel search | Manufacturer: PEUGEOT, Model Year: 2020, Model line: Partner, Model: Peugeot Partner 2020Pages: 260, PDF Size: 7.76 MB
Page 5 of 260
3
Contents
bit.ly/helpPSA
Parking sensors 127
Reversing Camera 129
Surround Rear Vision 130
7Practical information
Compatibility of fuels 134
Refuelling 134
Misfuel prevention (Diesel) 135
Snow chains 136
Towing device 136
Overload indicator 138
Energy economy mode 139
Roof bars / Roof rack 140
Bonnet 141
Engine compartment 141
Checking levels 142
Speed checks 144
AdBlue® (BlueHDi) 146
Free-wheeling 148
Advice on care and maintenance 148
8In the event of a breakdown
Running out of fuel (Diesel) 150
Tool kit 150
Temporary puncture repair kit 151
Spare wheel 153
Changing a bulb 156
Changing a fuse 161
12
V battery 163
Towing 167
9Technical data
Dimensions 169
Engine technical data and towed loads 173
Identification markings 176
10Bluetooth® audio system
First steps 177
Steering mounted controls 177
Menus 178
Radio 179
DAB (Digital Audio Broadcasting) radio 180
Media 181
Telephone 183
Frequently asked questions 186
11PEUGEOT Connect Radio
First steps 189
Steering mounted controls 190
Menus 191
Applications 192
Radio 192
DAB (Digital Audio Broadcasting) radio 194
Media 194
Telephone 196
Settings 199
Frequently asked questions 201
12PEUGEOT Connect Nav
First steps 203
Steering mounted controls 204
Menus 204
Voice commands 206
Navigation 209
Connected navigation 212
Applications 214
Radio 217
DAB (Digital Audio Broadcasting) radio 218
Media 219
Telephone 220
Settings 223
Frequently asked questions 224
■
Alphabetical index
Access to additional videos
Page 7 of 260
5
Overview
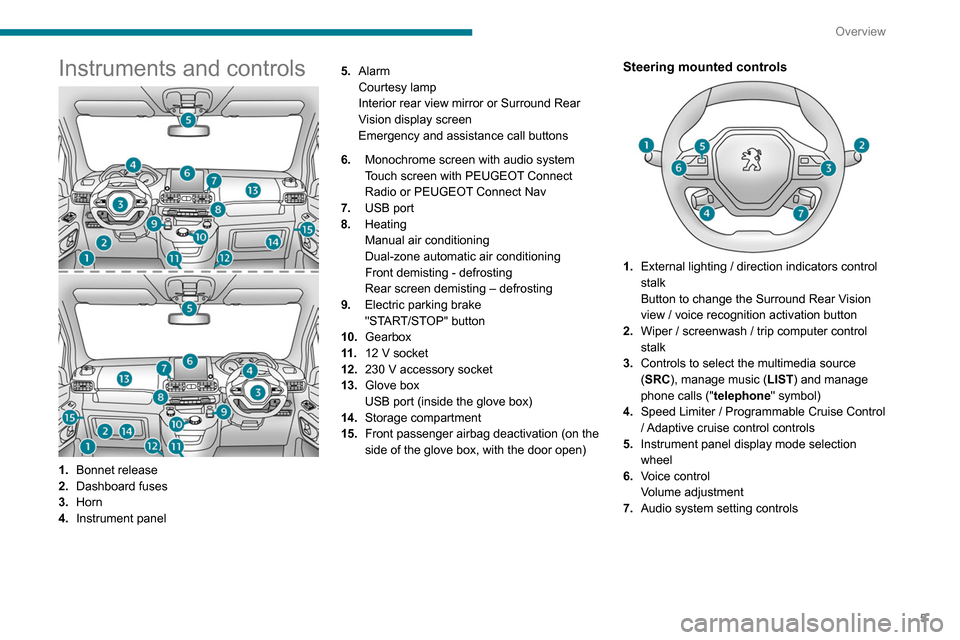
Instruments and controls
1.Bonnet release
2. Dashboard fuses
3. Horn
4. Instrument panel 5.
Alarm
Courtesy lamp
Interior rear view mirror or Surround Rear
Vision display screen
Emergency and assistance call buttons
6. Monochrome screen with audio system
Touch screen with PEUGEOT Connect
Radio or PEUGEOT Connect Nav
7. USB port
8. Heating
Manual air conditioning
Dual-zone automatic air conditioning
Front demisting - defrosting
Rear screen demisting – defrosting
9. Electric parking brake
"START/STOP" button
10. Gearbox
11 . 12 V socket
12. 230 V accessory socket
13. Glove box
USB port (inside the glove box)
14. Storage compartment
15. Front passenger airbag deactivation (on the
side of the glove box, with the door open)
Steering mounted controls
1.External lighting / direction indicators control
stalk
Button to change the Surround Rear Vision
view / voice recognition activation button
2. Wiper / screenwash / trip computer control
stalk
3. Controls to select the multimedia source
(SRC), manage music (LIST) and manage
phone calls (" telephone" symbol)
4. Speed Limiter / Programmable Cruise Control
/ Adaptive cruise control controls
5. Instrument panel display mode selection
wheel
6. Voice control
Volume adjustment
7. Audio system setting controls
Page 27 of 260
25
Access
2If the vehicle is unlocked but the doors or
tailgate are not subsequently opened, the
vehicle will automatically lock itself again after
approximately 30
seconds. If the vehicle is
fitted with an alarm, it will also be reactivated
automatically.
Automatic door mirror folding and unfolding can be deactivated by a
PEUGEOT dealer or a qualified workshop.
As a safety measure, never leave the vehicle, even for a short time, without
taking the Keyless Entry and Starting
system’s electronic key with you.
Be aware of the risk of theft of the vehicle if
the key is present in one of the defined areas
while the vehicle is unlocked.
To preserve the battery charge in the electronic key and the vehicle's battery,
the "hands-free" functions are set to
hibernation mode after 21 days without use.
To restore these functions, press one of the
remote control buttons or start the engine with
the electronic key in the reader.
For more information on starting with the
Keyless Entry and Starting system, refer to
the corresponding section.
Electrical interference
The electronic key may not operate if
close to certain electronic devices: telephone
(switched on or on standby), laptop computer,
strong magnetic fields, etc.
Locating the vehicle
This function helps you to spot your vehicle from
a distance, with the vehicle locked:
–
The direction indicators flash for approximately
10 seconds.
–
The courtesy lamps come on.
► Press this button.
Remote lighting
Briefly pressing this button switches on
the lighting remotely (sidelamps, dipped
beam headlamps and number plate lamps).
Pressing this button again before the end of the
timed period cancels remote lighting.
Advice
Remote control
The remote control is a sensitive, high-
frequency device; avoid handling it in your
pocket, due to the risk of unintentionally
unlocking the vehicle.
Avoid pressing the remote control buttons
while out of range of the vehicle, due to
the risk of rendering the remote control
inoperative. It would then be necessary to
reset it.
The remote control does not work
when the
key is in the ignition switch, even when the
ignition is switched off.
Anti-theft protection
Do not modify the electronic vehicle
immobiliser, as this might result in
malfunctions.
For vehicles with a key ignition switch,
remember to remove the key and turn the
steering wheel to engage the steering lock.
Locking the vehicle
Driving with the doors locked could make
it more difficult for the emergency services to
enter the vehicle in an emergency.
As a safety precaution, remove the key from
the ignition or take the electronic key with you
when leaving the vehicle, even for a short
time.
Purchasing a second-hand vehicle
Have the key codes memorised by a
PEUGEOT dealer, to ensure that the keys
in your possession are the only ones able to
start the vehicle.
Page 50 of 260
48
Ease of use and comfort
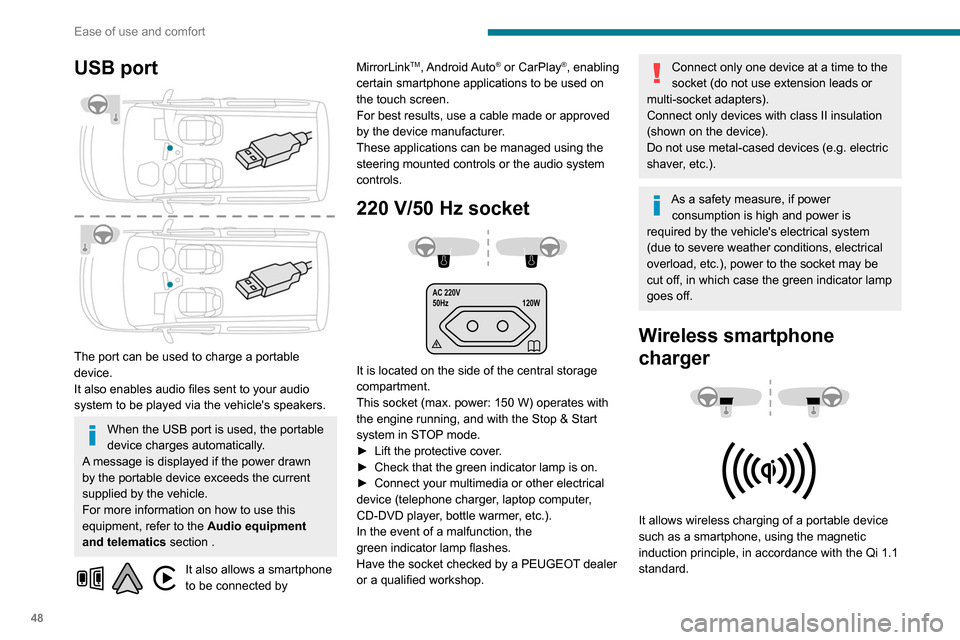
USB port
The port can be used to charge a portable
device.
It also enables audio files sent to your audio
system to be played via the vehicle's speakers.
When the USB port is used, the portable
device charges automatically.
A message is displayed if the power drawn
by the portable device exceeds the current
supplied by the vehicle.
For more information on how to use this
equipment, refer to the Audio equipment
and telematics section .
It also allows a smartphone
to be connected by MirrorLink
TM, Android Auto® or CarPlay®, enabling
certain smartphone applications to be used on
the touch screen.
For best results, use a cable made or approved
by the device manufacturer.
These applications can be managed using the
steering mounted controls or the audio system
controls.
220 V/50 Hz socket
AC 220V
50Hz 120W
It is located on the side of the central storage
compartment.
This socket (max. power: 150
W) operates with
the engine running, and with the Stop & Start
system in STOP mode.
►
Lift the protective cover
.
►
Check that the green indicator lamp is on.
►
Connect your multimedia or other electrical
device (telephone charger
, laptop computer,
CD-DVD player, bottle warmer, etc.).
In the event of a malfunction, the
green
indicator lamp flashes.
Have the socket checked by a PEUGEOT dealer
or a qualified workshop.
Connect only one device at a time to the
socket (do not use extension leads or
multi-socket adapters).
Connect only devices with class II insulation
(shown on the device).
Do not use metal-cased devices (e.g. electric
shaver, etc.).
As a safety measure, if power consumption is high and power is
required by the vehicle's electrical system
(due to severe weather conditions, electrical
overload, etc.), power to the socket may be
cut off, in which case the green indicator lamp
goes off.
Wireless smartphone
charger
It allows wireless charging of a portable device
such as a smartphone, using the magnetic
induction principle, in accordance with the Qi 1.1
standard.
The portable device to be charged must be
compatible with the Qi standard, either by design
or by using a compatible holder or shell.
The charging area is identified by the Qi symbol.
The charger works with the engine running and
with the Stop & Start system in STOP mode.
Charging is managed by the smartphone.
With Keyless Entry and Starting, the charger’s
operation may be briefly disrupted when a door
is opened or the ignition is switched off.
Charging
► With the charging area clear, place a device
in its centre.
When the portable device is detected, the
charger’s indicator lamp lights up green. It
remains lit for the whole time that the battery is
being charged.
The system is not designed to charge multiple devices simultaneously.
Do not leave any metal objects (coins,
keys, vehicle remote control, etc.) in the
charging area while a device is being
charged, due to the risk of overheating or
interrupting the charging process.
Page 51 of 260
49
Ease of use and comfort
3The portable device to be charged must be
compatible with the Qi standard, either by design
or by using a compatible holder or shell.
The charging area is identified by the Qi symbol.
The charger works with the engine running and
with the Stop & Start system in STOP mode.
Charging is managed by the smartphone.
With Keyless Entry and Starting, the charger’s
operation may be briefly disrupted when a door
is opened or the ignition is switched off.
Charging
► With the charging area clear, place a device
in its centre.
When the portable device is detected, the
charger’s indicator lamp lights up green. It
remains lit for the whole time that the battery is
being charged.
The system is not designed to charge multiple devices simultaneously.
Do not leave any metal objects (coins,
keys, vehicle remote control, etc.) in the
charging area while a device is being
charged, due to the risk of overheating or
interrupting the charging process.
Operating check
The state of the indicator lamp allows the
operation of the charger to be monitored.
State of the
indicator lamp Meaning
Off Engine switched off.
No compatible devices
detected.
Charging finished.
Fixed green Compatible device detected.
Charging.
Flashing orange Foreign object detected in the charging zone.
Device not well centred in
the charging zone.
Fixed orange Fault with the device's battery meter.
Device battery
temperature too high.
Charger malfunction.
If the indicator lamp is lit orange:
– remove the device, then place it back in the
centre of the charging zone.
or
–
remove the device and try again in a quarter
of an hour
.
If the problem persists, have the system checked
by a PEUGEOT dealer or a qualified workshop.
Load retaining partition
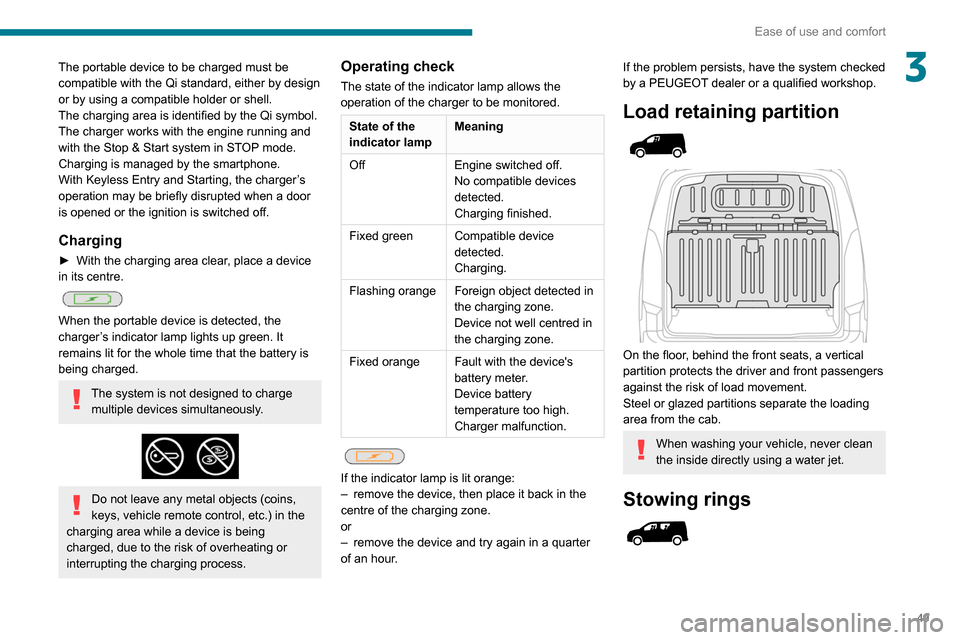
On the floor, behind the front seats, a vertical
partition protects the driver and front passengers
against the risk of load movement.
Steel or glazed partitions separate the loading
area from the cab.
When washing your vehicle, never clean
the inside directly using a water jet.
Stowing rings
Page 142 of 260
140
Practical information
► Put each fixing in place and lock them on the
roof one by one.
► Ensure that the roof bars or the roof rack are
correctly fitted (by shaking them).
The bars are adaptable for each fixing point.
Bonnet
Stop & Start
Before doing anything under the bonnet,
you must switch off the ignition to avoid any
risk of injury resulting from an automatic
change to START mode.
The location of the interior bonnet release lever prevents opening the
bonnet when the left-hand front door is
closed.
When the engine is hot, handle the
exterior safety catch and the bonnet stay
with care (risk of burns), using the protected
area.
When the bonnet is open, take care not to
damage the safety catch.
Do not open the bonnet under very windy
conditions.
If a telephone call is in progress at the
time, it will be maintained for around 10
minutes using your audio system’s hands-free
system.
Exiting the mode
These functions will be automatically reactivated
the next time the vehicle is used.
In order to restore the use of these functions
immediately, start the engine and let it run:
–
for less than 10 minutes, to use the equipment
for approximately 5 minutes,
–
for more than 10 minutes, to use the
equipment for approximately 30 minutes.
Let the engine run for the duration specified to
ensure that the battery charge is sufficient.
Do not repeatedly and continuously restart the
engine in order to charge the battery
.
A flat battery prevents the engine from starting.
For more information on the 12 V battery,
refer to the corresponding section.
Load reduction mode
System that manages the use of certain
functions according to the level of charge
remaining in the battery.
When the vehicle is being driven, the load
reduction function temporarily deactivates certain
functions, such as the air conditioning and the
heated rear screen.
The deactivated functions are reactivated
automatically as soon as conditions permit.
Roof bars / Roof rack
Recommendations
Distribute the load uniformly, taking care
to avoid overloading one of the sides.
Arrange the heaviest part of the load as close
as possible to the roof.
Secure the load firmly.
Drive gently: the vehicle will be more
susceptible to the effects of side winds and its
stability may be affected.
Regularly check the security and tight
fastening of the roof bars and racks, at least
before each trip.
In the event of loading ( not exceeding
40 cm in height) on the roof, do not
exceed the following loads:
–
T
ransverse bars on longitudinal bars:
80
kg.
–
T
wo transverse bars bolted to the roof:
100
kg.
–
Three transverse bars bolted to the roof:
150
kg.
–
An aluminium rack: 120
kg.
–
A
steel rack: 115 kg.
If the height exceeds 40 cm, adapt the speed
of the vehicle to the profile of the road to
avoid damaging the roof bars or the roof rack
and the fixings on the vehicle.
Refer to national legislation in order to comply
with the regulations for transporting objects
that are longer than the vehicle.
As a safety measure and to avoid damaging the roof, it is essential to use
the roof bars and racks approved for your
vehicle.
Observe the instructions on fitting and use
contained in the guide supplied with the roof
bars and racks.
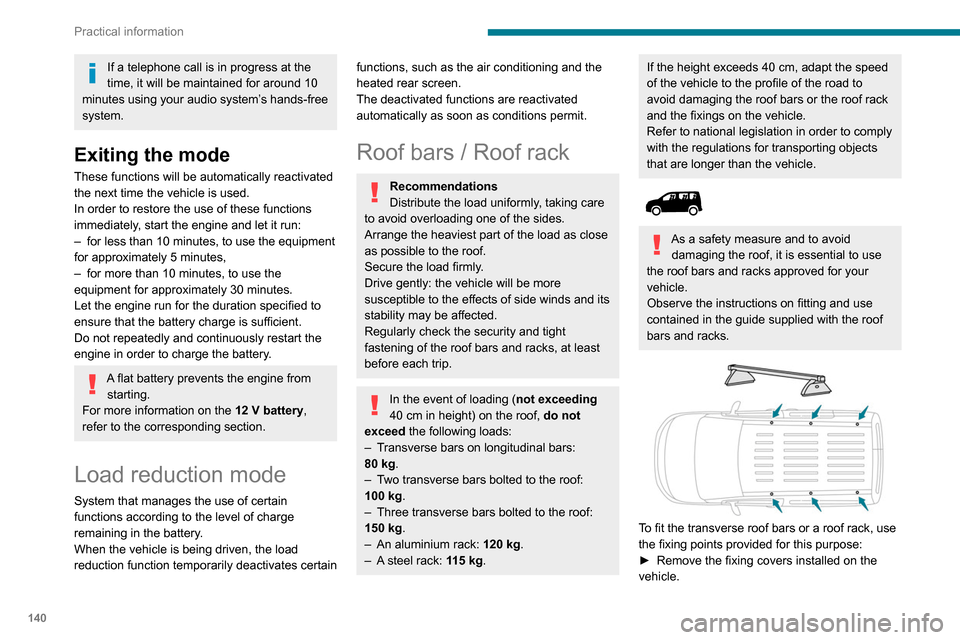
To fit the transverse roof bars or a roof rack, use
the fixing points provided for this purpose:
►
Remove the fixing covers installed on the
vehicle.
Page 164 of 260
162
In the event of a breakdown
malfunction of your vehicle. Contact a
PEUGEOT dealer or a qualified workshop.
Good
Failed
Tweezers
Installing electrical accessories
Your vehicle's electrical system is
designed to operate with standard or optional
equipment.
Before installing other electrical equipment
or accessories on your vehicle, contact a
PEUGEOT dealer or a qualified workshop.
PEUGEOT will not accept responsibility
for the cost incurred in repairing your
vehicle or for rectifying malfunctions resulting
from the installation of accessories not
supplied and not recommended by
PEUGEOT and not installed in accordance
with its instructions, in particular when the
combined consumption of all of the additional
equipment connected exceeds 10
milliamperes.
For more information on installing a
towbar or TAXI type equipment, contact a
PEUGEOT dealer.
Dashboard fuses
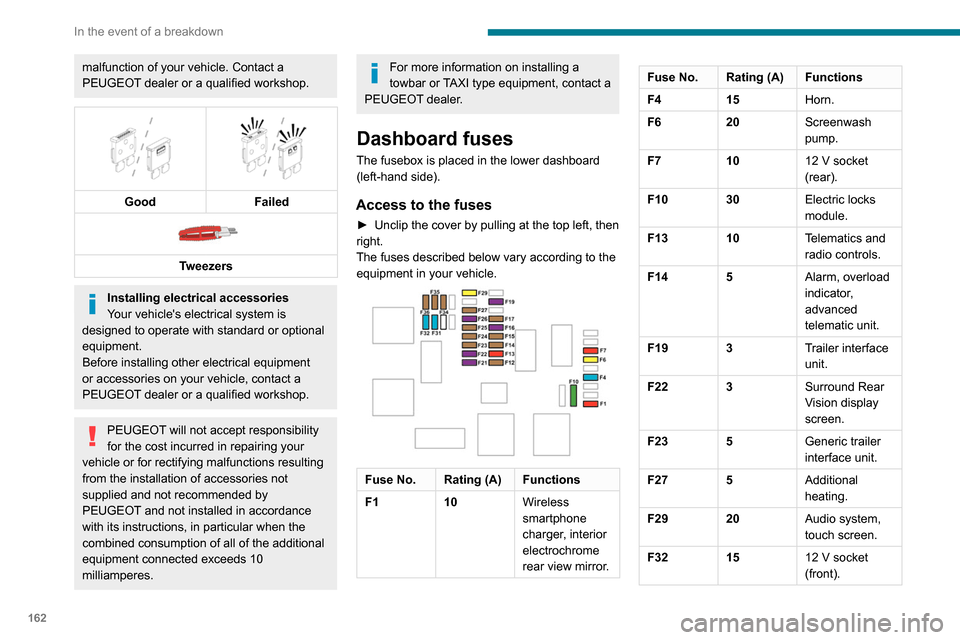
The fusebox is placed in the lower dashboard
(left-hand side).
Access to the fuses
► Unclip the cover by pulling at the top left, then
right.
The fuses described below vary according to the equipment in your vehicle.
Fuse No. Rating (A) Functions
F1 10Wireless
smartphone
charger, interior
electrochrome
rear view mirror.
Fuse No. Rating (A) Functions
F415Horn.
F6 20Screenwash
pump.
F7 1012
V socket
(rear).
F10 30 Electric locks
module.
F13 10 Telematics and
radio controls.
F14 5 Alarm, overload
indicator,
advanced
telematic unit.
F19 3 Trailer interface
unit.
F22 3 Surround Rear
Vision display
screen.
F23 5 Generic trailer
interface unit.
F27 5 Additional
heating.
F29 20 Audio system,
touch screen.
F32 15 12
V socket
(front).Fuse No. Rating (A) Functions
F34 5 Mirror control.
F36 5 USB socket.
Engine compartment fuses
The fusebox is placed in the engine
compartment near the battery.
Access to the fuses
► Release the two latches A.
► Remove the cover.
► Change the fuse.
► When you have finished, close the cover
carefully then engage the two latches A, to
ensure correct sealing of the fusebox.
Page 179 of 260
177
Bluetooth® audio system
10Bluetooth® audio system
The different functions and settings described vary according to the version
and configuration of your vehicle.
As a safety measure and because it requires sustained attention by the driver,
the pairing of a Bluetooth mobile telephone
with the Bluetooth hands-free system of your
audio system must be done with the vehicle
stationary and the ignition on.
Your audio system is coded in such a way that it will only operate in your
vehicle.
All work on the system must be carried out
exclusively by a dealer or qualified workshop,
to avoid any risk of electrocution, fire or
mechanical faults.
To avoid discharging the battery, the audio system may switch off after a few
minutes if the engine is not running.
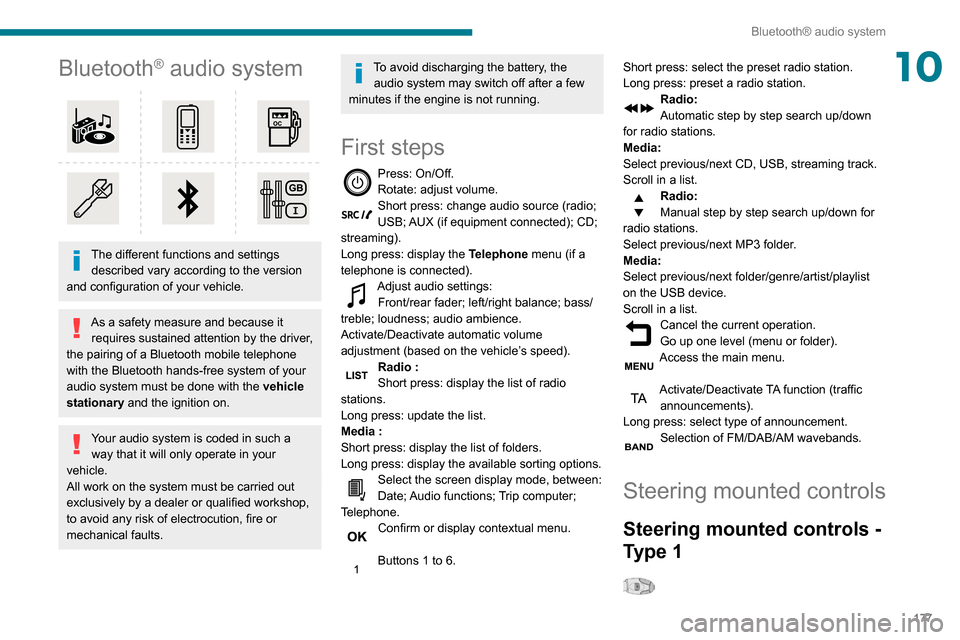
First steps
Press: On/Off.
Rotate: adjust volume.
Short press: change audio source (radio;
USB; AUX (if equipment connected); CD;
streaming).
Long press: display the Telephone menu (if a
telephone is connected).
Adjust audio settings: Front/rear fader; left/right balance; bass/
treble; loudness; audio ambience.
Activate/Deactivate automatic volume
adjustment (based on the vehicle’s speed).
Radio :
Short press: display the list of radio
stations.
Long press: update the list.
Media
:
Short press: display the list of folders.
Long press: display the available sorting options.
Select the screen display mode, between:
Date; Audio functions; Trip computer;
Telephone.
Confirm or display contextual menu.
Buttons 1 to 6. Short press: select the preset radio station.
Long press: preset a radio station.
Radio:
Automatic step by step search up/down
for radio stations.
Media:
Select previous/next CD, USB, streaming track.
Scroll in a list.
Radio:
Manual step by step search up/down for
radio stations.
Select previous/next MP3 folder.
Media:
Select previous/next folder/genre/artist/playlist
on the USB device.
Scroll in a list.
Cancel the current operation.
Go up one level (menu or folder).
Access the main menu.
Activate/Deactivate TA function (traffic announcements).
Long press: select type of announcement.
Selection of FM/DAB/AM wavebands.
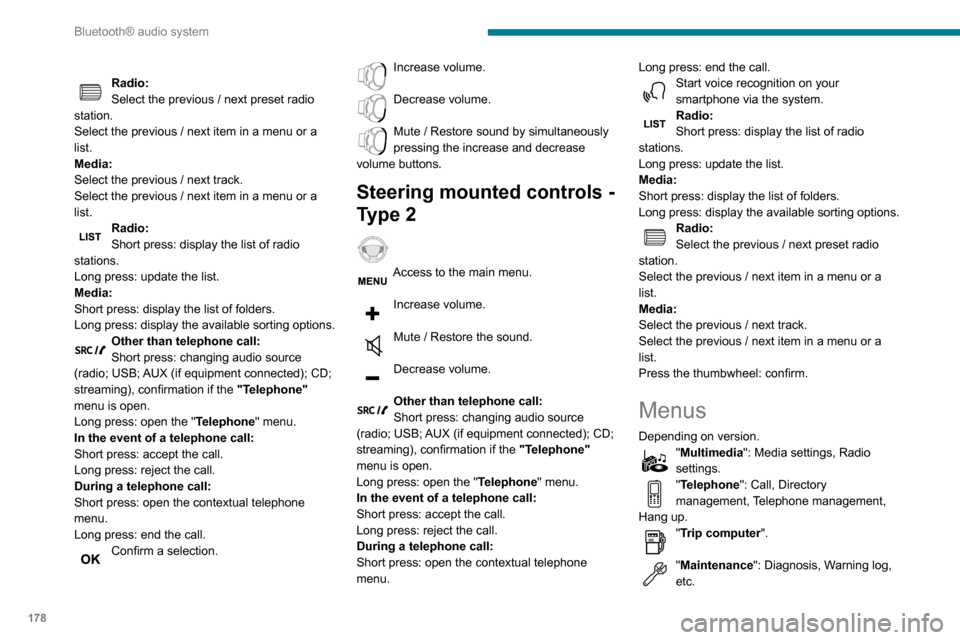
Steering mounted controls
Steering mounted controls -
Type 1
Page 180 of 260
178
Bluetooth® audio system
"Connections": Manage connections,
search for devices.
"Personalisation-configuration": Define
the vehicle parameters, Choice of
language, Display configuration, Choice of units,
Date and time adjustment.
Press the "MENU" button.
Move from one menu to another.
Enter a menu.
Radio
Selecting a station
Press the SOURCE button repeatedly
and select the radio.
Press this button to select a waveband
(FM / AM / DAB).
Press one of the buttons for an automatic
search for radio stations.
Press one of the buttons to carry out a
manual search up / down for radio
frequencies.
Press this button to display the list of
stations received locally.
To update this list, press for more than two
seconds. The sound is cut while updating.
Radio:
Select the previous / next preset radio
station.
Select the previous / next item in a menu or a
list.
Media:
Select the previous / next track.
Select the previous / next item in a menu or a
list.
Radio:
Short press: display the list of radio
stations.
Long press: update the list.
Media:
Short press: display the list of folders.
Long press: display the available sorting options.
Other than telephone call:
Short press: changing audio source
(radio; USB; AUX (if equipment connected); CD;
streaming), confirmation if the "Telephone"
menu is open.
Long press: open the " Telephone" menu.
In the event of a telephone call:
Short press: accept the call.
Long press: reject the call.
During a telephone call:
Short press: open the contextual telephone
menu.
Long press: end the call.
Confirm a selection.
Increase volume.
Decrease volume.
Mute / Restore sound by simultaneously
pressing the increase and decrease
volume buttons.
Steering mounted controls -
Type 2
Access to the main menu.
Increase volume.
Mute / Restore the sound.
Decrease volume.
Other than telephone call:
Short press: changing audio source
(radio; USB; AUX (if equipment connected); CD;
streaming), confirmation if the "Telephone"
menu is open.
Long press: open the " Telephone" menu.
In the event of a telephone call:
Short press: accept the call.
Long press: reject the call.
During a telephone call:
Short press: open the contextual telephone
menu. Long press: end the call.
Start voice recognition on your
smartphone via the system.
Radio:
Short press: display the list of radio
stations.
Long press: update the list.
Media:
Short press: display the list of folders.
Long press: display the available sorting options.
Radio:
Select the previous / next preset radio
station.
Select the previous / next item in a menu or a
list.
Media:
Select the previous / next track.
Select the previous / next item in a menu or a
list.
Press the thumbwheel: confirm.
Menus
Depending on version."Multimedia": Media settings, Radio
settings.
"Telephone": Call, Directory
management, Telephone management,
Hang up.
"Trip computer".
"Maintenance": Diagnosis, Warning log,
etc.
Page 184 of 260
182
Bluetooth® audio system
Press and hold one of these buttons for
fast forward or rewind.
Bluetooth® audio streaming
Streaming allows music files on the telephone to
be played via the vehicle's loudspeakers.
Connect the telephone.
(Refer to the "Pairing a Bluetooth® telephone"
section).
Activate the streaming source by pressing SOURCE.
In certain cases, play of the audio files must be
initiated from the keypad.
Audio files can be selected using the buttons on
the audio system control panel and the steering
mounted controls. The contextual information
can be displayed in the screen.
If the telephone supports the function. The audio
quality depends on the quality of transmission by
the telephone.
Connecting Apple® players
Connect the Apple® player to the USB port using
a suitable cable (not supplied).
Play starts automatically.
Control is via the audio system.
The classifications available are those of the
portable device connected (artists / albums /
genres / playlists).
The version of software in the audio system may
not be compatible with the generation of your
Apple
® player.
Select by "Folder" / " Artist" / "Genre" /
"Playlist".
Depending on availability and type of device
used.
Press OK to select the desired
classification, then press OK again to
confirm.
Playing files
Make a short press on this button to
display the chosen classification.
Navigate in the list using the left / right
and up / down buttons.
Confirm the selection by pressing OK.
Press one of these buttons to go to the
previous / next track in the list.
Press and hold one of these buttons for fast
forward or rewind.
Press one of these buttons to go to the
previous / next "Folder" / " Artist" /
"Genre" / "Playlist"* in the list.
Input AUX socket (AUX)
Depending on equipmentConnect a portable device (MP3 player,
etc.) to the auxiliary jack socket using an
audio cable (not supplied).
Any additional devices connected to the system must comply with the standard
* Depending on availability and the type of device used.
applicable to the product and/or the standard
IEC 60950-1.
Press the SOURCE button several times
in succession and select " AUX".
First adjust the volume on your portable device
(to a high level). Then adjust the volume on your
audio system. Controls are managed via the
portable device.
Do not connect the same device to both
the auxiliary jack socket and the USB
port at the same time.
CD player
Insert circular compact discs only.
Some anti-pirating systems, on original discs
or CDs copied using a personal recorder, may
cause faults which are no reflection on the
quality of the original player.
Insert a CD in the player, play begins
automatically.
External CD players connected via the
USB port are not recognised by the
system.
To play a disc which has already been inserted, press the SOURCE button
several times in succession and select " CD".
Press one of the buttons to select a track
on the CD.
Press the LIST button to display the list of
tracks on the CD.
Press and hold one of these buttons for
fast forward or rewind.
Playing an MP3 compilation
Insert an MP3 compilation in the CD player.
The audio equipment searches for all of the
music tracks, which may take anything between
a few seconds and several tens of seconds,
before play begins.
On a single disc, the CD player can read
up to 255 MP3 files spread over 8
directory levels.
However, it is advisable to keep to a limit of
two levels to reduce the access time before
the CD is played.
The folder structure is not observed during
playback.
All of the files are displayed on a single level.
To play a disc which has already been inserted, press the SOURCE button
several times in succession and select " CD".
Press one of the buttons to select a folder
on the CD.
Press one of the buttons to select a track
on the CD.
Press the LIST button to display the list of
directories of the MP3 compilation.