Display Peugeot Partner Tepee 2013 Owner's Manual
[x] Cancel search | Manufacturer: PEUGEOT, Model Year: 2013, Model line: Partner Tepee, Model: Peugeot Partner Tepee 2013Pages: 268, PDF Size: 9.88 MB
Page 19 of 268
17
1
FAMILIARISATIO
N
ECO-DRIVING
Eco-driving is a range of everyday practices that allow the motorist to optimise their fuel consumption and CO2
emissions.
Optimise the use of your
gearbox
With a manual gearbox, move off
gently, change up without waiting and
drive by changing up quite soon. If
your vehicle has the system, the gear
shift indicator invites you to change
up; it is displayed in the instrument
panel, follow its instructions.
With an automatic or electronic
gearbox, stay in Drive "D"
or
Auto "A"
, according to the type
of gearbox, without pressing
the accelerator pedal heavily or
suddenly.
Control the use of your
electrical equipment
Before moving off, if the passenger
compartment is too warm, ventilate it
by opening the windows and air vents
before using the air conditioning.
Above 30 mph (50 km/h), close the
windows and leave the air vents open.
Remember to make use of equipment
that can help keep the temperature
in the passenger compartment down
(sunroof and window blinds
…).
Switch off the headlamps and front
foglamps when the level of light does
not require their use.
Avoid running the engine before
moving off, particularly in winter; your
vehicle will warm up much faster
while driving.
Drive smoothly
Maintain a safe distance between
vehicles, use engine braking rather
than the brake pedal, and press the
accelerator progressively. These
practices contribute towards a
reduction in fuel consumption and CO
2
emissions and also helps reduce the
background traffi c noise.
If your vehicle has cruise control,
make use of the system at speeds
above 25 mph (40 km/h) when the
traffi c is fl owing well.
As a passenger, if you avoid
connecting your multimedia devices
(fi lm, music, video game
…), you
will contribute towards limiting the
consumption of electrical energy, and
so of fuel.
Disconnect your portable devices
before leaving the vehicle.
Switch off the air conditioning, unless
it has automatic digital regulation, as
soon as the desired temperature is
attained.
Switch off the demisting and
defrosting controls, if not automatic.
Switch off the heated seat as soon as
possible.
Page 31 of 268
READY TO SET OFF
22
Instruments and controls
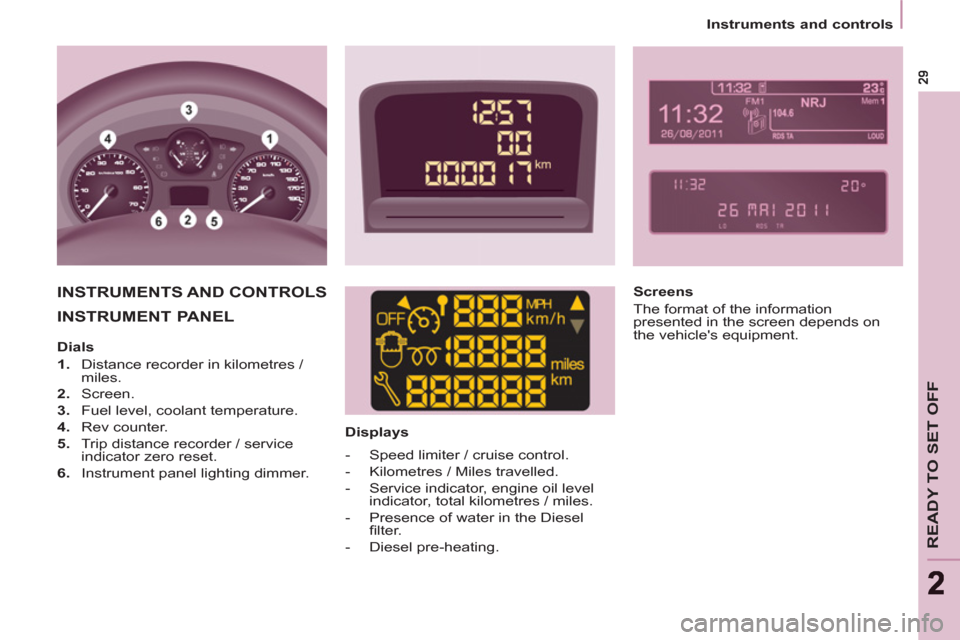
INSTRUMENT PANEL
Displays
INSTRUMENTS AND CONTROLS
Screens
The format of the information
presented in the screen depends on
the vehicle's equipment.
Dials
1.
Distance recorder in kilometres /
miles.
2.
Screen.
3.
Fuel level, coolant temperature.
4.
Rev counter.
5.
Trip distance recorder / service
indicator zero reset.
6.
Instrument panel lighting dimmer.
- Speed limiter / cruise control.
- Kilometres / Miles travelled.
- Service indicator, engine oil level
indicator, total kilometres / miles.
- Presence of water in the Diesel
fi lter.
- Diesel pre-heating.
Page 32 of 268
30
Instruments and controls
Centre console with screen
Instrument panel without screen
- turn to the right to increase the
hours (hold the button to the right
for rapid scrolling),
- turn to the left: 24H or 12H is
displayed,
- turn to the right to select 24H or
12H,
- turn to the left to complete the time
adjustment.
After approximately 30 seconds
without any action, the screen returns
to the normal display.
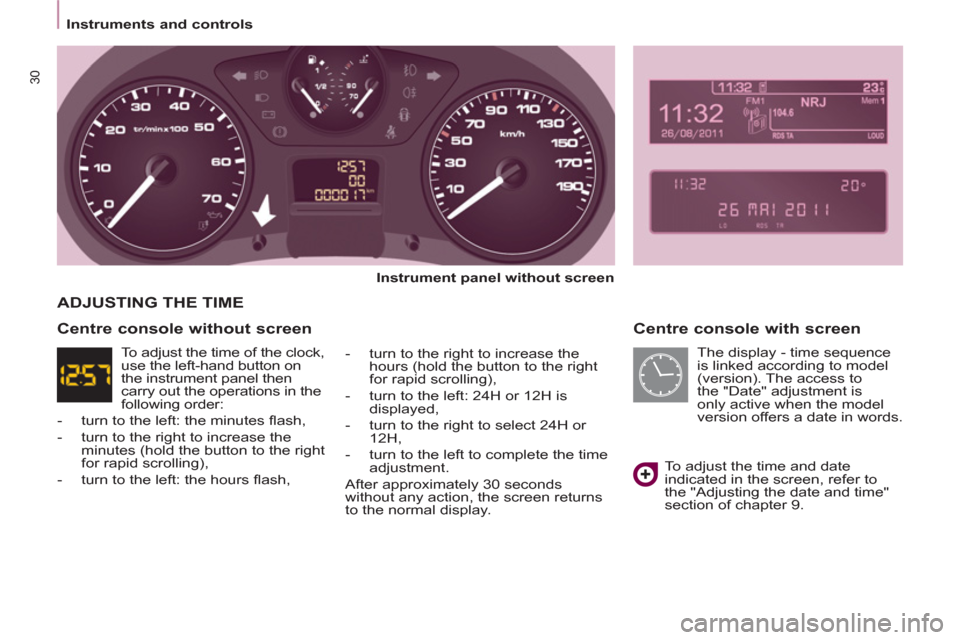
ADJUSTING THE TIME
To adjust the time and date
indicated in the screen, refer to
the "Adjusting the date and time"
section of chapter 9.
Centre console without screen
The display - time sequence
is linked according to model
(version). The access to
the "Date" adjustment is
only active when the model
version offers a date in words. To adjust the time of the clock,
use the left-hand button on
the instrument panel then
carry out the operations in the
following order:
- turn to the left: the minutes fl ash,
- turn to the right to increase the
minutes (hold the button to the right
for rapid scrolling),
- turn to the left: the hours fl ash,
Page 34 of 268
32
Instruments and controls
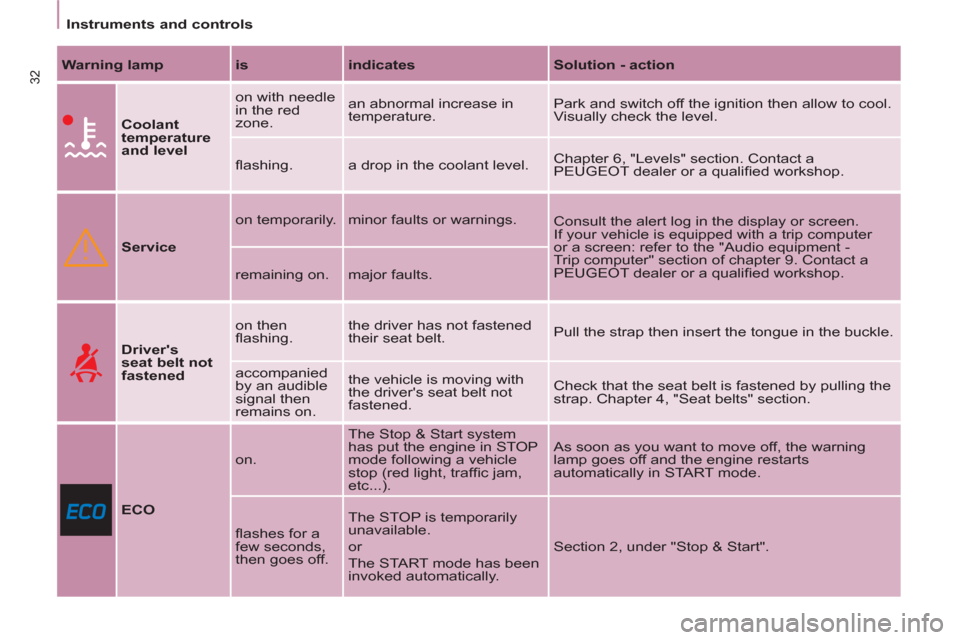
Warning lamp
is
indicates
Solution - action
Coolant
temperature
and level
on with needle
in the red
zone. an abnormal increase in
temperature. Park and switch off the ignition then allow to cool.
Visually check the level.
fl ashing. a drop in the coolant level. Chapter 6, "Levels" section. Contact a
PEUGEOT dealer or a qualifi ed workshop.
Service
on temporarily. minor faults or warnings.
Consult the alert log in the display or screen.
If your vehicle is equipped with a trip computer
or a screen: refer to the "Audio equipment -
Trip computer" section of chapter 9. Contact a
PEUGEOT dealer or a qualifi ed workshop.
remaining on. major faults.
Driver's
seat belt not
fastened
on then
fl ashing. the driver has not fastened
their seat belt. Pull the strap then insert the tongue in the buckle.
accompanied
by an audible
signal then
remains on. the vehicle is moving with
the driver's seat belt not
fastened. Check that the seat belt is fastened by pulling the
strap. Chapter 4, "Seat belts" section.
ECO
on. The Stop & Start system
has put the engine in STOP
mode following a vehicle
stop (red light, traffi c jam,
etc...). As soon as you want to move off, the warning
lamp goes off and the engine restarts
automatically in START mode.
fl ashes for a
few seconds,
then goes off. The STOP is temporarily
unavailable.
or
The START mode has been
invoked automatically. Section 2, under "Stop & Start".
Page 41 of 268
39
READY TO SET OFF
22
Instruments and controls
SERVICE INDICATOR
This programmes service intervals
according to the use of the vehicle.
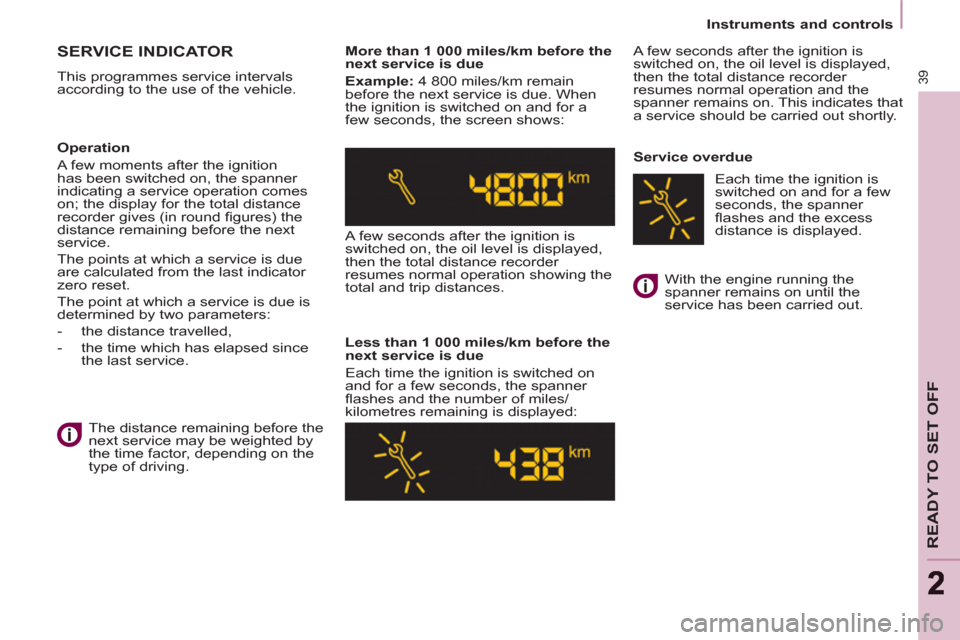
More than 1 000 miles/km before the
next service is due
Example:
4 800 miles/km remain
before the next service is due. When
the ignition is switched on and for a
few seconds, the screen shows:
A few seconds after the ignition is
switched on, the oil level is displayed,
then the total distance recorder
resumes normal operation showing the
total and trip distances.
Less than 1 000 miles/km before the
next service is due
Each time the ignition is switched on
and for a few seconds, the spanner
fl ashes and the number of miles/
kilometres remaining is displayed: A few seconds after the ignition is
switched on, the oil level is displayed,
then the total distance recorder
resumes normal operation and the
spanner remains on. This indicates that
a service should be carried out shortly.
Service overdue
Operation
A few moments after the ignition
has been switched on, the spanner
indicating a service operation comes
on; the display for the total distance
recorder gives (in round fi gures) the
distance remaining before the next
service.
The points at which a service is due
are calculated from the last indicator
zero reset.
The point at which a service is due is
determined by two parameters:
- the distance travelled,
- the time which has elapsed since
the last service.
The distance remaining before the
next service may be weighted by
the time factor, depending on the
type of driving. With the engine running the
spanner remains on until the
service has been carried out.
Each time the ignition is
switched on and for a few
seconds, the spanner
fl ashes and the excess
distance is displayed.
Page 42 of 268
40
Instruments and controls
Trip recorder zero reset button
After this operation, if you wish to
disconnect the battery, lock the
vehicle and wait for at least fi ve
minutes, otherwise the zero re-set will
not be registered.
Zero re-set
Your PEUGEOT dealer or a qualifi ed
workshop carries out this operation
after each service.
However, if you carry out the service
yourself, the re-set procedure is as
follows:
- switch off the ignition,
- press and hold the trip recorder
reset button,
- switch on the ignition.
The display begins a countdown.
When the display shows "=0"
, release
the button; the spanner disappears.
Engine oil level indicator
When the ignition is switched on, the
engine oil level is indicated for a few
seconds, after the service information.
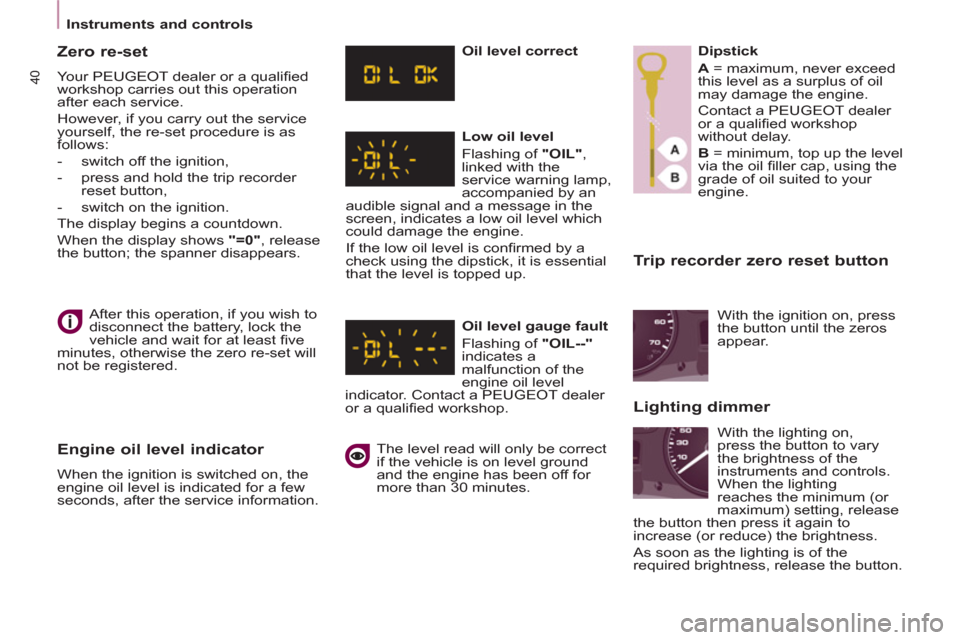
Oil level correct
Low oil level
Flashing of "OIL"
,
linked with the
service warning lamp,
accompanied by an
audible signal and a message in the
screen, indicates a low oil level which
could damage the engine.
If the low oil level is confi rmed by a
check using the dipstick, it is essential
that the level is topped up.
Oil level gauge fault
Flashing of "OIL--"
indicates a
malfunction of the
engine oil level
indicator. Contact a PEUGEOT dealer
or a qualifi ed workshop.
The level read will only be correct
if the vehicle is on level ground
and the engine has been off for
more than 30 minutes.
Dipstick
A
= maximum, never exceed
this level as a surplus of oil
may damage the engine.
Contact a PEUGEOT dealer
or a qualifi ed workshop
without delay.
B
= minimum, top up the level
via the oil fi ller cap, using the
grade of oil suited to your
engine.
Lighting dimmer
With the ignition on, press
the button until the zeros
appear.
With the lighting on,
press the button to vary
the brightness of the
instruments and controls.
When the lighting
reaches the minimum (or
maximum) setting, release
the button then press it again to
increase (or reduce) the brightness.
As soon as the lighting is of the
required brightness, release the button.
Page 48 of 268
46
Stop & Start
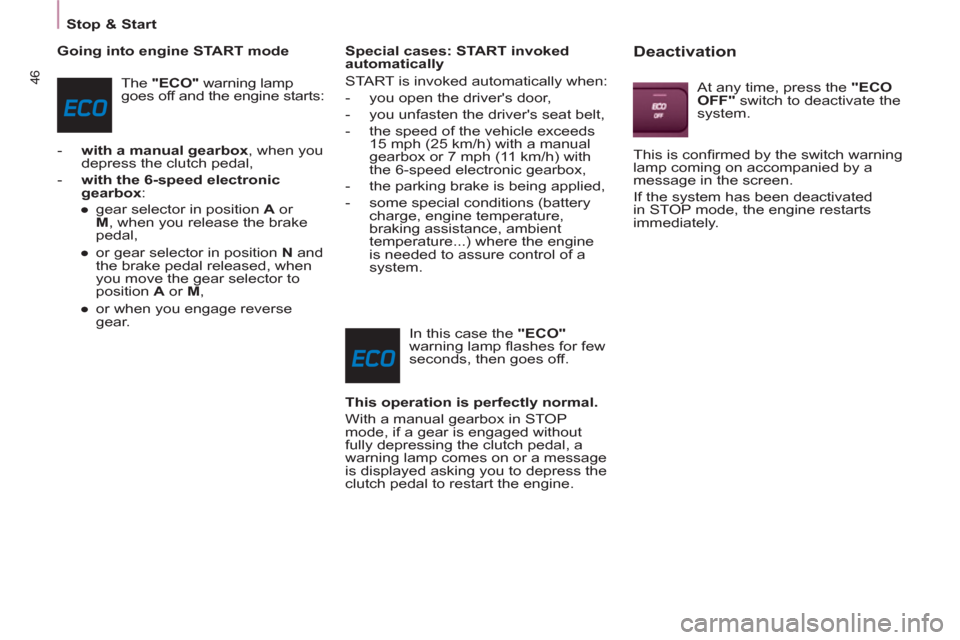
Going into engine START mode
The "ECO"
warning lamp
goes off and the engine starts:
- with a manual gearbox
, when you
depress the clutch pedal,
- with the 6-speed electronic
gearbox
:
●
gear selector in position A
or
M
, when you release the brake
pedal,
●
or gear selector in position N
and
the brake pedal released, when
you move the gear selector to
position A
or M
,
●
or when you engage reverse
gear.
Special cases: START invoked
automatically
START is invoked automatically when:
- you open the driver's door,
- you unfasten the driver's seat belt,
- the speed of the vehicle exceeds
15 mph (25 km/h) with a manual
gearbox or 7 mph (11 km/h) with
the 6-speed electronic gearbox,
- the parking brake is being applied,
- some special conditions (battery
charge, engine temperature,
braking assistance, ambient
temperature...) where the engine
is needed to assure control of a
system.
In this case the "ECO"
warning lamp fl ashes for few
seconds, then goes off.
This operation is perfectly normal.
With a manual gearbox in STOP
mode, if a gear is engaged without
fully depressing the clutch pedal, a
warning lamp comes on or a message
is displayed asking you to depress the
clutch pedal to restart the engine.
Deactivation
At any time, press the "ECO
OFF"
switch to deactivate the
system.
This is confi rmed by the switch warning
lamp coming on accompanied by a
message in the screen.
If the system has been deactivated
in STOP mode, the engine restarts
immediately.
Page 57 of 268
55
Steering mounted controls
EASE OF
USE and
COMFOR
T
3
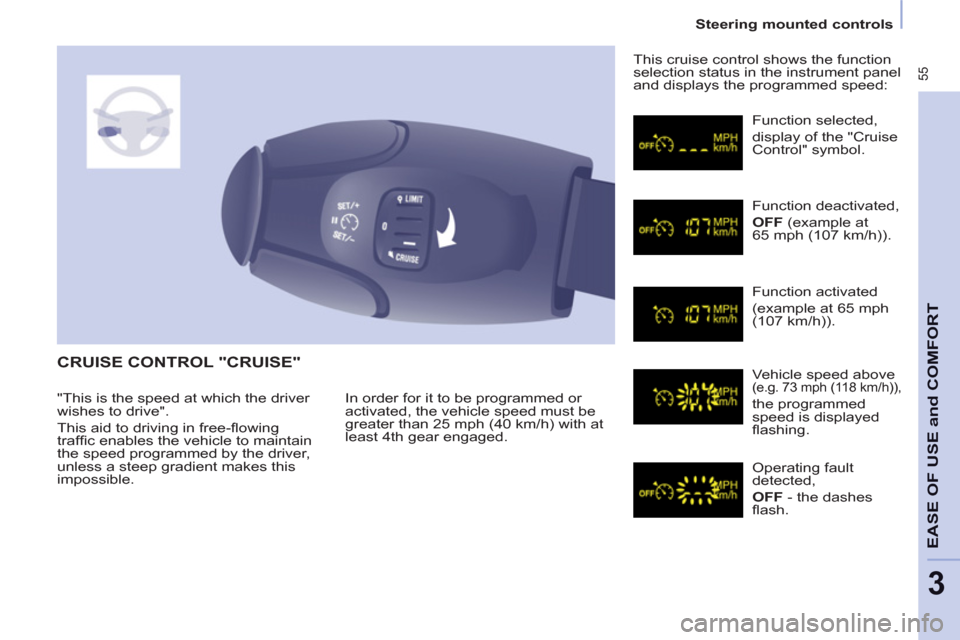
CRUISE CONTROL "CRUISE"
In order for it to be programmed or
activated, the vehicle speed must be
greater than 25 mph (40 km/h) with at
least 4th gear engaged. This cruise control shows the function
selection status in the instrument panel
and displays the programmed speed:
Function selected,
display of the "Cruise
Control" symbol.
Function deactivated,
OFF
(example at
65 mph (107 km/h)).
Function activated
(example at 65 mph
(107 km/h)).
Vehicle speed above (e.g. 73 mph (118 km/h)),
the programmed
speed is displayed
fl ashing.
Operating fault
detected,
OFF
- the dashes
fl ash. "This is the speed at which the driver
wishes to drive".
This aid to driving in free-fl owing
traffi c enables the vehicle to maintain
the speed programmed by the driver,
unless a steep gradient makes this
impossible.
Page 60 of 268
58
Steering mounted controls
However, pressing the pedal beyond
this point of resistance to the fl oor
allows the programmed speed to be
exceeded. To resume use of the limiter,
simply reduce the pressure on the
accelerator pedal gradually and return
to a speed below that programmed.
The operating actions may be
carried out when stationary, with the
engine running, or with the vehicle
moving.
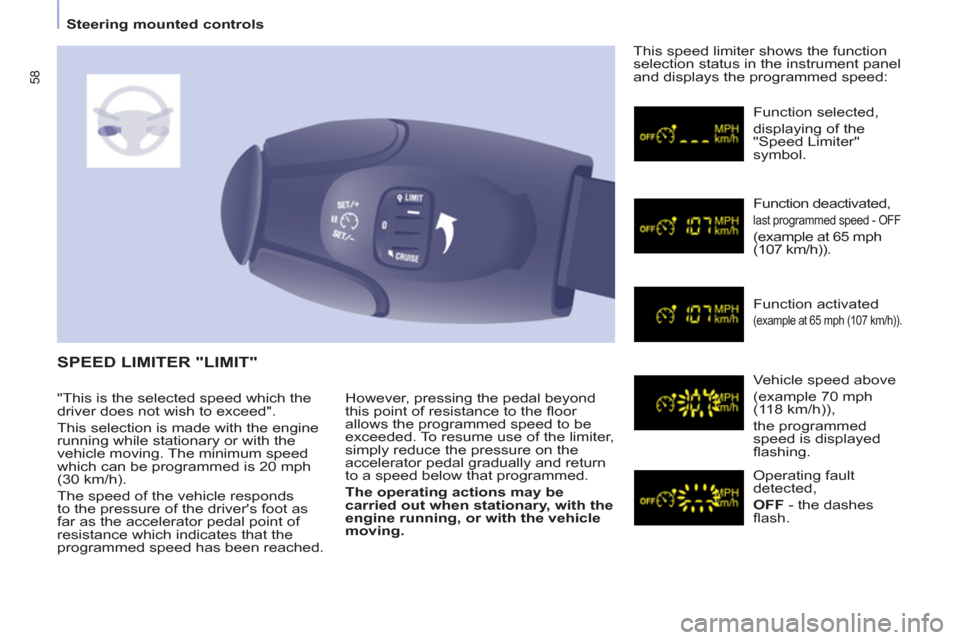
This speed limiter shows the function
selection status in the instrument panel
and displays the programmed speed:
SPEED LIMITER "LIMIT"
Function selected,
displaying of the
"Speed Limiter"
symbol.
Function deactivated,
last programmed speed - OFF
(example at 65 mph
(107 km/h)).
Function activated
(example at 65 mph (107 km/h)).
Vehicle speed above
(example 70 mph
(118 km/h)),
the programmed
speed is displayed
fl ashing.
Operating fault
detected,
OFF
- the dashes
fl ash. "This is the selected speed which the
driver does not wish to exceed".
This selection is made with the engine
running while stationary or with the
vehicle moving. The minimum speed
which can be programmed is 20 mph
(30 km/h).
The speed of the vehicle responds
to the pressure of the driver's foot as
far as the accelerator pedal point of
resistance which indicates that the
programmed speed has been reached.
Page 65 of 268
63
EASE OF
USE and
COMFOR
T
3
Ventilation
Good practice
For maximum cooling or heating of the
passenger compartment, it is possible
to exceed the value 15 by turning until
LO is displayed or the value 27 by
turning until HI is displayed.
On entering the vehicle, the inside
temperature may be much colder (or
warmer) than is comfortable. There is
no advantage in changing the value
displayed in order to quickly reach the
level of comfort required. The system
will use its maximum performance to
reach the comfort value set.
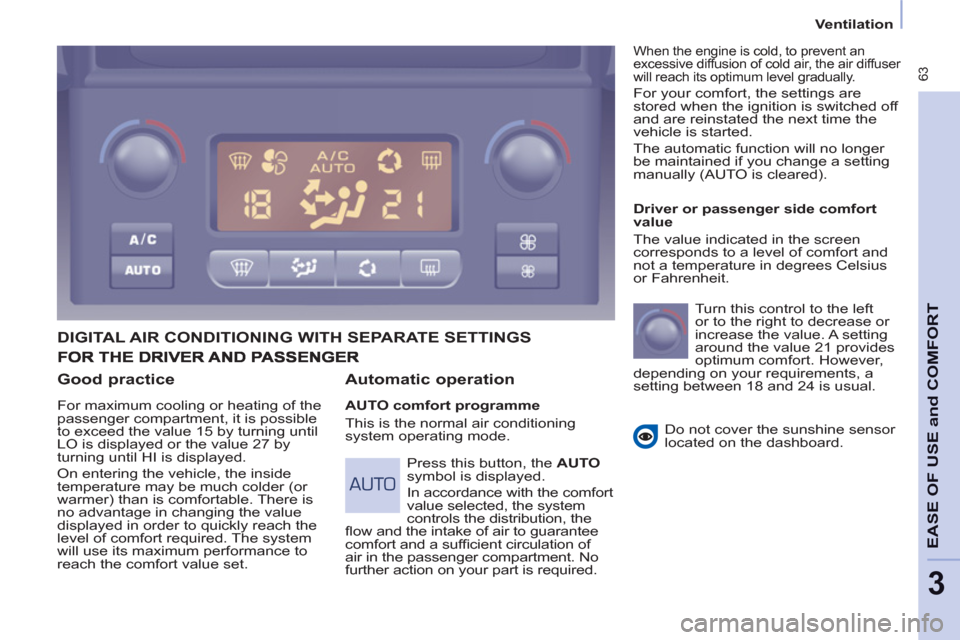
DIGITAL AIR CONDITIONING WITH SEPARATE SETTINGS
Automatic operation
AUTO comfort programme
This is the normal air conditioning
system operating mode.
Driver or passenger side comfort
value
The value indicated in the screen
corresponds to a level of comfort and
not a temperature in degrees Celsius
or Fahrenheit.
Turn this control to the left
or to the right to decrease or
increase the value. A setting
around the value 21 provides
optimum comfort. However,
depending on your requirements, a
setting between 18 and 24 is usual.
Do not cover the sunshine sensor
located on the dashboard.
Press this button, the AUTO
symbol is displayed.
In accordance with the comfort
value selected, the system
controls the distribution, the
fl ow and the intake of air to guarantee
comfort and a suffi cient circulation of
air in the passenger compartment. No
further action on your part is required.
When the engine is cold, to prevent an
excessive diffusion of cold air, the air diffuser
will reach its optimum level gradually.
For your comfort, the settings are
stored when the ignition is switched off
and are reinstated the next time the
vehicle is started.
The automatic function will no longer
be maintained if you change a setting
manually (AUTO is cleared).