door lock Peugeot Partner Tepee 2017 User Guide
[x] Cancel search | Manufacturer: PEUGEOT, Model Year: 2017, Model line: Partner Tepee, Model: Peugeot Partner Tepee 2017Pages: 292, PDF Size: 10.49 MB
Page 27 of 292
25
Partner2VP_en_Chap03_Pret-a-partir_ed02-2016
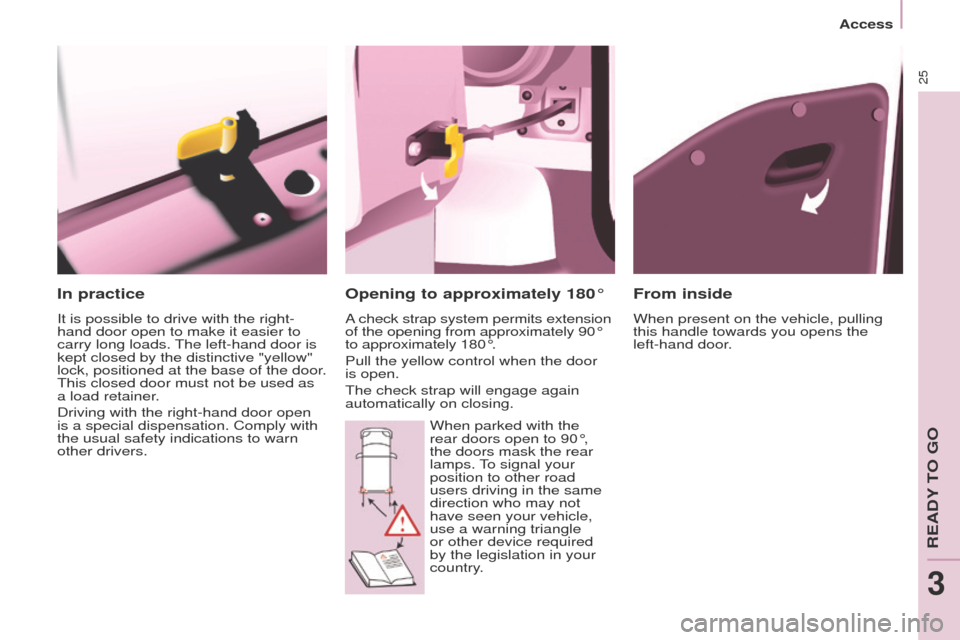
In practice
It is possible to drive with the right-
hand door open to make it easier to
carry long loads. The left-hand door is
kept closed by the distinctive "yellow"
lock, positioned at the base of the door.
This closed door must not be used as
a load retainer.
Driving with the right-hand door open
is a special dispensation. Comply with
the usual safety indications to warn
other drivers.
From inside
When present on the vehicle, pulling
this handle towards you opens the
left-hand door.
Opening to approximately 180°
A check strap system permits extension
of the opening from approximately 90°
to approximately 180°.
Pull the yellow control when the door
is open.
The check strap will engage again
automatically on closing.When parked with the
rear doors open to 90°,
the doors mask the rear
lamps. To signal your
position to other road
users driving in the same
direction who may not
have seen your vehicle,
use a warning triangle
or other device required
by the legislation in your
country.
Access
READY TO GO
3
Page 28 of 292
26
Partner2VP_en_Chap03_Pret-a-partir_ed02-2016
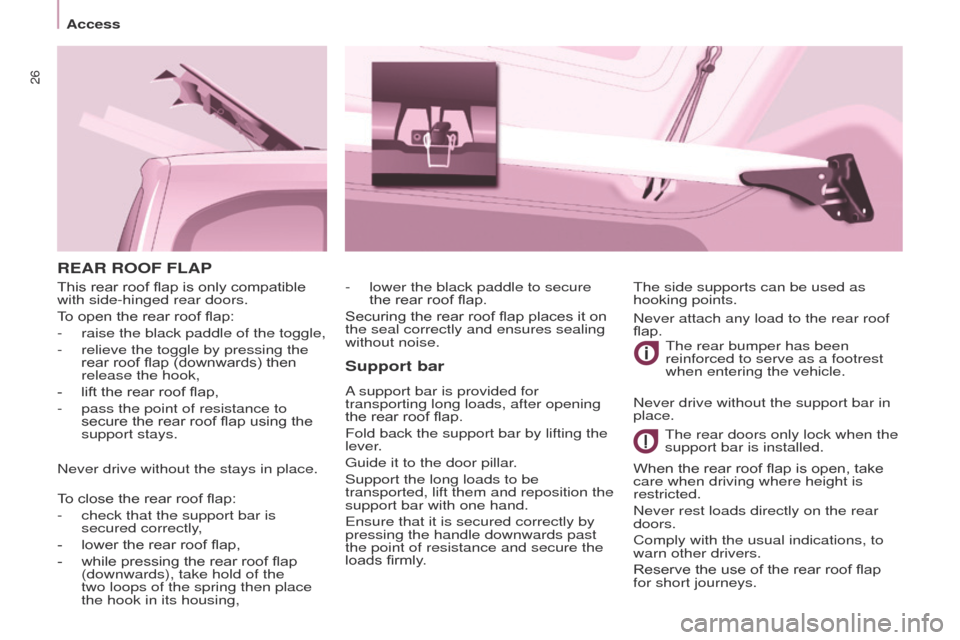
REAR ROOF FLAP
Support bar
A support bar is provided for
transporting long loads, after opening
the rear roof flap.
Fold back the support bar by lifting the
lever.
Guide it to the door pillar.
Support the long loads to be
transported, lift them and reposition the
support bar with one hand.
Ensure that it is secured correctly by
pressing the handle downwards past
the point of resistance and secure the
loads firmly.The rear bumper has been
reinforced to serve as a footrest
when entering the vehicle.
The rear doors only lock when the
support bar is installed.
When the rear roof flap is open, take
care when driving where height is
restricted.
Never rest loads directly on the rear
doors.
Comply with the usual indications, to
warn other drivers.
Reserve the use of the rear roof flap
for short journeys. The side supports can be used as
hooking points.
-
lower the black paddle to secure
the rear roof flap.
Securing the rear roof flap places it on
the seal correctly and ensures sealing
without noise.
This rear roof flap is only compatible
with side-hinged rear doors.
T
o open the rear roof flap:
-
raise the black paddle of the toggle,
-
relieve the toggle by pressing the
rear roof flap (downwards) then
release the hook,
-
lift the rear roof flap,
-
pass the point of resistance to
secure the rear roof flap using the
support stays.
Never drive without the stays in place.
T
o close the rear roof flap:
-
check that the support bar is
secured correctly
,
-
lower the rear roof flap,
-
while pressing the rear roof flap
(downwards), take hold of the
two
loops of the spring then place
the hook in its housing, Never attach any load to the rear roof
flap.
Never drive without the support bar in
place.
Access
Page 29 of 292
27
Partner2VP_en_Chap03_Pret-a-partir_ed02-2016
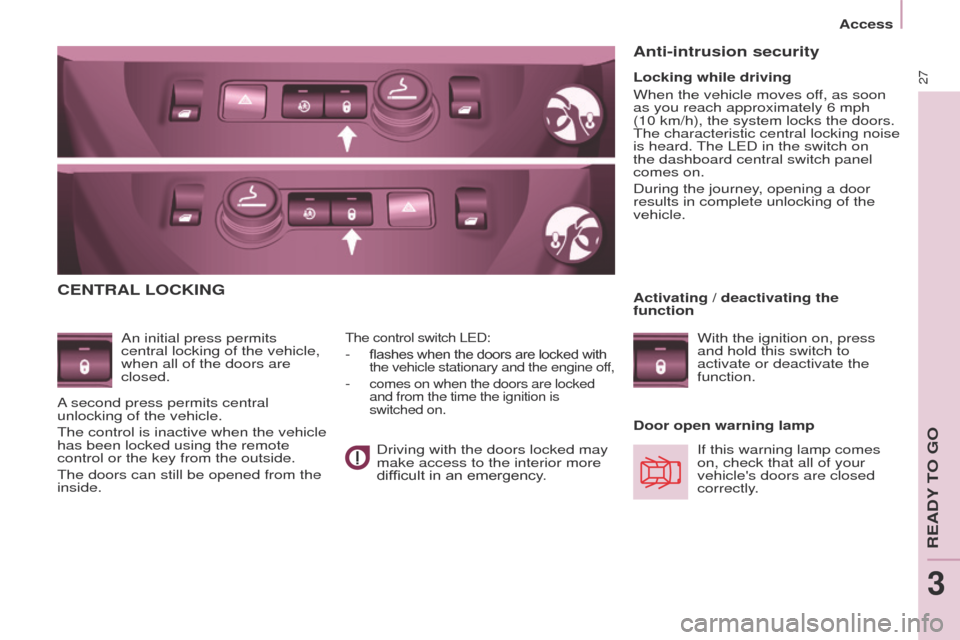
CENTRAL LOCKING
An initial press permits
central locking of the vehicle,
when all of the doors are
closed.
Door open warning lampThe control switch LED:
- flashes when the doors are locked with
the vehicle stationary and the engine off,
- comes on when the doors are locked
and from the time the ignition is
switched on.
Anti-intrusion security
If this warning lamp comes
on, check that all of your
vehicle's doors are closed
correctly.
Locking while driving
When the vehicle moves off, as soon
as you reach approximately 6 mph
(10
km/h), the system locks the doors.
The characteristic central locking noise
is heard. The LED in the switch on
the dashboard central switch panel
comes
on.
During the journey, opening a door
results in complete unlocking of the
vehicle.
Activating / deactivating the
function
With the ignition on, press
and hold this switch to
activate or deactivate the
function.
Driving with the doors locked may
make access to the interior more
difficult in an emergency.
A second press permits central
unlocking of the vehicle.
The control is inactive when the vehicle
has been locked using the remote
control or the key from the outside.
The doors can still be opened from the
inside.
Access
READY TO GO
3
Page 37 of 292
+
ABS
35
Partner2VP_en_Chap03_Pret-a-partir_ed02-2016Partner2VP_en_Chap03_Pret-a-partir_ed02-2016
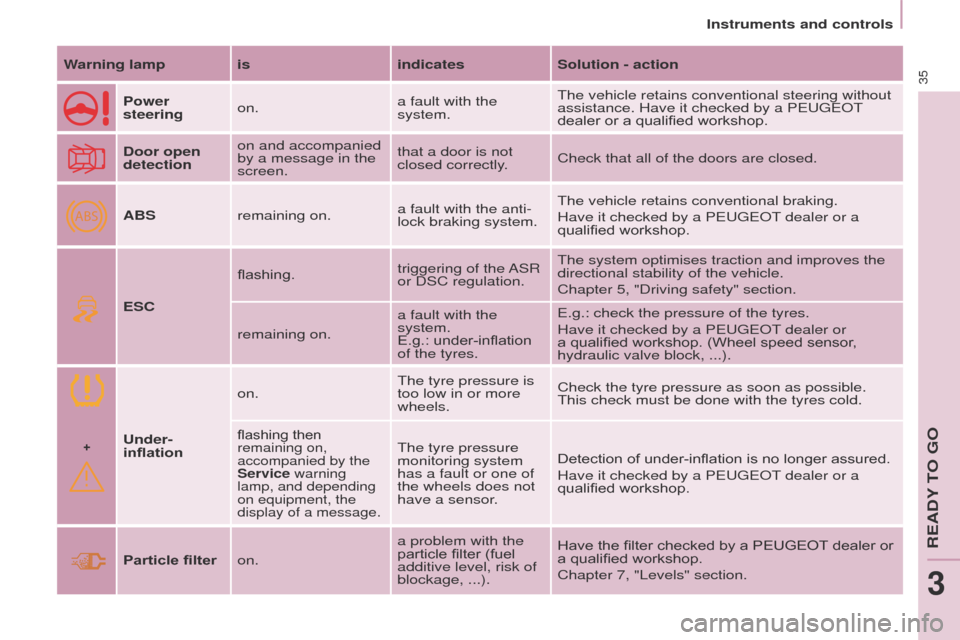
Warning lamp isindicatesSolution - action
Power
steering on. a fault with the
system.The vehicle retains conventional steering without
assistance. Have it checked by a PEUGEOT
dealer or a qualified workshop.
Door open
detection on and accompanied
by a message in the
screen. that a door is not
closed correctly.
Check that all of the doors are closed.
ABS remaining on. a fault with the anti-
lock braking system.The vehicle retains conventional braking.
Have it checked by a PEUGEOT dealer or a
qualified workshop.
ESC flashing.
triggering of the ASR
or DSC regulation.The system optimises traction and improves the
directional stability of the vehicle.
Chapter 5, "Driving safety" section.
remaining on. a fault with the
system.
E.g.: under-inflation
of the tyres.E.g.: check the pressure of the tyres.
Have it checked by a PEUGEOT dealer or
a qualified workshop. (Wheel speed sensor,
hydraulic valve block,
...).
Under-
inflation on.
The tyre pressure is
too low in or more
wheels.Check the tyre pressure as soon as possible.
This check must be done with the tyres cold.
flashing then
remaining on,
accompanied by the
Service warning
lamp, and depending
on equipment, the
display of a message.The tyre pressure
monitoring system
has a fault or one of
the wheels does not
have a sensor.Detection of under-inflation is no longer assured.
Have it checked by a PEUGEOT dealer or a
qualified workshop.
Particle filter on. a problem with the
particle filter (fuel
additive level, risk of
blockage,
...). Have the filter checked by a PEUGEOT dealer or
a qualified workshop.
Chapter 7, "Levels" section.
READY TO GO
3
Instruments and controls
Page 57 of 292
55
Partner2VP_en_Chap03_Pret-a-partir_ed02-2016Partner2VP_en_Chap03_Pret-a-partir_ed02-2016
The Stop & Start system
requires a battery of specific
characteristics. All work on this
type of battery must be done only
by a PEUGEOT dealer or a qualified
workshop.
For more information on the 12 V
battery, refer to "Battery" in section 8.
Good practice when stopping Good practice when starting
Diesel pre-heating warning
lamp
If the temperature is high
enough, the warning lamp
comes on for less than
one
second, you can start
without waiting.
In cold weather, wait for this warning
lamp to go off then operate the starter
(Starting position) until the engine
starts.
Door or bonnet open warning lamp
If this comes on, a door or
the bonnet is not closed
correctly, check!
Minimise engine and gearbox wear
When switching off the ignition, let the
engine run for a few seconds to allow
the turbocharger (Diesel engine) to
return to idle.
Do not press the accelerator when
switching off the ignition.
There is no need to engage a gear
after parking the vehicle.
STARTING AND ST OPPING
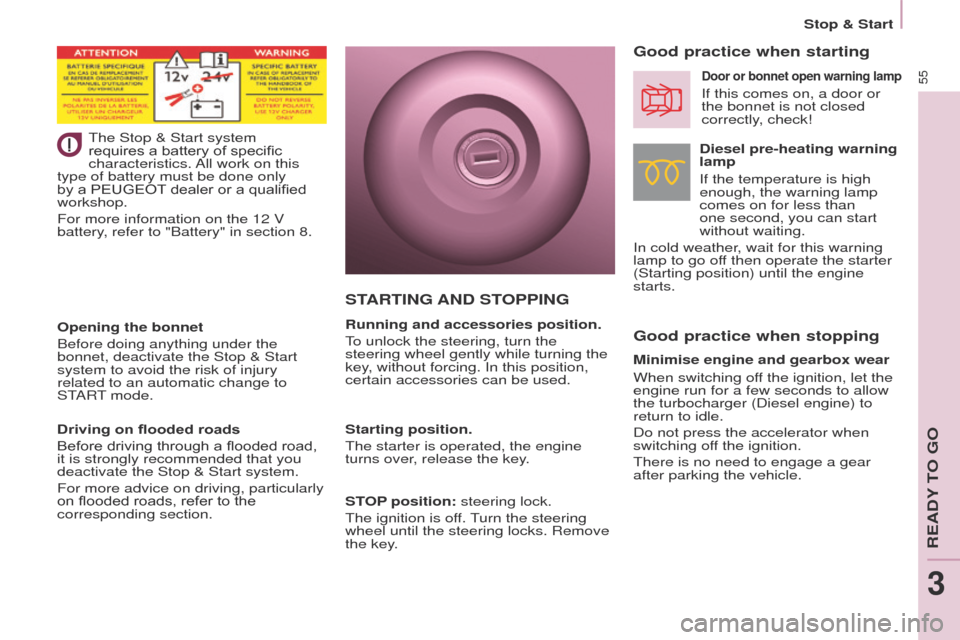
Running and accessories position.
To unlock the steering, turn the
steering wheel gently while turning the
key, without forcing. In this position,
certain accessories can be used.
Starting position.
The starter is operated, the engine
turns over, release the key.
STOP position: steering lock.
The ignition is off. Turn the steering
wheel until the steering locks. Remove
the key.
Opening the bonnet
Before doing anything under the
bonnet, deactivate the Stop & Start
system to avoid the risk of injury
related to an automatic change to
START mode.
Driving on flooded roads
Before driving through a flooded road,
it is strongly recommended that you
deactivate the Stop & Start system.
For more advice on driving, particularly
on flooded roads, refer to the
corresponding section.
READY TO GO
3
Stop & Start
Page 105 of 292
103
Partner2VP_en_Chap04_Ergonomie_ed02-2016Partner2VP_en_Chap04_Ergonomie_ed02-2016
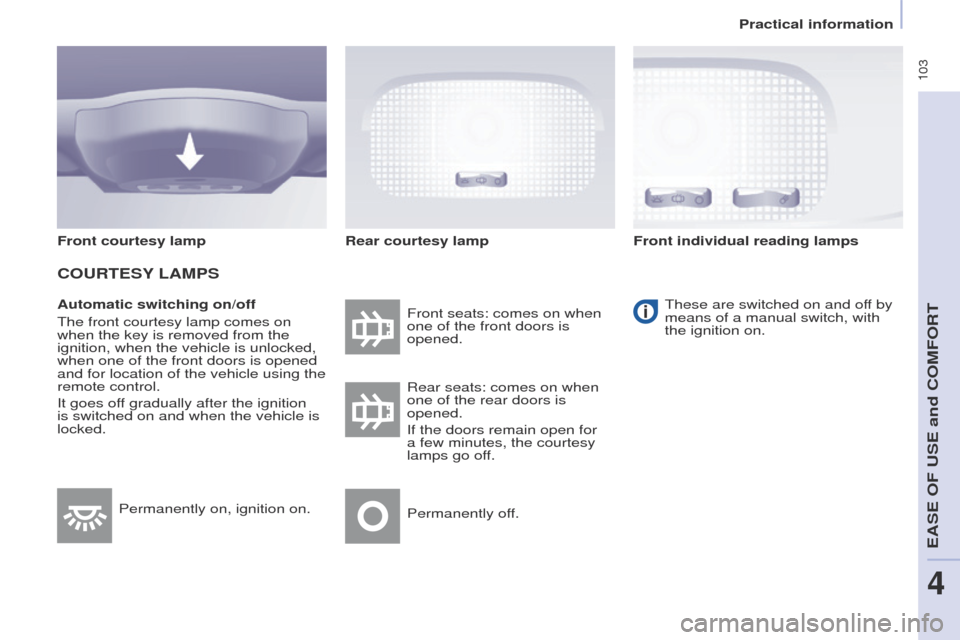
Automatic switching on/off
The front courtesy lamp comes on
when the key is removed from the
ignition, when the vehicle is unlocked,
when one of the front doors is opened
and for location of the vehicle using the
remote control.
It goes off gradually after the ignition
is switched on and when the vehicle is
locked.Front seats: comes on when
one of the front doors is
opened.
These are switched on and off by
means of a manual switch, with
the ignition on.
Rear seats: comes on when
one of the rear doors is
opened.
If the doors remain open for
a few minutes, the courtesy
lamps go off.
Permanently off.
Permanently on, ignition on.
Front courtesy lamp
COURTESY
LAMPS
Rear courtesy lamp Front individual reading lamps
EASE OF USE and COMFORT
4
Practical information
Page 148 of 292
146
Partner2VP_en_Chap05_Securite_ed02-2016
146
Partner2VP_en_Chap05_Securite_ed02-2016
ADVICE ON CHILD SEATS
At the rear, always leave sufficient
space between the front seat and:
-
a rearward facing child seat,
-
the feet of a child seated in a
forward facing child seat.
For this, move the front seat forward
and, if necessary
, straighten its
backrest as well. The incorrect installation of a child seat
in a vehicle compromises the child's
protection in the event of an accident.
Check that there is no seat belt or seat
belt buckle under the child seat, as this
could destabilise the seat.
Remember to fasten the seat belts or
the child seat harnesses keeping the
slack relative to the child's body to a
minimum, even for short journeys.
For the installation of a child seat using
the seat belt, ensure that the seat belt
is well tensioned on the child seat
and that it is holding the child seat
firmly against the vehicle's seat. If the
passenger seat is adjustable, move it
forward if necessary. For the optimum installation of a
forward facing child seat, ensure that
the back of the child seat is as close as
possible to the backrest of the vehicle's
seat, or in contact if possible.
The head restraint must be removed
before installing a child seat with a
backrest on the passenger seat.
Ensure that the head restraint is
stowed or attached securely so that it
is not thrown around the vehicle in the
event of sharp braking.
Refit the head restraint as soon as the
child seat is removed.Children at the front
The legislation on carrying a child on
the front passenger seat is specific to
each country. Refer to the legislation in
force in your country.
Deactivate the passenger's airbag
when a rearward facing child seat is
installed on the front seat.
Otherwise, the child would risk being
seriously injured or killed if the airbag
were deployed.
Installing a booster seat
The chest part of the seat belt must
be positioned on the child's shoulder
without touching the neck.
Ensure that the lap part of the seat belt
passes correctly over the child's thighs.
PEUGEOT recommends the use of a
booster seat which has a back, fitted
with a seat belt guide at shoulder level.
As a safety precaution, never leave:
-
one or more children alone and
unsupervised in a vehicle,
-
a child or an animal in a vehicle
which is exposed to the sun, with
the windows closed,
-
the keys within reach of children
inside the vehicle.
T
o prevent accidental opening of the
doors, use the "Child Lock".
Take care not to open the rear windows
by more than one third.
To protect young children from the rays
of the sun, fit side blinds to the rear
windows.
For an installation in row 3, put the
backrests of the outer and centre
seats in row 2 in the table position, or
remove these seats in row 2, so that
the child seat or the child's legs do not
touch the seats in row 2.
Child safety
Page 149 of 292
147
Partner2VP_en_Chap05_Securite_ed02-2016
147
Partner2VP_en_Chap05_Securite_ed02-2016
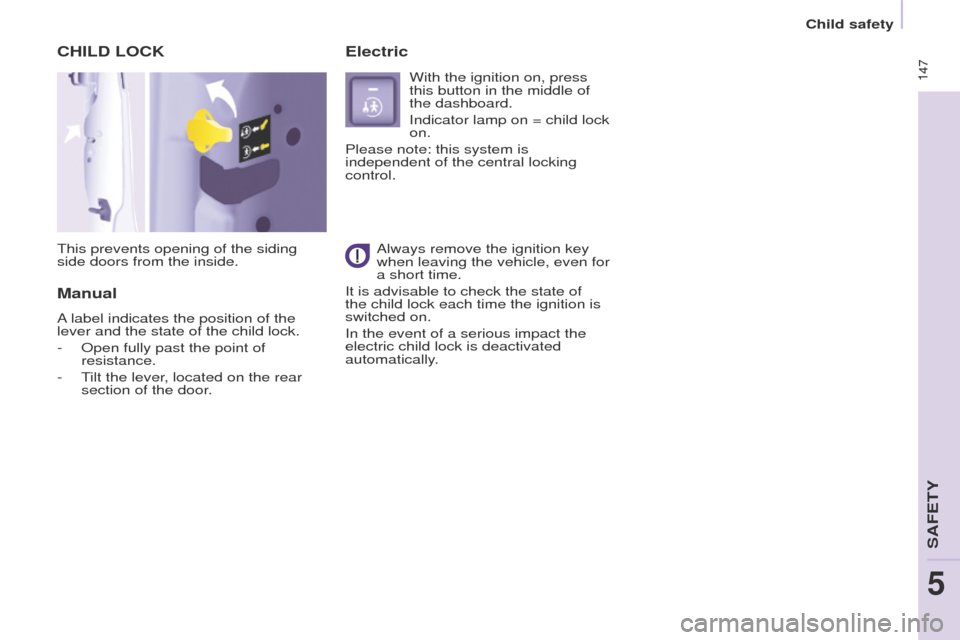
CHILD LOCK
This prevents opening of the siding
side doors from the inside.
ManualElectric
With the ignition on, press
this button in the middle of
the dashboard.
Indicator lamp on = child lock
on.
Please note: this system is
independent of the central locking
control.
Always remove the ignition key
when leaving the vehicle, even for
a short time.
It is advisable to check the state of
the child lock each time the ignition is
switched on.
In the event of a serious impact the
electric child lock is deactivated
automatically.
A label indicates the position of the
lever and the state of the child lock.
-
Open fully past the point of
resistance.
-
T
ilt the lever, located on the rear
section of the door.
SAFETY
5
Child safety
Page 163 of 292
161
Partner2VP_en_Chap07_Verification_ed02-2016Partner2VP_en_Chap07_Verification_ed02-2016
REFUELLING
Low fuel level
Filling
The fuel tank must be filled with the
engine off.
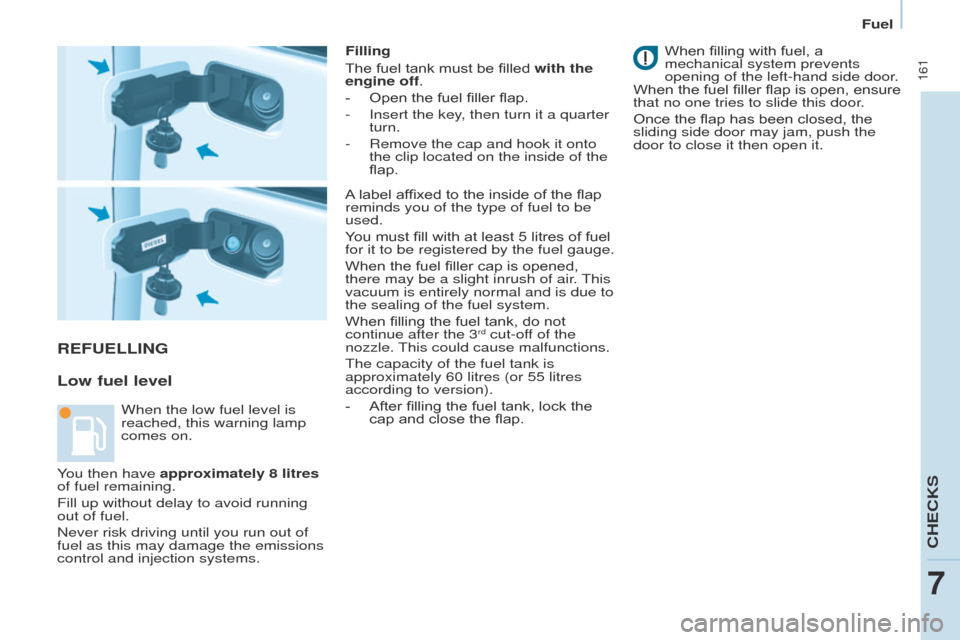
-
Open the fuel filler flap.
-
Insert the key
, then turn it a quarter
turn.
-
Remove the cap and hook it onto
the clip located on the inside of the
flap. When fillin
g with fuel, a
mechanical system prevents
opening of the left-hand side door.
When the fuel filler flap is open, ensure
that no one tries to slide this door.
Once the flap has been closed, the
sliding side door may jam, push the
door to close it then open it.
When the low fuel level is
reached, this warning lamp
comes on. A label affixed to the inside of the flap
reminds you of the type of fuel to be
used.
You must fill with at least 5 litres of fuel
for it to be registered by the fuel gauge.
When the fuel filler cap is opened,
there may be a slight inrush of air. This
vacuum is entirely normal and is due to
the sealing of the fuel system.
When filling the fuel tank, do not
continue after the 3
rd cut-off of the
nozzle. This could cause malfunctions.
The capacity of the fuel tank is
approximately 60 litres (or 55 litres
according to version).
-
After fillin
g the fuel tank, lock the
cap and close the flap.
You then have approximately 8 litres
of fuel remaining.
Fill up without delay to avoid running
out of fuel.
Never risk driving until you run out of
fuel as this may damage the emissions
control and injection systems.
CHECKS
7
Fuel
Page 187 of 292
185
Partner2VP_en_Chap08_Aide-rapide_ed02-2016Partner2VP_en_Chap08_Aide-rapide_ed02-2016
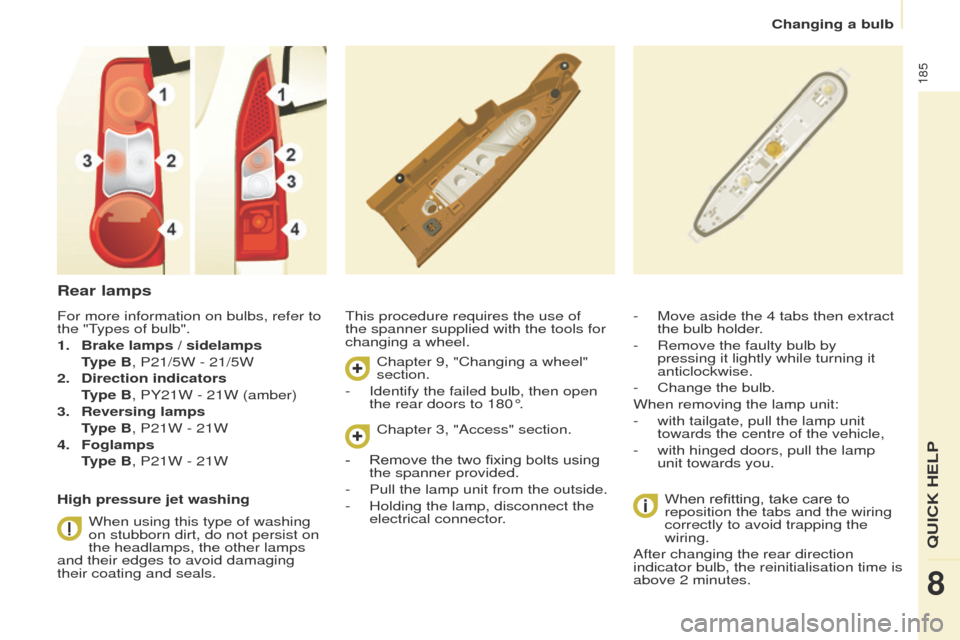
Rear lamps
This procedure requires the use of
the spanner supplied with the tools for
changing a wheel.When refitting, take care to
reposition the tabs and the wiring
correctly to avoid trapping the
wiring.
After changing the rear direction
indicator bulb, the reinitialisation time is
above 2 minutes. - Move aside the 4 tabs then extract
the bulb holder
.
-
Remove the faulty bulb by
pressing it lightly while turning it
anticlockwise.
-
Change the bulb.
When removing the lamp unit:
-
with tailgate, pull the lamp unit
towards the centre of the vehicle,
-
with hinged doors, pull the lamp
unit towards you.
For more information on bulbs, refer to
the "T
ypes of bulb".
1.
Brake lamps / sidelamps
T
ype B, P21/5W - 21/5W
2.
Direction indicators
T
ype B, PY21W - 21W (amber)
3.
Reversing lamps
T
ype B, P21W - 21W
4.
Foglamps
T
ype B, P21W - 21W
High pressure jet washing When using this type of washing
on stubborn dirt, do not persist on
the headlamps, the other lamps
and their edges to avoid damaging
their coating and seals. Chapter 9, "Changing a wheel"
section.
-
Identify the failed bulb, then open
the rear doors to 180°. Chapter 3, "Access" section.
-
Remove the two fixing bolts using
the spanner provided.
-
Pull the lamp unit from the outside.
-
Holding the lamp, disconnect the
electrical connector
.
QUICK HELP
8
Changing a bulb