sensor PEUGEOT PARTNER TEPEE 2020 User Guide
[x] Cancel search | Manufacturer: PEUGEOT, Model Year: 2020, Model line: PARTNER TEPEE, Model: PEUGEOT PARTNER TEPEE 2020Pages: 216, PDF Size: 8.46 MB
Page 115 of 216
113
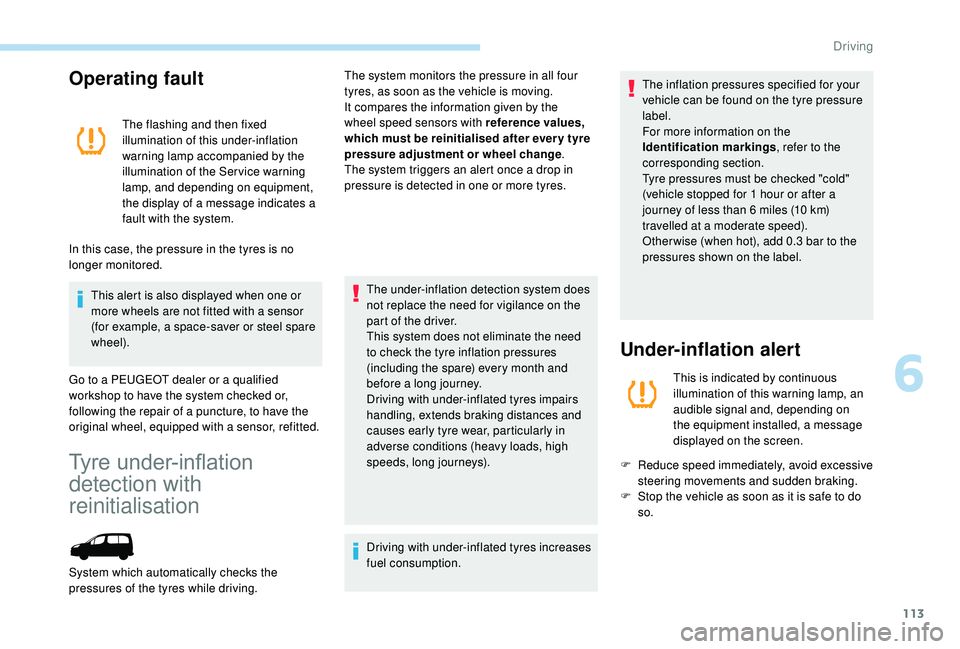
Operating fault
The flashing and then fixed
illumination of this under-inflation
warning lamp accompanied by the
illumination of the Ser vice warning
lamp, and depending on equipment,
the display of a message indicates a
fault with the system.
In this case, the pressure in the tyres is no
longer monitored.
This alert is also displayed when one or
more wheels are not fitted with a sensor
(for example, a space-saver or steel spare
wheel).
Go to a PEUGEOT dealer or a qualified
workshop to have the system checked or,
following the repair of a puncture, to have the
original wheel, equipped with a sensor, refitted.
Tyre under-inflation
detection with
reinitialisation
The system monitors the pressure in all four
tyres, as soon as the vehicle is moving.
It compares the information given by the
wheel speed sensors with reference values,
which must be reinitialised after ever y tyre
pressure adjustment or wheel change .
The system triggers an alert once a drop in
pressure is detected in one or more tyres.
The under-inflation detection system does
not replace the need for vigilance on the
part of the driver.
This system does not eliminate the need
to check the tyre inflation pressures
(including the spare) every month and
before a long journey.
Driving with under-inflated tyres impairs
handling, extends braking distances and
causes early tyre wear, particularly in
adverse conditions (heavy loads, high
speeds, long journeys).
Driving with under-inflated tyres increases
fuel consumption.
System which automatically checks the
pressures of the tyres while driving. The inflation pressures specified for your
vehicle can be found on the tyre pressure
label.
For more information on the
Identification markings
, refer to the
corresponding section.
Tyre pressures must be checked "cold"
(vehicle stopped for 1
hour or after a
journey of less than 6
miles (10 km)
travelled at a moderate speed).
Other wise (when hot), add 0.3
bar to the
pressures shown on the label.
Under-inflation alert
This is indicated by continuous
illumination of this warning lamp, an
audible signal and, depending on
the equipment installed, a message
displayed on the screen.
F
R
educe speed immediately, avoid excessive
steering movements and sudden braking.
F
S
top the vehicle as soon as it is safe to do
so.
6
Driving
Page 122 of 216
120
When changing the programmed
reference speed by means of a maintained
press, remain vigilant as the speed can
increase or decrease rapidly.
Do not use the cruise control on slippery
roads or in heavy traffic.
When descending a steep hill, the cruise
control system cannot prevent the vehicle
from exceeding the programmed speed.
The cruise control system cannot in
any circumstances replace the need
to obser ve speed limits or the need for
vigilance on the part of the driver.
It is advisable to leave your feet near the
pedals.
To avoid any jamming under the pedals:
-
e
nsure that the mat is positioned and
secured to the floor correctly,
-
n
ever fit one mat on top of another.
Active City Brake
Active City Brake is a driving assistance
system that aims to avoid a frontal collision
or reduce the speed of an impact if the driver
does not react sufficiently (inadequate brake
application). This system has been designed to
improve driving safety.
The driver must always check the traffic
and assess the distance and relative
speed of other vehicles.
Active City Brake cannot in any
circumstances replace the need for
vigilance on the part of the driver.
Never look at the laser sensor through
an optical instrument (magnifying glass,
microscope, etc.) at a distance of less
than 10
centimetres: risk of eye injury!
Principle
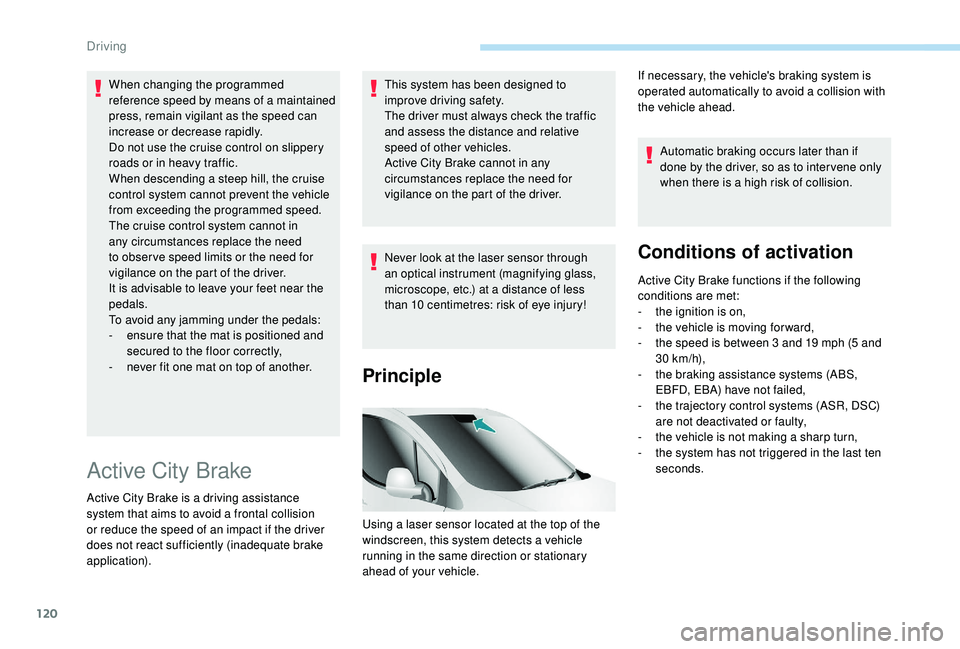
Using a laser sensor located at the top of the
windscreen, this system detects a vehicle
running in the same direction or stationary
ahead of your vehicle.Automatic braking occurs later than if
done by the driver, so as to inter vene only
when there is a high risk of collision.
Conditions of activation
Active City Brake functions if the following
conditions are met:
-
t
he ignition is on,
-
t
he vehicle is moving for ward,
-
t
he speed is between 3 and 19 mph (5 and
30
km/h),
-
t
he braking assistance systems (ABS,
EBFD, EBA) have not failed,
-
t
he trajectory control systems (ASR, DSC)
are not deactivated or faulty,
-
t
he vehicle is not making a sharp turn,
-
t
he system has not triggered in the last ten
seconds.
If necessary, the vehicle's braking system is
operated automatically to avoid a collision with
the vehicle ahead.
Driving
Page 123 of 216
121
Operation
When your vehicle is too close to or
approaches the vehicle ahead too quickly, the
system automatically applies the brakes to
avoid a collision.
You are then warned by the display of a
message.
Your vehicle's brake lamps come on to warn
other road users.The collision can be avoided if the speed
difference between your vehicle and
the one ahead is not more than 9
mph
(15
km/h).
Above this threshold, the system will do
what is possible to avoid or reduce the
accident by lowering the speed of impact.
The automatic braking can bring the vehicle to
a complete stop if the situation requires it.
In this case, the vehicle is held stationary
temporarily (for about 1.5
seconds) to allow
the driver to take back control by pressing the
brake pedal.
Unless the driver presses the clutch
quickly enough during automatic braking,
triggering of the system may cause the
engine to stall. During automatic braking, the driver can
always obtain a higher rate of deceleration
than that controlled by the system, by
pressing firmly on the brake pedal.
After an impact, the system is
automatically put out of ser vice: it no
longer operates.
You must go to a PEUGEOT dealer or a
qualified workshop to have the system
made operational again.
Operating limits
The system only detects vehicles that are
stationary or moving in the same direction as
your vehicle.
It does not detect small vehicles (bicycles,
motorcycles), pedestrians or animals, nor
non-reflective stationary objects.
This system will not trigger or will be interrupted
if the driver:
-
a
ccelerates hard
-
o
r turns the steering wheel sharply
(avoidance manoeuvre). When weather conditions are difficult
(extremely heavy rain, snow, fog, hail,
etc.), braking distances increase, which
may reduce the system’s ability to avoid a
collision.
The driver must therefore remain
particularly cautious.
Never let snow build up on the bonnet
or any object beyond the bonnet or the
front of the roof: this could enter the
field of vision of the sensor and obstruct
detection.Deactivation
The system is deactivated in the vehicle
configuration menu, accessible with the ignition
on.
Its status is stored when the ignition is switched off.
When the system is deactivated, a
message is displayed every time the
ignition is switched on, to warn you.
6
Driving
Page 124 of 216
122
With monochrome screen C
F Press the MENU button for access to the
main menu.
F
Sel
ect "Personalisation-Configuration ".
F
Sel
ect "Define the vehicle parameters ".
F
Sel
ect "Driving assistance ".
F
Sel
ect "Automatic emergency braking :
OFF " or " Automatic emergency braking :
ON ".
F
P
ress the " 7" or " 8" button to tick or
untick the box and respectively activate or
deactivate the system.
F
P
ress the " 5" or " 6" button, then the OK
button to select the " OK" box and confirm or
the Back button to cancel.
With the touch screen
F Press the " MENU" button.
F Sel ect the " Driving" menu.
F
I
n the secondary page, select " Vehicle
parameters ".
F
Sel
ect the " Driving assistance " tab.
F
T
ick or untick the " Automatic emergency
braking " box to activate or deactivate the
system.
F
Confirm.
Operating faults
Sensor fault
The operation of the laser sensor may suffer
inter ference from accumulations of dirt or
misting of the windscreen. In this case you are
warned by the display of a message.
Use windscreen demisting and regularly clean
the area of the windscreen in front of the
sensor. Do not stick or other wise attach any object
on the windscreen in front of the sensor.
System fault
In the event of a malfunction of the system, you
are warned by an audible signal and the display
of the message " Automatic braking system
fault ".
Have the system checked by a PEUGEOT
dealer or a qualified workshop.
In the event of an impact to the
windscreen at the sensor, deactivate the
system and contact a PEUGEOT dealer
or a qualified workshop
to have your
windscreen replaced. Do not attempt to remove, adjust or test
the sensor.
Only a PEUGEOT dealer or a qualified
workshop is able to work on the system.
When towing a trailer or when the vehicle
is being towed, the system must be
deactivated.
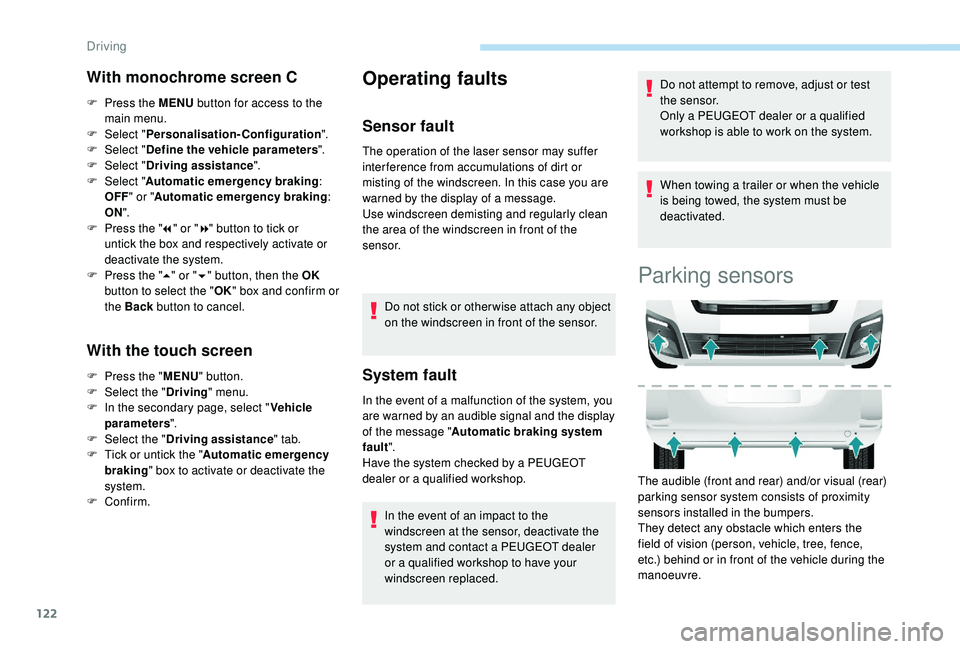
Parking sensors
The audible (front and rear) and/or visual (rear)
parking sensor system consists of proximity
sensors installed in the bumpers.
They detect any obstacle which enters the
field of vision (person, vehicle, tree, fence,
etc.) behind or in front of the vehicle during the
manoeuvre.
Driving
Page 125 of 216
123
Certain objects detected at the beginning of the
manoeuvre will no longer be detected at the
end of the manoeuvre due to the blind spots
between and below the sensors.
Examples: stake, roadworks cone or pavement
post.
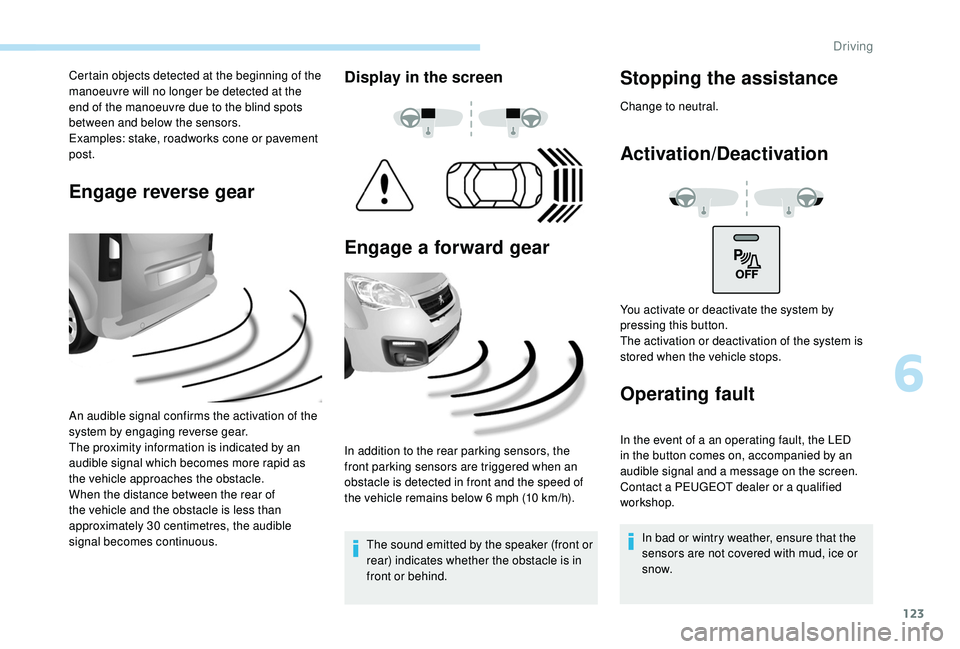
Engage reverse gear
An audible signal confirms the activation of the
system by engaging reverse gear.
The proximity information is indicated by an
audible signal which becomes more rapid as
the vehicle approaches the obstacle.
When the distance between the rear of
the vehicle and the obstacle is less than
approximately 30
centimetres, the audible
signal becomes continuous.
Display in the screen
Engage a forward gear
In addition to the rear parking sensors, the
front parking sensors are triggered when an
obstacle is detected in front and the speed of
the vehicle remains below 6
mph (10 km/h).
The sound emitted by the speaker (front or
rear) indicates whether the obstacle is in
front or behind.
Stopping the assistance
Change to neutral.
Activation/Deactivation
Operating fault
In the event of a an operating fault, the LED
in the button comes on, accompanied by an
audible signal and a message on the screen.
Contact a PEUGEOT dealer or a qualified
workshop. In bad or wintry weather, ensure that the
sensors are not covered with mud, ice or
snow.
You activate or deactivate the system by
pressing this button.
The activation or deactivation of the system is
stored when the vehicle stops.
6
Driving
Page 126 of 216
124
The system will be deactivated
automatically if a trailer is being towed or if
a bicycle carrier is fitted (vehicle fitted with
a towbar or bicycle carrier recommended
by PEUGEOT).
The parking sensor system cannot in
any circumstances replace the need for
vigilance on the part of the driver.
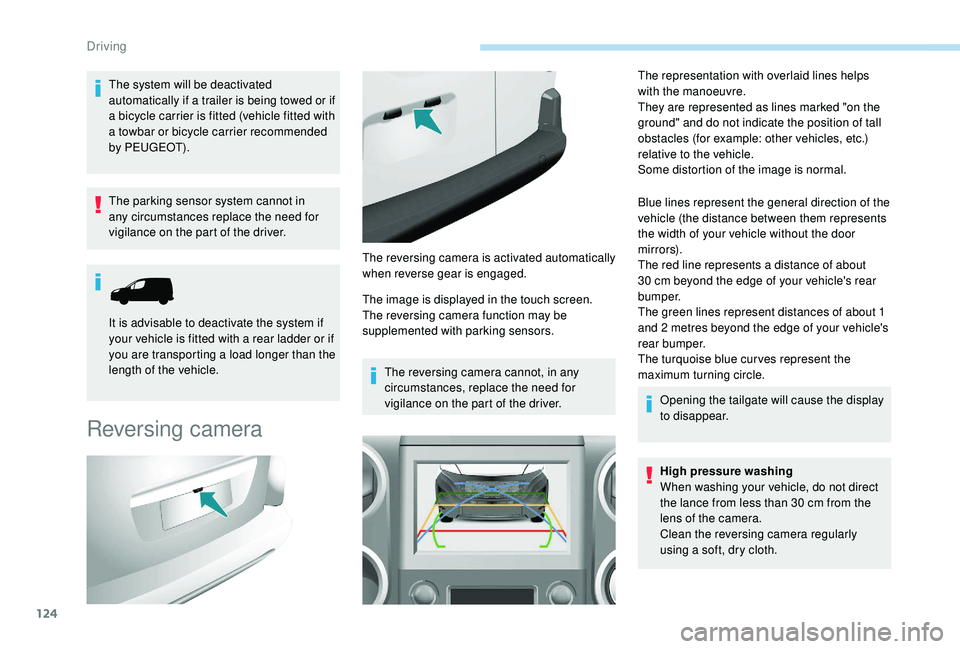
Reversing camera
The image is displayed in the touch screen.
The reversing camera function may be
supplemented with parking sensors.The reversing camera cannot, in any
circumstances, replace the need for
vigilance on the part of the driver. The representation with overlaid lines helps
with the manoeuvre.
They are represented as lines marked "on the
ground" and do not indicate the position of tall
obstacles (for example: other vehicles, etc.)
relative to the vehicle.
Some distortion of the image is normal.
Blue lines represent the general direction of the
vehicle (the distance between them represents
the width of your vehicle without the door
m i r r o r s).
The red line represents a distance of about
30
cm beyond the edge of your vehicle's rear
b u m p e r.
The green lines represent distances of about 1
and 2
metres beyond the edge of your vehicle's
rear bumper.
The turquoise blue cur ves represent the
maximum turning circle.
Opening the tailgate will cause the display
to disappear.
High pressure washing
When washing your vehicle, do not direct
the lance from less than 30
cm from the
lens of the camera.
Clean the reversing camera regularly
using a soft, dry cloth.
It is advisable to deactivate the system if
your vehicle is fitted with a rear ladder or if
you are transporting a load longer than the
length of the vehicle.
The reversing camera is activated automatically
when reverse gear is engaged.
Driving
Page 136 of 216
134
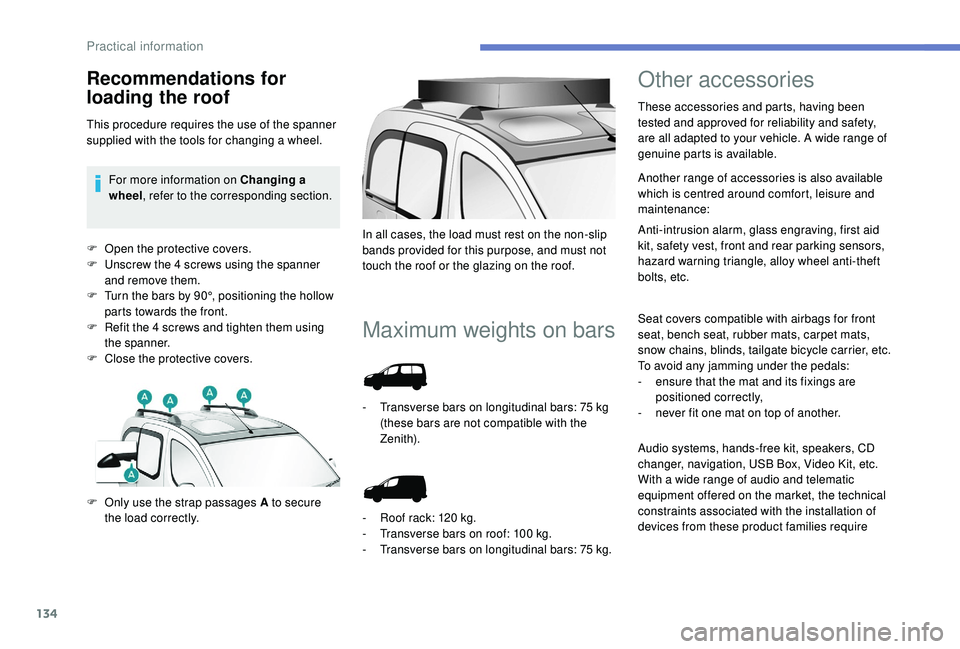
F Open the protective covers.
F U nscrew the 4 screws using the spanner
and remove them.
F
T
urn the bars by 90°, positioning the hollow
parts towards the front.
F
R
efit the 4 screws and tighten them using
the spanner.
F
C
lose the protective covers.
Maximum weights on bars
F Only use the strap passages A to secure the load correctly. In all cases, the load must rest on the non-slip
bands provided for this purpose, and must not
touch the roof or the glazing on the roof.
-
T
ransverse bars on longitudinal bars: 75 kg
(these bars are not compatible with the
Zenith).
-
R
oof rack: 120 kg.
-
T
ransverse bars on roof: 100 kg.
-
T
ransverse bars on longitudinal bars: 75
kg.
Other accessories
These accessories and parts, having been
tested and approved for reliability and safety,
are all adapted to your vehicle. A wide range of
genuine parts is available.
Another range of accessories is also available
which is centred around comfort, leisure and
maintenance:
Anti-intrusion alarm, glass engraving, first aid
kit, safety vest, front and rear parking sensors,
hazard warning triangle, alloy wheel anti-theft
bolts, etc.
Seat covers compatible with airbags for front
seat, bench seat, rubber mats, carpet mats,
snow chains, blinds, tailgate bicycle carrier, etc.
To avoid any jamming under the pedals:
-
e
nsure that the mat and its fixings are
positioned correctly,
-
n
ever fit one mat on top of another.
Recommendations for
loading the roof
This procedure requires the use of the spanner
supplied with the tools for changing a wheel.For more information on Changing a
wheel , refer to the corresponding section.
Audio systems, hands-free kit, speakers, CD
changer, navigation, USB Box, Video Kit, etc.
With a wide range of audio and telematic
equipment offered on the market, the technical
constraints associated with the installation of
devices from these product families require
Practical information
Page 149 of 216
147
Never go underneath a vehicle that is
supported only by a jack (use an axle stand).
Never use an electric screwdriver instead of
the wheelbrace.
Refitting the repaired wheel
The wheel is refitted in the same way as the
spare wheel; do not forget to refit the wheel
trim.For more information on Identification
markings
, including the tyre label, refer to
the corresponding section.
For more information on Tyre under-
inflation detection , including
recommendations after changing a wheel
with a tyre under-inflation detection
sensor, refer to the corresponding section.
F
S
ecure the carrier on the hook, then raise
the carrier by tightening the bolt with the
wheelbrace.
F
T
ighten the bolt fully and check that the
wheel is held flat against the floor.
If not, repeat the procedure.
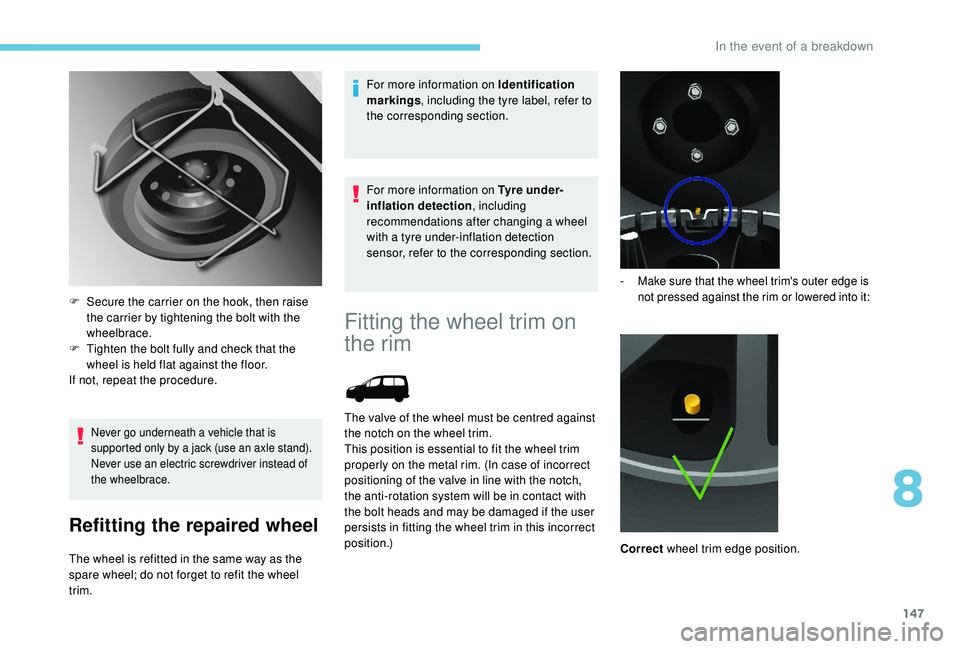
Fitting the wheel trim on
the rim
The valve of the wheel must be centred against
the notch on the wheel trim.
This position is essential to fit the wheel trim
properly on the metal rim. (In case of incorrect
positioning of the valve in line with the notch,
the anti-rotation system will be in contact with
the bolt heads and may be damaged if the user
persists in fitting the wheel trim in this incorrect
position.)
- Make sure that the wheel trim's outer edge is not pressed against the rim or lowered into it:
Correct wheel trim edge position.
8
In the event of a breakdown
Page 157 of 216
155
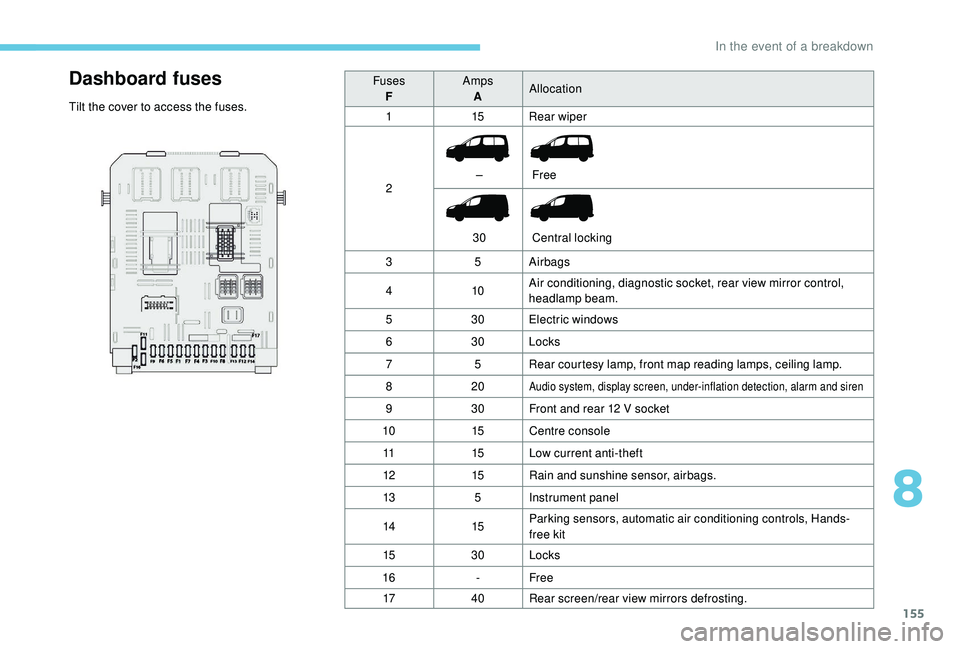
Dashboard fuses
Tilt the cover to access the fuses.Fuses
F Amps
A Allocation
1 15Rear wiper
2 –
30 Free
Central locking
3 5Airbags
4 10Air conditioning, diagnostic socket, rear view mirror control,
headlamp beam.
5 30Electric windows
6 30Locks
7 5Rear courtesy lamp, front map reading lamps, ceiling lamp.
8 20
Audio system, display screen, under-inflation detection, alarm and siren
930Front and rear 12 V socket
10 15Centre console
11 15Low current anti-theft
12 15Rain and sunshine sensor, airbags.
13 5Instrument panel
14 15Parking sensors, automatic air conditioning controls, Hands-
free kit
15 30Locks
16 -Free
17 40Rear screen/rear view mirrors defrosting.
8
In the event of a breakdown
Page 159 of 216
157
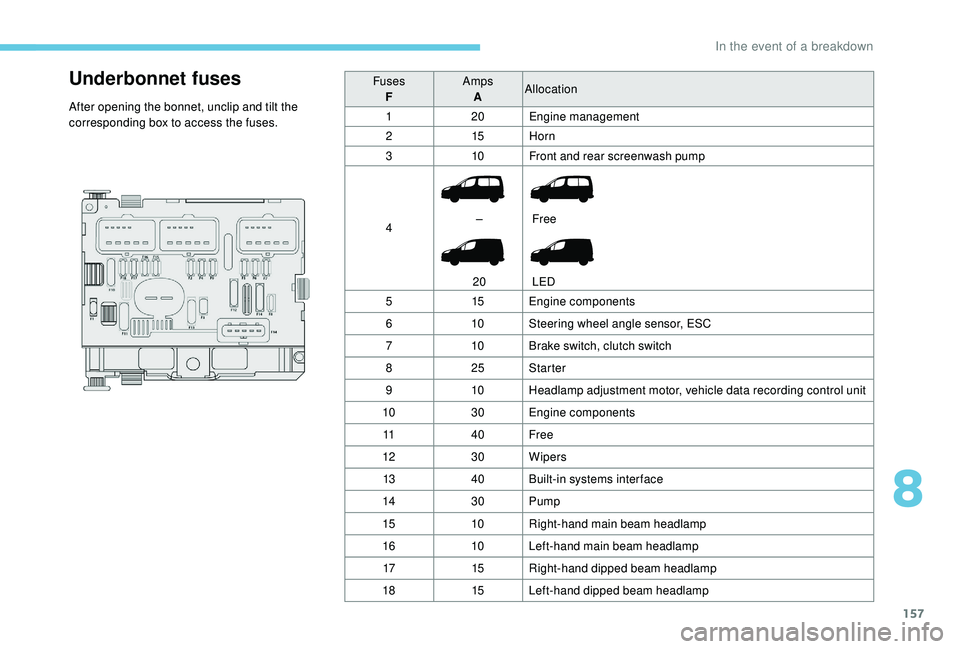
Underbonnet fuses
After opening the bonnet, unclip and tilt the
corresponding box to access the fuses.Fuses
F Amps
A Allocation
1 20Engine management
2 15Horn
3 10Front and rear screenwash pump
4 –
20 Free
LED
5 15Engine components
6 10Steering wheel angle sensor, ESC
7 10Brake switch, clutch switch
8 25Starter
9 10Headlamp adjustment motor, vehicle data recording control unit
10 30Engine components
11 40Free
12 30Wipers
13 40Built-in systems inter face
14 30Pump
15 10Right-hand main beam headlamp
16 10Left-hand main beam headlamp
17 15Right-hand dipped beam headlamp
18 15Left-hand dipped beam headlamp
8
In the event of a breakdown