radio PONTIAC BONNEVILLE 1993 Owners Manual
[x] Cancel search | Manufacturer: PONTIAC, Model Year: 1993, Model line: BONNEVILLE, Model: PONTIAC BONNEVILLE 1993Pages: 322, PDF Size: 16.31 MB
Page 50 of 322
You can match a transmitter to as many
Aifferent vehicles as you own, provided
they are equipped with
exactly the same
model system.
(General Motors offers
several different models of these systems
on their vehicles.) Each vehicle can have
only two transmitters matched to it. See
your dealer to match transmitters to
another vehicle.
Your Remote Keyless Entry operates on
a radio frequency subject to Federal
Communications Commission (FCC)
Rules.
This device complies with
Part 15 of the
FCC Rules. Operation is subject to the
following two conditions:
(1) This
device may not cause harmful
interference, and
(2) This device must
accept any interference received,
including interference that may cause
undesired operation. Should
interference
to this system
occur,
try this:
Check to determine if battery
replacement is necessary. See the
instructions on battery replacement.
Check the distance. You may be too
far from your vehicle. This product
has a maximum range.
Check the location. Other vehicles or
objects may be blocking the signal.
See your Pontiac dealer or a qualified
technician for service.
Changes or modifications to this system
by other than an authorized service
facility could void authorization to use
this equipment.
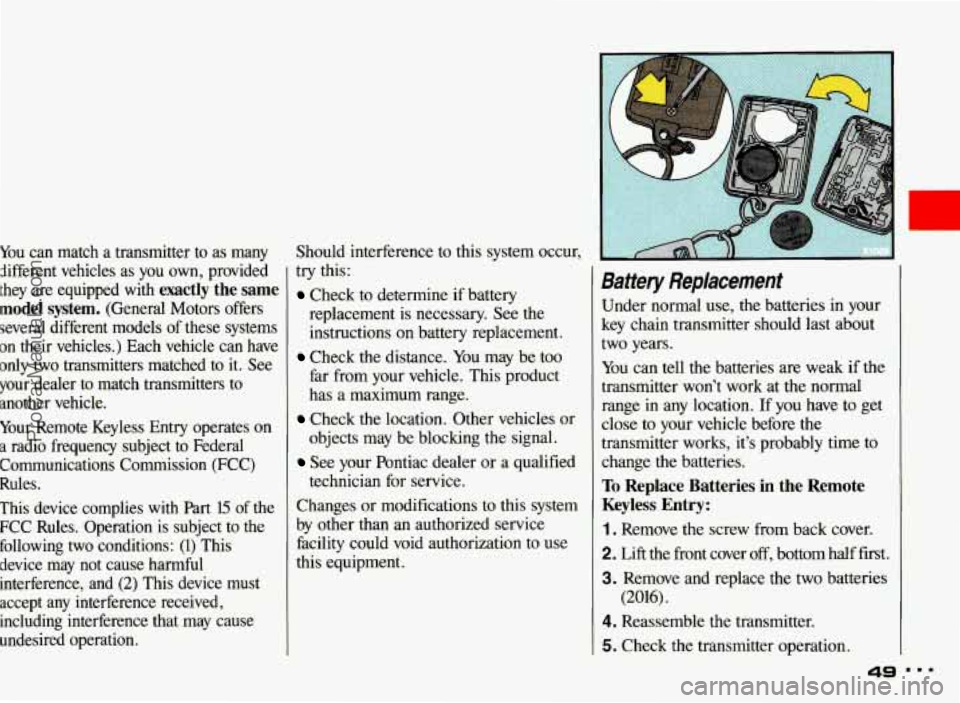
Battery Replacement
Under normal use, the batteries in your
key chain transmitter should last about
two years.
You can tell the batteries are weak if the
transmitter won’t work at the normal
range in any location. If you have to get
close to your vehicle before the
transmitter works, it’s probably time to
change the batteries.
To Replace Batteries in the Remote
Keyless Entry:
1. Remove the screw from back cover.
2. Lift the front cover off, bottom half first.
3. Remove and replace the two batteries
4. Reassemble the transmitter.
5. Check the transmitter operation.
(2016).
49
r
m..
ProCarManuals.com
Page 58 of 322
New Venice bbBreak-ln”
Your modern Pontiac doesn’t need
an elaborate “break-in.” But it will
perform better
in the long run if
you follow these guidelines:
Don’t drive at any one speed-
fast or slow-for the first
500
.miles (804 km). Don’t make full-
throttle
starts.
Avoid making hard stops for the
first 200 miles (322 km) or so.
During this time your new brake
linings aren’t yet broken in. Hard
stops
with new linings can mean
premature wear and earlier
replacement. Follow this “breaking-in” guideline every
time you get
new brake linings.
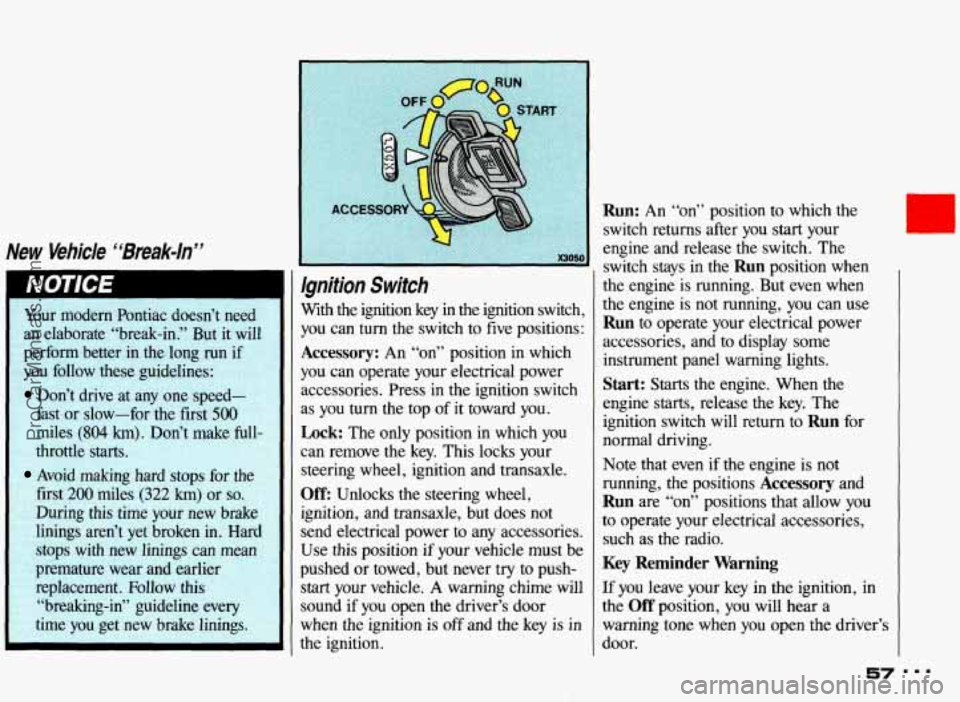
Ignition Switch
With the ignition key in the ignition switch,
you can turn the switch to five positions:
Accessory: An “on” position in which
you can operate your electrical power
accessories. Press in the ignition switch
as
you turn the top of it toward you.
Lock: The only position in which you
can remove the key. This locks your
steering wheel, ignition and transaxle.
Off: Unlocks the steering wheel,
ignition, and transaxle, but does not
send electrical power to any accessories.
Use this position if your vehicle must be
pushed or towed, but never try to push-
start your vehicle. A warning chime will
sound if you open the driver’s door
when the ignition is
off and the key is in
the ignition.
Run: An “on” position to which the
switch returns after you
start your
engine and release the switch. The
switch stays in the
Run position when
the engine is running. But even when
the engine is not running, you can use
Run to operate your electrical power
accessories, and to display some
instrument panel warning lights.
Start: Starts the engine. When the
engine starts, release the key. The
ignition switch will return to
Run for
normal driving.
Note that even if the engine
is not
running, the positions
Accessory and
Run are “on” positions that allow you
to operate your electrical accessories,
such as the radio.
Key Reminder Warning
If you leave your key in the ignition, in
the
Off position, you will hear a
warning tone when you open the driver’s
door.
57 ===
ProCarManuals.com
Page 105 of 322
Features & Controls
Battery Warning Light (CONI:)
your accessories, such as. the radio and
climate control system.
Some clusters with gages do
not have a
battery warning light. They have a
CHECK GAGES warning to indicate a
problem. Vehicles with the supercharged
engine also have a similar battery
warning light.
Malfunction Indicator Lamp
(Service Engine Soon Light)
A computer monitors operation of your
fuel, ignition and emission controls
systems. This light should come on
when the ignition is on but the engine is
not running, as a check to show you it is
working.
If it does not come on at all,
have it fixed right away.
If it stays on, or
it comes on while you are driving, the
computer is indicating that
you have a
problem. You should take your vehicle
in for service soon.
am. 104
b c ProCarManuals.com
Page 120 of 322
In this part you’ll find out how to
operate the comfort control systems
and audio systems offered with your
Pontiac. Be sure to read about the
particular system supplied with your
vehicle.
Part 3
Comfort Controls &
Audio Systems n
..................................... Standard Climate Control. .l20
Electronic Climate Control 123
AM/FM Stereo Radio .128
AM/FM Stereo with Cassette Player and Graphic Equalizer ................ 131
.........................................
................................. Setting the Clock .............. .E7
AMlFM Stereo with Cassette Player ................................. .I29
AM/FM Stereo with Compact Disc Player ............................ .134
Steering Wheel Controls for Audio System ............................ .139
Understanding Radio Reception
..................................... .140
Care of Your Cassette Tape Player ................................... .141
............................................
Gaincontrol .................................................... 140
.......................................
.............................................
........................................
Care of Your Compact Discs .141
Fixed Mast Antenna.
.I42
Power Antenna Mast Care .I42
119 = =
ProCarManuals.com
Page 127 of 322
..I
Comfort Controls & Audio
Flow-Through Ventilation System
(CONT)
Ventilation Tips
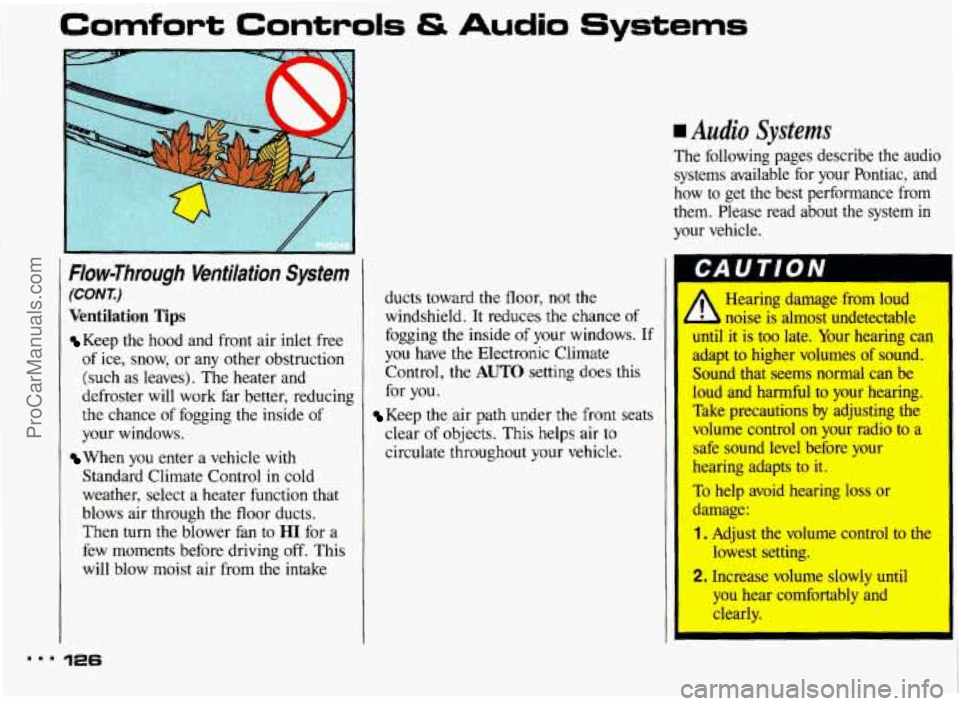
Keep the hood and front air inlet free
of ice, snow, or any other obstruction
(such as leaves). The heater and
defroster will work far better, reducing
the chance of fogging
the inside of
your windows.
Standard Climate Control in cold
weather, select a heater function that
blows air through
the floor ducts.
Then turn the blower fan to
HI for a
few moments before driving off. This
will blow moist air from the intake
When you enter a vehicle with
126
ducts toward the floor, not the
windshield. It reduces the chance of
fogging the inside of your windows. If
you have the Electronic Climate
Control,
the AUTO setting does this
for you.
Keep the air path under the front seats
clear of objects. This helps air to
circulate throughout your vehicle.
rn Audio Systems
The following pages describe the audio systems available for your Pontiac, and
how to get the best performance from
them. Please read about the system
in
your vehicle.
Hearing damage from loud
noise is almost undetectable
until it
is too late. Your hearing can
adapt to higher volumes of sound.
Sound that seems normal can be
loud and harmful to your hearing.
Take precautions by adjusting the
volume control on your radio to a
safe sound level before your
hearing adapts to it.
To help avoid hearing loss or
damage:
1. Adjust the volume control to the
lowest setting.
2. Increase volume slowly until
you he: :omfortably and
clearly.
I
ProCarManuals.com
Page 128 of 322
Before you add any sound equipment to your vehicle-like a
tape player, CB radio, mobile
telephone or two-way radio-be
sure you can add what
you want. If
you can, it’s very important to do it
properly. Added sound equipment
may interfere with the operation
of
your vehicle’s engine, Delco@ radio
or other systems, and can even
damage them. And, your vehicle’s systems may interfere with the
operation of sound equipment that
has been added improperly.
So, before adding sound
equipment, check with your dealer and be sure to check federal rules
covering mobile radio and
telephone units.
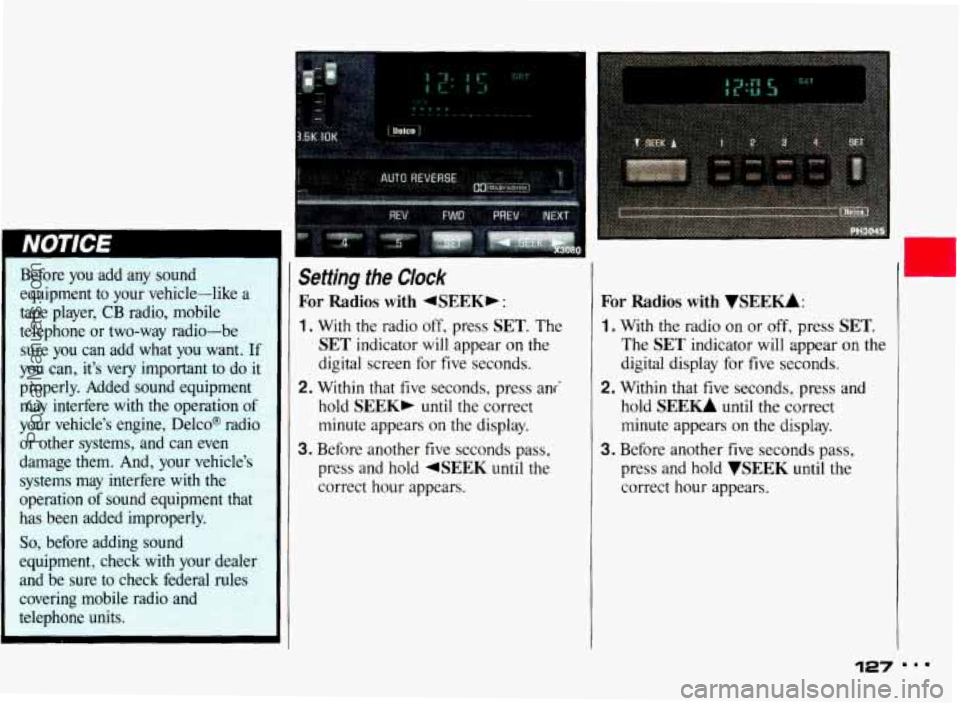
Setting the Clock
For Radios with 4SEEKb :
1. With the radio off, press SET. The
SET indicator will appear on the
digital screen for five seconds.
2. Within that five seconds, press ani
hold
SEEK, until the correct
minute appears
on the display.
3. Before another five seconds pass,
press and hold
4SEEK until the
correct hour appears.
For Radios with VSEEU:
1. With the radio on or off, press SET.
The SET indicator will appear on the
digital display for five seconds.
2. Within that five seconds, press and
hold
SEE- until the correct
minute appears
on the display.
3. Before another five seconds pass,
press and hold
WEEK until the
correct hour appears.
127 ...
ProCarManuals.com
Page 129 of 322
m..
Comfort Controls & Audio Systems
A#.FM Stereo Radio
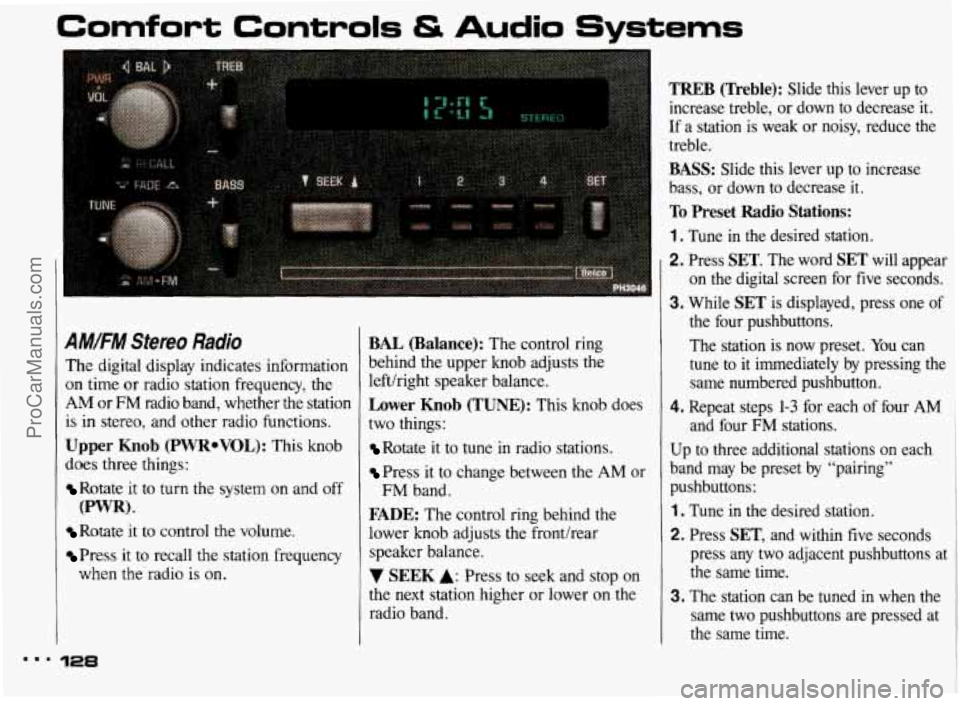
The digital display indicates information
on time or radio station frequency, the
AM or FM radio band, whether the station
is
in stereo, and other radio functions.
Upper Knob (PWRoVOL): This knob
does three things:
Rotate it to turn the system on and off
Rotate it to control the volume.
Press it to recall the station frequency
(PWR).
when the radio is on.
128
BAL (Balance): The control ring
behind the upper knob adjusts the
lefthight speaker balance.
Lower Knob (TUNE): This knob does
two things:
Rotate it to tune in radio stations.
Press it to change between the AM or
FADE: The control ring behind the
lower knob adjusts the fronthear
speaker balance.
7 SEEK A: Press to seek and stop on
the next station higher or lower
on the
radio band.
FM band.
TREB (Treble): Slide this lever up to
increase treble, or down to decrease it.
If a station is weak or noisy, reduce the
treble.
BASS: Slide this lever up to increase
bass, or down to decrease
it.
To Preset Radio Stations:
1 . Tune in the desired station.
2. Press SET. The word SET will appear
on the digital screen for five seconds.
3. While SET is displayed, press one of
the four pushbuttons.
The station is now preset. You can
tune to
it immediately by pressing the
same numbered pushbutton.
4. Repeat steps 1-3 for each of four AM
and four FM stations.
Up to three additional stations on each
band may be preset by “pairing”
pushbuttons:
1 . Tune in the desired station.
2. Press SET, and within five seconds
press any two adjacent pushbuttons at
the same time.
3. The station can be tuned in when the
same two pushbuttons are pressed at
the same time.
ProCarManuals.com
Page 130 of 322
AM/FM Stereo with Cassette
Player
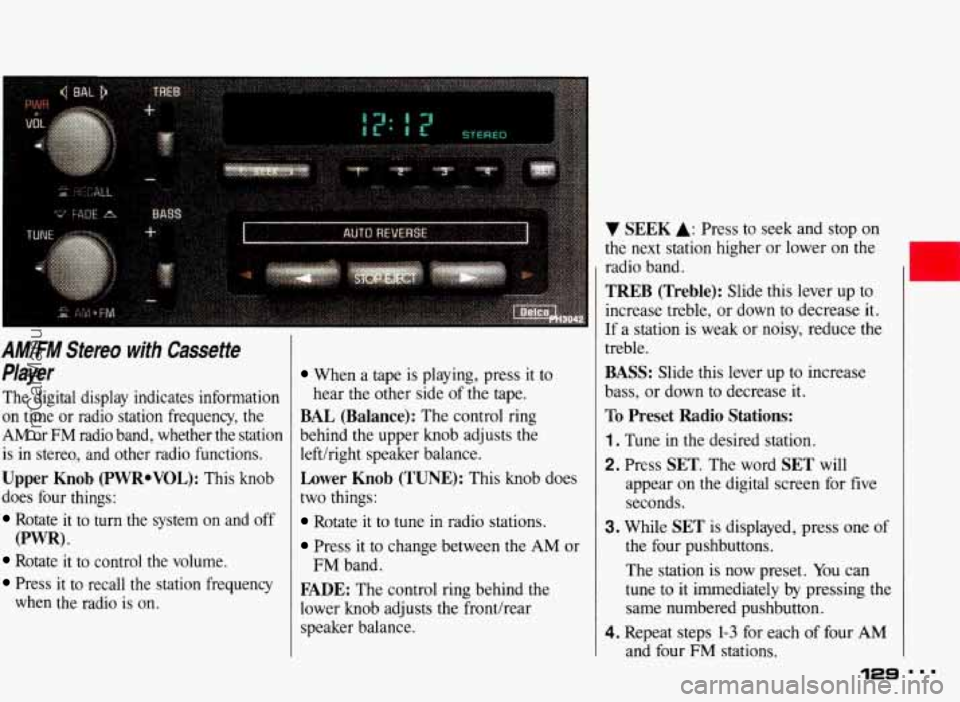
The digital display indicates information
on time or radio station frequency, the
AM or FM radio band, whether the station
is in stereo, and other radio functions.
Upper Knob (PWRoVOL): This knob
does four things:
Rotate it to turn the system on and off
Rotate it to control the volume.
Press it to recall the station frequency
(PWR) *
when the radio is on.
When a tape is playing, press it to
hear the other side
of the tape.
BAL (Balance): The control ring
behind the upper knob adjusts the
lefthight speaker balance.
Lower Knob (TUNE): This knob does
two things:
Rotate it to tune in radio stations.
Press it to change between the AM or
FADE: The control ring behind the
lower knob adjusts the fronthear
speaker balance.
FM band.
V SEEK A: Press to seek and stop on
the next station higher or lower
on the
radio band.
TREB (Treble): Slide this lever up to
increase treble, or down
to decrease it.
If a station is weak or noisy, reduce the
treble.
BASS: Slide this lever up to increase
bass, or down to decrease it.
To Preset Radio Stations:
1. Tune in the desired station.
2. Press SET. The word SET will
appear
on the digital screen for five
seconds.
3. While SET is displayed, press one of
the four pushbuttons.
The station is
now preset. You can
tune
to it immediately by pressing the
same numbered pushbutton.
4. Repeat steps 1-3 for each of four AM
and four FM stations.
129 ...
ProCarManuals.com
Page 131 of 322
Comfort Controls & Audio Systems
AMIFM Stereo with Cassette
Player
(CONX:)
Up to three additional stations on each
band may be preset by “pairing”
pushbuttons:
1. Tune in the desired station.
2. Press SET, and within five seconds
press any two adjacent pushbuttons at
the same time.
3. The station can be tuned in when the
same two pushbuttons are pressed at
the same time.
To Play a Cassette Tape:
With the power switch on, insert a tape
into the cassette door. Do not use tapes
that are longer than
45 minutes on each
side.
When the right indicator arrow is lit,
selections listed on the bottom side
of
the cassette are playing. When the left
arrow is lit, selections listed on the top
side
of the cassette are playing. To
change sides of the tape, press the upper
control knob while the cassette is
playing. When the end
of a tape is
reached, the other side will then play.
FAST FORWARD: Depress the button
with the arrow pointing
in the same
direction that the tape is playing.
To stop
fast forward, press the
STOP-EJECT
button.
REWRSE: Depress the button with the
arrow pointing in the opposite direction
that the tape is playing.
To stop reverse,
press the
STOP-EJECT button.
STOP-EJECT To stop playing a tape,
fully press this button (the cassette will be partially ejected, and the radio will
begin playing).
ProCarManuals.com
Page 132 of 322
AM/FM Stereo with Cassette
Player and Graphic Equalizer
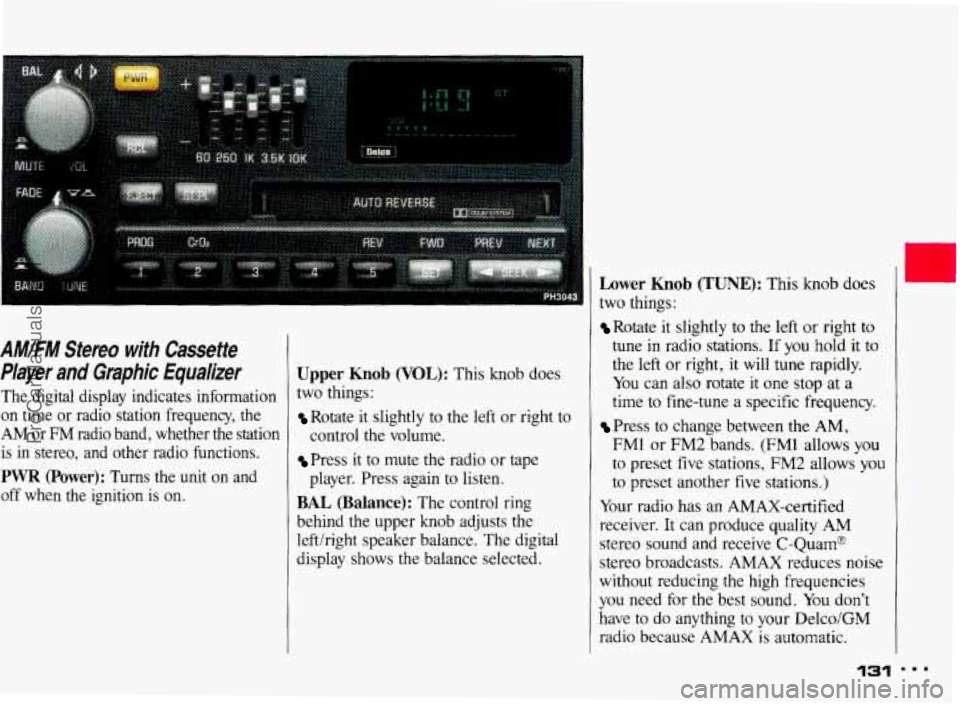
The digital display indicates information
on time
or radio station frequency, the
AM or FM radio band, whether the station is in stereo, and other radio functions.
PWR (Power): Turns the unit on and
off when the ignition
is on.
Upper Knob (VOL): This knob does
two things:
Rotate it slightly to the left or right to
control the volume.
Press it to mute the radio or tape
BAL (Balance): The control ring
behind the upper knob adjusts the
lefthight speaker balance. The digital
display shows the balance selected. player.
Press again to listen.
Lower Knob (TUNE): This knob does
two things:
Rotate it slightly to the left or right to
tune in radio stations. If you hold it to
the
left or right, it will tune rapidly.
You can also rotate
it one stop at a
time to fine-tune a specific frequency.
Press to change between the AM,
FM1 or FM2 bands. (FM1 allows
you
to preset five stations, FM2 allows you
to preset another five stations.)
Your radio has an AMAX-certified
receiver. It can produce quality AM
stereo sound and receive C-Quam@
stereo broadcasts. AMAX reduces noise
without reducing the high frequencies
you need for the best sound. You don’t
have
to do anything to your Delco/GM
radio because AMAX is automatic.
1,
131
ProCarManuals.com