clock PONTIAC BONNEVILLE 1998 Owners Manual
[x] Cancel search | Manufacturer: PONTIAC, Model Year: 1998, Model line: BONNEVILLE, Model: PONTIAC BONNEVILLE 1998Pages: 395, PDF Size: 17.6 MB
Page 142 of 395
v
Section 3 Comfort Controls and Audio Systems
In this section, you’ll find out how to operate the comfort control and audio systems offered w\
ith your vehicle. Be
sure to read about the particular systems supplied
with your vehicle.
3-2
3-5
3-6 3-6 3-8
3-8
3-9
3-9
3-9
3-
10
3-11
3-15
Comfort Controls Air Conditioning
Heating Ventilation System Defogging and Defrosting
Rear Window Defogger
Audio Systems Setting
the Clock for AM-FM Stereo
Setting the Clock for All Systems Except
AM-FM Stereo
AM-FM Stereo
AM-FM Stereo with Cassette Tape Player
(If Equipped)
AM-FM Stereo with Cassette Tape Player and
Equalizer (If Equipped) 3-
18
3-21
3-24
3-26
3-27
3-27
3-28
3-29 3-29
3-30
3-30
AM-FM Stereo with Compact Disc Player
(If Equipped)
AM-FM Stereo with Compact Disc Player and
Equalizer (If Equipped)
Theft-Deterrent Feature
Audio Steering Wheel Controls (If Equipped)
Understanding Radio Reception
Tips About Your Audio System
Care of Your Cassette Tape Player
Care
of Your Compact Discs
Care of Your Compact Disc Player
Fixed Mast Antenna
Power Antenna Mast Care
3-1
Page 150 of 395
EICE: I
~~
Do not try to clear frost or other material from
the inside of the rear window with a razor blade
or anything else that is sharp. This may damage
the defogger grid. The repairs wouldn’t
be
covered by your warranty.
Audio Systems
Your Delco Electronics audio system has been designed
to operate easily
and give years of listening pleasure.
You will get the most enjoyment out of it if you acquaint
yourself with it first. Find out what your Delco
Electronics system can do
and how to operate all its
controls, to be sure you’re getting the most out of the
advanced engineering that went into
it.
Setting the Clock for AM-FM Stereo
Press SET. Within five seconds, press and hold the
SEEK down arrow until the correct hour appears on the
display. Press and hold the
SEEK up arrow until the
correct minute appears on the display.
Setting the Clock for All Systems Except
AM-FM Stereo
Press and hold HR until the correct hour appears. Press
and hold MIN until the correct minute appears. There
will be a two-second delay before the clock goes into
time-set mode, and the colon on the display
will blink
while in this mode.
3-9
Page 151 of 395
AM-FM Stereo Finding a Station
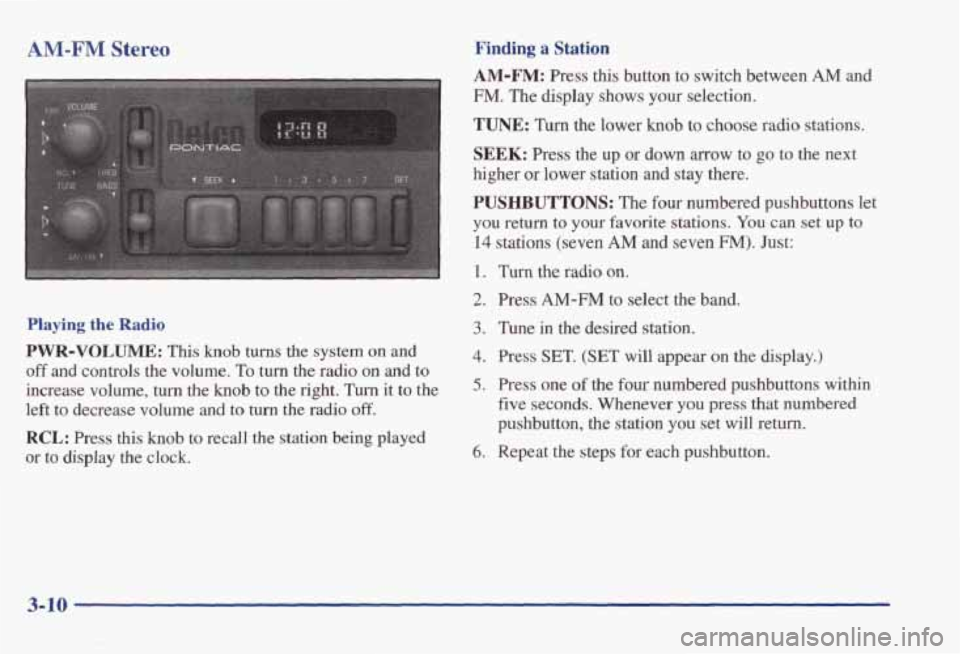
Playing the Radio
PWR-VOLUME: This knob turns the system on and
off and controls the volume. To turn the radio on and to
increase volume,
turn the knob to the right. Turn it to the
left to decrease volume and to
turn the radio off.
RCL: Press this knob to recall the station being played
or to display the clock.
AM-FM: Press this button to switch between AM and
FM. The display shows your selection.
TUNE: Turn the lower knob to choose radio stations.
SEEK: Press the up or down arrow to go to the next
higher or lower station
and stay there.
PUSHBUTTONS: The four numbered pushbuttons let
you return to your favorite stations.
You can set up to
14 stations (seven AM and seven FM). Just:
1. Turn the radio on.
2. Press AM-FM to select the band.
3. Tune in the desired station.
4. Press SET. (SET will appear on the display.)
5. Press one of the four numbered pushbuttons within
five seconds. Whenever
you press that numbered
pushbutton, the station you set will return.
6. Repeat the steps for each pushbutton.
3-10
Page 162 of 395
FWD (6): Press and hold this button to quickly advance
within a track.
You will hear sound at a reduced volume.
The display
will show elapsed time.
RECALL: Press this button to see what track is
currently playing. Press
RECALL again within five
seconds to see how long the track has been playing.
When a new track starts to play, the track number will
also appear. Press RECALL a third time and the time of
day will be displayed.
AM-FM: Press this button to play the radio when a disc
is playing. The disc will stop but remain
in the player.
CD/PLAY: Press this button to change to the disc
function when the radio is
on.
EJECT: Press this button to remove the disc or stop the
disc and switch to the radio. EJECT will work with the
radio
off.
AM-FM Stereo with Compact Disc Player
and Equalizer
(If Equipped)
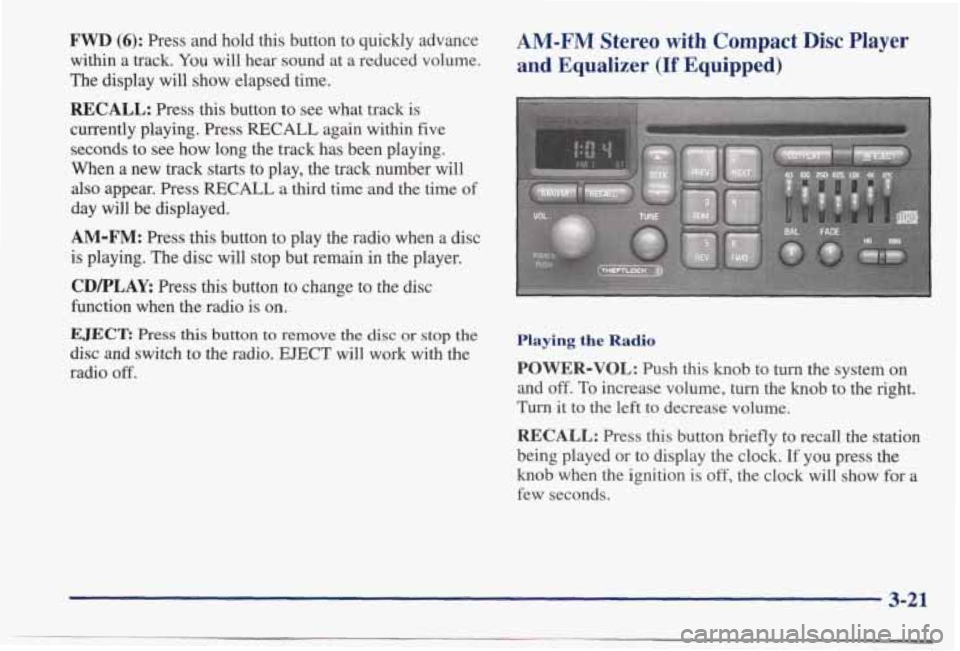
Playing the Radio
POWER-VOL: Push this knob to turn the system on
and
off. To increase volume, turn the knob to the right.
Turn it to the left to decrease volume.
RECALL: Press this button briefly to recall the station
being played or to display the clock. If you press the
knob when the ignition is off, the clock will show for a
few seconds.
3-21
Page 185 of 395
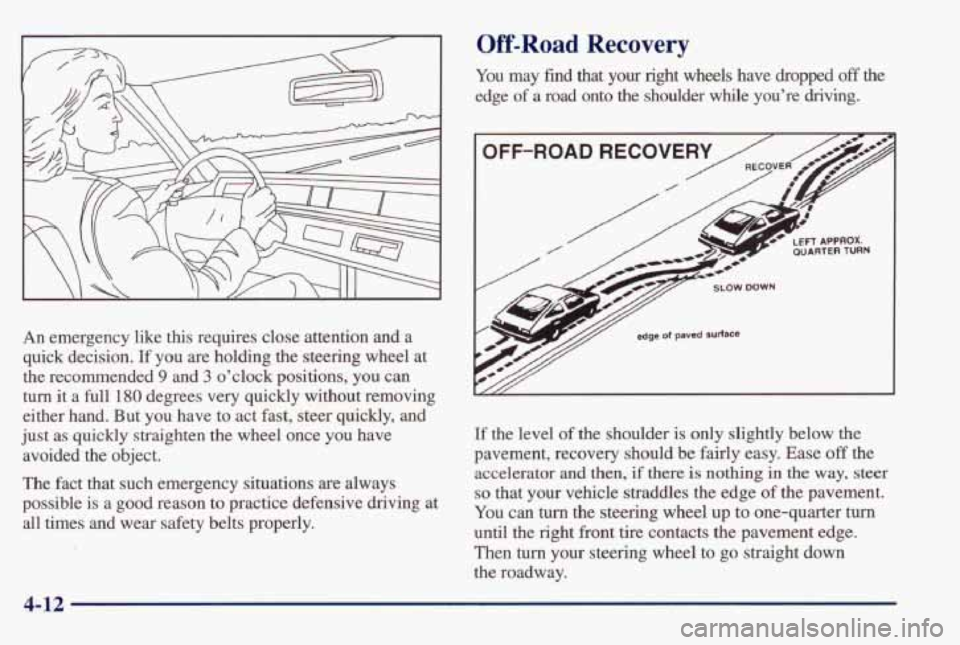
An emergency like this requires close attention and a
quick decision.
If you are holding the steering wheel at
the recommended
9 and 3 o’clock positions, you can
turn it a full 180 degrees very quickly without removing
either hand. But you have
to act fast, steer quickly, and
just
as quickly straighten the wheel once you have
avoided the object.
The fact that such emergency situations
are always
possible is a good reason to practice defensive driving at
all times and wear safety belts properly.
Off-Road Recovery
You may find that your right wheels have dropped off the
edge
of a road onto the shoulder while you’re driving.
I OFF-ROAD RECOVERY /
I
If the level of the shoulder is only slightly below the
pavement, recovery should
be fairly easy. Ease off the
accelerator
and then, if there is nothing in the way, steer
so that your vehicle straddles the edge of the pavement.
You can turn the steering wheel up to one-quarter turn
until the right front tire contacts the pavement edge.
Then
turn your steering wheel to go straight down
the roadway.
4-12
Page 235 of 395
How to Add Coolant to the Radiator
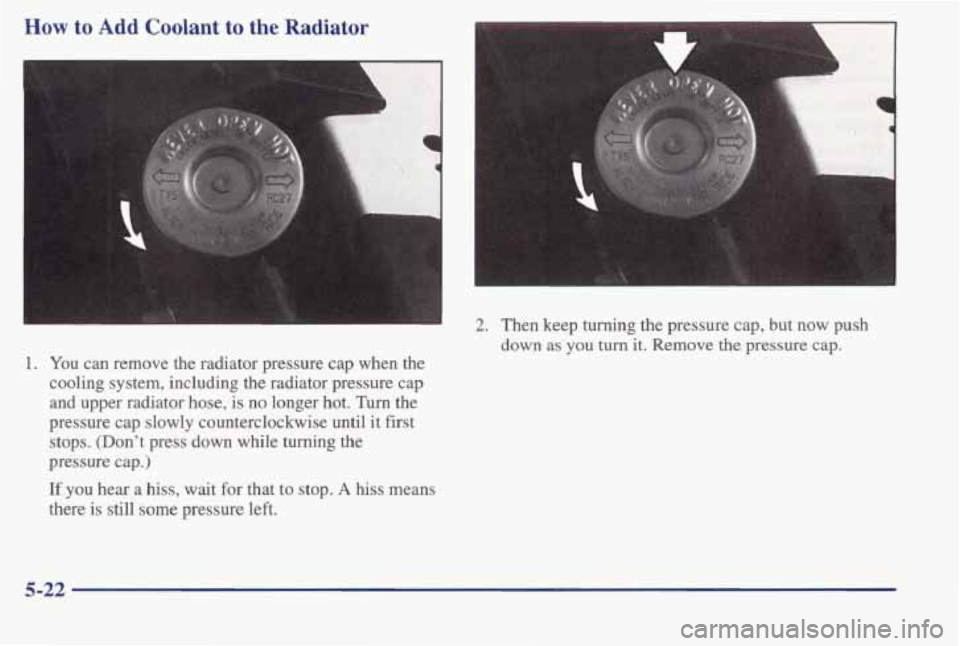
1. You can remove the radiator pressure cap when the
cooling system, including the radiator pressure cap
and upper radiator hose, is no longer hot. Turn the
pressure cap slowly counterclockwise until it first
stops. (Don’t press down while turning the
pressure cap.)
If you hear a hiss, wait for that to stop. A hiss means
there is still some pressure left.
2. Then keep turning the pressure cap, but now push
down as
you turn it. Remove the pressure cap.
5-22
Page 239 of 395
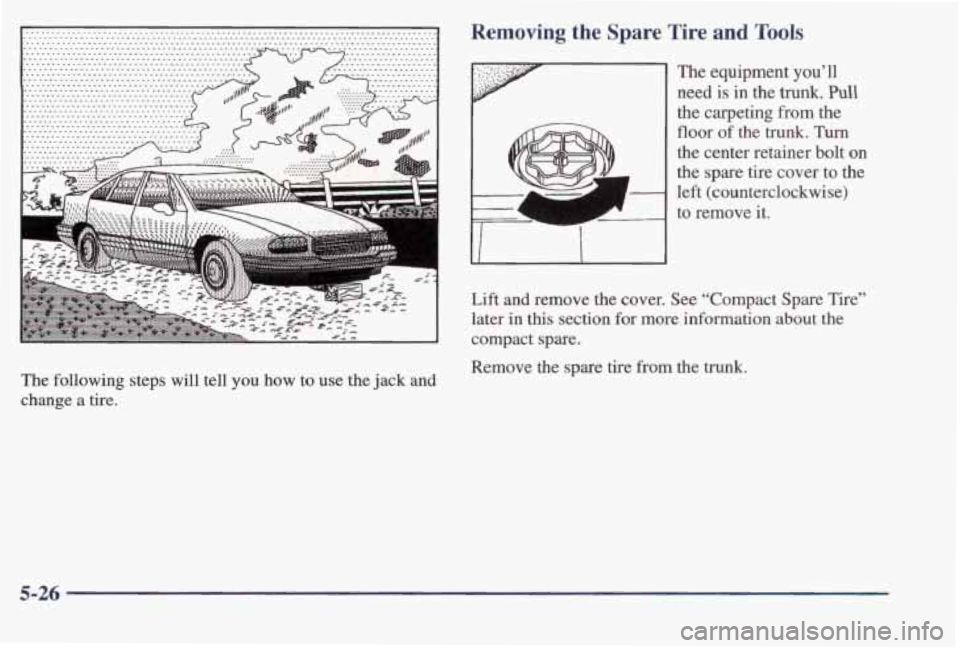
The following steps will tell you how to use the jack and
change a tire.
Removing the Spare Tire and Tools
The equipment you’ll
need
is in the trunk. Pull
the carpeting from the
floor
of the trunk. Turn
the center retainer bolt on
the spare tire cover to the
left (counterclockwise)
to remove it.
Lift
and remove the cover. See “Compact Spare Tire”
later
in this section for more information about the
compact spare.
Remove the spare tire
from the trunk.
5-26
Page 240 of 395
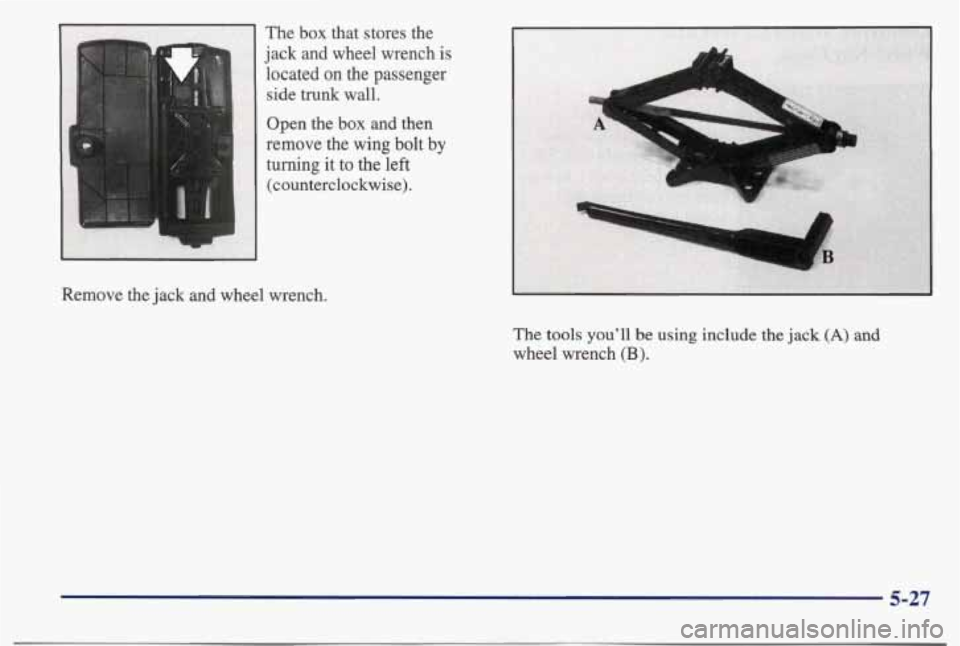
The box that stores the
jack and wheel wrench is
located on the passenger side
trunk wall.
Open the
box and then
remove the wing bolt
by
turning it to the left
(counterclockwise).
Remove the jack and wheel wrench. The tools you'll be using include the jack
(A) and
wheel wrench
(B).
5-27
Page 242 of 395
Removing the Flat Tire and Installing the Spare Tire
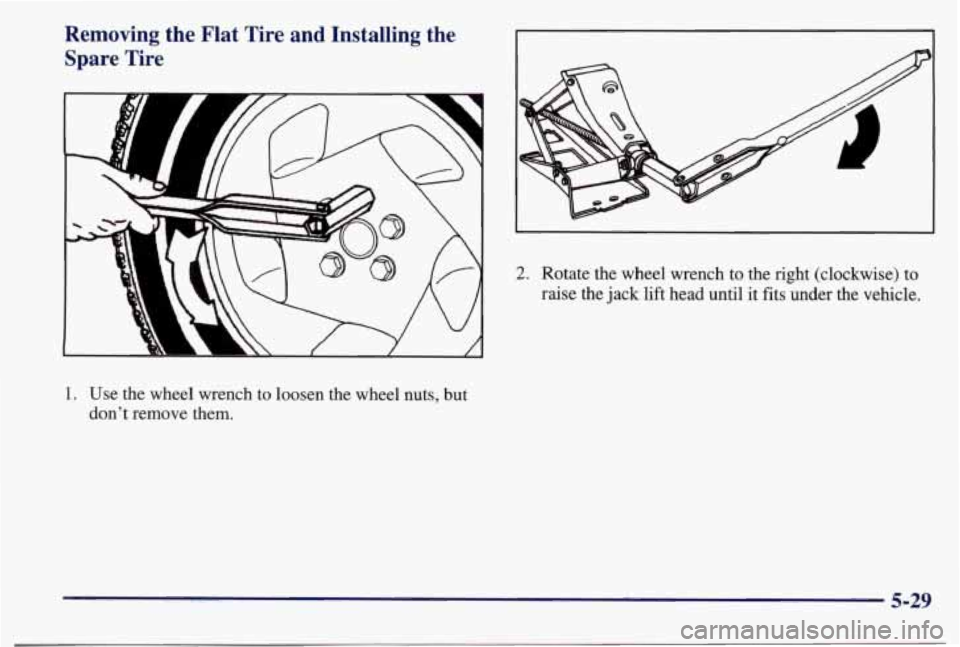
1. Use the wheel wrench to loosen the wheel nuts, but
don’t remove them.
2. Rotate the wheel wrench to the right (clockwise) to
raise the jack lift head until it fits under the vehicle.
5-29
Page 244 of 395
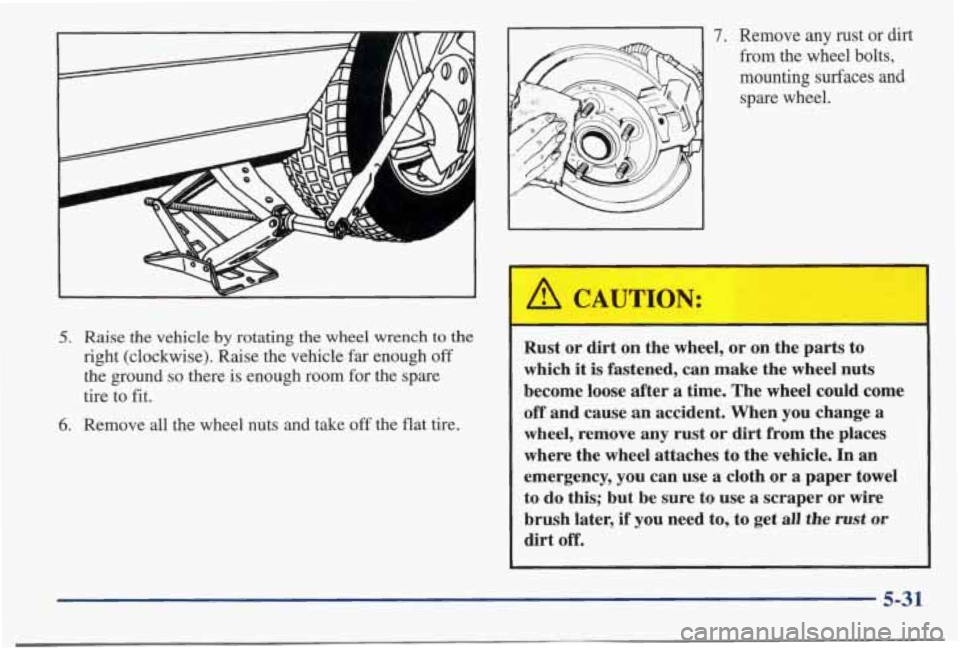
5. Raise the vehicle by rotating the wheel wrench to the
right (clockwise). Raise the vehicle far enough off
the ground so there is enough room for the spare
tire to
fit.
6. Remove all the wheel nuts and take off the flat tire.
7. Remove any rust or dirt
from the wheel bolts,
mounting surfaces and
spare wheel.
I
A CAUTION:
Rust or dirt on the wheel, or on the parts to
which it is fastened,
CM make the wheel nuts
become loose after
a time. The wheel could come
off and cause an accident. When you change a
wheel, remove any rust or dirt from the places
where the wheel attaches
to the vehicle. In an
emergency, you can use a cloth or a paper towel
to
do this; but be sure to use a scraper or wire
brush later, if you need to, to get all the rust or
dirt off.
5-31