clock PONTIAC BONNEVILLE 2003 User Guide
[x] Cancel search | Manufacturer: PONTIAC, Model Year: 2003, Model line: BONNEVILLE, Model: PONTIAC BONNEVILLE 2003Pages: 418, PDF Size: 20.24 MB
Page 268 of 418
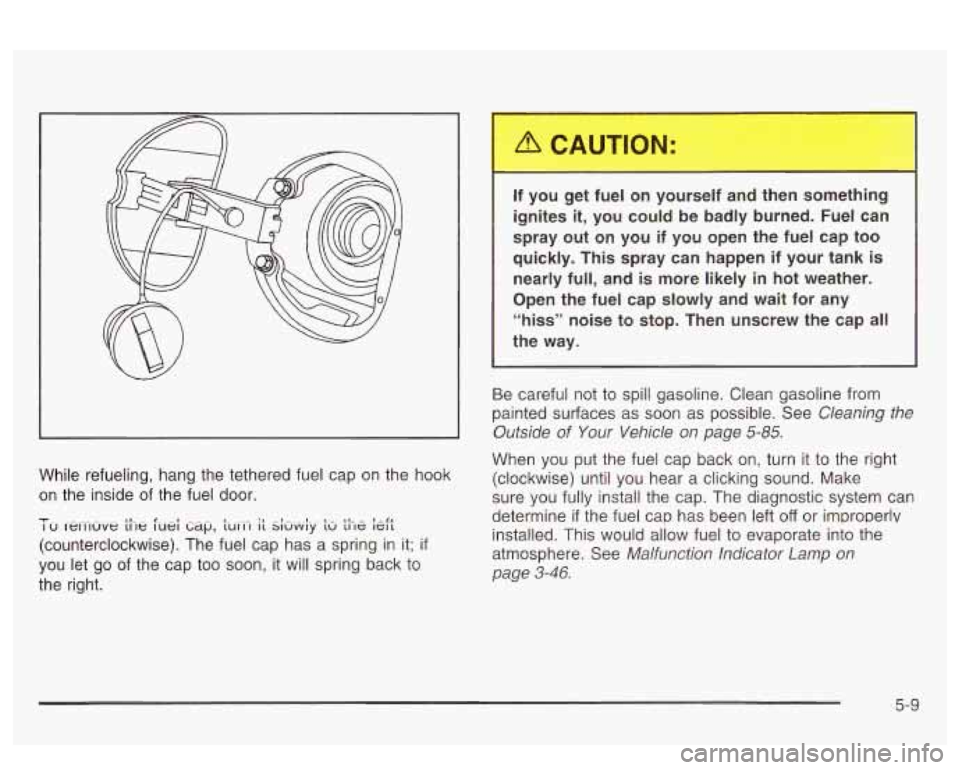
While refueling, hang the tethered fuel cap on the hook
on the inside of the fuel door.
-I- I u rewluve t11e luei ti~~p, ~UCI-I it Si&y t~ the kft I,- - 1
(counterclockwise). The fuel cap has a spring in it; if
you let go of the cap too soon, it will spring back to
the right. If you get fuel on yourself and
then something
ignites
it, you could be badly burned. Fuel can
spray out on you if you open the fuel cap too
quickly. This spray can happen if your tank is nearly full, and is more likely in hot weather.
Open the fuel cap slowly and wait for any
“hiss” noise to stop. Then unscrew the cap
all
the way.
Be careful not to spill gasoline. Clean gasoline from
painted surfaces as soon as possible. See
Cleaning the
Outside
of Your Vehicle on page 5-85.
When you put the fuel cap back on, turn it to the right
(clockwise) until you hear a clicking sound. Make
sure you fully install the cap. The diagnostic system can
determine
if the fuel cap has been left off or improperlv
installed. This would allow fuel to evaporate into the
atmosphere. See
Malfunction Indicator Lamp on
page
3-46.
5-9
Page 295 of 418
How to Add Coolant to the Radiator
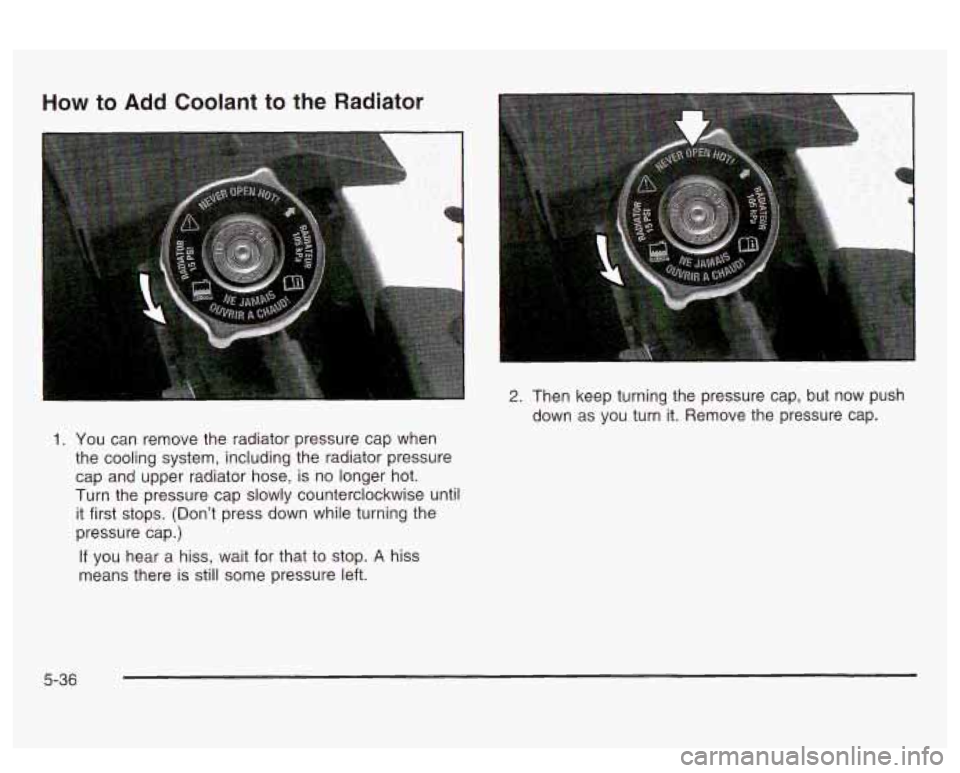
1. You can remove the radiator pressure cap when
the cooling system, including the radiator pressure
cap and upper radiator hose, is no longer hot.
Turn the pressure cap slowly counterclockwise until
it first stops. (Don’t press down while turning the
pressure cap.)
If you hear a hiss, wait for that to stop. A hiss
means there is still some pressure left.
2. Then keep turning the pressure cap, but now push
down as you turn it. Remove the pressure cap.
5-36
Page 296 of 418
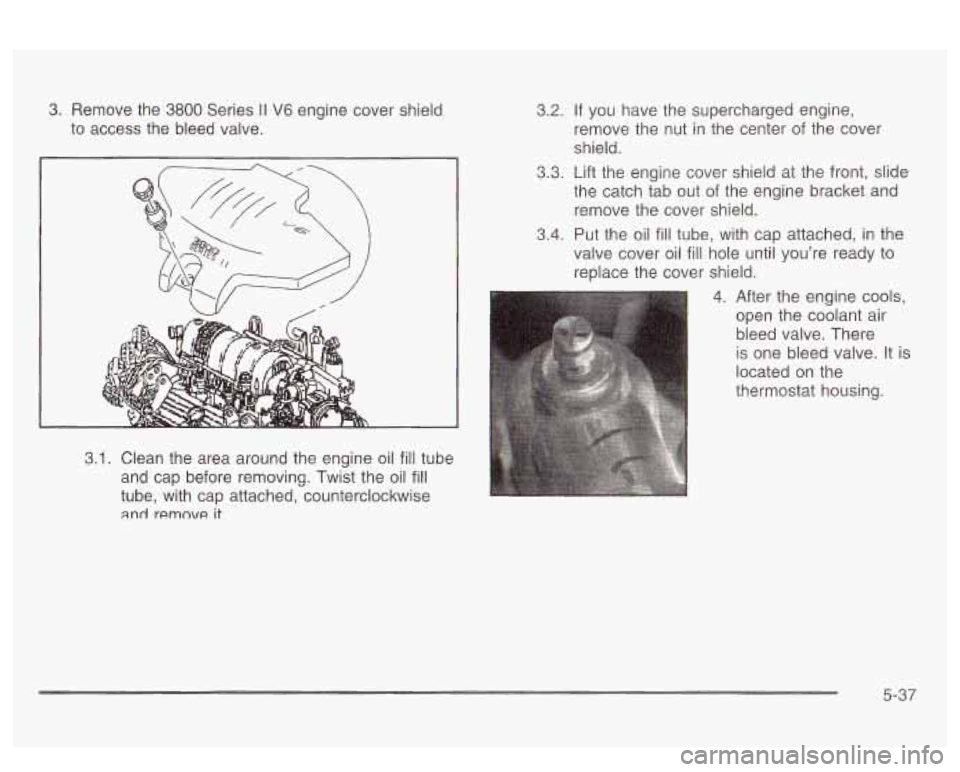
3. Remove the 3800 Series II V6 engine cover shield
to access the bleed valve.
3.1. Clean the area around the engine oil fill tube
and cap before removing. Twist the oil
fill
tube, with cap attached, counterclockwise
and remnvc! it^
3.2. If you have the supercharged engine,
remove the nut in the center of the cover
shield.
3.3. Lift the engine cover shield at the front, slide
the catch tab out
of the engine bracket and
remove the cover shield.
3.4. Put the oil
fill tube, with cap attached, in the
valve cover oil
fill hole until you’re ready to
replace the cover shield.
4. After the engine cools,
open the coolant air
bleed valve. There
is one bleed valve. It is
located on the
thermostat housing.
5-37
Page 297 of 418
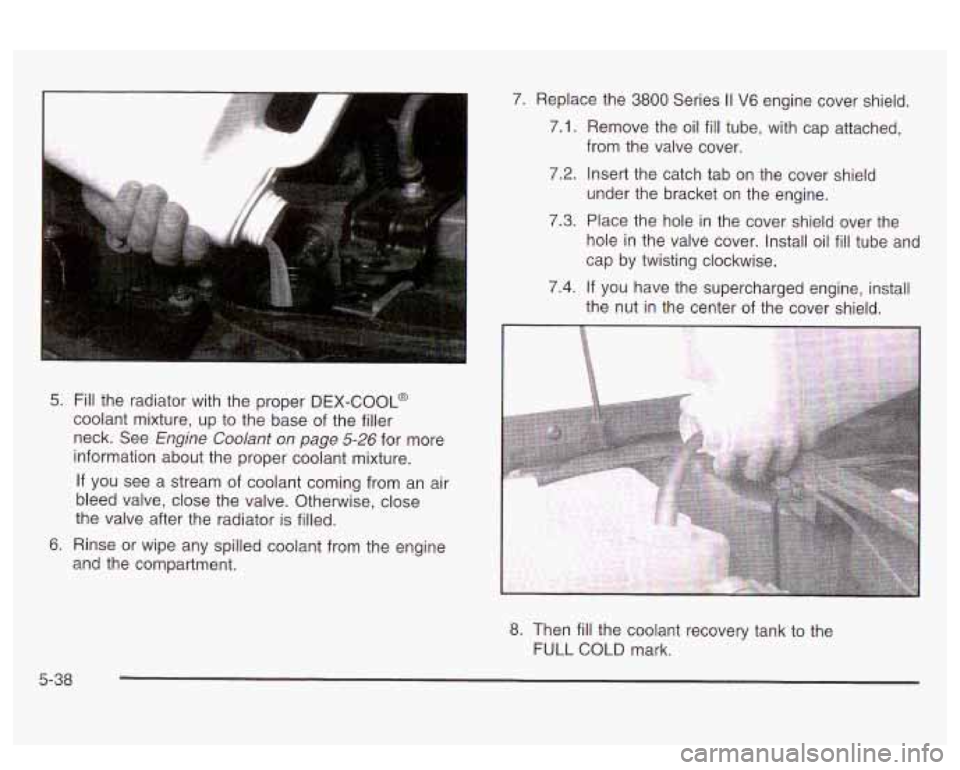
5. Fill the radiator with the proper DEX-COOL@
coolant mixture, up to the base of the filler
neck. See
Engine Coolant on page 5-26 for more
information about the proper coolant mixture.
If you see a stream of coolant coming from an air
bleed valve, close the valve. Otherwise, close
the valve after the radiator is filled.
6. Rinse or wipe any spilled coolant from the engine
and the compartment.
5-38
7. Replace the 3800 Series II V6 engine cover shield.
7.1. Remove the oil fill tube, with cap attached,
i.2. Insert the catch tab on the cover shield
under the bracket on the engine.
from the
valve cover.
7.3. Place the hole in the cover shield over the
hole in the valve cover. Install oil
fill tube and
cap by twisting clockwise.
7.4. If you have the supercharged engine, install
the nut in the center of the cover shield.
8. Then fill the coolant recovery tank to the
FULL
COLD mark.
Page 315 of 418

Bulb Replacement
For the type of bulb to use, see Replacement Bulbs on
page
5-60.
For any bulb changing procedure not listed in this
section, contact your dealer.
Halogen Bulbs
Headlamps
Halogen bulbs have pressurized gas inside
and can burst
if you drop or scratch the bulb.
You or others could be injured. Be sure
to read
and
follow the instructions on the bulb
package.
1. Reach behind the headlamp assembly, push in and
turn the bulb assembly counterclockwise to remove
the bulb assembly from the headlamp assembly.
5-56
Page 316 of 418
Front Turn Signal and Parking
Lamps
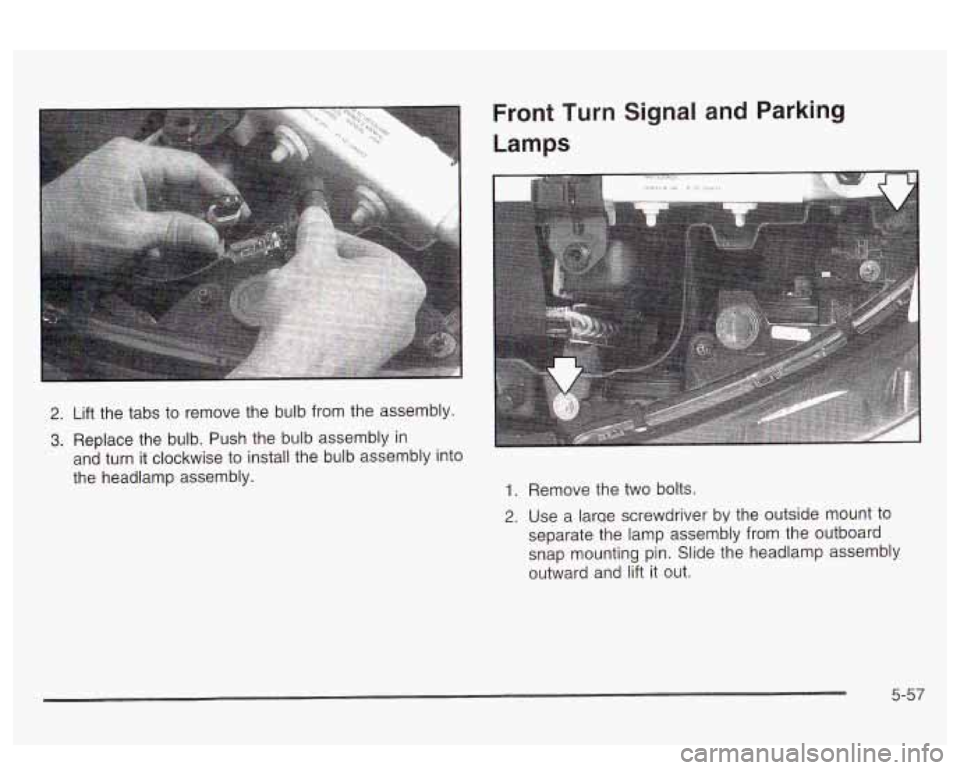
2. Lift the tabs to remove the bulb from the assembly.
3. Replace the bulb. Push the bulb assembly in
and turn it clockwise to install the bulb assembly into
the headlamp assembly.
1. Remove the two bolts.
2. Use a larqe screwdriver by the outside mount to
separate the lamp assembly from the outboard
snap mounting pin. Slide the headlamp assembly
outward and lift
it out.
5-57
Page 317 of 418
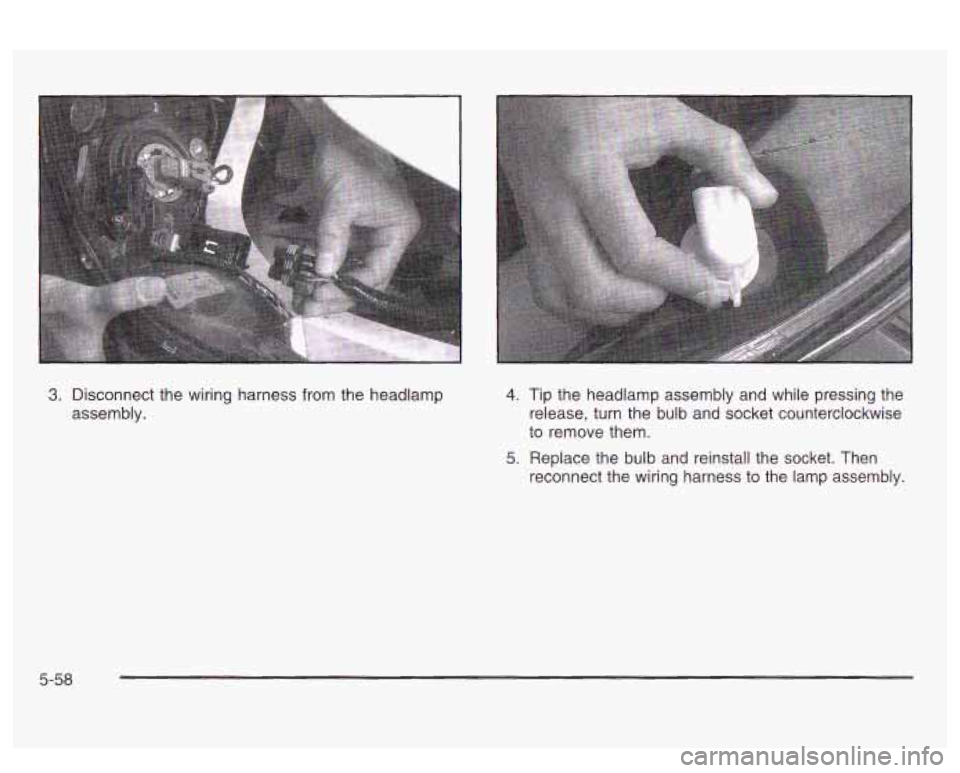
3. ~iSCOnneCt the wiring harness from the headlamp
assembly. 4.
5.
Tip the headlamp assembly and while pressing the
release, turn the bulb and socket counterclockwise
to remove them.
Replace the bulb and reinstall the socket. Then
reconnect the wiring harness to the lamp assembly.
5-58
Page 318 of 418
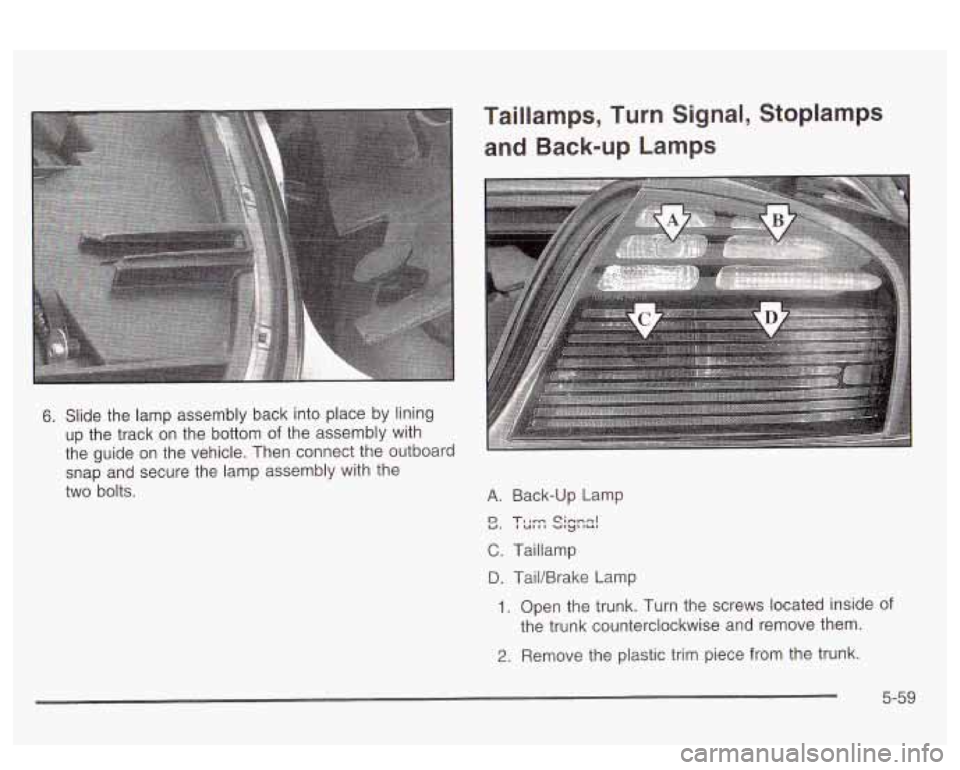
6. Slide the lamp assembly back into place by lining
up the track on the bottom
of the assembly with
the guide on the vehicle. Then connect the outboard
snap and secure the lamp assembly with the
two bolts.
C. Taillamp
D. PaiVBrake Lamp
1. Open the trunk. Turn the screws located inside of
the trunk counterclockwise and remove them.
2. Remove the plastic trim piece from the trunk.
5-59
Page 319 of 418
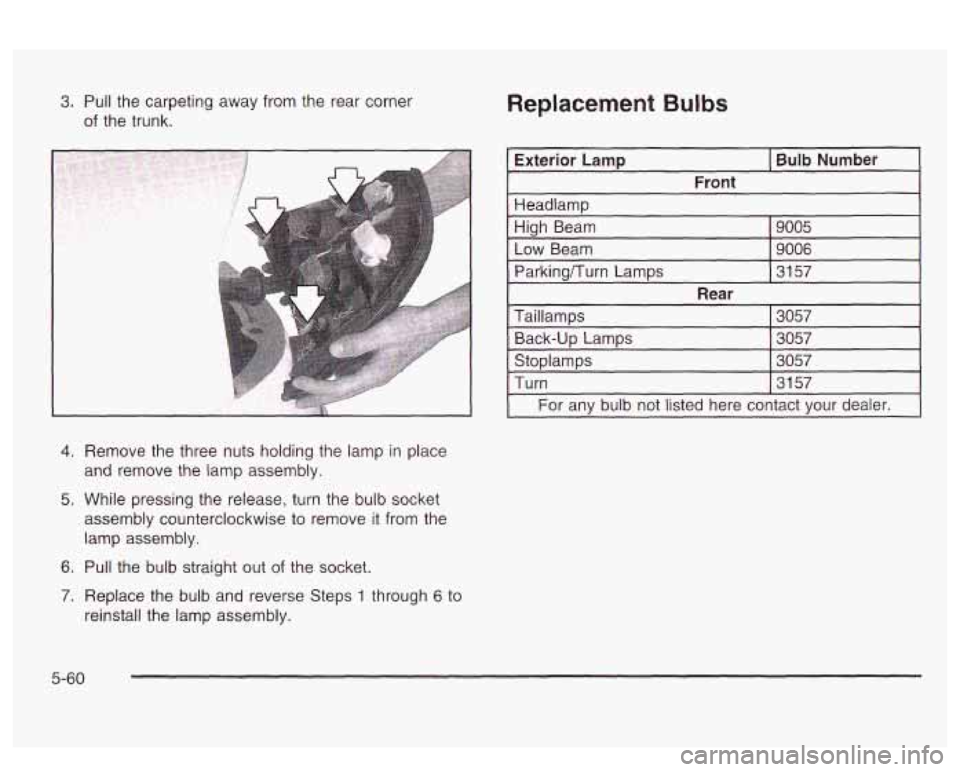
3. Pull the carpeting away from the rear corner
of the trunk.
4.
5.
6.
7.
A
Remove the three nuts holding the lamp in place
and remove the lamp assembly.
While pressing the release, turn the bulb socket
assembly counterclockwise to remove it from the
lamp assembly.
Pull the bulb straight out of the socket.
Replace the bulb and reverse Steps 1 through
6 to
reinstall the lamp assembly.
Replacement Bulbs
-
Exterior Lamp I Bulb Number
Front
I Headlamp I
-High Beam
~
9005
Low Beam 9006
Parkingnurn Lamps I 3157
Rear
Taillamps
Back-up Lamps 3057
3057
StoDlamDs 3057
Turn
I 3157
For any bulb not listed here contact Vour dealer.
5-60
Page 334 of 418

Removing the Flat Tire and Installing
the Spare Tire 2. The jack has a bolt at the end. Attach the wheel
wrench to the bolt to create a jack handle.
1. Use the wheel wrench to loosen the wheel nuts, but
don't remove them.
3. Turn the wheel wrench counterclockwise to lower
the jack
lift head until it fits under the vehicle.
5-75