oil temperature PONTIAC BONNEVILLE 2003 Owners Manual
[x] Cancel search | Manufacturer: PONTIAC, Model Year: 2003, Model line: BONNEVILLE, Model: PONTIAC BONNEVILLE 2003Pages: 418, PDF Size: 20.24 MB
Page 93 of 418
To Use the Engine Coolant Heater
1. Turn off the engine.
2. Open the hood and unwrap the electrical cord.
The engine coolant heater cord is located on the
passenger’s side of the vehicle, above the
headlamp assembly.
3. Plug it into a normal, grounded 1 IO-volt AC outlet.
Plu ing the cord into an
L Jrounded outlet
could cause an electrical shock.
Also, the
wrong kind of extension cord could overheat
and cause a fire. You could
be seriously
injured. Plug the cord into a properly grounded
three-prong 110-volt
AC outlet. If the cord
won’t reach, use a heavy-duty three-prong
extension cord rated for at least 15 amps.
4. Before starting the engine, be sure to unplug and
store the cord
as it was before to keep it away
from moving engine parts.
If you don’t, it could be
damaged. How long should
you keep the coolant heater plugged
in? The answer depends
on the outside temperature, the
kind of oil you have, and some other things. Instead
of trying to list everything here, we ask that you contact
your dealer in the area where you’ll be parking your
vehicle. The dealer can give you the best advice for that
particular area.
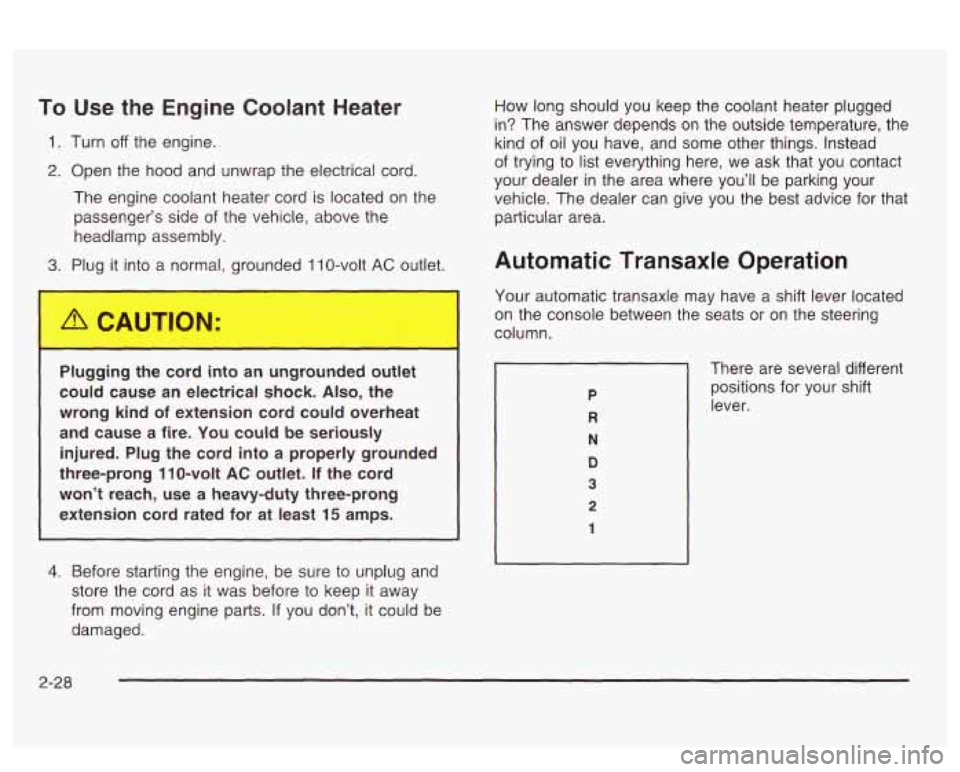
Automatic Transaxle Operation
Your automatic transaxle may have a shift lever located
on the console between the seats or on the steering
column.
There are several different
positions for your shift
lever.
2-28
Page 116 of 418
Section 3 Instrument Panel
Instrument Panel Overview ............................... 3.4
Hazard Warning Flashers
................................ 3.5
Other Warning Devises
................................... 3.6
Horn
............................................................. 3.6
Tilt Wheel
..................................................... 3.6
Turn SignaVMultifunction Lever
......................... 3.7
Exterior Lamps
............................................. 3.13
Interior Lamps
.............................................. 3.16
Head-Up Display (HUD)
................................. 3-21
Accessory Power Outlets
............................... 3.23
Ashtrays and Cigarette Lighter
........................ 3.24
Ciimate Controls ............................................ 3.25
Climate Control System ................................. 3.25
Automatic Climate Control System
................... 3.28
Outlet Adjustment
......................................... 3.32
Climate Controls Personalization
..................... 3.33
Warning Lights, Gages and Indicators ............. 3.34
Instrument Panel Cluster
................................ 3-35
Speedometer and Odometer
-8-38
Tachometer ................................................. 3.39
Safety Belt Reminder Light
............................. 3.39
. -- ..........................
Air Bag Readiness Light ............................. 3.40
Battery Warning bight
.................................... 3-41
Voltmeter Gage
............................................ 3-41
Brake System Warning Light
.......................... 3-42
Warning Light
........................................... 3-43
Traction Control System (TCS) Warning Light
...... 3-43
Low Traction Active Light ............................... 3-44
Engine Coolant Temperature Gage
.................. 3-45
Tire Pressure Light
....................................... 3-46
Anti-Lock
Brake System
Malfunction Indicator Lamp
....... ............... 3-46
Oil Pressure Gage
.................. ............... 3-49
Check Oil Level Light
J-50
Low Washer Fluid Warning Light ..................... 3-51
n ....................................
Security Light ............................................... 3-51
Check Gages Warning Light
........................... 3-51
Door Ajar Light
............................................. 3-52
Trunk Ajar Light
............................................ 3-52
............... 3-53
Fuel Gage
............................. ............... 3-53
Boost Gage
....................... ................... 3-54
Cnnrirn vu, Y . "1 \!nhirlo I . ..-.- Snnn - - - . lizht . ~
3- 1
Page 136 of 418
Head-Up Display (HUD)
If the HUD image is too bright, or too high in
your field
of view, it may take you more time to
see things you need to see when it's dark
outside. Be sure to keep the HUD image dim
and placed low in your field of view.
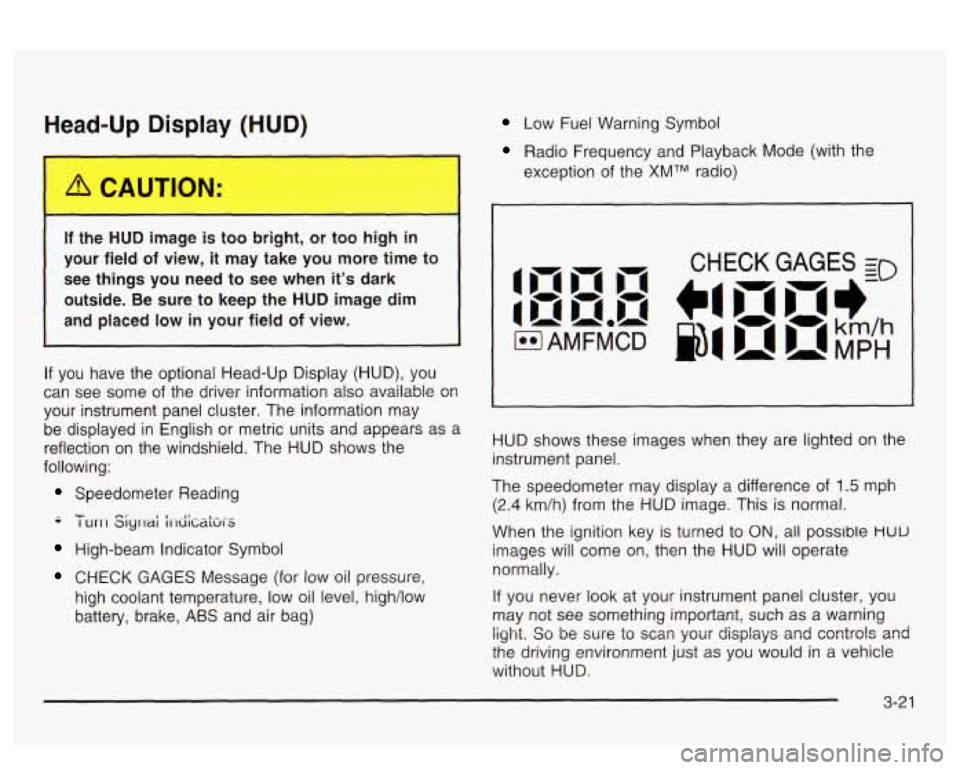
If you have the optional Head-Up Display (HUD), you
can see
some of the driver information also available 08
your instrument panel cluster. The information may
be displayed in English
or metric units and appears as a
reflection on the windshield. The HUD shows the
following:
Speedometer Reading
-- - I urrl Siyrlai i1-diCaki-S
High-beam Indicator Symbol
CHECK GAGES Message (for low oil pressure,
high coolant temperature, low oil level, high/low
battery, brake,
ABS and air bag)
Low Fuel Warning Symbol
Radio Frequency and Playback Mode (with the
exception of the
XMTM radio)
HUD shows these images when they are lighted on the
instrument panel.
The speedometer may display a difference of
1.5 mph
(2.4 km/h) from the HUD image. This is normal.
When the ignition key is turned to
ON, all possible HUU
images will come on, then the HUD will operate
normally.
If you never look at your instrument panel cluster, you
may not see something important, such as a warning
light. So be wre to scm your displays and csntrols and
the driving environment just as you would in a vehicle
without HUD.
Page 164 of 418
Here are some things you need to know in order to help
your vehicle pass an inspection:
Your vehicle will not pass this inspection
if the SERVICE
ENGINE SOON light is on or not working properly.
Your vehicle will not pass this inspection
if the OBD
(on-board diagnostic) system determines that critical
emission control systems have not been completely
diagnosed by the system. The vehicle would be
considered not ready for inspection. This can happen
if
you have recently replaced your battery or if your
battery has run down. The diagnostic system is
designed to evaluate critical emission control systems
during normal driving. This may take several days
of routine driving.
If you have done this and your vehicle
still does not pass the inspection for lack of
OBD
system readiness, see your dealer or qualified service
center to prepare the vehicle for inspection.
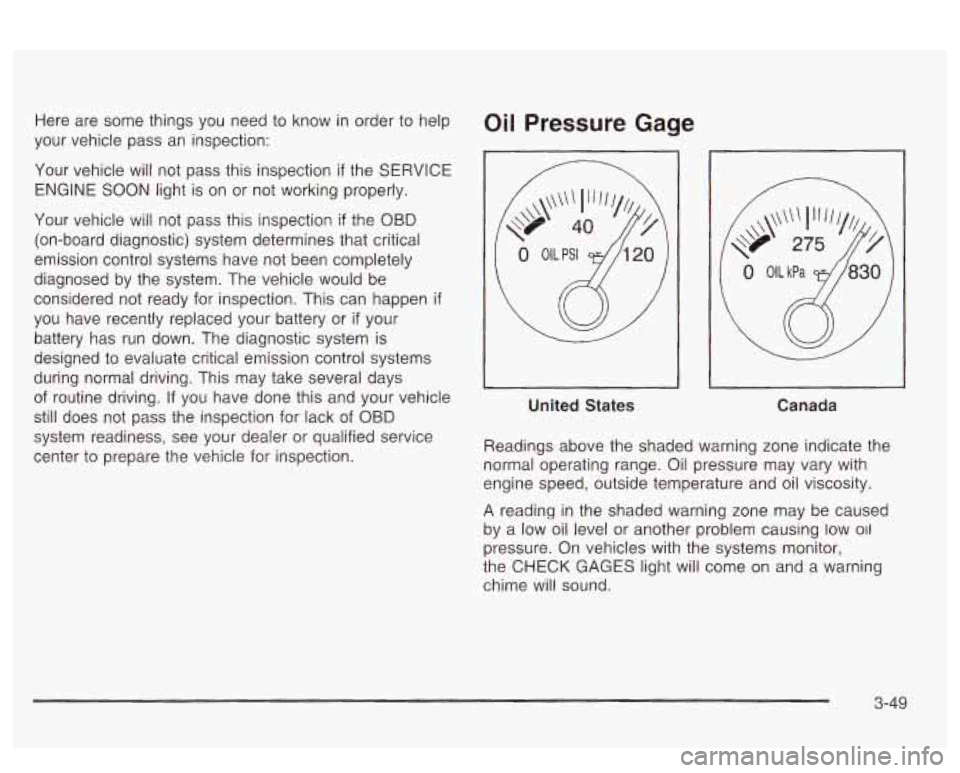
Oil Pressure Gage
United States
Canada
Readings above the shaded warning zone indicate the
normal operating range. Oil pressure may vary with
engine speed, outside temperature and oil viscosity.
A reading in the shaded warning zone may be caused
by a low oil level or another problem causing low
011
pressure. On vehicles with the systems monitor,
the
CHECK GAGES light will come on and a warning
chime will sound.
3-49
Page 166 of 418
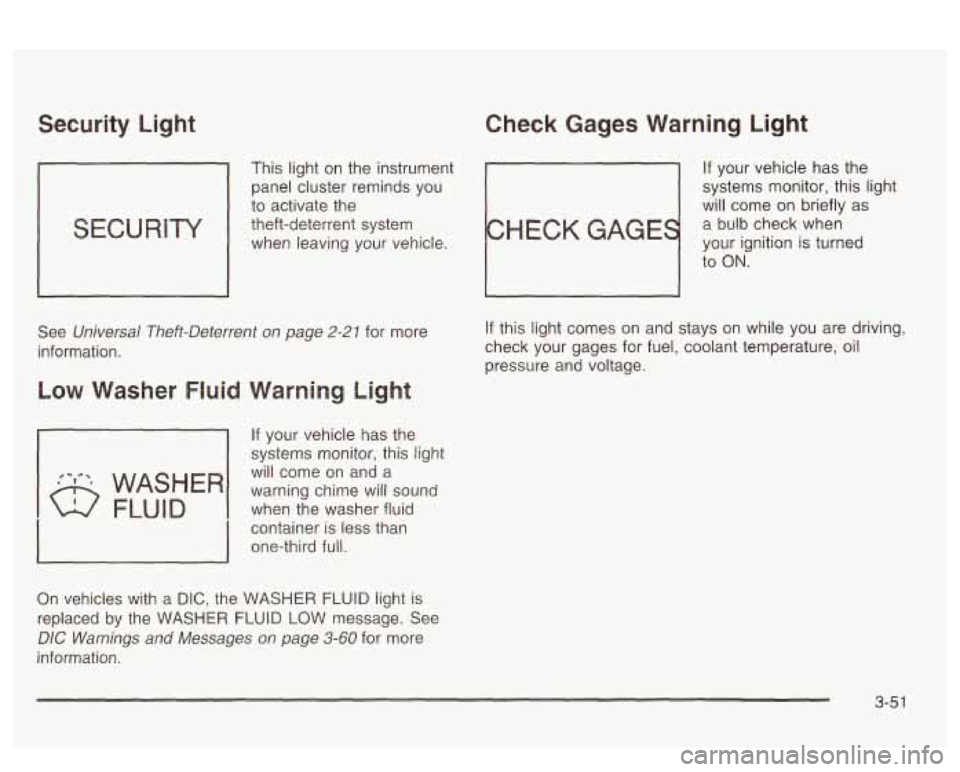
Security Light Check Gages Warning Light
This light on the instrument If your vehicle has the
panel cluster reminds you systems
monitor, this light
to activate the
will come on briefly as
theft-deterrent system
a bulb check when
when leaving your vehicle.
your ignition is turned
to
ON.
See Universal Theft-Deterrent on page 2-21 for more
information.
If your vehicle has the
systems monitor, this light
will come on and a
when the washer fluid
container
is less than
one-third full. warning chime will sound
On vehicles with a DIC, the WASHER FLUID light is
replaced by the WASHER FLUID LOW message. See
DIC Warnings and Messages on page 3-60 for more
information.
If this light comes on and stays on while you are driving,
check your gages for fuel, coolant temperature, oil
pressure and voltage.
3-5 1
Page 175 of 418
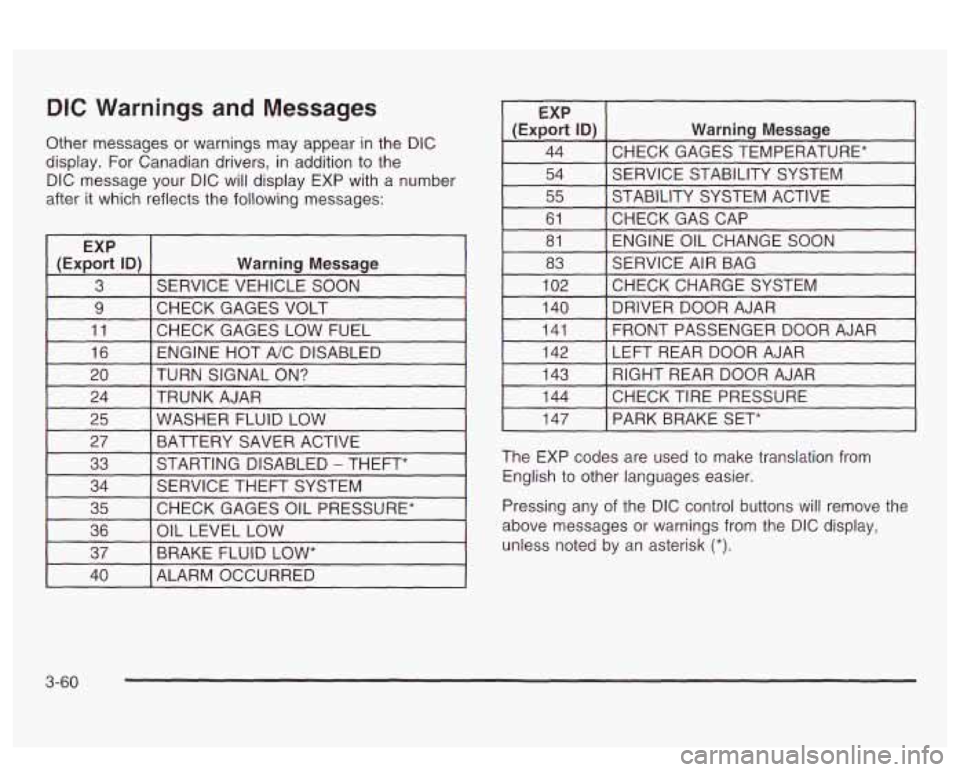
DIC Warnings and Messages
Other messages or warnings may appear in the DIC
display. For Canadian drivers, in addition to the
DIC message your DIC will display EXP with a number
after it which reflects the following messages:
~
EXP
(Export
ID) Warning Message
3 SERVICE VEHICLE SOON
9 I CHECK GAGES VOLT I I
11 [CHECK GAGES LOW FUEL 1
16 I ENGINE HOT A/C DISABLED I
EXP
(Export
ID) Warning Message
44 CHECK GAGES TEMPERATURE* ~~ ~
54 SERVICE STABILITY SYSTEM
55 STABILITY SYSTEM ACTIVE
61 ENGINE OIL CHANGE SOON
81
CHECKGASCAP
83
CHECKCHARGESYSTEM
102 SERVICE
AIR BAG
I 140 I DRIVER DOOR AJAR I
141
LEFT REAR DOOR AJAR
142 FRONT PASSENGER
DOOR AJAR
20 TRUNK AJAR
24 TURN SIGNAL
ON? 143
CHECK TIRE PRESSURE 144 RIGHT REAR DOOR AJAR
25 BATTERY SAVER ACTIVE
27
WASHER FLUID LOW
33
CHECK GAGES OIL PRESSURE*
35 SERVICE
THEFT SYSTEM
34 STARTING DISABLED
- THEFT*
36
BRAKE FLUID
LOW* 37
OIL
LEVEL LOW
I 147 I PARK BRAKE SET*
The EXP codes are used to make translation from
English to other languages easier.
Pressing any of the DIC control buttons
will remove the
above messages or warnings from the DIC display,
unless noted by an asterisk
(*).
40 I ALARM OCCURRED
3-60
Page 278 of 418
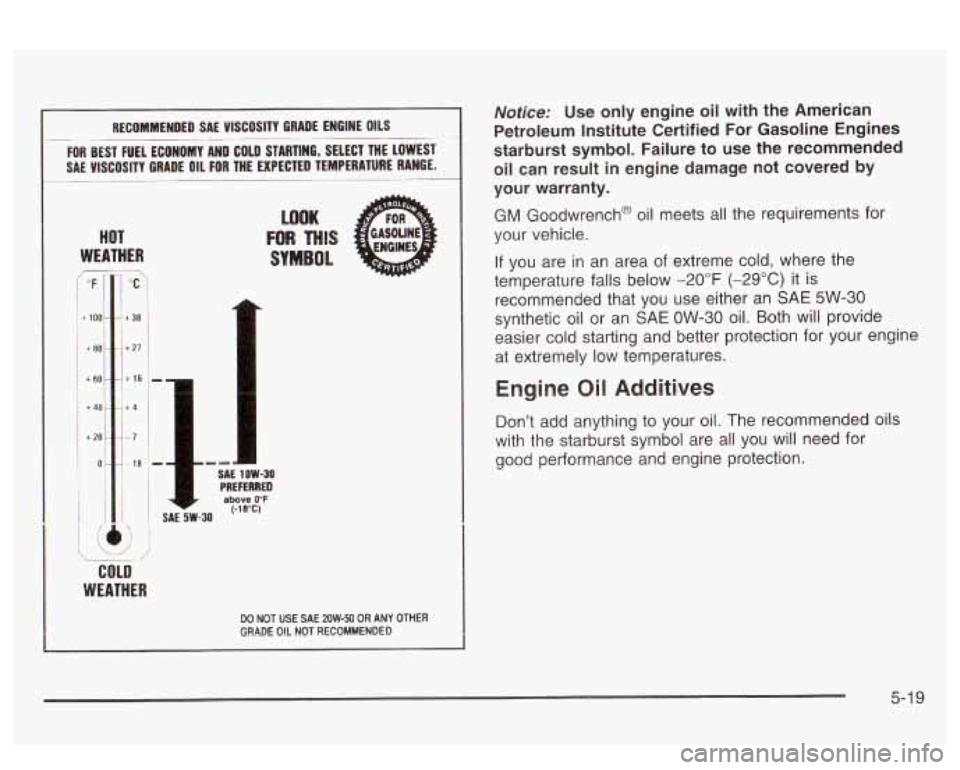
RECOMMENDED SAE VISCOSITY GRADE ENGINE OILS
FOR BEST FUEL ECONOMY AND COLD STARTING, SELECT THE LOWEST
SAE VISCOSITY GRADE
OIL FOR THE EXPECTED TEMPERATURE RANGE.
HOT
WEATHER
+ 80 ~
+ 60
."I
7 "C
t 38
f 21
t 16
+4
-7
18
COLD
WEATHER
~ 1'
/.
SAE~W-XI
LOOK
FOR THIS
SYMBOL
.- SAE 1OW-30 PREFERRED above 0°F (-1WC)
DO NOT USE SAE 2OW-50 OR ANY OTHER GRADE OIL NOT REGOMMEMBED
Notice: Use only engine oil with the American
Petroleum Institute Certified For Gasoline Engines
starburst symbol. Failure to use the recommended
oil can result in engine damage not covered by
your warranty.
GM Goodwrench@ oil meets all the requirements for
your vehicle.
If you are in an area of extreme cold, where the
temperature falls below -20°F (-29°C) it is
recommended that you use either an
SAE 5W-30
synthetic oil or an SAE OW-30 oil. Both will provide
easier cold starting and better protection for your engine
at extremely
low temperatures.
Engine Oil Additives
Don't add anything to your oil. The recommended oils
with the starburst symbol are
all you will need for
good performance and engine protection.
5-1 9
Page 279 of 418

When to Change Engine Oil (Vehicles
Without the
GM Oil Life SystemTM)
If any one of these is true for you, use the short trip/city
maintenance schedule:
e
e
e
e
Most trips are less than 5 miles (8 km). This is
particularly important when outside temperatures
are below freezing.
Most trips include extensive idling (such as frequent
driving in stop-and-go traffic).
You frequently tow a trailer or use a carrier
on top
of your vehicle.
The vehicle is used for delivery service, police, tax1
or other commercial application.
Driving under these conditions causes engine oil
to
break down sooner. If any one of these is true for your
vehicle, then you need to change your oil and filter
every
3,000 miles (5 000 km) or 3 months - whichever
occurs first.
If none of them is true, use the long trip/highway
maintenance schedule. Change the oil and filter every
7,500 miles (1 2 500 km) or 12 months - whichever
occurs first. Driving a vehicle with a fully warmed engine
under highway conditions will cause engine oil
to
break down slower.
When to Change Engine Oil (Vehicles
With the
GM Oil Life SystemrM)
If so equipped, your vehicle has a computer system that
lets you know when to change the engine oil and
filter. This is based on engine revolutions and engine
temperature and not on mileage. Based on driving
conditions, the mileage at which an oil change will be
indicated can vary considerably. For the oil life system to
work properly, you must reset the system every time
the oil is changed.
When the system has calculated that oil life has been
diminished, it will indicate that an oil change is
necessary. An ENGINE
OIL CHANGE SOON message
will come on. Change your oil as soon as possible
within the next two times you stop for fuel. It is possible
that,
if you are driving under the best conditions, the
oil life system may not indicate that an oil change
is necessary for over a year. However, your engine oil
and filter must be changed at least once a year and
at this time the system must be reset. It is also
important to check your oil regularly and keep it at the
proper level.
If the system is ever reset accidentally, you must
change your oil at
3,000 miles (5 000 km) since your
last oil change. Remember
to reset the oil life system
whenever the oil is changed.
5-20
Page 282 of 418
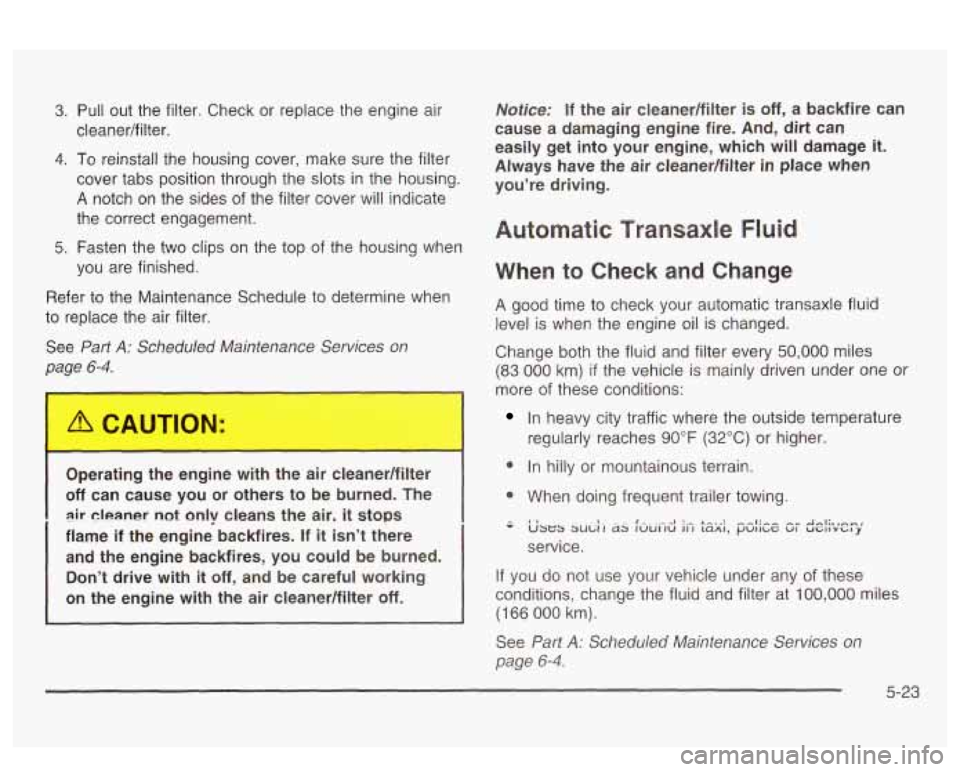
3. Pull out the filter. Check or replace the engine air
4. To reinstall the housing cover, make sure the filter
cover tabs position through the slots in the housing.
A notch on the sides of the filter cover will indicate
the correct engagement.
cleaner/filter.
5. Fasten the
two clips on the top of the housing when
you are finished.
Refer to the Maintenance Schedule to determine when
to replace the air filter.
See
Part A: Scheduled Maintenance Services on
page
6-4.
Operating : el ne with ? ai :leane r
off can cause you or others to be burned. The
air cleaner not only cleans the air, it stops
flame if the engine backfires. If
it isn’t there
and the engine backfires, you could be burned.
Don’t drive with
it off, and be careful working
on the engine with the air cleaner/filter
off.
I
Notice: If the air cleanedfilter is off, a backfire can
cause a damaging engine fire.
And, dirt can
easily get into your engine, which will damage
it.
Always have the air cleaner/filter in place when
you’re driving.
When to Check and Change
A good time to check your automatic transaxle fluid
level is when the engine oil is changed.
Change both the fluid and filter every
50,000 miles
(83 000 km) if the vehicle is mainly driven under one or
more of
these conditions:
In heavy city traffic where the outside temperature
regularly reaches 90°F (32°C) or higher.
9 In hilly or mountainous terrain.
0 When doing frequent trailer towing.
- I, - SUU~~I 2s IWUIIU ii7 Lam, pwm,c uI U~~lv~Iy 1-...--1 . A-.,: .--I:-- -” Afil;,,nm,
service.
If you do not use your vehicle under any of these
conditions, change the fluid and filter at
100,000 miles
(166 000 km).
See
Part A: Scheduled Maintenance Services on
page
6-4.
5-23
Page 285 of 418
How to Add Fluid
Refer to the Maintenance Schedule to determine what
kind of transaxle fluid
to use. See Part D:
Recommended Fluids and Lubricants on page 6-24.
If the fluid level is low, add only enough of the proper
fluid
to bring the level into the cross-hatched area on the
dipstick.
1. Pull out the dipstick.
2. Using a long-neck funnel, add enough fluid at the
dipstick hole
to bring it to the proper level.
It doesn’t take much fluid, generally less than one
pint
(0.5 L). Don’t overfill.
Notice: We recommend you use only fluid labeled
DEXRON@-Ill, because fluid with that label is
made especially for your automatic transaxle.
Damage caused by fluid other than DEXRON@-Ill
is
not covered by your new vehicle warranty.
3. After adding fluid, recheck the fluid level as
described under “How to Check,” earlier in this
section.
Engine Coolant
The cooling system in your vehicle is filled with
DEX-COOL@ engine coolant. This coolant is designed
to remain
in your vehicle for 5 years or 150,000 miles
(240
000 km), whichever occurs first, if you add
only extended life coolant.
The following explains your cooling system and how to
add coolant when it is low. If you have a problem
with engine overheating, see
Engine Overheating on
page
5-29.
A 50/50 mixture of clean, drinkable water and
DEX-COOL@ coolant will:
Give freezing protection down to -34°F (-37°C).
Give boiling protection up to 265°F (129°C)
Protect against rust and corrosion.
Help keep the proper engine temperature.
Let the warning lights and gages work as
they should.
4. When the correct fluid level is obtained, push the
dipstick back
in all the way.
5-26