clock PONTIAC FIREBIRD 1997 Owners Manual
[x] Cancel search | Manufacturer: PONTIAC, Model Year: 1997, Model line: FIREBIRD, Model: PONTIAC FIREBIRD 1997Pages: 410, PDF Size: 19.2 MB
Page 62 of 410

If your vehicle has this option, it has a theft-deterrent
alarm system. Once armed, the system will sound the
horn and flash the parking lamps if the vehicle is
broken into.
Shock Sensor
Coupe Convertible
The shock sensor is what triggers the alarm when it
detects a blow to your vehicle. It
is located over the
right rear wheelhouse near the spare
tire in the hatch
area. There are two levels of alarms via the shock
sensor: Two horn blasts and parking lamp flashes for
non-threatening blows to the vehicle and
a full two
minute alarm for harder blows to the vehicle. Its
sensitivity can be adjusted if more or less sensitivity is
desired. (Note: If sensitivity is increased too much,
it
may give false alarms caused by gusts of wind or other
natural events that may shake the vehicle).
To adjust, remove the label covering the adjustment
knob on the sensor and adjust as desired. Turn clockwise
to increase sensitivity and turn counterclockwise to decrease sensitivity. The shock sensor
is ignored by the
alarm system when the ignition is on, when the hatch is
open, when the alarm is disarmed, when it is customized
to be ignored and for five seconds after
the horn sounds
an alarm or chirp. The shock sensor is ignored after
triggering three full alarms until the system is rearmed.
2-13
Page 101 of 410

Headlamp Doors
The headlamp doors are designed to open when you turn
the headlamps on and close when you turn the
headlamps off. The headlamp doors can be opened
without turning
on the headlamps by turning the
headlamps on, then turning the switch back
to the
parking lamps position. The headlamp doors should
be open when
driving in
icy or snowy conditions to prevent the doors from
freezing closed and when washing the vehicle to help
clean the headlamps.
You can open the headlamp doors manually:
1. Open the hood.
2. Remove the plastic cover from the retractor
motor knob.
3. Turn the retractor motor knob counterclockwise until
the headlamp door
is fully open. The knob will get
harder
to turn when the headlamp door is all the
way up.
motor
knob.
4. Replace the plastic cover on the retractor
To manually close the headlamp doors, turn the lamps
o€€ and turn the knob clockwise. If the headlamp doors
aren’t working properly, see your Pontiac dealer
for help.
2-52
Page 122 of 410

6. Pull down on the center opening and align the hooks
with the holes.
Push forward on the larger part of the
latch until it clicks.
Do not force the latch. If it is
hard to lock, the top is not properly aligned.
If your vehicle suffers a power loss, such as a dead
battery, you can still raise
or lower the top manually by
rotating the valve in the left side
of the trunk. Open
the trunk and find the tab along the left side trim
panel.
Lift up the tab and turn the valve clockwise to
release the hydraulic pressure. Turn the ignition key to
the
LOCK position. You can now raise or lower your top
manually. Be sure to close the valve after installing your
top
so you can raise or lower it electrically later.
2-73
Page 140 of 410
Section 3 Comfort Controls and Audio Systems
In this section, you’ll find out how to operate the comfort control and audio systems offered with your Pontiac.
Be sure to read about the particular systems supplied with your vehicle.
3-2
3-3
3-3
3-4
3-4
3-4
3
-4
3-5
3-5
3-6
3 -6
3-7
Comfort Controls
Air Conditioning
Cooling
Heating
Bi-Level Heating
Ventilation
Defogging and Defrosting
Rear Window Defogger
Ventilation System
Audio Systems Setting the Clock
for All Systems
AM-FM Stereo with Cassette Tape Player
3-10
3- 14
3-16
3-19
3-2
1
3-22
3-22
3-23
3-23
3-24 AM-FM Stereo with Cassette
Tape Player
and Equalizer
AM-FM Stereo with Compact Disc Player
and Equalizer
Trunk Mounted
CD Changer
Theft-Deterrent Feature
Steering Wheel Controls
Understanding Radio Reception
Tips About Your Audio System
Care
of Your Cassette Tape Player
Care
of Your Compact Discs
Power Antenna Mast Care
3-1
Page 141 of 410
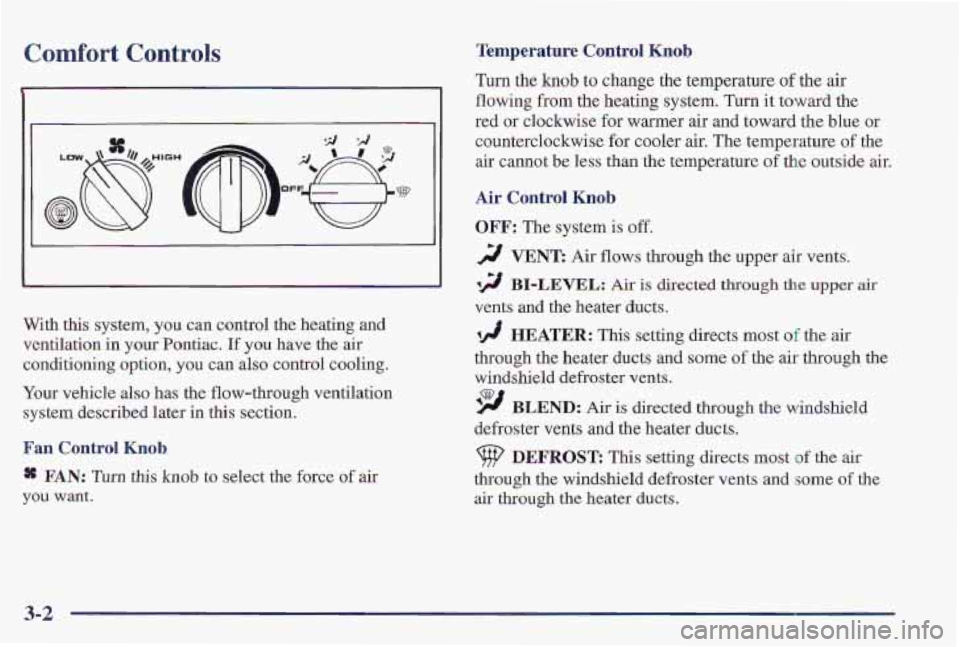
Comfort Controls Temperature Control Knob
Turn the knob to change the temperature of the air
I flowing from the heating system, Turn it toward the
I, ,I red or clockwise for warmer air and toward the blue or
counterclockwise
for cooler air. The temperature of the
air cannot be less than the temperature
of the outside air.
Air ContL - - ____ - .b
OFF: The system is off. I
2 VENT Air flows through the upper air vents.
12 BI-LEVEL: Air is directed through the upper air
vents and the heater ducts.
With this
system, you can control the heating and
ventilation in your Pontiac.
If you have the air
conditioning option, you can also control cooling.
Your vehicle also has the flow-through ventilation
system described later in this section.
Fan Control Knob.
a FAN: Turn this knob to select the force of air
you want.
/ HEATER: This setting directs most of the air
through the heater ducts and some
of the air through the
windshield defroster vents.
'9 BLEND: Air is 'directed through the windshield
defroster vents
and the heater ducts.
9 DEFROS'G: This setting directs most of the air
through the windshield defroster vents and some of the
air through the heater ducts.
3-2
Page 145 of 410
Ventilation Tips
a Keep the hood and front air inlet free of ice, snow or
any other obstruction (such
as leaves). The heater
and defroster will work far better, reducing the
chance
of fogging the inside of your windows.
When you enter
a vehicle in cold weather, turn the
fan control
knob to the right for a few moments
before driving
off. This helps clear the intake ducts
of snow and moisture, and reduces the chance of
fogging
the inside of your windows.
Keep the air path under the rront sems clear of
objects. This helps air to circulate throughout
your vehicle.
Audio Systems
Your Delco@ audio system has been designed to operate
easily and give years
of listening pleasure. You will get
the most enjoyment out
of it if you acquaint yourself
with it first. Find out what your Delco system can do
and how to operate all its controls,
to be sure you’re
getting the most out o’f the advanced ‘engineering that
went into it.
If you have power door locks, your vehicle has a feature
called Retained Accessory Power
(RAP). With RAP,
you can play your audio system even after the ignition is
off. See “Retained Accessory Power” in the Index.
Setting the Clock for All Systems
Press and hold HR until the correct hour appears. Press
and hold MIN until the correct minute appears. There
will
be a two-second delay before the clock goes into
time-set mode, and the colon on the display will blink
while
in this mode.
3-6
Page 146 of 410
AM-FM Stereo with Cassette Tape Player
(If Equipped)
Playing the Radio
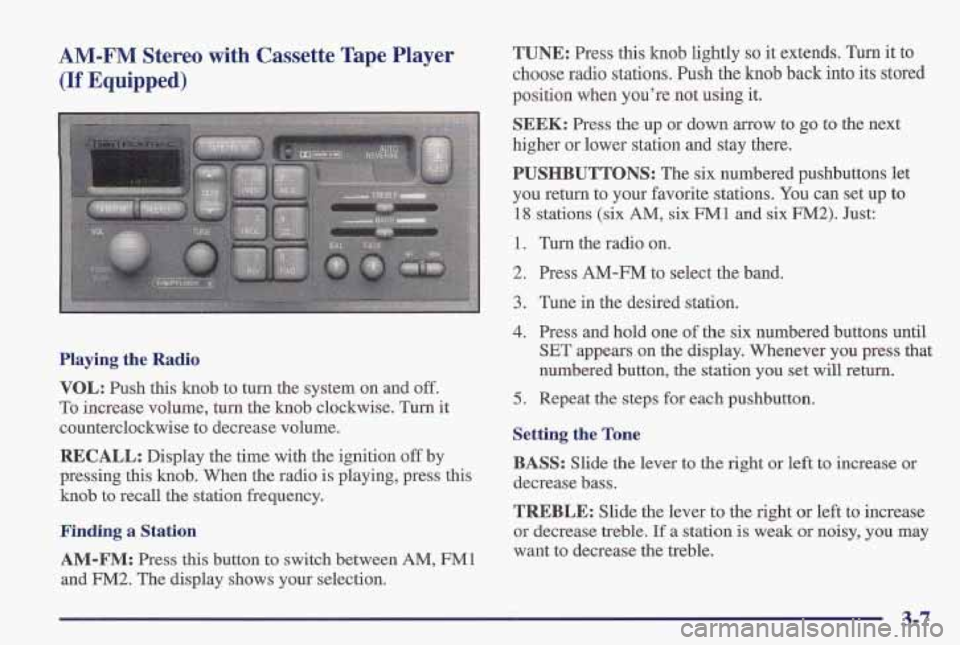
VOL: Push this knob to turn the system on and off.
To increase volume, turn the knob clockwise. Turn it
counterclockwise to decrease volume.
RECALL: Display the time with the ignition off by
pressing this knob. When the radio is playing, press this
knob to recall the station frequency.
Finding a Station
AM-FM: Press this button to switch between AM, FM1
and FM2. The display shows your selection.
TUNE: Press this knob lightly so it extends. Turn it to
choose radio stations. Push the knob back into its stored
position when
you’re not using it.
SEEK: Press the up or down arrow to go to the next
higher or lower station and stay there.
PUSHBUTTONS: The six numbered pushbuttons let
you return to your favorite stations.
You can set up to
18 stations (six AM, six FM1 and six FM2). Just:
1. Turn the radio on.
2. Press AM-FM to select the band.
3. Tune in the desired station.
4. Press and hold one of the six numbered buttons until
SET appears on the display. Whenever you press that
numbered button, the station you set will return.
5. Repeat the steps for each pushbutton.
Setting the Tone
BASS: Slide the lever to the right or left to increase or
decrease bass.
TREBLE: Slide the lever to the right or left to increase
or decrease treble, If
a station is weak or noisy, you may
want to decrease the treble.
3-7
Page 147 of 410
Adjusting the Speakers
BAL: Press this knob lightly so it extends. Turn this
knob to move the sound to the left or right speakers.
The middle position balances the sound between
the speakers.
FADE: Press this knob lightly so it extends. Turn this
knob to move the sound to the front or rear speakers.
The middle position balances the sound between
the speakers.
Push these knobs back into their stored positions when
you’re not using them.
Playing a Cassette Tape
Your tape player is built to work best with tapes that are
30 to 45 minutes long on each side. Tapes longer than
that are
so thin they may not work well in this player.
While the tape is playing, use the
VOL, FADE, BAL,
BASS and TREB controls just as you do for the radio.
The display will
show an arrow to show which side of
the tape is playing. When the down indicator arrow is
lit, selections listed on the bottom side of the cassette are
playing, When the up arrow is lit, selections listed
on the
top side
of the cassette are playing. The tape player
automatically begins playing the other side when it
reaches the end
of the tape.
If E and a number appear on the radio display, the tape
won’t play because
of an error.
0 E10: The tape is tight and the player can’t turn the
tape hubs. Remove the tape. Hold the tape with
the open end down and try to turn the right hub
counterclockwise with
a pencil. Turn the tape over
and repeat.
If the hubs do not turn easily, your tape
may be damaged and should not be used in the
player. Try a new tape to make sure your player is
working properly.
Ell: The tape is broken. Try a new tape.
If any error occurs repeatedly or if an error can’t be
corrected, please contact your dealer.
If your radio
displays
an error number, write it down and provide it to
your dealer when reporting the problem.
PREV (I): Press this button or the SEEK down arrow to
search
for the previous selection on the tape. Your tape
must have at least three seconds
of silence between each
selection for
PREV or SEEK to work. The tape direction
arrow blinks during
PREV or SEEK operation. Press
PREV or the SEEK down arrow to stop searching. The
sound will mute during PREV or SEEK operation.
Page 150 of 410
Playing the Radio
VOL: Push this knob to turn the system on and off. To
increase volume, turn the knob clockwise. Turn it
counterclockwise to decrease volume.
RECALL: Display the time with the ignition off by
pressing this knob. When the radio is playing, press this
knob to recall the station frequency.
Finding a Station
AM-FM:
Press this button to switch between AM, FM1
and FM2. The display shows your selection.
TUNE: Press this knob lightly so it extends. Turn it to
choose radio stations. Push the knob back into its stored
position when you’re not using it.
SEEK: Press the up or down arrow to go to the next
higher or lower station and stay there.
PUSHBUTTONS: The six numbered pushbuttons let
you return to your favorite stations.
You can set up to
18 stations (six AM, six FM1 and six FM2). Just:
1. Turn the radio on.
2. Press AM-FM to select the band.
3. Tune in the desired station.
4. Press and hold one of the six numbered buttons until
SET appears on the display. Whenever you press that
numbered button, the station you set will return.
5. Repeat the steps for each pushbutton.
Setting the Tone
EQUALIZER: A
seven band equalizer is part of your
audio system. Slide the levers up to boost or down
to
reduce frequency range.
Adjusting the Speakers
BAL: Press this knob lightly so it extends. Turn it to
move the sound to the left or right speakers. The middle
position balances
the sound between the speakers.
FADE: Press this knob lightly so it extends. Turn it to
move the sound to the front or rear speakers. The middle
position balances the sound between
the speakers.
Push these knobs back into their stored positions
when
you’re not using them.
Playing a Cassette Tape
Your tape player is built to work best with tapes that are
30 to 45 minutes long on e,ach side. Tapes longer than
that are so thin they may not work well in this play’er.
3-11
Page 151 of 410
While the tape is playing, use the VOL, FADE and BAL
controls just as you do for the radio. The display will
show an arrow to show which side of the tape is playing.
When the down indicator arrow is lit, selections listed
on the bottom side
of the cassette are playing. When the
up arrow is lit, selections listed on
the top side of the
cassette are playing. The tape player automatically
begins playing the other side when
it reaches the end of
the tape.
If E and a number appear on the radio display, the tape
won’t play because
of an error.
E10: The tape is tight and the player can’t turn the
tape hubs. Remove the tape. Hold the tape with
the open end down and
try to turn the right hub
counterclockwise with
a pencil, Turn the tape over
and repeat. If the hubs do not turn easily, your tape
may be damaged and should not be used
in the
player. Try a new tape
to make sure your player is
working properly.
Ell: The tape is broken. Try a new tape.
If any error occurs repeatedly or if an error can’t be
corrected, please contact your dealer. If your radio
displays an error nuniber, write
it down and provide it to
your dealer when reporting the problem.
PREY (1): Press this button or the SEEK down arrow to
search for the previous selection on the tape. Your tape
must have at least three seconds
of silence between ah
selection for PREV or SEEK to work. The tape direction
arrow blinks during
PREV or SEEK operation. Press
PREV or the SEEK down arrow to stop searching. The
sound will mute during
PREV or SEEK operation.
NEXT (2): Press this button or the SEEK up arrow to
search for the next selection on the tape.
If you hold the
button, the player will continue moving forward through
the tape. Your tape must have at least three seconds
of
silence between each selection for NEXT or’SEEK to
work. The tape direction arrow blinks during NEXT or
SEEK operation. Press
NEXT or the SEEK up arrow to
stop searching. The sound will mute during NEXT or
SEEK operation.
PROG (3): Press this button to play the other side
of the tape.
on (4): Press this button to reduce background noise.
Note that the double-D symbol will appear
on the display,
Dolby00 Noise Reduction
is manufactured under a
license from Dolby Laboratories Licensing Corporation.
Dolby and the double-D symbol
are trademarks of
Dolby Laboratories Licensing Corporation.
3-12