lock PONTIAC FIREBIRD 1998 Workshop Manual
[x] Cancel search | Manufacturer: PONTIAC, Model Year: 1998, Model line: FIREBIRD, Model: PONTIAC FIREBIRD 1998Pages: 406, PDF Size: 18.23 MB
Page 130 of 406

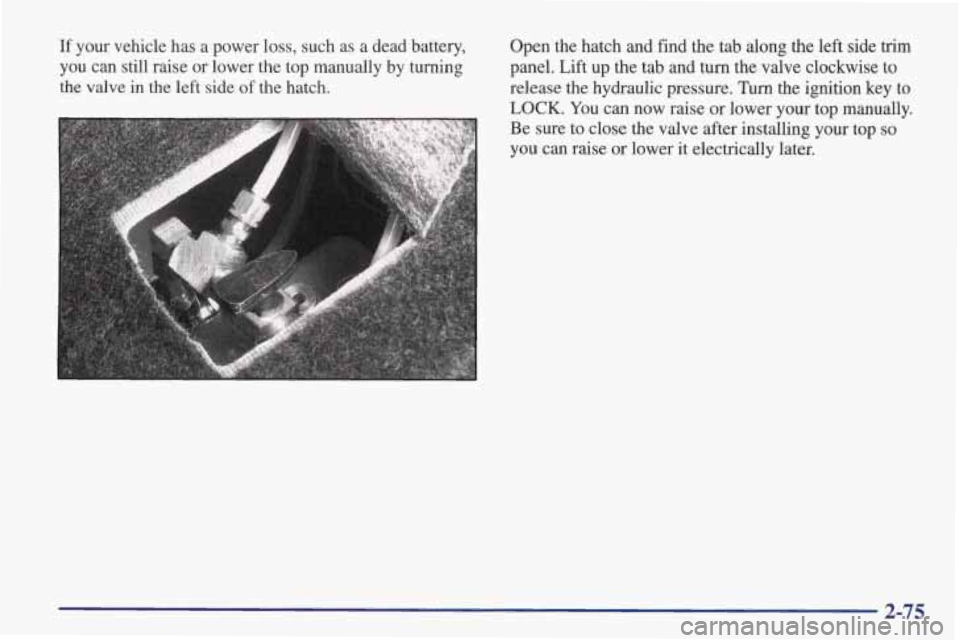
If your vehicle has a power loss, such as a dead battery,
you can still raise or lower the top manually by turning
the valve in the left side of the hatch.
.
Open the hatch and find the tab along the left side trim
panel. Lift up the tab and turn the valve clockwise to
release the hydraulic pressure. Turn the ignition key to
LOCK. You can now raise or lower your top manually.
Be sure to close the valve after installing your top
so
you can raise or lower it electrically later.
2-75
Page 136 of 406

Air Bag Readiness Light
There is an air bag readiness light on the instrument
panel, which shows AIR
BAG. The system checks the
air bag’s electrical system for malfunctions. The light
tells you if there is an electrical problem. The system
check includes
the air bag sensors, the air bag modules,
the wiring and the crash sensing and diagnostic module.
For more information on the air bag system, see “Air
Bag” in the Index.
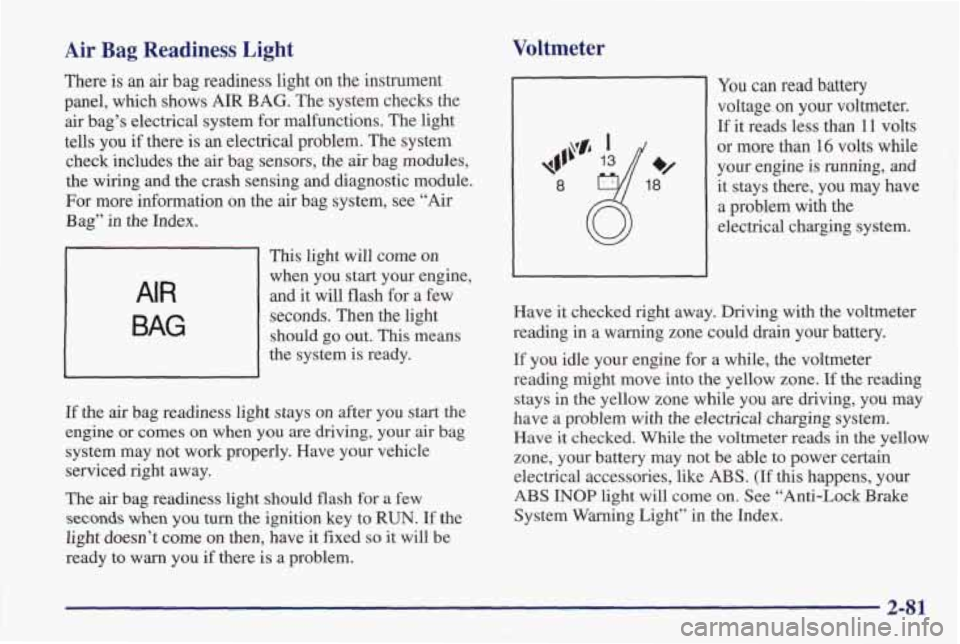
AIR
BAG
This light will come on
when you start your engine,
and it will flash for a few
seconds. Then the light
should
go out. This means
the system is ready.
If the air bag readiness light stays
on after you start the
engine or comes on when you are driving, your air bag
system may not work properly. Have your vehicle
serviced right away.
The air bag readiness light should flash for
a few
seconds when you turn the ignition key to RUN. If the
light doesn’t come on then, have it fixed
so it will be
ready to warn you
if there is a problem.
Voltmeter
You can read battery
voltage on your voltmeter.
If it reads less than 11 volts
or more than 16 volts while
your engine is running, and
it stays there, you may have
a problem with the
electrical charging system.
Have it checked right away. Driving with the voltmeter
reading in a warning zone could drain your battery.
If you idle your engine for a while, the voltmeter
reading might move into
the yellow zone. If the reading
stays in the yellow zone while you are driving, you may
have a problem with the electrical charging system.
Have
it checked. While the voltmeter reads in the yellow
zone, your battery may not be able to power certain electrical accessories, like
ABS. (If this happens, your
ABS INOP light will come on. See “Anti-Lock Brake
System Warning Light” in the Index.
2-81
Page 138 of 406

Anti-Lock Brake System Warning Light
ABS
INOP
With the anti-lock brake system, this light will come
on when you start your
engine and
it will stay
on for three seconds.
That’s normal.
If the anti-lock brake system warning light stays on
longer than normal after you’ve started your engine, turn
the ignition
off. Or, if the light comes on and stays on
when you’re driving, stop as soon as possible and turn
the ignition off. Then start the engine again to reset the
system.
If the light still stays on, or comes on again
while you’re driving, your vehicle needs service. If the
light is on and the regular brake system warning light
isn’t on, you still have brakes, but you don’t have
anti-lock brakes. Adjust your driving accordingly.
The anti-lock brake system warning light should come
on briefly when you turn the ignition key to
RUN. If the
light doesn’t come on then, have
it fixed so it will be
ready to warn you if there is a problem.
Traction Control System Warning Light
(Option)
This warning light should
come on briefly
as you start
the engine. If the warning
light doesn’t come on
then,
have it fixed so it will be
ready to warn you if there’s
a problem.
If it stays on, or comes on when you’re driving, there
may be a problem with your traction control system and
your vehicle may need service. When this warning light
is on, the system will not
limit wheel spin. Adjust your
driving accordingly.
The traction control system warning light will come on
if
you turn the system off by pressing the TCS button
located in front
of the console, the warning light will
come on and stay on. To turn the system back on,
press the button again. The warning light should go
off. (See “Traction Control System” in the Index for
more information.)
If
the traction control system warning light comes on
and stays on for an extended period of time when the
system is turned on, your vehicle needs service.
2-83
Page 139 of 406

Low Traction Light
LOW
TRAC
When your anti-lock system
is adjusting brake pressure
to help avoid
a braking skid,
this light will come on.
If you have the traction control system, this light will
also come on when the system is limiting wheel spin.
You may feel or hear the system working, but this is
normal. Slippery road conditions may exist if the low
traction light
comes on, so adjust your driving
accordingly. The light will stay on for a few seconds
after the traction control system stops limiting
wheel spin.
The low traction light
also comes on briefly when you
turn the ignition key to
RUN. If the light doesn’t come
on then, have it fixed so it will be there to tell you when
the anti-lock
brake system or traction control system
is active.
Engine Coolant Temperature Gage
This gage shows the engine
coolant temperature.
If the
gage pointer moves into
the red area,
your engine
is too hot! It means that
your engine coolant
has overheated.
If you have been operating your vehicle under normal
driving conditions,
you should pull off the road, stop
your vehicle and turn off the engine as soon as possible.
In “Problems on the Road,” this manual shows what to
do. See “Engine Overheating” in the Index.
2-84
Page 146 of 406

Section 3 Comfort Controls and Audio Systems
In this section, you’ll find out how to operate the comfort control and audio systems offered with your vehicle. Be
sure to read about the particular systems supplied with your v\
ehicle.
3-2
3-3
3-4
3-4
3-5
3-6
3-7
3-7
3-8 3-11 Comfort Controls
Air Conditioning
Heating
Defogging and Defrosting
Rear Window Defogger
Ventilation System
Setting the Clock
AM-FM Stereo with Cassette Tape Player and
Equalizer (If Equipped)
Monsoonm
AM-FM Stereo with Cassette
Tape Player and Equalizer (If Equipped)
AM-€34 Stereo with Compact Disc Player and
Equalizer (If Equipped)
3-12
3-14
3-17
3-19
3-20
3
-20
3-21
3-22
3-22
3-22
MonsoonTM AM-FM Stereo with Compact
Disc Player and Equalizer
(If Equipped)
Trunk Mounted CD Changer (If Equipped)
Theft-Deterrent Feature
Audio Steering Wheel Controls (If Equipped)
Understanding Radio Reception
Tips About Your Audio System
Care of Your Cassette Tape Player
Care of Your Compact Discs
Care of Your Compact Disc Player
Power Antenna Mast Care
3-1
Page 147 of 406

Comfort Controls
With this system, you can control the heating and
ventilation in
your vehicle. If you have the air
conditioning option, you can also control cooling.
Your vehicle also has the flow-through ventilation
system
described later in this section.
Fan Control Knob
Turn the fan knob to select the force of air
you want.
Temperature Control Knob
Turn the center knob to change the temperature of the
air flowing from the heating system. Turn it toward the
red area (clockwise) for warmer air and toward the blue
area (counterclockwise) for cooler
air.
Air Control Knob
OFF’: The system is off.
2 VENT: Air flows through the upper air vents.
12 BI-LEVEL: Air is directed through the upper air
vents and the heater ducts.
ld HEATER: This setting directs most of the air
through the heater ducts and some of the air through the
windshield defroster vents.
‘3 BLEND: Air is directed through the windshield
defroster vents and the heater ducts.
DEFROST: This setting directs most of the air
through the windshield defroster vents and some of the
air through the heater ducts.
Page 152 of 406

Audio Systems
Your Delco Electronics audio system has been designed
to operate easily and give years of listening pleasure.
You will get the most enjoyment out of it if you acquaint
yourself with it first. Find out what your Delco
Electronics system can do and how to operate
all its
controls, to be sure you’re getting the most out of the
advanced engineering that went into it.
If you have power door locks, your vehicle has a feature
called Retained Accessory Power
(RAP). With RAP,
you can play your audio system even after the ignition is
off. See “Retained Accessory Power” in the Index.
Setting the Clock
Press and hold HR until the correct hour appears. Press
and hold
MIN until the correct minute appears. There
will be a two-second delay before the clock goes into
time-set mode, and the colon on the display will blink
while in
this mode.
AM-FM Stereo with Cassette Tape Player
and Equalizer
(If Equipped)
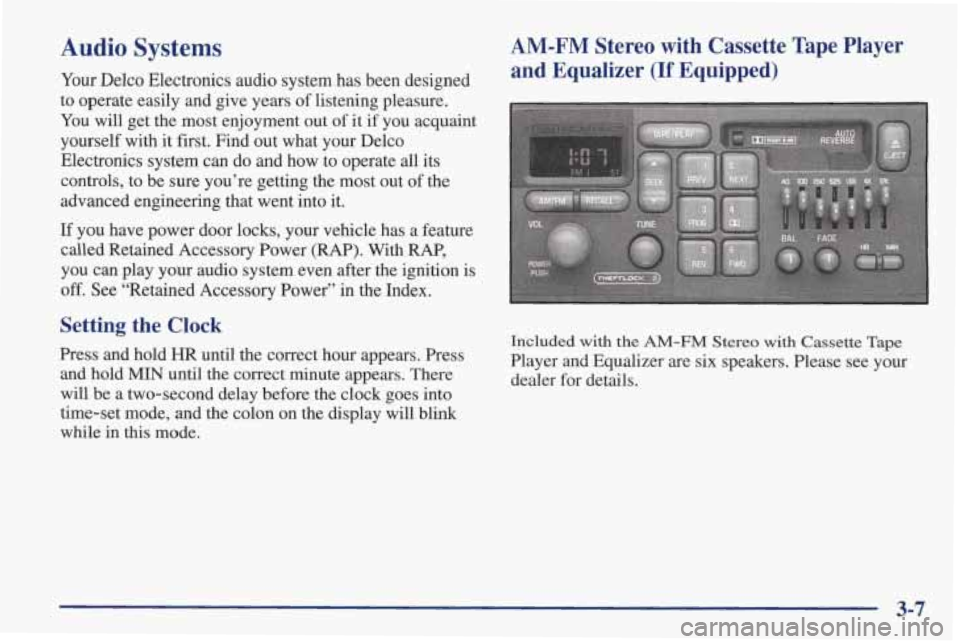
Included with the AM-FM Stereo with Cassette Tape
Player and Equalizer are six speakers. Please see your
dealer for details.
3-7
Page 153 of 406

MonsoonTM AM-FM Stereo with Cassette RECALL: Display the time with the ignition off by
Tape Player and Equalizer (If Equipped) pressing this button. When the radio is playing, press
this knob to recall the station frequency.
Included
with the Monsoon AM-FM Stereo with
Cassette Tape Player and Equalizer are 10
high
performance speakers and a powerful 8 channel
amplifier.
This feature requires power windows and
door locks. Please see your dealer for details.
Playing the Radio
POWER-VOL:
Push this knob to turn the system on
and
off. To increase volume, turn the knob to the right.
Turn it to the left to decrease volume.
Finding a Station
AM-FM: Press this button to switch between AM, FM1
and
FM2. The display shows your selection.
TUNE: Press this knob lightly so it extends. Turn it to
choose radio stations.
Push the knob back into its stored
position when you’re not using it.
SEEK: Press the up or down arrow to go to the next
higher
or lower station and stay there.
PUSHBUTTONS: The six numbered pushbuttons let
you return to your favorite stations.
You can set up to
18 stations (six
AM, six FM1 and six FM2). Just:
1. Turn the radio on.
2. Press AM-FM to select the band.
3. Tune in the desired station.
4. Press and hold one of the six numbered buttons until
SET appears on the display. Whenever you press that
numbered button, the station you set
will return.
5. Repeat the steps for each pushbutton.
Page 157 of 406

Monsoon AM-FM Stereo with Compact
Disc Player and Equalizer (If Equipped)
Included with the Monsoon AM-FM Stereo with
Compact Disc Player and Equalizer are
10 high
performance speakers and a powerful
8 channel
amplifier. This feature requires power windows and
door locks. Please see your dealer for details.
Playing the Radio
POWER-VOL:
Push this knob to turn the system on
and
off. To increase volume, turn the knob to the right.
Turn
it to the left to decrease volume.
RECALL: Press this button briefly to recall the station
being played or to display the clock.
If you press the
knob
when the ignition is off, the clock will show for a
few seconds.
Finding a Station
AM-FM: Press this button to switch between AM, FM1
and FM2. The display shows your selection.
TUNE: Press this knob lightly so it extends. Turn it to
choose radio stations.
Push the knob back into its stored
position
when you're not using it.
SEEK: Press the up or down arrow to go to the next
higher
or lower station and stay there.
PUSHBUTTONS: The six numbered pushbuttons let
you return to your favorite stations. You
can set up to
18 stations (six AM, six FM1 and six FM2). Just:
1. Turn the radio on.
2. Press AM-FM to select the band.
3. Tune in the desired station.
4. Press and hold one of the six numbered buttons until
SET appears on the display. Whenever you press that
numbered button, the station you set will return.
5. Repeat the steps for each pushbutton.
3-12
Page 162 of 406

Theft-Deterrent Feature 2. Turn the ignition to ACCESSORY or RUN.
THEFTLOCK@ is designed
to discourage theft of your
radio. It works by using a secret code to disable all radio
functions whenever battery power is removed.
The THEFTLOCK feature for the radio may be used or
ignored.
If ignored, the system plays normally and the
radio is not protected by the feature. If THEFTLOCK is
activated, your radio will not operate if stolen.
When THEFTLOCK
is activated, the radio will display
LOC to indicate
a locked condition anytime battery
power is removed.
If your battery loses power for any
reason, you must unlock the radio with the secret
code
before it will operate.
Activating the Theft-Deterrent Feature
The instructions which follow explain how to enter your
secret code
to activate the THEFTLOCK system. It is
recommended that you read through all nine steps
before starting the procedure.
NOTE: If you allow more than
15 seconds to elapse
between any steps, the radio automatically reverts to
time and you must start the procedure over at Step
4.
1. Write down any three or four-digit number from
000 to 1999 and keep it in a safe place separate from
the vehicle.
3. Turn the radio off.
4. Press the 1 and 4 buttons together. Hold them down
until
--- shows on the display. Next you will use the
secret code number which you have written down.
5. Press MIN and 000 will appear on the display.
6. Press MIN again to make the last two digits agree
7. Press HR to make the first one or two digits agree
with your code.
with your code.
8. Press AM-FM after you have confirmed that the
code matches the secret code you have written down.
The display will show REP to let you know that you
need to repeat Steps 5 through 7 to
confirm your
secret code.
9. Press AM-FM and this time the display will show
SEC to let you know that your radio
is secure.
Note that with the ignition off, the THEFTLOCK indicator will flash, indicating a secured radio.
3-17