buttons PONTIAC G3 2010 Owners Manual
[x] Cancel search | Manufacturer: PONTIAC, Model Year: 2010, Model line: G3, Model: PONTIAC G3 2010Pages: 368, PDF Size: 3.94 MB
Page 10 of 368
Press3to sound the panic alarm on the hatchback
model. Press any of the buttons on the transmitter to
turn off the alarm.
The LED light (A) on the transmitter flashes when the
buttons on the transmitter are pressed. If the light does
not flash the transmitter battery needs to be replaced.
See Keys
on page 3‑2andRemote Keyless Entry
(RKE) System Operation on page 3‑4.
Door Locks
From the outside, lock or unlock the door using the key
or the Remote Keyless Entry (RKE) transmitter.
From the inside, all of the doors can be locked and
unlocked by pushing or pulling the manual door lock on
each door.
On vehicles equipped with the central door unlocking
system, lock or unlock all the doors from the inside
using the driver door lock switch.
For more information see:
.Door Locks on page 3‑6.
.Central Door Unlocking System on page 3‑7.
Liftgate
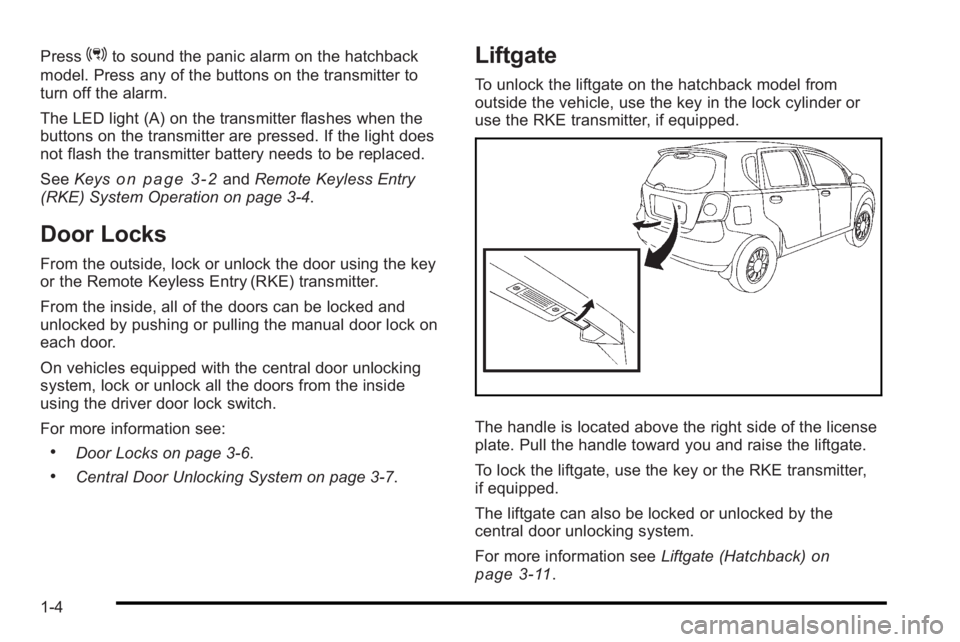
To unlock the liftgate on the hatchback model from
outside the vehicle, use the key in the lock cylinder or
use the RKE transmitter, if equipped.
The handle is located above the right side of the license
plate. Pull the handle toward you and raise the liftgate.
To lock the liftgate, use the key or the RKE transmitter,
if equipped.
The liftgate can also be locked or unlocked by the
central door unlocking system.
For more information see Liftgate (Hatchback)
on
page 3‑11.
1-4
Page 23 of 368
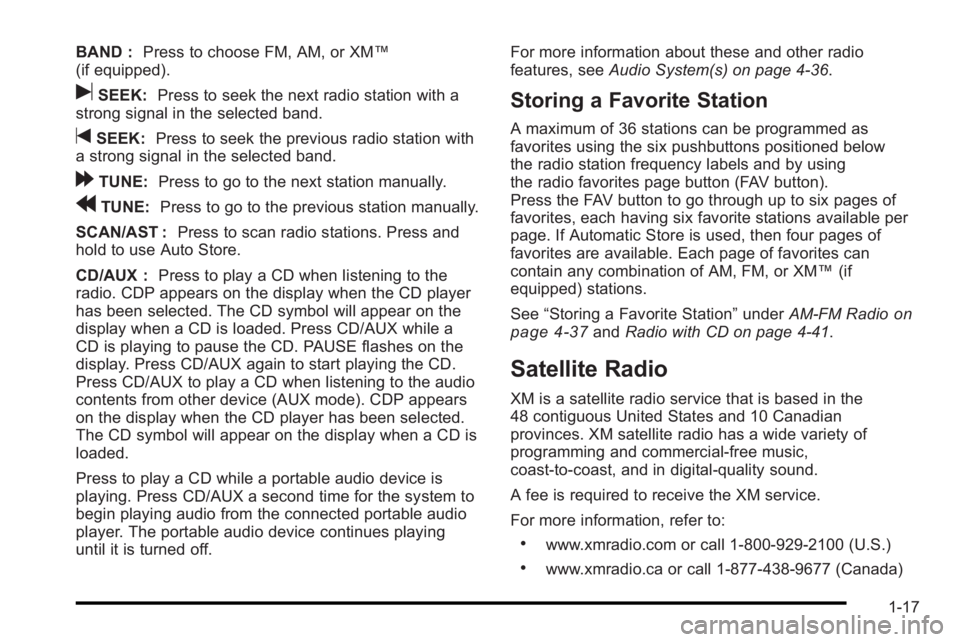
BAND :Press to choose FM, AM, or XM™
(if equipped).
uSEEK: Press to seek the next radio station with a
strong signal in the selected band.
tSEEK: Press to seek the previous radio station with
a strong signal in the selected band.
[TUNE: Press to go to the next station manually.
rTUNE: Press to go to the previous station manually.
SCAN/AST : Press to scan radio stations. Press and
hold to use Auto Store.
CD/AUX : Press to play a CD when listening to the
radio. CDP appears on the display when the CD player
has been selected. The CD symbol will appear on the
display when a CD is loaded. Press CD/AUX while a
CD is playing to pause the CD. PAUSE flashes on the
display. Press CD/AUX again to start playing the CD.
Press CD/AUX to play a CD when listening to the audio
contents from other device (AUX mode). CDP appears
on the display when the CD player has been selected.
The CD symbol will appear on the display when a CD is
loaded.
Press to play a CD while a portable audio device is
playing. Press CD/AUX a second time for the system to
begin playing audio from the connected portable audio
player. The portable audio device continues playing
until it is turned off. For more information about these and other radio
features, see
Audio System(s) on page 4‑36.
Storing a Favorite Station
A maximum of 36 stations can be programmed as
favorites using the six pushbuttons positioned below
the radio station frequency labels and by using
the radio favorites page button (FAV button).
Press the FAV button to go through up to six pages of
favorites, each having six favorite stations available per
page. If Automatic Store is used, then four pages of
favorites are available. Each page of favorites can
contain any combination of AM, FM, or XM™ (if
equipped) stations.
See “Storing a Favorite Station” underAM-FM Radio
on
page 4‑37and Radio with CD on page 4‑41.
Satellite Radio
XM is a satellite radio service that is based in the
48 contiguous United States and 10 Canadian
provinces. XM satellite radio has a wide variety of
programming and commercial-free music,
coast-to-coast, and in digital-quality sound.
A fee is required to receive the XM service.
For more information, refer to:
.www.xmradio.com or call 1-800-929-2100 (U.S.)
.www.xmradio.ca or call 1-877-438-9677 (Canada)
1-17
Page 25 of 368
Cruise Control
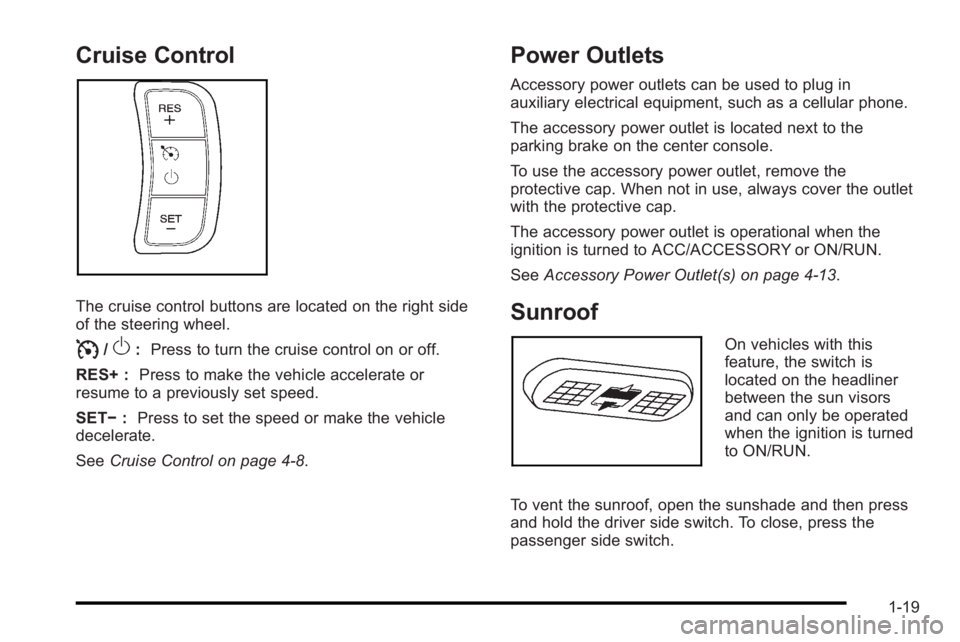
The cruise control buttons are located on the right side
of the steering wheel.
I/O:Press to turn the cruise control on or off.
RES+ : Press to make the vehicle accelerate or
resume to a previously set speed.
SET− :Press to set the speed or make the vehicle
decelerate.
See Cruise Control on page 4‑8.
Power Outlets
Accessory power outlets can be used to plug in
auxiliary electrical equipment, such as a cellular phone.
The accessory power outlet is located next to the
parking brake on the center console.
To use the accessory power outlet, remove the
protective cap. When not in use, always cover the outlet
with the protective cap.
The accessory power outlet is operational when the
ignition is turned to ACC/ACCESSORY or ON/RUN.
SeeAccessory Power Outlet(s) on page 4‑13.
Sunroof
On vehicles with this
feature, the switch is
located on the headliner
between the sun visors
and can only be operated
when the ignition is turned
to ON/RUN.
To vent the sunroof, open the sunshade and then press
and hold the driver side switch. To close, press the
passenger side switch.
1-19
Page 30 of 368
![PONTIAC G3 2010 Owners Manual The OnStar system can record and transmit vehicle
information. This information is automatically sent to an
OnStar call center when
Qis pressed,]is pressed,
or if the airbags or ACR system deploy. Thi PONTIAC G3 2010 Owners Manual The OnStar system can record and transmit vehicle
information. This information is automatically sent to an
OnStar call center when
Qis pressed,]is pressed,
or if the airbags or ACR system deploy. Thi](/img/50/40815/w960_40815-29.png)
The OnStar system can record and transmit vehicle
information. This information is automatically sent to an
OnStar call center when
Qis pressed,]is pressed,
or if the airbags or ACR system deploy. This information
usually includes the vehicle's GPS location and, in the
event of a crash, additional information regarding the
crash that the vehicle was involved in (e.g. the direction
from which the vehicle was hit). When the virtual
advisor feature of OnStar hands-free calling is used, the
vehicle also sends OnStar the vehicle's GPS location
so they can provide services where it is located.
Location information about the vehicle is only available
if the GPS satellite signals are unobstructed and
available.
The vehicle must have a working electrical system,
including adequate battery power, for the OnStar
equipment to operate. There are other problems OnStar
cannot control that may prevent OnStar from providing
OnStar service at any particular time or place. Some
examples are damage to important parts of the vehicle
in a crash, hills, tall buildings, tunnels, weather or
wireless phone network congestion.
Your Responsibility
Increase the volume of the radio if the OnStar advisor
cannot be heard.
If the light next to the OnStar buttons is red, the system
may not be functioning properly. Press
Qand request a
vehicle diagnostic. If the light appears clear (no light is
appearing), your OnStar subscription has expired and
all services have been deactivated. Press
Qto confirm
that the OnStar equipment is active.
1-24
Page 108 of 368

Remote Keyless Entry (RKE) System
Operation
The Remote Keyless Entry (RKE) transmitter functions
work up to 65 feet (20 m) away from the vehicle.
There are other conditions which can affect the
performance of the transmitter. SeeRemote Keyless
Entry (RKE) System on page 3‑3.
HatchbackSedan The following functions may be available if the vehicle
has RKE:
Q(Lock):
Press to lock all of the doors. If all of the
doors and the trunk or liftgate are closed, the hazard
lamps flash once and the horn will sound to indicate
that locking has occurred and the theft-deterrent system
is active.
K(Unlock): Press to unlock all of the doors. The
hazard lamps flash twice to indicate that unlocking has
occurred and that the theft-deterrent system is
deactivated. If the doors are not opened within
30 seconds the doors will lock again.
3(Panic) (Hatchback): Press to sound the panic
alarm. The hazard lamps will flash and the panic alarm
will stay on for about 30 seconds. Press any of the
buttons on the transmitter to turn off the alarm.
V(Remote Trunk Release) (Sedan): Press and
hold for approximately one second to open the trunk.
The LED light (A) on the transmitter flashes when the
buttons on the transmitter are pressed. If the light does
not flash see “Battery Replacement” later in this section.
The buttons do not operate and the theft-deterrent
system does not activate if the key is in the ignition.
3-4
Page 109 of 368
Programming Transmitters to the
Vehicle
Only RKE transmitters programmed to the vehicle will
work. If a transmitter is lost or stolen, a replacement
can be purchased and programmed through your
dealer/retailer. When the replacement transmitter
is programmed to the vehicle, all remaining
transmitters must also be programmed. Any lost or
stolen transmitters no longer work once the new
transmitter is programmed. Each vehicle can have
up to five transmitters programmed to it.
Battery Replacement
Replace the battery if the LED on the transmitter does
not flash when you press the buttons.
Notice:When replacing the battery, do not touch
any of the circuitry on the transmitter. Static from
your body could damage the transmitter. To replace the battery:
1. Remove the screw from the back of the cover and open the cover of the transmitter.
2. Pull the transmitter out of the cover and carefully turn the circle cover of the transmitter unit
toward open.
3. Remove the battery.
4. Insert the new battery, positive side facing up. Use one three-volt, CR1620, or equivalent,
type battery.
5. Turn the circle cover of the transmitter unit toward close and put the transmitter unit in the cover.
6. Put the two halves back together and replace the screw. Make sure the cover is on tightly, so water
will not get in.
7. Test the transmitter operation.
3-5
Page 121 of 368

How the System Alarm is Activated
If a door or the trunk or liftgate is opened without using
the key or the remote keyless entry transmitter, the horn
will sound and the lamps will flash for up to 30 seconds.
How to Turn Off the System Alarm
If the system alarm is active, it can be deactivated using
one of the following methods:
.Press one of the buttons on the remote keyless
entry transmitter.
.Unlock the driver's or passenger's front door using
the key.
Otherwise, the alarm will automatically stop after
30 seconds. The system will then lock the doors and
rearm the theft-deterrent system.
How to Detect a Tamper Condition
If the hazard warning lamps flash once when you press
the lock button on the remote keyless entry transmitter,
the theft-deterrent system alarm was activated while
you were away.
Starting and Operating
Your Vehicle
New Vehicle Break-In
Notice: The vehicle does not need an elaborate
break-in. But it will perform better in the long run if
you follow these guidelines:
.Do not drive at any one constant speed,
fast or slow, for the first 805 km (500 miles).
Do not make full-throttle starts. Avoid
downshifting to brake or slow the vehicle.
.Avoid making hard stops for the first 322 km
(200 miles) or so. During this time the new
brake linings are not yet broken in. Hard
stops with new linings can mean premature
wear and earlier replacement. Follow this
breaking-in guideline every time you get new
brake linings.
Following break‐in, engine speed and load can be
gradually increased.
3-17
Page 150 of 368
Cruise Control
For vehicles with cruise control, a speed of about
39 km/h (24 mph) or more can be maintained without
keeping your foot on the accelerator. Cruise control
does not work at speeds below 39 km/h (24 mph).
When the brakes are applied, or the clutch pedal if you
have a manual transmission, the cruise control turns off.
{WARNING:
Cruise control can be dangerous where you
cannot drive safely at a steady speed. So, do not
use the cruise control on winding roads or in
heavy traffic.
Cruise control can be dangerous on slippery
roads. On such roads, fast changes in tire traction
can cause excessive wheel slip, and you could
lose control. Do not use cruise control on slippery
roads.
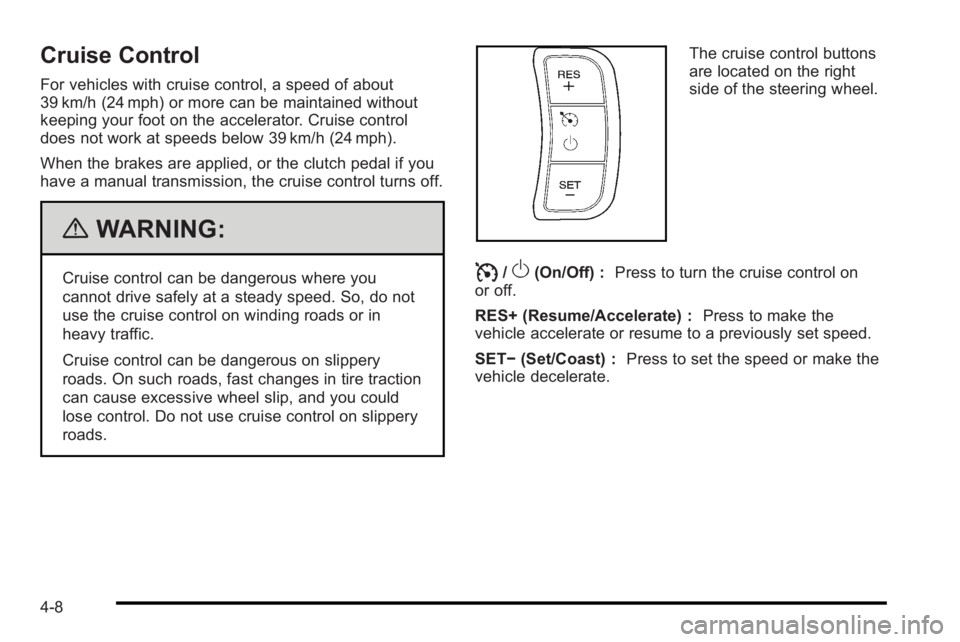
The cruise control buttons
are located on the right
side of the steering wheel.
I/O(On/Off) :Press to turn the cruise control on
or off.
RES+ (Resume/Accelerate) : Press to make the
vehicle accelerate or resume to a previously set speed.
SET− (Set/Coast) : Press to set the speed or make the
vehicle decelerate.
4-8
Page 157 of 368
Clock
There is a digital clock located in the center of the
instrument panel, above the center air outlets. When the
ignition is turned to ACC/ACCESSORY or ON/RUN,
the time is displayed in the digital clock. There are
three buttons for adjusting the digital clock:
H (Hour):Press once to go forward one hour. To go
forward more than one hour, press and hold the button
until the correct hour is reached.
M (Minute): Press once to go forward one minute. To go
forward more than one minute, press and hold the
button until the correct minute is reached.
S (Set): Press to reset the time to the nearest hour.
For example, if the set button is pressed while the time
is between 8:00 and 8:29, the display is set to 8:00.
If this button is pressed while the time is between
8:30 and 8:59, the display is set to 9:00.
After disconnecting the battery or replacing the fuse,
reset the clock.
Climate Controls
Climate Control System
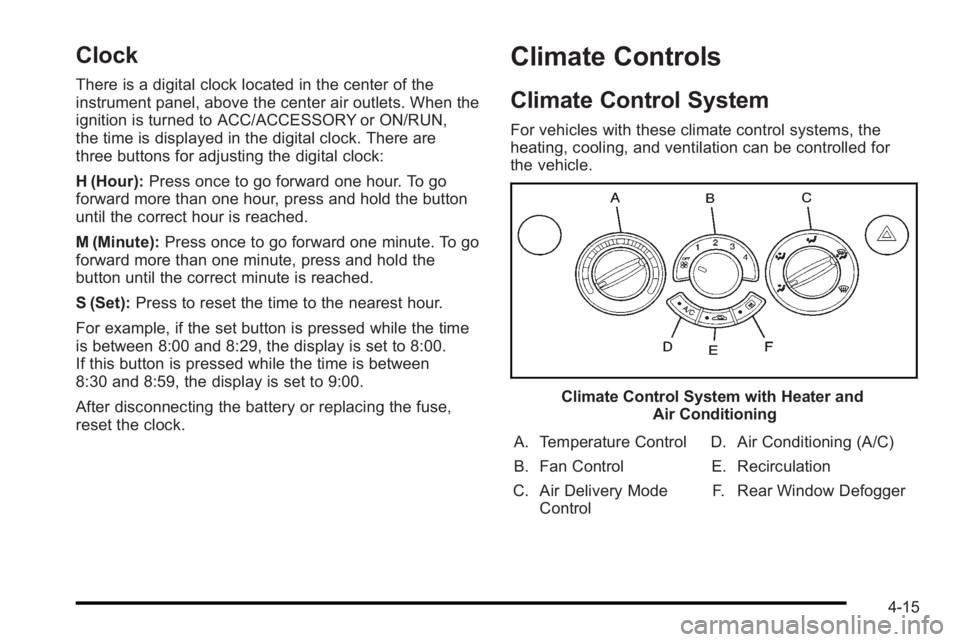
For vehicles with these climate control systems, the
heating, cooling, and ventilation can be controlled for
the vehicle.
Climate Control System with Heater and Air Conditioning
A. Temperature Control
B. Fan Control
C. Air Delivery Mode Control D. Air Conditioning (A/C)
E. Recirculation F. Rear Window Defogger
4-15
Page 180 of 368
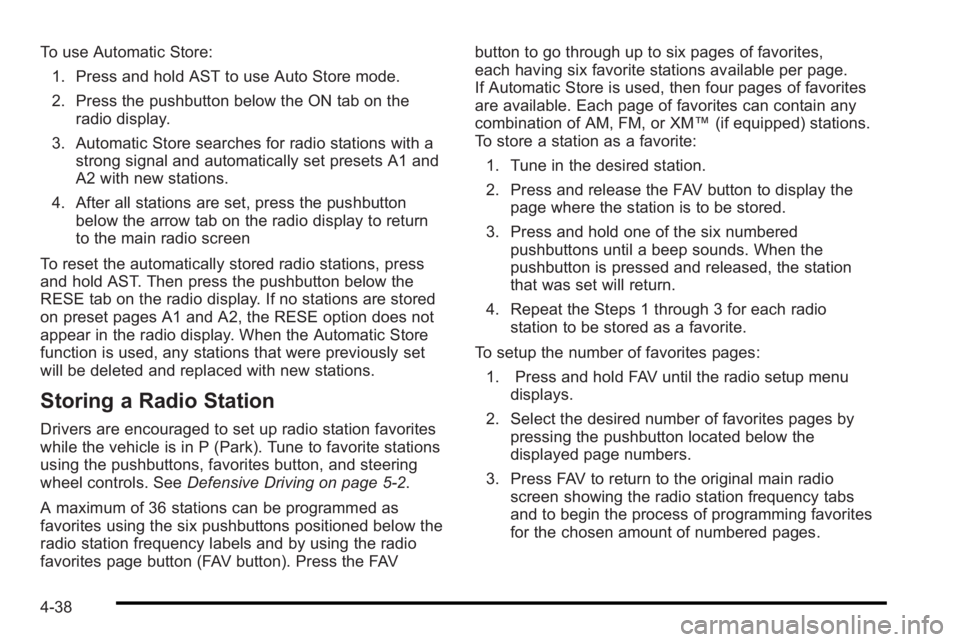
To use Automatic Store:1. Press and hold AST to use Auto Store mode.
2. Press the pushbutton below the ON tab on the radio display.
3. Automatic Store searches for radio stations with a strong signal and automatically set presets A1 and
A2 with new stations.
4. After all stations are set, press the pushbutton below the arrow tab on the radio display to return
to the main radio screen
To reset the automatically stored radio stations, press
and hold AST. Then press the pushbutton below the
RESE tab on the radio display. If no stations are stored
on preset pages A1 and A2, the RESE option does not
appear in the radio display. When the Automatic Store
function is used, any stations that were previously set
will be deleted and replaced with new stations.
Storing a Radio Station
Drivers are encouraged to set up radio station favorites
while the vehicle is in P (Park). Tune to favorite stations
using the pushbuttons, favorites button, and steering
wheel controls. See Defensive Driving on page 5‑2.
A maximum of 36 stations can be programmed as
favorites using the six pushbuttons positioned below the
radio station frequency labels and by using the radio
favorites page button (FAV button). Press the FAV button to go through up to six pages of favorites,
each having six favorite stations available per page.
If Automatic Store is used, then four pages of favorites
are available. Each page of favorites can contain any
combination of AM, FM, or XM™
(if equipped) stations.
To store a station as a favorite:
1. Tune in the desired station.
2. Press and release the FAV button to display the page where the station is to be stored.
3. Press and hold one of the six numbered pushbuttons until a beep sounds. When the
pushbutton is pressed and released, the station
that was set will return.
4. Repeat the Steps 1 through 3 for each radio station to be stored as a favorite.
To setup the number of favorites pages: 1. Press and hold FAV until the radio setup menu displays.
2. Select the desired number of favorites pages by pressing the pushbutton located below the
displayed page numbers.
3. Press FAV to return to the original main radio screen showing the radio station frequency tabs
and to begin the process of programming favorites
for the chosen amount of numbered pages.
4-38