maintenance schedule PONTIAC G3 2010 Owners Manual
[x] Cancel search | Manufacturer: PONTIAC, Model Year: 2010, Model line: G3, Model: PONTIAC G3 2010Pages: 368, PDF Size: 3.94 MB
Page 2 of 368
2010 Pontiac G3 Owner ManualM
Headlamp Aiming . . . . . . . . . . . . . . . . . . . . . . . . . . . . . . . 6-42
Bulb Replacement . . . . . . . . . . . . . . . . . . . . . . . . . . . . . . 6-43
Windshield Wiper Blade Replacement . . . . . . . . . . . 6-49
Tires . . . . . . . . . . . . . . . . . . . . . . . . . . . . . . . . . . . . . . . . . . . . 6-50
Appearance Care . . . . . . . . . . . . . . . . . . . . . . . . . . . . . . . 6-79
Vehicle Identification . . . . . . . . . . . . . . . . . . . . . . . . . . . . 6-85
Electrical System . . . . . . . . . . . . . . . . . . . . . . . . . . . . . . . . 6-86
Capacities and Specifications . . . . . . . . . . . . . . . . . . . 6-93 Maintenance Schedule
. . . . . . . . . . . . . . . . . . . . . . . . . . . 7-1
Maintenance Schedule . . . . . . . . . . . . . . . . . . . . . . . . . . . 7-2
Customer Assistance Information . . . . . . . . . . . . . . . 8-1
Customer Assistance and Information . . . . . . . . . . . . 8-2
Reporting Safety Defects . . . . . . . . . . . . . . . . . . . . . . . . 8-14
Vehicle Data Recording and Privacy . . . . . . . . . . . . . 8-16
Index . . . . . . . . . . . . . . . . . . . . . . . . . . . . . . . . . . . . i-1
Page 28 of 368
Driving for Better Fuel Economy
Driving habits can affect fuel mileage. Here are some
driving tips to get the best fuel economy possible.
.Avoid fast starts and accelerate smoothly.
.Brake gradually and avoid abrupt stops.
.Avoid idling the engine for long periods of time.
.When road and weather conditions are
appropriate, use cruise control, if equipped.
.Always follow posted speed limits or drive more
slowly when conditions require.
.Keep vehicle tires properly inflated.
.Combine several trips into a single trip.
.Replace the vehicle's tires with the same TPC
Spec number molded into the tire's sidewall near
the size.
.Follow recommended scheduled maintenance.
Roadside Assistance Program
U.S.:1-800-ROADSIDE (762-3743)
TTY Users: 1-888-889-2438
Canada: 1-800-268-6800
As the owner of a new Pontiac, you are automatically
enrolled in the Roadside Assistance program. This
program provides technically trained advisors who are
available 24 hours a day, 365 days a year, minor repair
information or towing arrangements.
Roadside Assistance and OnStar
If you have a current OnStar subscription, press the
OnStar button and the current GPS location will be sent
to an OnStar Advisor who will assess your problem,
contact Roadside Assistance, and relay exact location
to get you the help you need.
Online Owner Center
The Online Owner Center is a complimentary service
that includes online service reminders, vehicle
maintenance tips, online owner manual, special
privileges and more.
Sign up today at: www.gmownercenter.com/pontiac
(U.S.) or www.gm.ca (Canada).
1-22
Page 102 of 368
Restraint System Check
Checking the Restraint Systems
Safety Belts
Now and then, check that the safety belt reminder light,
safety belts, buckles, latch plates, retractors, and
anchorages are all working properly.
Look for any other loose or damaged safety belt system
parts that might keep a safety belt system from doing its
job. See your dealer/retailer to have it repaired. Torn or
frayed safety belts may not protect you in a crash.
They can rip apart under impact forces. If a belt is torn
or frayed, get a new one right away.
Make sure the safety belt reminder light is working.
SeeSafety Belt Reminders
on page 4‑23for more
information.
Keep safety belts clean and dry. See Care of Safety
Belts
on page 6‑82.
Airbags
The airbag system does not need regularly scheduled
maintenance or replacement. Make sure the airbag
readiness light is working. See Airbag Readiness Light
on page 4‑23for more information.
Notice: If an airbag covering is damaged, opened,
or broken, the airbag may not work properly. Do not
open or break the airbag coverings. If there are any
opened or broken airbag covers, have the airbag
covering and/or airbag module replaced. For the
location of the airbag modules, see What Makes an
Airbag Inflate?
on page 2‑63. See your dealer/
retailer for service.
2-72
Page 160 of 368
Rear Window and Outside Mirror
Defogger
For vehicles with a rear window and outside mirror
defogger, they only work when the ignition is turned
to ON/RUN.
The rear window defogger uses a warming grid to
remove fog or frost from the rear window.
<(Rear Window Defogger) : Press to turn the rear
window and outside mirror defogger on or off. An
indicator light comes on to show that the feature is on.
If the vehicle does not have air conditioning, the rear
window defogger may turn off about 10 minutes after
the button is pressed. If it remains on, it can be turned
off by pressing
defogger turns off about 10 minutes after the button is
pressed. The defogger can also be turned off by turning
the engine off.
Notice: Do not use anything sharp on the inside of
the rear window. If you do, you could cut or damage
the warming grid, and the repairs would not be
covered by the vehicle warranty. Do not attach a
temporary vehicle license, tape, a decal or anything
similar to the defogger grid.
Outlet Adjustment
To open an outlet, press on its cover. Turn the cover to
change the direction of the airflow.
Operation Tips
.Clear away any ice, snow or leaves from the air
inlets at the base of the windshield that may block
the flow of air into the vehicle.
.Use of non-GM approved hood deflectors may
adversely affect the performance of the system.
.Keep the path under the front seats clear of
objects to help circulate the air inside of the vehicle
more effectively.
Passenger Compartment Air Filter
For vehicles with a passenger compartment air filter, it
is located behind the glove box. It can be accessed
after removing the glove box from its housing.
Pollen and dust are removed by the filter. The filter
should be replaced as part of routine scheduled
maintenance. For a replacement filter see your dealer/
retailer. See Scheduled Maintenance
on page 7‑3for
replacement intervals.
4-18
Page 174 of 368
The oil light could also come on in three other
situations:
.When the ignition is on but the engine is not
running, the light will come on as a test to show it
is working. It goes out when the ignition is turned
on. If it does not come on with the ignition on,
there may be a problem with the fuse or bulb.
Have it fixed right away.
.If the vehicle comes to a hard stop, the light may
come on for a moment. This is normal.
{WARNING:
Do not keep driving if the oil pressure is low.
The engine can become so hot that it catches fire.
Someone could be burned. Check the oil as soon
as possible and have the vehicle serviced.
Notice: Lack of proper engine oil maintenance can
damage the engine. The repairs would not be
covered by the vehicle warranty. Always follow the
maintenance schedule in this manual for changing
engine oil.
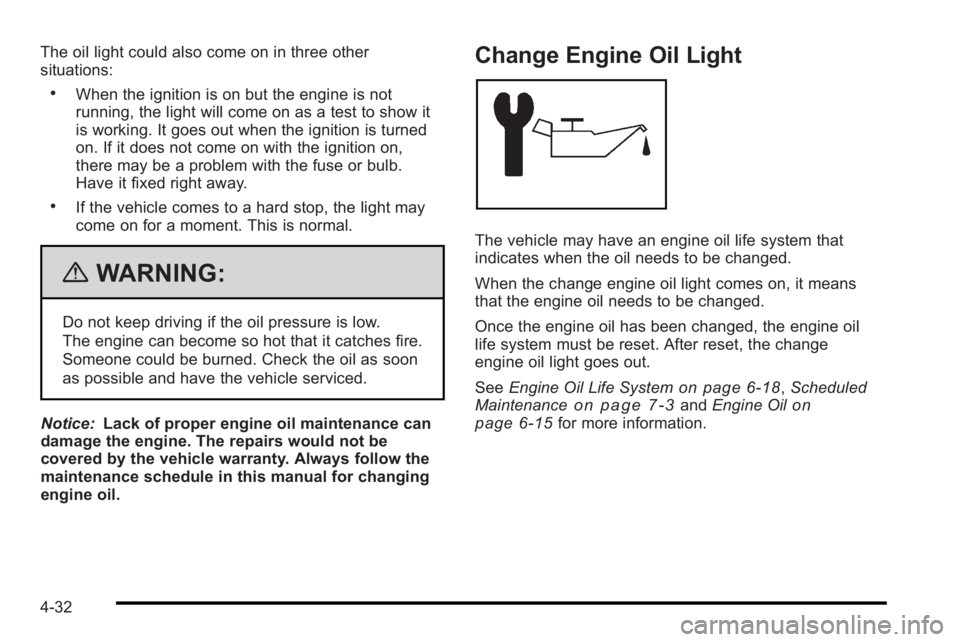
Change Engine Oil Light
The vehicle may have an engine oil life system that
indicates when the oil needs to be changed.
When the change engine oil light comes on, it means
that the engine oil needs to be changed.
Once the engine oil has been changed, the engine oil
life system must be reset. After reset, the change
engine oil light goes out.
See Engine Oil Life System
on page 6‑18,Scheduled
Maintenanceon page 7‑3and Engine Oilon
page 6‑15for more information.
4-32
Page 243 of 368

What to Do with Used Oil
Used engine oil contains certain elements that can be
unhealthy for your skin and could even cause cancer.
Do not let used oil stay on your skin for very long. Clean
your skin and nails with soap and water, or a good hand
cleaner. Wash or properly dispose of clothing or rags
containing used engine oil. See the manufacturer's
warnings about the use and disposal of oil products.
Used oil can be a threat to the environment. If you
change your own oil, be sure to drain all the oil from the
filter before disposal. Never dispose of oil by putting it in
the trash, pouring it on the ground, into sewers, or into
streams or bodies of water. Recycle it by taking it to a
place that collects used oil.
Engine Air Cleaner/Filter
The engine air cleaner/filter is located in the engine
compartment on the passenger side of the vehicle. See
Engine Compartment Overview
on page 6‑14for more
information on location.
When to Inspect the Engine Air Cleaner/
Filter
Inspect the air cleaner/filter at the Maintenance II
intervals and replace it at the first oil change after each
50,000 mile (80 000 km) interval. See Scheduled
Maintenance
on page 7‑3for more information. If you
are driving in dusty/dirty conditions, inspect the filter at
each engine oil change.
6-19
Page 244 of 368

How to Inspect the Engine Air Cleaner/
Filter
To inspect the engine air cleaner/filter, remove the filter
from the vehicle and lightly shake the filter to release
loose dust and dirt. If the filter remains caked with dirt, a
new filter is required.
To inspect or replace the air cleaner/filter:
1. Remove the screws and lift off the cover.
2. Inspect or replace the engine air cleaner/filter.
3. Put the cover back on tightly and tighten thescrews. See
Scheduled Maintenance
on page 7‑3for
replacement intervals.
{WARNING:
Operating the engine with the air cleaner/filter off
can cause you or others to be burned. The air
cleaner not only cleans the air; it helps to stop
flames if the engine backfires. Use caution when
working on the engine and do not drive with the
air cleaner/filter off.
Notice: If the air cleaner/filter is off, dirt can easily
get into the engine, which could damage it. Always
have the air cleaner/filter in place when you are
driving.
6-20
Page 245 of 368

Automatic Transmission Fluid
When to Check Automatic
Transmission Fluid
Check the automatic transmission fluid level at least
twice a year. Add fluid if needed. SeeScheduled
Maintenance on page 7‑3.
How to Check Automatic Transmission
Fluid
Because this operation can be a little difficult, you may
choose to have this done at the dealer/retailer service
department.
If you do it yourself, be sure to follow all the instructions
here, or you could get a false reading on the dipstick.
Notice: Too much or too little fluid can damage your
transmission. Too much can mean that some of the
fluid could come out and fall on hot engine parts or
exhaust system parts, starting a fire. Too little fluid
could cause the transmission to overheat. Be sure
to get an accurate reading if you check your
transmission fluid. Wait at least 30 minutes before checking the
transmission fluid level if you have been driving:
.When outside temperatures are above
90°F (32°C).
.At high speed for quite a while.
.In heavy traffic
—especially in hot weather.
To get the right reading, the fluid should be at normal
operating temperature, which is 158°F to 176°F (70°C
to 80°C).
Get the vehicle warmed up by driving about 15 miles
(24 km) when outside temperatures are above 50°F
(10°C). If it is colder than 50°F (10°C), you may have to
drive longer.
Checking the Fluid Level
Prepare the vehicle as follows: 1. Park the vehicle on a level place. Keep the engine running.
2. With the parking brake applied, place the shift lever in P (Park).
3. With your foot on the brake pedal, move the shift lever through each gear range, pausing for about
three seconds in each range. Then, position the
shift lever in P (Park).
4. Let the engine run at idle for three to five minutes.
6-21
Page 246 of 368

Then, without shutting off the engine, follow these
steps:1. Locate the automatic transmission dipstick which is located toward the front of the engine
compartment, near the power steering fluid
reservoir.
See Engine Compartment Overview
on page 6‑14for more information on location.
2. Pull out the dipstick and wipe it with a clean rag or paper towel.
3. Push the dipstick back in all the way, wait three seconds, and then pull it back out again.
4. Check both sides of the dipstick. The fluid shouldbe between MIN (A) and MAX (B) mark of the hot
area of the dipstick.
5. If the fluid level is in the acceptable range, push the dipstick back in all the way.
How to Add Automatic Transmission
Fluid
Refer to the Maintenance Schedule to determine what
kind of transmission fluid to use. See Recommended
Fluids and Lubricants on page 7‑12.
If the fluid level is low, add only enough of the proper
fluid to bring the level into the area between the two
dimples in the hot range on the dipstick.
1. Pull out the dipstick.
2. Using a long-neck funnel, add enough fluid at the dipstick hole to bring it to the proper level.
It does not take much fluid, generally less than one
pint (0.5 L). Do not overfill.
Notice: Use of the incorrect automatic transmission
fluid may damage the vehicle, and the damages may
not be covered by the vehicle's warranty. Always
use the automatic transmission fluid listed in
Recommended Fluids and Lubricants on page 7‑12.
3. After adding fluid, recheck the fluid level as described under “How to Check Automatic
Transmission Fluid” earlier in this section.
4. When the correct fluid level is obtained, push the dipstick back in all the way.
6-22
Page 247 of 368

Manual Transmission Fluid
It is not necessary to check the transmission fluid level.
A transmission fluid leak is the only reason for fluid
loss. If a leak occurs, take the vehicle to the dealer/
retailer service department and have it repaired as soon
as possible. SeeRecommended Fluids and Lubricants
on page 7‑12for the proper fluid to use.
Hydraulic Clutch
There is one reservoir for both the brake and the
hydraulic clutch fluid. See Brakeson page 6‑34for
more information.
The hydraulic clutch linkage in the vehicle is
self-adjusting. The master cylinder reservoir is
filled with hydraulic fluid.
A fluid loss in this system could indicate a problem.
Have the system inspected and repaired.
When to Check and What to Use
Refer to the Maintenance Schedule to determine how
often to check the fluid level in the master cylinder
reservoir and for the proper fluid. See Scheduled
Maintenance
on page 7‑3and Recommended Fluids
and Lubricants on page 7‑12.
How to Check and Add Fluid
The reservoir is located near the back of the engine
compartment on the driver side of the vehicle. See
Engine Compartment Overview
on page 6‑14for more
information on location.
To check the fluid level, look on the side of the
reservoir. If the fluid reaches the MAX (A) mark on the
reservoir, the fluid level is correct. If the fluid does not
reach the MIN (B) mark on the reservoir, then fluid
needs to be added.
6-23