remote start PONTIAC G6 2005 Owners Manual
[x] Cancel search | Manufacturer: PONTIAC, Model Year: 2005, Model line: G6, Model: PONTIAC G6 2005Pages: 354, PDF Size: 2.27 MB
Page 67 of 354

Keys...............................................................2-2
Remote Keyless Entry System.........................2-3
Remote Keyless Entry System Operation...........2-4
Doors and Locks.............................................2-9
Door Locks....................................................2-9
Power Door Locks........................................2-10
Door Ajar Reminder......................................2-10
Delayed Locking...........................................2-10
Automatic Door Locks...................................2-11
Programmable Automatic Door Unlock.............2-11
Lockout Protection........................................2-12
Trunk..........................................................2-12
Windows........................................................2-14
Power Windows............................................2-15
Sun Visors...................................................2-16
Theft-Deterrent Systems..................................2-16
Content Theft-Deterrent.................................2-16
PASS-Key
®III+............................................2-18
PASS-Key®III+ Operation..............................2-18
Starting and Operating Your Vehicle................2-20
New Vehicle Break-In....................................2-20
Ignition Positions..........................................2-20
Retained Accessory Power (RAP)...................2-21
Starting Your Engine.....................................2-21
Adjustable Throttle and Brake Pedal................2-22
Engine Coolant Heater..................................2-23Automatic Transaxle Operation.......................2-24
Parking Brake..............................................2-28
Shifting Into Park (P).....................................2-29
Shifting Out of Park (P).................................2-30
Parking Over Things That Burn.......................2-31
Engine Exhaust............................................2-31
Running Your Engine While You Are Parked. . . .2-32
Mirrors...........................................................2-33
Manual Rearview Mirror.................................2-33
Manual Rearview Mirror with OnStar
®..............2-33
Automatic Dimming Rearview Mirror................2-33
Automatic Dimming Rearview Mirror
with OnStar
®............................................2-34
Outside Power Mirrors...................................2-35
Outside Convex Mirror...................................2-35
OnStar
®System.............................................2-36
HomeLink®Transmitter...................................2-37
Programming the HomeLink®Transmitter.........2-38
Storage Areas................................................2-41
Glove Box...................................................2-41
Cupholder(s)................................................2-41
Center Console Storage Area.........................2-42
Convenience Net..........................................2-42
Sunroof.........................................................2-42
Sunroof - Panoramic.....................................2-43
Section 2 Features and Controls
2-1
Page 70 of 354

At times you may notice a decrease in range. This is
normal for any remote keyless entry system. If the
transmitter does not work or if you have to stand closer
to your vehicle for the transmitter to work, try this:
Check the distance. You may be too far from your
vehicle. You may need to stand closer during
rainy or snowy weather.
Check the location. Other vehicles or objects may
be blocking the signal. Take a few steps to the
left or right, hold the transmitter higher, and
try again.
Check to determine if battery replacement is
necessary. See “Battery Replacement” under
Remote Keyless Entry System Operation on
page 2-4.
If you are still having trouble, see your dealer or a
quali�ed technician for service.
Remote Keyless Entry System
Operation
The following functions
may be available if your
vehicle has the remote
keyless entry system:
/(Remote Start):If your vehicle has this feature, it
may be started remotely by pressing and releasing
the lock button, then immediately following, pressing the
remote start button and holding it until the turn signal
lamps �ash, or for four seconds if the lights are not
visible. Pressing the remote start button again after the
vehicle has started will shut off the remote start. See
“Remote Vehicle Start” following for more information.Remote Keyless Entry
with Remote Start
shown, without Remote
Start similar
2-4
Page 73 of 354

Remote Vehicle Start
Your vehicle may have a remote starting feature. This
feature allows you to start the engine from outside of the
vehicle. It also starts up the vehicle’s heating or air
conditioning systems and rear window defogger. When
the remote start system is active and the vehicle
has an automatic climate control system, it will
automatically regulate the inside temperature. Normal
operation of the system will return after the ignition
key is turned to the on position.
Laws in some communities may restrict the use of
remote starters, for example, requiring a person using
remote start to have the vehicle in view when doing so.
Check local regulations for any requirements on
remote starting of vehicles.
Do not use the remote start feature if your vehicle is low
on fuel. Your vehicle may run out of fuel.The remote start feature provides two separate starts,
each with 10 minutes of engine running. Or it provides
one start with 10 minutes of engine running, which
can be extended by 10 more minutes. Once two starts
have been provided, the ignition switch must be
cycled to on and then off, to get two more remote starts.
The remote start feature will not operate if the key is
in the ignition, a door is open, the hood is not closed, the
hazard warning �ashers are on, or two remote starts
have been provided without cycling the ignition switch to
on and then off.
Your remote keyless entry transmitter, with the remote
start button, provides an increased range of operation.
However, the range may be less while the vehicle
is running. As a result, you may need to be closer to
your vehicle to turn it off, than you were to turn it on.
There are other conditions which can affect the
performance of the transmitter, seeRemote Keyless
Entry System on page 2-3.
2-7
Page 74 of 354

/(Remote Start):Press and release the lock button
and then press and hold the remote start button to
use the remote start feature.
To start the vehicle using the remote start feature, do
the following:
1. Aim the transmitter at the vehicle.
2. Press and release the transmitter’s lock button, then
immediately press and hold the transmitter’s remote
start button until the vehicle’s turn signal lights �ash
or for at least four seconds if the lights are not visible.
The vehicle’s doors will be locked.
3. When the vehicle starts, the parking lamps will turn
on and remain on while the vehicle is running.
4. If it is your �rst remote start since last driving,
repeat these steps while the engine is still
running for a 10 minute time extension.When you enter the vehicle during a remote start, turn
the key to the on position to drive the vehicle.
If the vehicle is left running it will automatically shut off
after 10 minutes unless a time extension has been
done. To manually shut off a remote start, do any of
the following:
Aim the remote keyless entry transmitter at the
vehicle and press the remote start button until
the parking lamps turn off.
Turn on the hazards warning �ashers.
Turn the ignition switch on and then off.
2-8
Page 83 of 354

Disarming the System
You can disarm the system by doing any one of the
following:
Press the remote keyless entry transmitter
unlock button.
Turn the ignition on.
Turn the driver’s door key lock cylinder
counterclockwise.
Once the system is disarmed, the security light will
stop �ashing.
How the System Alarm is Activated
If the system is armed, it can be activated by either:
Opening the driver’s door. This will cause a
ten second pre-alarm chirp followed by a
thirty second full alarm of horn and lights.
Opening any other door or trunk. This will
immediately cause a full alarm of horn and lights
for thirty seconds.
Opening the hood, if the vehicle is equipped with
the remote start feature, will activate the alarm.
When an alarm event has �nished, the system will
re-arm itself automatically.
How to Turn Off the System Alarm
To turn off the system alarm, do one of the following:
Press the lock button on the remote keyless
entry transmitter. The system will then re-arm itself.
Press the unlock button on the remote keyless entry
transmitter. This will also disarm the system.
Insert the key in the driver’s door key lock cylinder
and turn it counterclockwise. This will also disarm
the system.
Insert the key in the ignition and turn it on. This will
also disarm the system.
Simulated Armed Mode
If you choose not to arm the system or if proper arming
can not be completed, the Content Theft Deterrent
system will �ash the security light once every
three seconds after a one minute delay with all the
doors closed. This �ashing serves as a visual deterrent;
however, the system is not armed.
How to Detect a Tamper Condition
If you hear three chirps when you press the unlock or
lock buttons on the remote keyless transmitter, it means
that the content theft security system alarm was
triggered previously.
2-17
Page 129 of 354

Climate Controls
Climate Control System
With this system you can control the heating, cooling
and ventilation for your vehicle. If your vehicle has
the remote start feature, the climate control system will
function as part of the remote start feature. The system
will return to the last settings the vehicle was at when
it was turned off.
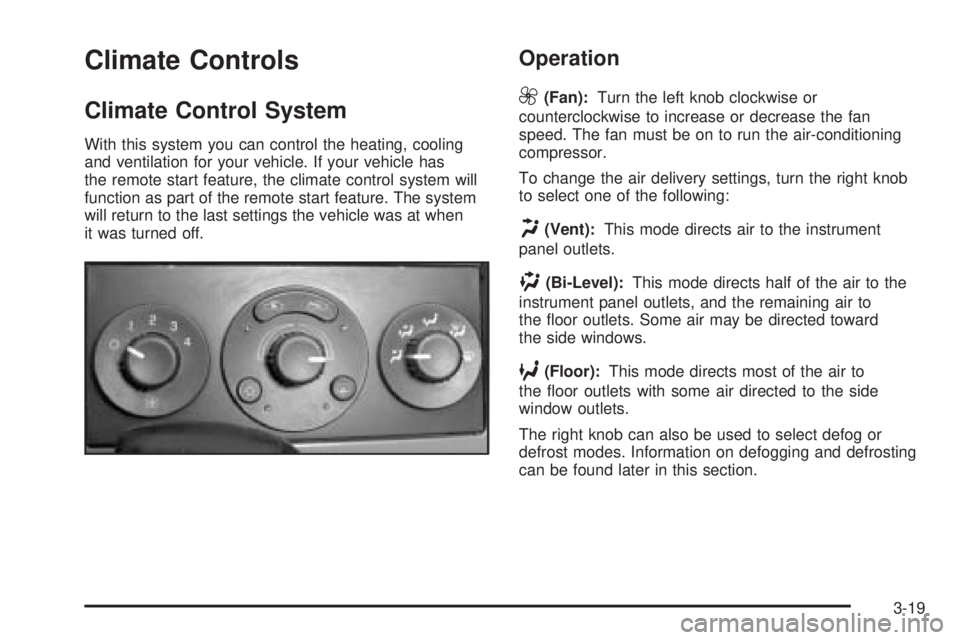
Operation
9
(Fan):Turn the left knob clockwise or
counterclockwise to increase or decrease the fan
speed. The fan must be on to run the air-conditioning
compressor.
To change the air delivery settings, turn the right knob
to select one of the following:
H(Vent):This mode directs air to the instrument
panel outlets.
)(Bi-Level):This mode directs half of the air to the
instrument panel outlets, and the remaining air to
the �oor outlets. Some air may be directed toward
the side windows.
6(Floor):This mode directs most of the air to
the �oor outlets with some air directed to the side
window outlets.
The right knob can also be used to select defog or
defrost modes. Information on defogging and defrosting
can be found later in this section.
3-19
Page 133 of 354

If your vehicle has the remote start feature, the rear
defogger will automatically be turned on if it is cold
outside. The indicator light will be on. When the vehicle
transitions out of the remote start mode, the rear
defogger will turn off.
Notice:Don’t use anything sharp on the inside of
the rear window. If you do, you could cut or damage
the warming grid, and the repairs wouldn’t be
covered by your warranty. Do not attach a temporary
vehicle license, tape, a decal or anything similar
to the defogger grid.
Outlet Adjustment
Rotate the instrument panel outlets and move the
louvers on the outlets to change the direction and
amount of air�ow in your vehicle.
Operation Tips
Clear away any ice, snow or leaves from the air
inlets at the base of the windshield that may
block the �ow of air into your vehicle.
Use of non-GM approved hood de�ectors may
adversely affect the performance of the system.
Keep the path under the front seats clear of objects
to help circulate the air inside of your vehicle more
effectively.
When an objectionable odor outside the vehicle is
encountered, use the MAX mode, with the
temperature knob at a comfortable setting to
prevent the odor from entering the vehicle through
the ventilation system. This can be helpful when
driving through a long tunnel with poor ventilation.
However, extended usage of this mode in cold
or cool weather can cause window fogging.
3-23
Page 149 of 354

Personalization
MENU:Press this button while the vehicle is in ON to
scroll through each of the personalization options in
the following order. All of the personalization options
may not be available on your vehicle. Only the options
available will be displayed on your DIC.
Oil Life Reset
Units Selection (English/Metric)
Remote Start Capability
Horn Chirp During Remote Keyless Entry Locking
Horn Chirp During Remote Keyless Entry Unlocking
Exterior Light Flash During Remote Keyless Entry
Locking or Unlocking
Delayed Locking
Automatic Vehicle Unlocking: Speci�c Doors
Automatic Vehicle Unlocking: When Key is Off or
When Shift To Park
Exterior Perimeter Lighting During Remote Keyless
Entry Unlock
Security System Passive or Remote Keyless
Entry Arming
Select Language: (English, French, Spanish or
German)When the desired option is reached, press the enter
button to toggle between the modes of that option.
To make a selection, press the MENU button again.
If no selection is made within 10 seconds, the display
will revert back to the previous information displayed.
The MENU mode is exited when the information button
is pressed, a 10 second time period has elapsed,
the ignition is turned to OFF or the end of the MENU list
is reached.
SeeDIC Vehicle Personalization on page 3-42for more
information on the personalization options.
Enter
ENTER/r(Enter):Press this button to reset certain
functions and to turn off or acknowledge messages
on the DIC display. This button also toggles through the
options available in each personalization menu.
3-39
Page 152 of 354

DIC Vehicle Personalization
The following personalization options may appear
on your vehicle’s audio display by pressing the
MENU button:
OIL LIFE RESET:When this option is displayed, you
can reset the engine oil life system. To reset the system
to 100%, press and hold the enter button for at least
one second. An ACKNOWLEDGED display message
will appear for three seconds or until the next button is
pressed. This will tell you the system has been reset.
SeeEngine Oil Life System on page 5-16for more
information.
UNITS:When UNITS appears on the display, press the
enter button to move between METRIC or ENGLISH.
When you have made your choice, press the MENU
button to record your selection. The initial setting from
the factory is English.
If you choose English, all information will be displayed
in English units. For example, distance in miles and fuel
economy in miles per gallon is displayed.If you choose metric, all information will be displayed in
metric units. For example, distance in kilometers and
fuel economy in liters per 100 kilometers is displayed.
The unit measurement will also change the trip odometer,
temperature and average fuel economy displays.
REMOTE START:The remote start option, if equipped,
can be enabled or disabled. When REMOTE START
appears on the display, press the enter button to move
between OFF and ON. When you have made your
choice, press the MENU button to record your selection.
The initial setting from the factory is ON.
LOCK HORN:If your vehicle has remote keyless entry,
this option which allows the vehicle’s horn to chirp
every time the lock button on the remote keyless entry
transmitter is pressed, can be enabled or disabled.
When LOCK HORN appears on the display, press the
enter button to move between ON and OFF. When you
have made your choice, press the MENU button to
record your selection. The initial setting from the
factory is ON.
3-42
Page 267 of 354

4. Open the hoods and locate the batteries. Find the
positive (+) and negative (−) terminal locations on
each vehicle. SeeEngine Compartment Overview
on page 5-12for more information on location.
{CAUTION:
An electric fan can start up even when the
engine is not running and can injure you. Keep
hands, clothing and tools away from any
underhood electric fan.
{CAUTION:
Using a match near a battery can cause battery
gas to explode. People have been hurt doing
this, and some have been blinded. Use a
�ashlight if you need more light.
Be sure the battery has enough water. You do
not need to add water to the battery installed
in your new vehicle. But if a battery has �ller
caps, be sure the right amount of �uid is there.
CAUTION: (Continued)
CAUTION: (Continued)
If it is low, add water to take care of that �rst.
If you do not, explosive gas could be present.
Battery �uid contains acid that can burn you.
Do not get it on you. If you accidentally get it
in your eyes or on your skin, �ush the place
with water and get medical help immediately.
5. Check that the jumper cables do not have loose or
missing insulation. If they do, you could get a
shock. The vehicles could be damaged too.
Before you connect the cables, here are some
things you should know. Positive (+) will go
to positive (+) or to a remote positive (+) terminal if
the vehicle has one. Negative (−) will go to a
heavy, unpainted metal engine part or to a remote
negative (−) terminal if the vehicle has one.
Do not connect positive (+) to negative (−)oryou
will get a short that would damage the battery
and maybe other parts too. And do not connect the
negative (−) cable to the negative (−) terminal on
the dead battery because this can cause sparks.
5-35