tow PONTIAC G6 2006 User Guide
[x] Cancel search | Manufacturer: PONTIAC, Model Year: 2006, Model line: G6, Model: PONTIAC G6 2006Pages: 416, PDF Size: 2.66 MB
Page 112 of 416
To release the parking brake, hold the brake pedal
down. Pull the parking brake handle up until you can
press the release button. Hold the release button in as
you move the brake handle all the way down.
Notice:Driving with the parking brake on can
overheat the brake system and cause premature
wear or damage to brake system parts. Verify that
the parking brake is fully released and the brake
warning light is off before driving.
If you are towing a trailer and you are parking on a hill,
seeTowing a Trailer on page 4-40.Shifting Into Park (P)
(Automatic Transaxle)
{CAUTION:
It can be dangerous to get out of your vehicle
if the shift lever is not fully in PARK (P) with
the parking brake �rmly set. Your vehicle can
roll. If you have left the engine running, the
vehicle can move suddenly. You or others
could be injured. To be sure your vehicle will
not move, even when you are on fairly level
ground, use the steps that follow. If you are
pulling a trailer, seeTowing a Trailer on
page 4-40.
2-34
Page 113 of 416

Use the following procedure to shift into PARK (P):
1. Hold the brake pedal down with your right foot and
set the parking brake.
2. Move the shift lever into PARK (P) by holding in the
button on the shift lever and pushing the lever all
the way toward the front of the vehicle.
3. Turn the ignition key to OFF.
4. Remove the key and take it with you. If you can
leave your vehicle with the ignition key in your
hand, your vehicle is in PARK (P).Leaving Your Vehicle With the Engine
Running (Automatic Transaxle)
{CAUTION:
It can be dangerous to leave your vehicle with
the engine running. Your vehicle could move
suddenly if the shift lever is not fully in
PARK (P) with the parking brake �rmly set.
And, if you leave the vehicle with the engine
running, it could overheat and even catch �re.
You or others could be injured. Do not leave
your vehicle with the engine running.
If you have to leave your automatic transaxle vehicle
with the engine running, be sure your vehicle is in
PARK (P) and your parking brake is �rmly set before
you leave it. After you have moved the shift lever
into PARK (P), hold the regular brake pedal down. Then,
see if you can move the shift lever away from PARK (P)
without �rst pushing the button.
If you can, it means that the shift lever was not fully
locked into PARK (P).
2-35
Page 116 of 416
Running the Engine While Parked
It is better not to park with the engine running. But if you
ever have to, here are some things to know.
{CAUTION:
Idling the engine with the climate control
system off could allow dangerous exhaust into
your vehicle. See the earlier caution under
Engine Exhaust on page 2-37.
Also, idling in a closed-in place can let deadly
carbon monoxide (CO) into your vehicle even if
the climate control fan is at the highest setting.
One place this can happen is a garage.
Exhaust — with CO — can come in easily.
NEVER park in a garage with the engine
running.
Another closed-in place can be a blizzard.
SeeWinter Driving on page 4-27.
{CAUTION:
It can be dangerous to get out of your vehicle
if the automatic transaxle shift lever is not fully
in PARK (P) with the parking brake �rmly set.
Your vehicle can roll. Do not leave your vehicle
when the engine is running unless you have
to. If you have left the engine running, the
vehicle can move suddenly. You or others
could be injured. To be sure your vehicle will
not move, even when it is on fairly level
ground, always set the parking brake and
move the automatic transaxle shift lever to
PARK (P), or the manual transaxle shift lever
to NEUTRAL.
Follow the proper steps to be sure your vehicle will
not move. If you have an automatic transaxle, see
Shifting Into Park (P) (Automatic Transaxle) on
page 2-34.
If you are parking on a hill and if you are pulling a
trailer, seeTowing a Trailer on page 4-40.
2-38
Page 117 of 416
Mirrors
Manual Rearview Mirror
The mirror can be adjusted two ways. First, to adjust
the height of the mirror, adjust the arm that connects the
mirror to the windshield. Second, adjust the angle of
the mirror, by moving the mirror to a position that allows
you to see out of the back window.
To reduce glare from headlamps behind you, move the
lever toward you to the night position. To return the
mirror to the daytime position, move the lever away
from you.
Manual Rearview Mirror with
OnStar
®
Your vehicle may have a rearview mirror with the
OnStar®system.
Control buttons for the OnStar
®system are at the
bottom of the mirror. See your GM dealer for more
information on the OnStar
®system and how to
subscribe to OnStar®. Also, seeOnStar®System on
page 2-44for more information about the services
OnStar
®provides.
Mirror Operation
While sitting in a comfortable driving position, adjust the
rearview mirror so you can see clearly behind your
vehicle. Grip it in the center to move it up or down and
side to side. The day/night control, located at the
bottom of the mirror, adjusts the mirror to reduce
headlamp glare from behind during evening or dark
conditions. Move the control to the right for night
conditions. Return it to the center for daytime use.
Automatic Dimming Rearview Mirror
with OnStar
®and Compass
Your vehicle may have an automatic dimming rearview
mirror with a compass and OnStar®controls. For
more information about OnStar®, seeOnStar®System
on page 2-44.
The automatic dimming feature turns on each time the
vehicle is started. To turn automatic dimming off or
on, press the left button below the mirror. A green
indicator light will be on when automatic dimming is on.
There are also three OnStar
®buttons located at the
bottom of the mirror. See your dealer for more
information on the system and how to subscribe to
OnStar
®. SeeOnStar®System on page 2-44for more
information about the service OnStar®provides.
2-39
Page 121 of 416
Outside Power Mirrors
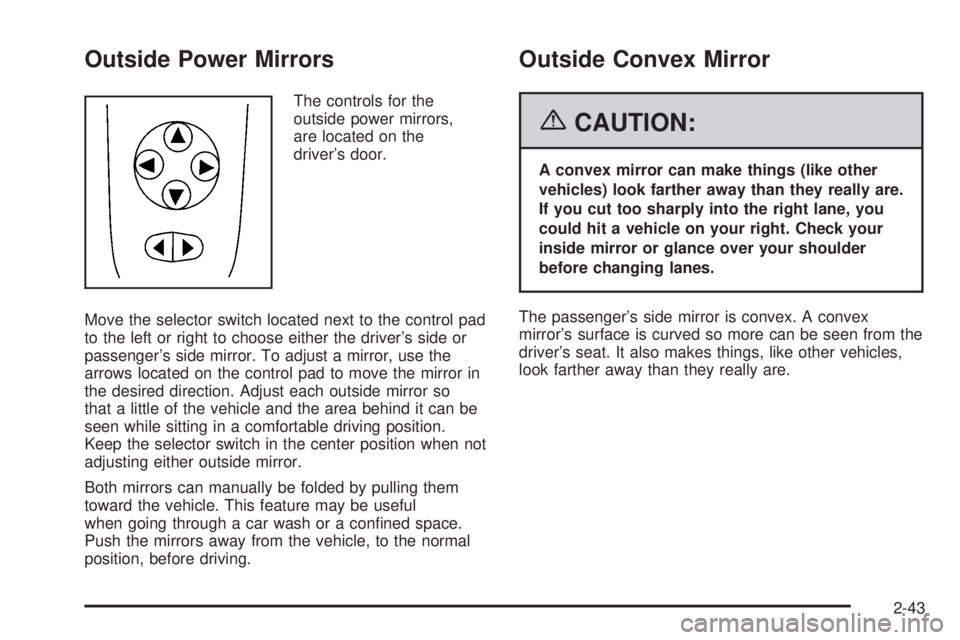
The controls for the
outside power mirrors,
are located on the
driver’s door.
Move the selector switch located next to the control pad
to the left or right to choose either the driver’s side or
passenger’s side mirror. To adjust a mirror, use the
arrows located on the control pad to move the mirror in
the desired direction. Adjust each outside mirror so
that a little of the vehicle and the area behind it can be
seen while sitting in a comfortable driving position.
Keep the selector switch in the center position when not
adjusting either outside mirror.
Both mirrors can manually be folded by pulling them
toward the vehicle. This feature may be useful
when going through a car wash or a con�ned space.
Push the mirrors away from the vehicle, to the normal
position, before driving.
Outside Convex Mirror
{CAUTION:
A convex mirror can make things (like other
vehicles) look farther away than they really are.
If you cut too sharply into the right lane, you
could hit a vehicle on your right. Check your
inside mirror or glance over your shoulder
before changing lanes.
The passenger’s side mirror is convex. A convex
mirror’s surface is curved so more can be seen from the
driver’s seat. It also makes things, like other vehicles,
look farther away than they really are.
2-43
Page 138 of 416
Turn and Lane-Change Signals
The turn signal has two upward (for right) and
two downward (for left) positions. These positions
allow you to signal a turn or a lane change.
To signal a turn, move the lever all the way up or down.
When the turn is �nished, the lever will return
automatically.
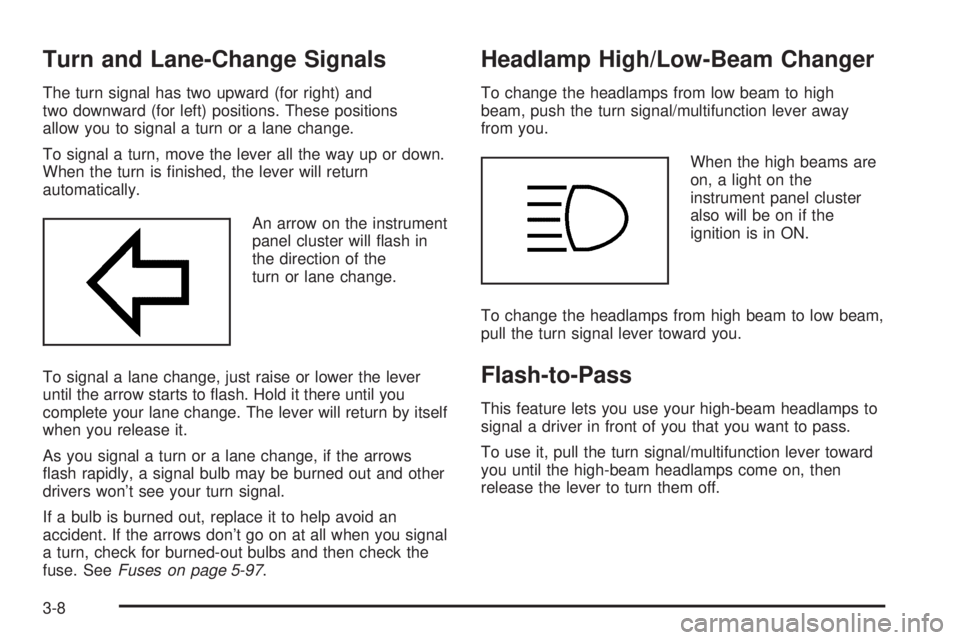
An arrow on the instrument
panel cluster will �ash in
the direction of the
turn or lane change.
To signal a lane change, just raise or lower the lever
until the arrow starts to �ash. Hold it there until you
complete your lane change. The lever will return by itself
when you release it.
As you signal a turn or a lane change, if the arrows
�ash rapidly, a signal bulb may be burned out and other
drivers won’t see your turn signal.
If a bulb is burned out, replace it to help avoid an
accident. If the arrows don’t go on at all when you signal
a turn, check for burned-out bulbs and then check the
fuse. SeeFuses on page 5-97.
Headlamp High/Low-Beam Changer
To change the headlamps from low beam to high
beam, push the turn signal/multifunction lever away
from you.
When the high beams are
on, a light on the
instrument panel cluster
also will be on if the
ignition is in ON.
To change the headlamps from high beam to low beam,
pull the turn signal lever toward you.
Flash-to-Pass
This feature lets you use your high-beam headlamps to
signal a driver in front of you that you want to pass.
To use it, pull the turn signal/multifunction lever toward
you until the high-beam headlamps come on, then
release the lever to turn them off.
3-8
Page 150 of 416

Climate Controls
Climate Control System
With this system you can control the heating, cooling
and ventilation for your vehicle. If your vehicle has
the remote start feature, the climate control system will
function as part of the remote start feature. The
system will return to the last settings the vehicle was at
when it was turned off.
Operation
9
(Fan):Turn the left knob clockwise or
counterclockwise to increase or decrease the fan speed.
The fan must be on to run the air-conditioning
compressor.To change the air delivery settings, turn the right knob
to select one of the following:
H(Vent):This mode directs air to the instrument
panel outlets.
)(Bi-Level):This mode directs half of the air to the
instrument panel outlets, and the remaining air to
the �oor outlets. Some air may be directed toward the
side windows.
6(Floor):This mode directs most of the air to
the �oor outlets with some air directed to the side
window outlets.
:(Outside Air):Press the right side of this button to
turn the outside air mode on. When this mode is selected,
air from outside the vehicle will circulate throughout your
vehicle. When the button is pressed, an indicator light will
come on to let you know that it is activated. The outside
air mode can be used with all modes, but it cannot be
used with the recirculation mode. Pressing this button will
cancel the recirculation mode.
3-20
Page 167 of 416
When the ignition is on, the brake system warning light
will also come on when you set your parking brake.
The light will stay on if your parking brake doesn’t
release fully. If it stays on after your parking brake is
fully released, it means you have a brake problem.
If the light comes on while you are driving, pull off the
road and stop carefully. You may notice that the pedal is
harder to push. Or, the pedal may go closer to the
�oor. It may take longer to stop. If the light is still on,
have the vehicle towed for service. SeeTowing
Your Vehicle on page 4-38.
{CAUTION:
Your brake system may not be working
properly if the brake system warning light is
on. Driving with the brake system warning light
on can lead to an accident. If the light is still
on after you have pulled off the road and
stopped carefully, have the vehicle towed
for service.
Anti-Lock Brake System
Warning Light
If your vehicle has the
anti-lock brake system, the
light will come on when
your engine is started
and may stay on for
several seconds.
That’s normal.
If the light stays on, turn the ignition to OFF. Or, if the
light comes on when you’re driving, stop as soon
as possible and turn the ignition off. Then start the
engine again to reset the system. If the light still stays
on, or comes on again while you’re driving, your vehicle
needs service. If the regular brake system warning
light isn’t on, you still have brakes, but you don’t have
anti-lock brakes. If the regular brake system warning
light is also on, you don’t have anti-lock brakes
and there’s a problem with your regular brakes. See
Brake System Warning Light on page 3-36.
The anti-lock brake system warning light will come on
brie�y when you turn the ignition key to ON. This is
normal. If the light doesn’t come on then, have it �xed
so it will be ready to warn you if there is a problem.
3-37
Page 171 of 416
Notice:If you keep driving your vehicle with this
light on, after awhile, your emission controls
may not work as well, your fuel economy may not
be as good, and your engine may not run as
smoothly. This could lead to costly repairs that may
not be covered by your warranty.
Notice:Modi�cations made to the engine,
transaxle, exhaust, intake, or fuel system of your
vehicle or the replacement of the original tires with
other than those of the same Tire Performance
Criteria (TPC) can affect your vehicle’s emission
controls and may cause this light to come on.
Modi�cations to these systems could lead to costly
repairs not covered by your warranty. This may
also result in a failure to pass a required Emission
Inspection/Maintenance test.
This light should come on, as a check to show you it is
working, when the ignition is on and the engine is
not running. If the light does not come on, have it
repaired. This light will also come on during a
malfunction in one of two ways:
Light Flashing— A mis�re condition has been
detected. A mis�re increases vehicle emissions and
may damage the emission control system on your
vehicle. Diagnosis and service may be required.
Light On Steady— An emission control system
malfunction has been detected on your vehicle.
Diagnosis and service may be required.
If the Light is Flashing
The following may prevent more serious damage to
your vehicle:
Reducing vehicle speed
Avoiding hard accelerations
Avoiding steep uphill grades
If you are towing a trailer, reduce the amount of
cargo being hauled as soon as it is possible
If the light stops �ashing and remains on steady, see “If
the Light Is On Steady” following.
If the light continues to �ash, when it is safe to do so,
stop the vehicle. Find a safe place to park your vehicle.
Turn the key off, wait at least 10 seconds and restart
the engine. If the light remains on steady, see “If
the Light Is On Steady” following. If the light is still
�ashing, follow the previous steps, and see your dealer
for service as soon as possible.
3-41
Page 188 of 416

Adjusting the Speakers (Balance/Fade)
BAL/FADE /S(Balance/Fade):To adjust the
balance between the right and the left speakers, press
and release the balance and fade button until BAL
appears on the display. Turn the ADJ knob to move the
sound toward the right or the left speakers.
To adjust the fade between the front and the rear
speakers, press and release the balance and fade
button until FADE appears on the display. Then turn the
ADJ knob to move the sound toward the front or the
rear speakers.
To adjust the balance or the fade to the middle position,
select BAL or FADE. Then press and hold the balance
and fade button for more than two seconds. You
will hear a beep and the level will be adjusted to the
middle position.
To adjust the speaker controls to the middle position,
�rst end out of balance and fade by pressing another
button, causing the radio to perform that function, or by
waiting �ve seconds for the display to return to the
default display. Then press and hold the balance and
fade button for more than two seconds until you hear a
beep. ALL CENTERED will appear on the display.
Radio Messages
CALIBRATE:The audio system has been calibrated for
your vehicle from the factory. If CALIBRATE appears
on the display it means that the radio has not been
con�gured properly for your vehicle and must be
returned to your GM dealer for service.
LOCKED:This message is displayed when the
THEFTLOCK
®system has locked up. Take the vehicle
to your GM dealer for service.
If any error occurs repeatedly or if an error cannot be
corrected, contact your GM dealer.
Playing a CD
Insert a CD partway into the slot, label side up. The
player will pull it in and the CD should begin playing. If
you want to insert a CD with the ignition off, �rst
press the eject button or the DISP knob.
As each new track starts to play, the track number will
appear on the display.
If the ignition or radio is turned off with a CD in the
player, it will stay in the player. When the ignition
or radio is turned on, the CD will start playing, where it
stopped, if it was the last selected audio source.
3-58