automatic transmission PONTIAC G6 2009 Owners Manual
[x] Cancel search | Manufacturer: PONTIAC, Model Year: 2009, Model line: G6, Model: PONTIAC G6 2009Pages: 410, PDF Size: 2.33 MB
Page 83 of 410
Keys...............................................................2-2
Remote Keyless Entry (RKE) System................2-3
Remote Keyless Entry (RKE) System
Operation...................................................2-4
Remote Vehicle Start......................................2-6
Doors and Locks.............................................2-9
Door Locks....................................................2-9
Power Door Locks..........................................2-9
Door Ajar Reminder........................................2-9
Delayed Locking...........................................2-10
Automatic Door Lock.....................................2-10
Programmable Automatic Door Unlock.............2-10
Rear Door Security Locks..............................2-11
Lockout Protection........................................2-11
Trunk..........................................................2-12
Windows........................................................2-14
Power Windows............................................2-15
Sun Visors...................................................2-17
Theft-Deterrent Systems..................................2-17
Content Theft-Deterrent.................................2-17
PASS-Key
®III+ Electronic Immobilizer.............2-19
PASS-Key®III+ Electronic Immobilizer
Operation.................................................2-19
Starting and Operating Your Vehicle................2-21
New Vehicle Break-In....................................2-21
Ignition Positions..........................................2-21
Retained Accessory Power (RAP)...................2-22Starting the Engine.......................................2-23
Engine Coolant Heater..................................2-25
Automatic Transmission Operation...................2-26
Parking Brake..............................................2-31
Shifting Into Park..........................................2-32
Shifting Out of Park......................................2-34
Parking Over Things That Burn.......................2-34
Engine Exhaust............................................2-35
Running the Vehicle While Parked..................2-36
Mirrors...........................................................2-37
Manual Rearview Mirror.................................2-37
Automatic Dimming Rearview Mirror................2-37
Compass.....................................................2-38
Outside Power Mirrors...................................2-39
Outside Convex Mirror...................................2-39
OnStar
®System.............................................2-40
Storage Areas................................................2-43
Glove Box...................................................2-43
Cupholders..................................................2-43
Center Console Storage.................................2-43
Convenience Net..........................................2-43
Sunroof.........................................................2-43
Retractable Hardtop........................................2-44
Lowering the Retractable Hardtop...................2-44
Raising the Retractable Hardtop......................2-47
Section 2 Features and Controls
2-1
Page 108 of 410

Automatic Transmission Operation
The vehicle will have one of these styles of shifter
located in the center console between the seats.
P (Park):This position locks your front wheels.
It is the best position to use when you start the
engine because your vehicle cannot move easily.{CAUTION:
It is dangerous to get out of the vehicle if the shift
lever is not fully in P (Park) with the parking brake
�rmly set. The vehicle can roll.
Do not leave the vehicle when the engine is
running unless you have to. If you have left the
engine running, the vehicle can move suddenly.
You or others could be injured. To be sure the
vehicle will not move, even when you are on fairly
level ground, always set the parking brake and
move the shift lever to P (Park). SeeShifting Into
Park on page 2-32. If you are pulling a trailer, see
Towing a Trailer on page 4-30.
Make sure the shift lever is fully in P (Park) before
starting the engine. The vehicle has an automatic
transmission shift lock control system. You must apply
the regular brake �rst, then press the shift lever button
before you can shift from P (Park) while the ignition key
is in ON/RUN. If you cannot shift out of P (Park), ease
pressure on the shift lever and push the shift lever all the
way into P (Park) as you maintain brake application.
2-26
Page 112 of 410

Driver Shift Control (DSC)
To use this feature,
1. Move the shift lever from DRIVE (D) rearward to
MANUAL (M).
While driving in manual mode, the transmission
will remain in the driver selected gear. When coming
to a stop in the manual position, the vehicle will
automatically shift into FIRST (1) gear.
2. Press the + (plus) paddle located on top of
the steering wheel controls forward to upshift,
or push the backside of the shift paddle rearward
to downshift.The Driver Information Center (DIC) in the instrument
cluster will change from the currently displayed message
to the letter “M”, For MANUAL position, and a number
indicating the requested gear range when moving
the shift lever forward or rearward.
While using the DSC feature the transmission will have
�rmer shifting and sportier performance. You can use
this for sport driving or when climbing hills to stay in gear
longer or to downshift for more power or engine braking.
The transmission will only allow you to shift into gears
appropriate for the vehicle speed and engine revolutions
per minute (RPM):
The transmission will not automatically shift to the
next higher gear if the vehicle speed or engine
RPM is too high.
The transmission will not allow shifting to the next
lower gear if the vehicle speed or engine RPM is
too high.
2-30
Page 118 of 410

Running the Vehicle While Parked
It is better not to park with the engine running. But if you
ever have to, here are some things to know.
{CAUTION:
Idling a vehicle in an enclosed area with poor
ventilation is dangerous. Engine exhaust may
enter the vehicle. Engine exhaust contains Carbon
Monoxide (CO) which cannot be seen or smelled.
It can cause unconsciousness and even death.
Never run the engine in an enclosed area that
has no fresh air ventilation. For more information,
seeEngine Exhaust on page 2-35.
{CAUTION:
It can be dangerous to get out of the vehicle if
the automatic transmission shift lever is not fully
in P (Park) with the parking brake �rmly set. The
vehicle can roll. Do not leave the vehicle when the
engine is running unless you have to. If you have
left the engine running, the vehicle can move
suddenly. You or others could be injured. To be
sure the vehicle will not move, even when you are
on fairly level ground, always set the parking brake
and move the shift lever to P (Park).
Follow the proper steps to be sure the vehicle will not
move. SeeShifting Into Park on page 2-32.
If parking on a hill and pulling a trailer, seeTowing a
Trailer on page 4-30.
2-36
Page 126 of 410

Sunshade Operation
The sunshade will open automatically when opening the
sunroof.
However, it can manually be pulled shut after the
sunroof is closed. To adjust the sunshade, push it
backward or pull it forward to the desired position.
The sunshade cannot be adjusted further than
the current closed position of the sunroof.
Notice:If you force the sunshade forward of the
sliding glass panel, damage will occur and the
sunroof may not open or close properly. Always
close the glass panel before closing the sunshade.
Do not leave the sunroof open for long periods of
time. Debris can collect in the tracks and possibly
damage the sunroof operation and plug the water
draining system.
Retractable Hardtop
The following procedures explain the proper operation
of the retractable hardtop. The retractable hardtop
will not operate if the trunk cargo cover is not in place.
If the retractable hardtop is lowered or raised multiple
times, the engine should be running while doing
so to prevent drain on the vehicle’s battery.
Lowering the Retractable Hardtop
Notice:Leaving the retractable hardtop down and
exposing the interior of the vehicle to outdoor
conditions may cause damage. Always close the
retractable hardtop if leaving the vehicle outdoors.
Notice:Lowering the top if it is damp, wet, or
dirty can cause stains, mildew, and damage to
the inside of your vehicle. Dry off the top before
lowering it.
Notice:If you lower the retractable hardtop in cold
weather (32°F/0°C or lower), you may damage top
components. Do not lower the retractable hardtop
in cold weather.
1. Park on a level surface, and shift the transmission
into (P) Park. The vehicle must be in (P) Park, and
the engine must be running, or the ignition turned
to the ON/RUN position, to operate the retractable
hardtop.
2-44
Page 137 of 410
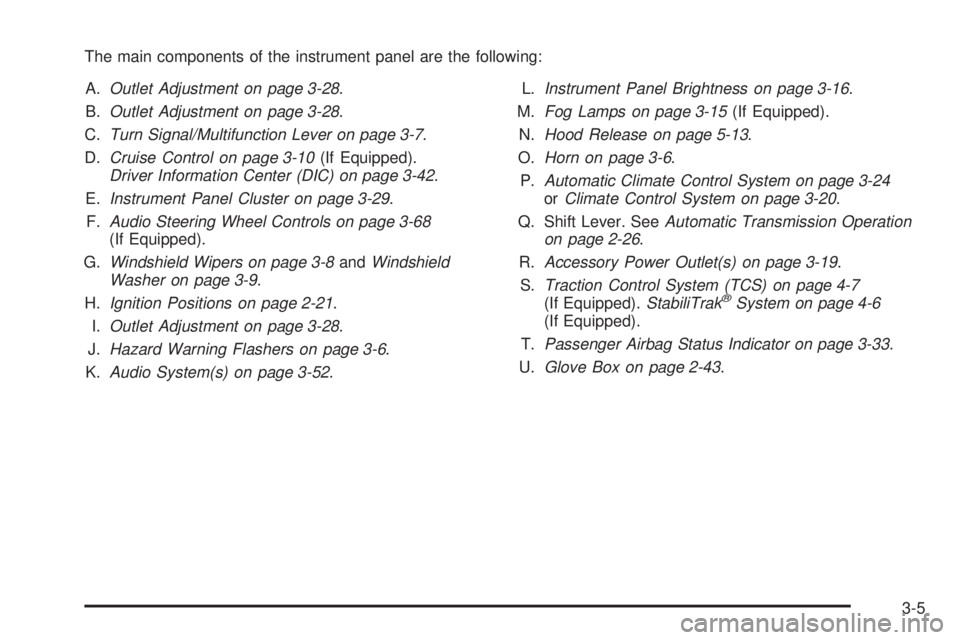
The main components of the instrument panel are the following:
A.Outlet Adjustment on page 3-28.
B.Outlet Adjustment on page 3-28.
C.Turn Signal/Multifunction Lever on page 3-7.
D.Cruise Control on page 3-10(If Equipped).
Driver Information Center (DIC) on page 3-42.
E.Instrument Panel Cluster on page 3-29.
F.Audio Steering Wheel Controls on page 3-68
(If Equipped).
G.Windshield Wipers on page 3-8andWindshield
Washer on page 3-9.
H.Ignition Positions on page 2-21.
I.Outlet Adjustment on page 3-28.
J.Hazard Warning Flashers on page 3-6.
K.Audio System(s) on page 3-52.L.Instrument Panel Brightness on page 3-16.
M.Fog Lamps on page 3-15(If Equipped).
N.Hood Release on page 5-13.
O.Horn on page 3-6.
P.Automatic Climate Control System on page 3-24
orClimate Control System on page 3-20.
Q. Shift Lever. SeeAutomatic Transmission Operation
on page 2-26.
R.Accessory Power Outlet(s) on page 3-19.
S.Traction Control System (TCS) on page 4-7
(If Equipped).StabiliTrak
®System on page 4-6
(If Equipped).
T.Passenger Airbag Status Indicator on page 3-33.
U.Glove Box on page 2-43.
3-5
Page 147 of 410
Automatic Headlamp System
When it is dark enough outside, the automatic headlamp
system turns on the headlamps at the normal brightness
along with other lamps such as the taillamps,
sidemarker, parking lamps, and the instrument panel
lights. The radio lights will also be dim.
The vehicle has a light sensor on top of the instrument
panel that controls the automatic headlamp system.
Do not cover the sensor or the automatic headlamp
system will turn on when it is not needed.
There is a delay in the transition between the daytime
and nighttime operation of the DRL and the automatic
headlamp systems so that driving under bridges or
bright overhead street lights does not affect the system.
The DRL and automatic headlamp systems will only
be affected when the light sensor sees a change
in lighting lasting longer than this delay.
If vehicle is started in a dark garage, the automatic
headlamp system comes on immediately. Once the
vehicle leaves the garage, it takes about one minute for
the automatic headlamp system to change to DRL if
it is light outside. During that delay, the instrument panel
cluster may not be as bright as usual. Make sure the
instrument panel brightness control is in the full
bright position. SeeInstrument Panel Brightness on
page 3-16.To idle the vehicle with the automatic headlamp
system off, turn the ignition on and set the exterior light
switch to the off/on position. For vehicles �rst sold in
Canada, the transmission must stay in P (Park) for this
function.
The regular headlamps should be used when needed.
Fog Lamps
For vehicles with fog lamps, the button for this feature is
located on the instrument panel, to the left of the
steering wheel.
The ignition must be on for the fog lamps to work.
#:Press to turn the fog lamps on or off. An indicator
light comes on when the fog lamps are on.
The parking lamps automatically turn on and off when
the fog lamps are turned on and off.
The fog lamps turn off while the high-beam headlamps
are turned on.
Some localities have laws that require the headlamps to
be on along with the fog lamps.
3-15
Page 162 of 410

Speedometer and Odometer
The speedometer shows the vehicle speed in both miles
per hour (mph) and kilometers per hour (km/h).
The odometer shows how far the vehicle has been
driven, in either miles (used in the United States)
or kilometers (used in Canada).
When in manual shift mode, the odometer will change
from the vehicle’s mileage to the letter M, for manual
mode, and a number indicating the requested gear
range when moving the shift lever forward or rearward.
For more information seeAutomatic Transmission
Operation on page 2-26.
This vehicle has a tamper resistant odometer.
Repair or replacement of the instrument panel cluster
should only be performed by your dealer/retailer.
Trip Odometer
The trip odometer can display how far the vehicle has
been driven since it was last reset.
For more information seeDIC Operation and Displays
on page 3-43.
Tachometer
The tachometer shows the
engine speed in revolutions
per minute (rpm).
Notice:If the engine is operated with the tachometer
in the shaded warning area, the vehicle could be
damaged, and the damages would not be covered by
the vehicle warranty. Do not operate the engine with
the tachometer in the shaded warning area.2.4L and 3.6L Engine
shown, 3.5L and
3.9L Engine similar
3-30
Page 209 of 410
The Traction Control System (TCS) and StabiliTrak can
be turned off if needed by pressing and holding the
StabiliTrak/TCS button. Press the button again to turn
StabiliTrak and Traction Control back on. SeeTraction
Control System (TCS) on page 4-7for more information.
If cruise control is being used when the system
activates, the StabiliTrak light will �ash and cruise
control will automatically disengage. Cruise control may
be reengaged when road conditions allow. See
Cruise Control on page 3-10.
Traction Control System (TCS)
The vehicle has a Traction Control System (TCS) that
limits wheel spin. This is especially useful in slippery road
conditions. The system operates only if it senses that one
or both of the front wheels are spinning or beginning to
lose traction. When this happens, the system reduces
engine power and may also upshift the transmission to
limit wheel spin. Also, the traction control system
activates the appropriate corner brakes to gain even
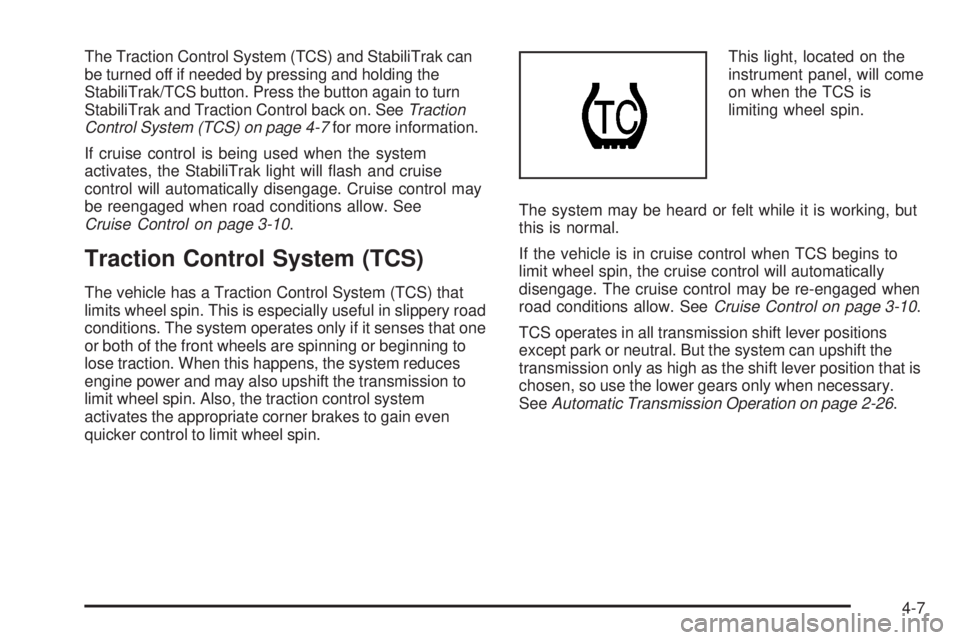
quicker control to limit wheel spin.This light, located on the
instrument panel, will come
on when the TCS is
limiting wheel spin.
The system may be heard or felt while it is working, but
this is normal.
If the vehicle is in cruise control when TCS begins to
limit wheel spin, the cruise control will automatically
disengage. The cruise control may be re-engaged when
road conditions allow. SeeCruise Control on page 3-10.
TCS operates in all transmission shift lever positions
except park or neutral. But the system can upshift the
transmission only as high as the shift lever position that is
chosen, so use the lower gears only when necessary.
SeeAutomatic Transmission Operation on page 2-26.
4-7
Page 228 of 410
Towing
Towing Your Vehicle
To avoid damage, the disabled vehicle should be towed
with all four wheels off the ground. Consult your dealer/
retailer or a professional towing service if the disabled
vehicle must be towed. SeeRoadside Assistance
Program on page 7-7.
To tow the vehicle behind another vehicle for
recreational purposes (such as behind a motorhome),
see “Recreational Vehicle Towing” following.
Recreational Vehicle Towing
Recreational vehicle towing means towing the vehicle
behind another vehicle – such as behind a motorhome.
The two most common types of recreational vehicle
towing are known as dinghy towing and dolly towing.
Dinghy towing is towing the vehicle with all four wheels
on the ground. Dolly towing is towing the vehicle with
two wheels on the ground and two wheels up on a device
known as a dolly.Here are some important things to consider before
recreational vehicle towing:
What’s the towing capacity of the towing vehicle?
Be sure to read the tow vehicle manufacturer’s
recommendations.
How far will the vehicle be towed? Some vehicles
have restrictions on how far and how long they
can tow.
Does the vehicle have the proper towing
equipment? See your dealer/retailer or trailering
professional for additional advice and equipment
recommendations.
Is the vehicle ready to be towed? Just as preparing
the vehicle for a long trip, make sure the vehicle is
prepared to be towed. SeeBefore Leaving on a
Long Trip on page 4-15.
Dinghy Towing From the Front
If the vehicle has the 3.9L V6 engine with the four-speed
automatic transmission, the vehicle cannot be dinghy
towed.
If the vehicle does not have the 3.9L V6 engine with a
four-speed automatic transmission, it can be dinghy
towed.
4-26