PONTIAC G6 2010 Owners Manual
Manufacturer: PONTIAC, Model Year: 2010, Model line: G6, Model: PONTIAC G6 2010Pages: 448, PDF Size: 2.5 MB
Page 141 of 448
Compass
Compass Operation
PressOor depending on the vehicle, press AUTO/OFF
to turn the compass on or off.
When the ignition and the compass feature are on, the
compass displays the current compass direction
after a few seconds.
Compass Calibration
If after a few seconds the display does not show a
compass direction, (N for North for example), there may
be a strong magnetic field interfering with the compass.
Interference can be caused by a magnetic antenna
mount, note pad holder, or similar object. If the letter C
appears in the compass window, the compass may
need to be reset or calibrated.
The mirror can be calibrated by driving the vehicle in
circles at 8 km (5 mph) or less until the display reads a
direction.
Compass Variance
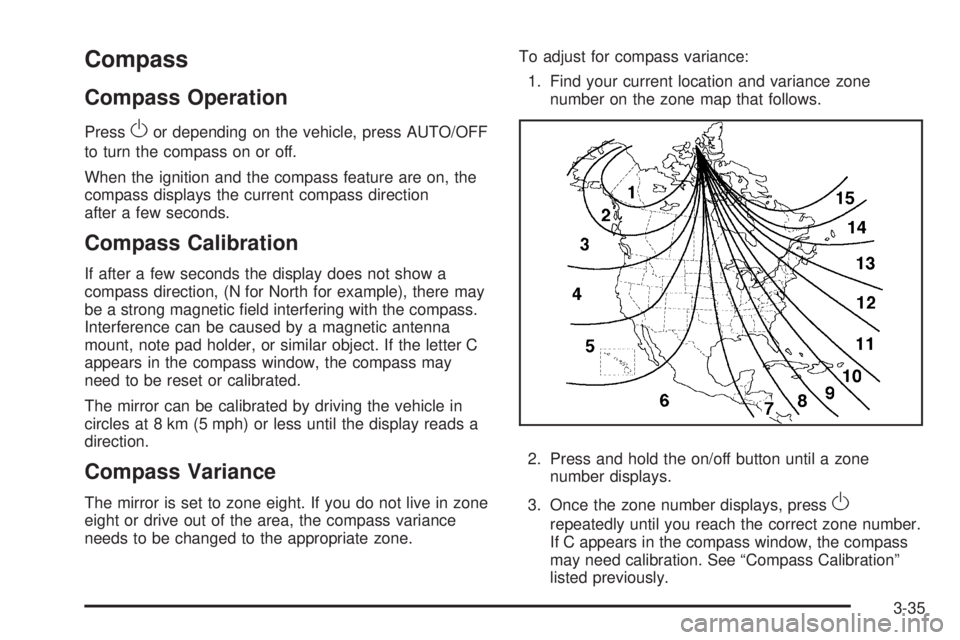
The mirror is set to zone eight. If you do not live in zone
eight or drive out of the area, the compass variance
needs to be changed to the appropriate zone.To adjust for compass variance:
1. Find your current location and variance zone
number on the zone map that follows.
2. Press and hold the on/off button until a zone
number displays.
3. Once the zone number displays, pressO
repeatedly until you reach the correct zone number.
If C appears in the compass window, the compass
may need calibration. See “Compass Calibration”
listed previously.
3-35
Page 142 of 448
Outside Power Mirrors
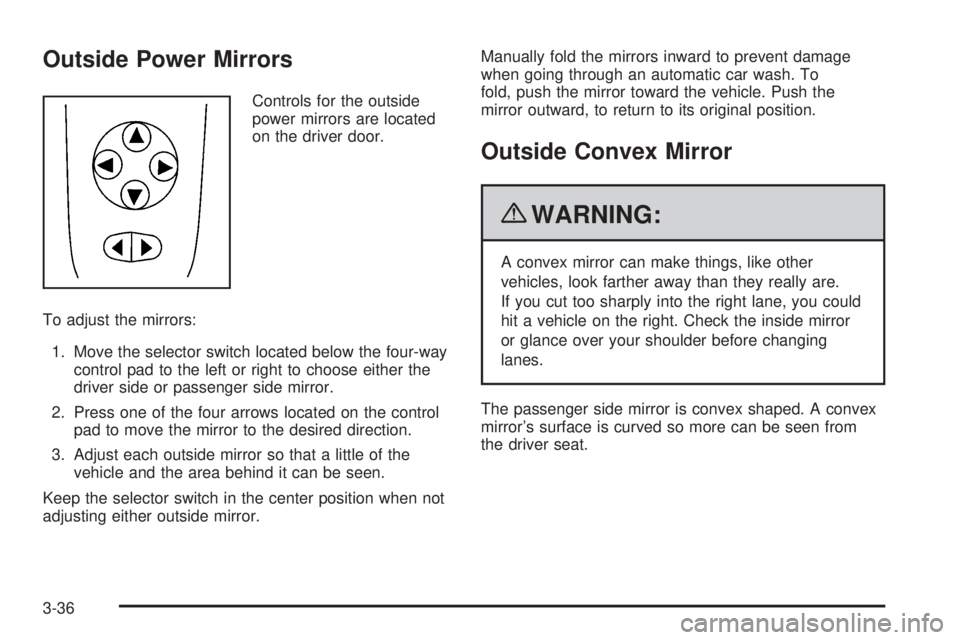
Controls for the outside
power mirrors are located
on the driver door.
To adjust the mirrors:
1. Move the selector switch located below the four-way
control pad to the left or right to choose either the
driver side or passenger side mirror.
2. Press one of the four arrows located on the control
pad to move the mirror to the desired direction.
3. Adjust each outside mirror so that a little of the
vehicle and the area behind it can be seen.
Keep the selector switch in the center position when not
adjusting either outside mirror.Manually fold the mirrors inward to prevent damage
when going through an automatic car wash. To
fold, push the mirror toward the vehicle. Push the
mirror outward, to return to its original position.
Outside Convex Mirror
{WARNING:
A convex mirror can make things, like other
vehicles, look farther away than they really are.
If you cut too sharply into the right lane, you could
hit a vehicle on the right. Check the inside mirror
or glance over your shoulder before changing
lanes.
The passenger side mirror is convex shaped. A convex
mirror’s surface is curved so more can be seen from
the driver seat.
3-36
Page 143 of 448
Storage Areas
Glove Box
Lift up on the glove box lever to open it.
Cupholders
There are two cupholders in the front center console of
the vehicle and two in the rear of the center console.
Pull down the door on the rear of the center console to
use the rear seat cupholders.
Center Console Storage
The center console has a separate storage area. Pull
up the release handle on the front of the cover to open
the compartment.
In the floor console is a power accessory outlet. See
Accessory Power Outlet(s) on page 4-15for more
information.
Convenience Net
For vehicles with a convenience net, it is located in the
rear of the vehicle. Use the convenience net to store
small loads as far forward as possible. The net should
not be used to store heavy loads.
Sunroof
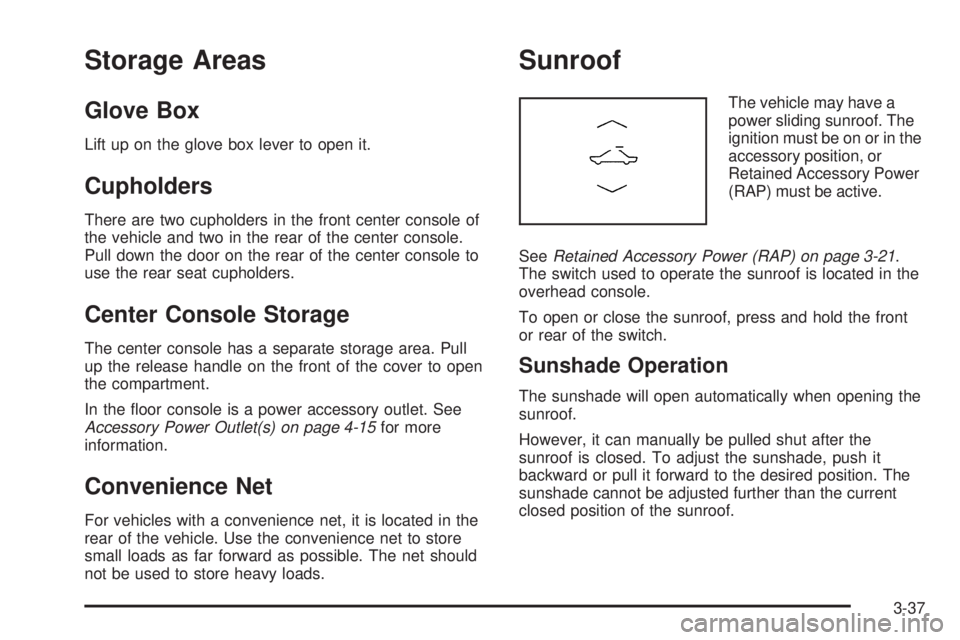
The vehicle may have a
power sliding sunroof. The
ignition must be on or in the
accessory position, or
Retained Accessory Power
(RAP) must be active.
SeeRetained Accessory Power (RAP) on page 3-21.
The switch used to operate the sunroof is located in the
overhead console.
To open or close the sunroof, press and hold the front
or rear of the switch.
Sunshade Operation
The sunshade will open automatically when opening the
sunroof.
However, it can manually be pulled shut after the
sunroof is closed. To adjust the sunshade, push it
backward or pull it forward to the desired position. The
sunshade cannot be adjusted further than the current
closed position of the sunroof.
3-37
Page 144 of 448
Notice:Forcing the sunshade forward of the
sliding glass panel may cause damage and the
sunroof may not operate properly. Always close the
glass panel before closing the sunshade.
Do not leave the sunroof open for long periods of time.
Debris can collect in the tracks and possibly damage
the sunroof operation and plug the water draining
system.
Retractable Hardtop
The following procedures explain the proper operation
of the retractable hardtop. The retractable hardtop
will not operate if the trunk cargo cover is not in place.
If the retractable hardtop is lowered or raised multiple
times, the engine should be running while doing
so to prevent drain on the vehicle’s battery.
Lowering the Retractable Hardtop
Notice:Leaving the retractable hardtop down and
exposing the interior of the vehicle to outdoor
conditions may cause damage. Always close the
retractable hardtop if leaving the vehicle outdoors.
Notice:Lowering the top if it is damp, wet, or
dirty can cause stains, mildew, and damage to the
inside of your vehicle. Dry off the top before
lowering it.Notice:If you lower the retractable hardtop in cold
weather (32°F/0°C or lower), you may damage
top components. Do not lower the retractable
hardtop in cold weather.
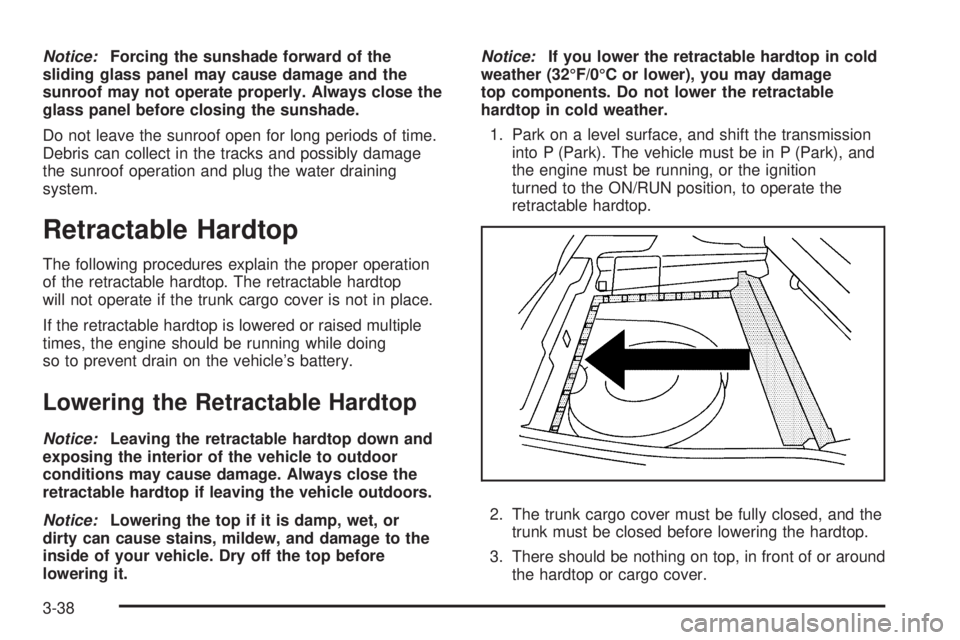
1. Park on a level surface, and shift the transmission
into P (Park). The vehicle must be in P (Park), and
the engine must be running, or the ignition
turned to the ON/RUN position, to operate the
retractable hardtop.
2. The trunk cargo cover must be fully closed, and the
trunk must be closed before lowering the hardtop.
3. There should be nothing on top, in front of or around
the hardtop or cargo cover.
3-38
Page 145 of 448
{WARNING:
When the retractable hardtop is opened or closed,
people can be injured by the parts that move: the
hardtop and its mechanism, the trunk lid, and the
side windows. Keep people away from these parts
when you are lowering or raising the top.
{WARNING:
If the retractable hardtop is not completely opened
or closed, the system will cause the retractable
hardtop to slowly descend after 3 minutes. You or
others could be injured. The retractable hardtop
will descend immediately if the ignition is turned to
LOCK/OFF during the opening or closing of the
retractable hardtop. Always completely open or
close the retractable hardtop and do not shut off
the ignition during the opening or closing of the
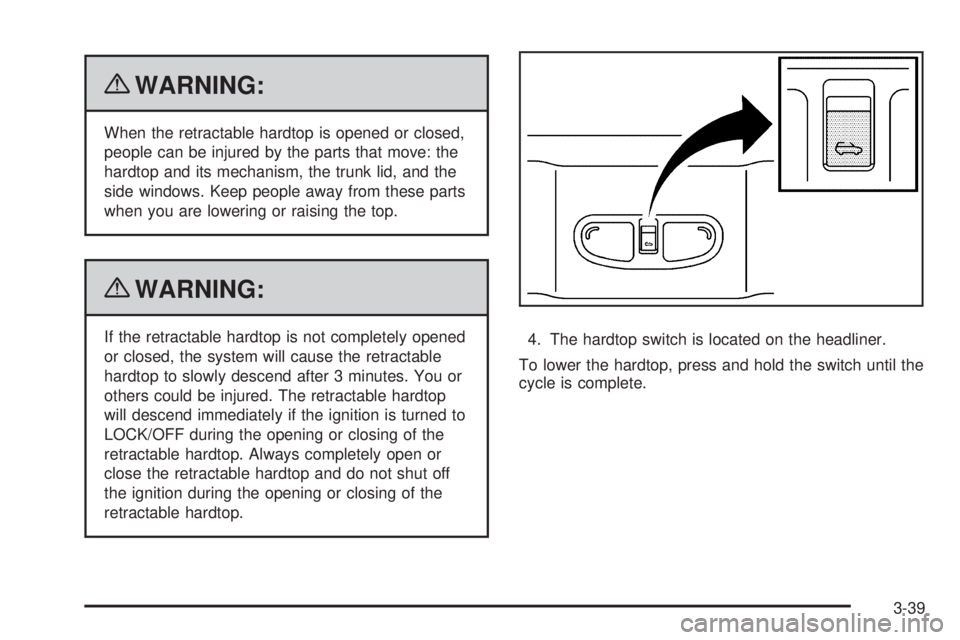
retractable hardtop.4. The hardtop switch is located on the headliner.
To lower the hardtop, press and hold the switch until the
cycle is complete.
3-39
Page 146 of 448
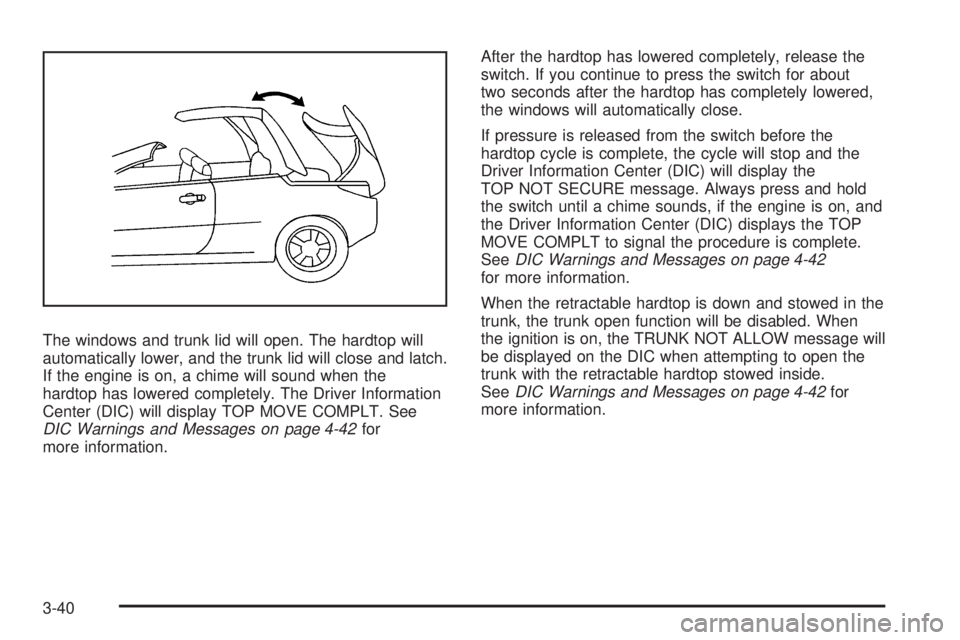
The windows and trunk lid will open. The hardtop will
automatically lower, and the trunk lid will close and latch.
If the engine is on, a chime will sound when the
hardtop has lowered completely. The Driver Information
Center (DIC) will display TOP MOVE COMPLT. See
DIC Warnings and Messages on page 4-42for
more information.After the hardtop has lowered completely, release the
switch. If you continue to press the switch for about
two seconds after the hardtop has completely lowered,
the windows will automatically close.
If pressure is released from the switch before the
hardtop cycle is complete, the cycle will stop and the
Driver Information Center (DIC) will display the
TOP NOT SECURE message. Always press and hold
the switch until a chime sounds, if the engine is on, and
the Driver Information Center (DIC) displays the TOP
MOVE COMPLT to signal the procedure is complete.
SeeDIC Warnings and Messages on page 4-42
for more information.
When the retractable hardtop is down and stowed in the
trunk, the trunk open function will be disabled. When
the ignition is on, the TRUNK NOT ALLOW message will
be displayed on the DIC when attempting to open the
trunk with the retractable hardtop stowed inside.
SeeDIC Warnings and Messages on page 4-42for
more information.
3-40
Page 147 of 448
Raising the Retractable Hardtop
1. Park on a level surface, and shift the transmission
into P (Park). The vehicle must be in P (Park), and
the engine must be running, or the ignition
turned to the ON/RUN position, to operate the
retractable hardtop.
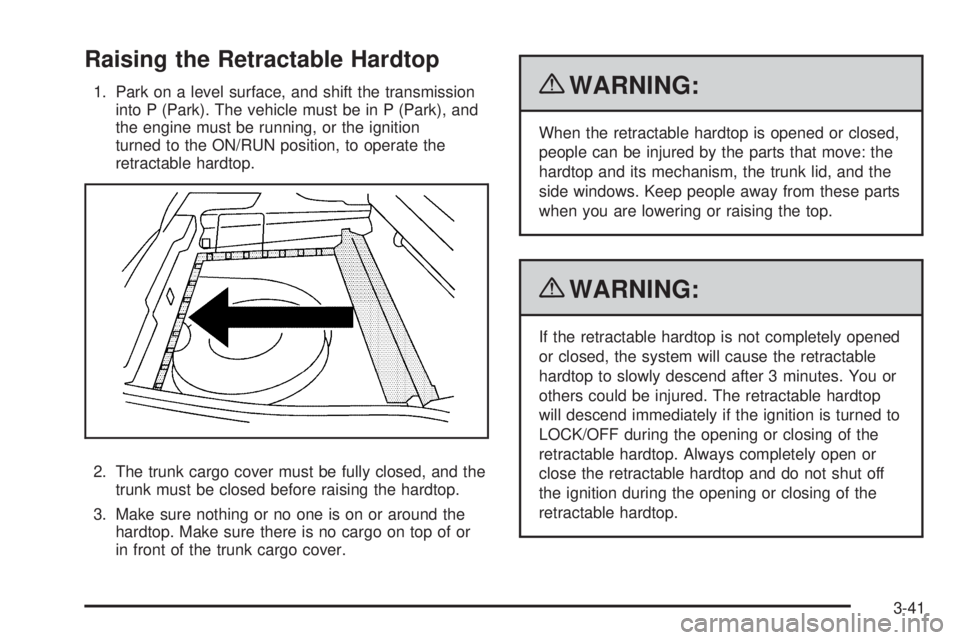
2. The trunk cargo cover must be fully closed, and the
trunk must be closed before raising the hardtop.
3. Make sure nothing or no one is on or around the
hardtop. Make sure there is no cargo on top of or
in front of the trunk cargo cover.{WARNING:
When the retractable hardtop is opened or closed,
people can be injured by the parts that move: the
hardtop and its mechanism, the trunk lid, and the
side windows. Keep people away from these parts
when you are lowering or raising the top.
{WARNING:
If the retractable hardtop is not completely opened
or closed, the system will cause the retractable
hardtop to slowly descend after 3 minutes. You or
others could be injured. The retractable hardtop
will descend immediately if the ignition is turned to
LOCK/OFF during the opening or closing of the
retractable hardtop. Always completely open or
close the retractable hardtop and do not shut off
the ignition during the opening or closing of the
retractable hardtop.
3-41
Page 148 of 448
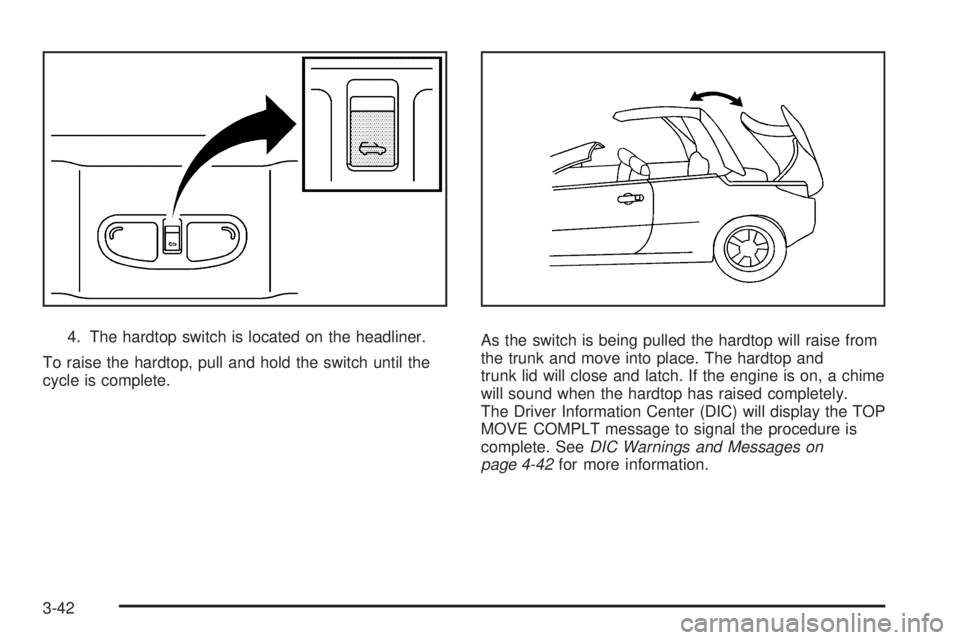
4. The hardtop switch is located on the headliner.
To raise the hardtop, pull and hold the switch until the
cycle is complete.As the switch is being pulled the hardtop will raise from
the trunk and move into place. The hardtop and
trunk lid will close and latch. If the engine is on, a chime
will sound when the hardtop has raised completely.
The Driver Information Center (DIC) will display the TOP
MOVE COMPLT message to signal the procedure is
complete. SeeDIC Warnings and Messages on
page 4-42for more information.
3-42
Page 149 of 448
After the hardtop has raised completely, release the
switch. If you continue to pull the switch for about
two seconds after the hardtop has raised completely,
the windows will automatically close.
If the switch is released before the hardtop cycle is
complete, the cycle stops and the Driver Information
Center (DIC) displays the TOP NOT SECURE message.
Always pull and hold the switch until a chime sounds,
if the engine is on, and the Driver Information Center
(DIC) displays the TOP MOVE COMPLT to signal
the procedure is complete. SeeDIC Warnings and
Messages on page 4-42for more information.The hardtop will not operate if the vehicle has an
electrical failure. If an electrical failure occurs,
see your dealer/retailer for service.
If your vehicle must be towed to a dealer/retailer for
service, your vehicle should be towed by flatbed with the
vehicle facing backwards. Consult your dealer/retailer
or professional towing service if you need to have
your disabled vehicle towed. SeeRoadside Assistance
Program on page 8-7.
3-43
Page 150 of 448

✍NOTES
3-44