turn signal PONTIAC G6 2010 Owners Manual
[x] Cancel search | Manufacturer: PONTIAC, Model Year: 2010, Model line: G6, Model: PONTIAC G6 2010Pages: 448, PDF Size: 2.5 MB
Page 9 of 448
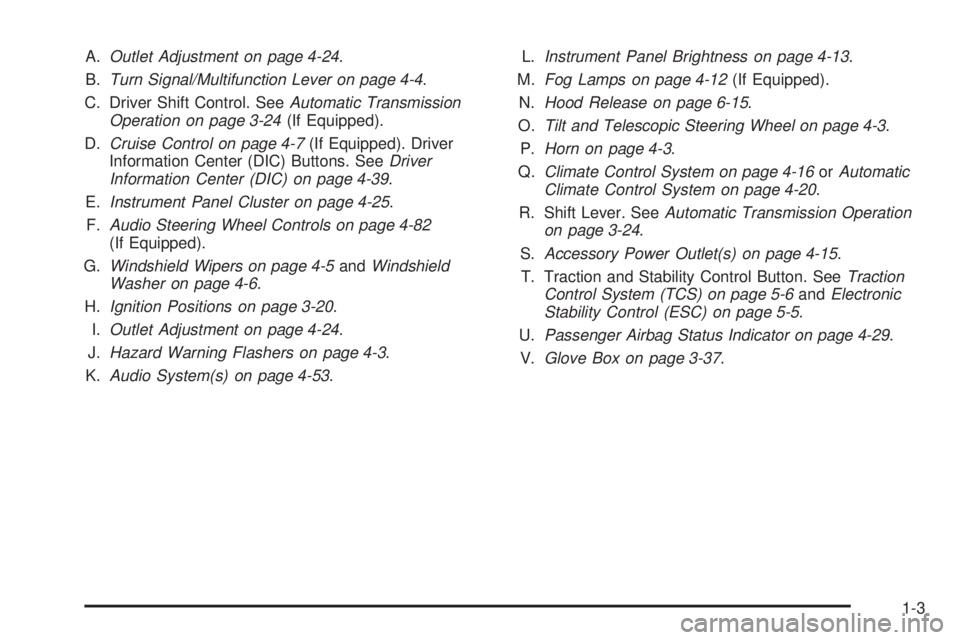
A.Outlet Adjustment on page 4-24.
B.Turn Signal/Multifunction Lever on page 4-4.
C. Driver Shift Control. SeeAutomatic Transmission
Operation on page 3-24(If Equipped).
D.Cruise Control on page 4-7(If Equipped). Driver
Information Center (DIC) Buttons. SeeDriver
Information Center (DIC) on page 4-39.
E.Instrument Panel Cluster on page 4-25.
F.Audio Steering Wheel Controls on page 4-82
(If Equipped).
G.Windshield Wipers on page 4-5andWindshield
Washer on page 4-6.
H.Ignition Positions on page 3-20.
I.Outlet Adjustment on page 4-24.
J.Hazard Warning Flashers on page 4-3.
K.Audio System(s) on page 4-53.L.Instrument Panel Brightness on page 4-13.
M.Fog Lamps on page 4-12(If Equipped).
N.Hood Release on page 6-15.
O.Tilt and Telescopic Steering Wheel on page 4-3.
P.Horn on page 4-3.
Q.Climate Control System on page 4-16orAutomatic
Climate Control System on page 4-20.
R. Shift Lever. SeeAutomatic Transmission Operation
on page 3-24.
S.Accessory Power Outlet(s) on page 4-15.
T. Traction and Stability Control Button. SeeTraction
Control System (TCS) on page 5-6andElectronic
Stability Control (ESC) on page 5-5.
U.Passenger Airbag Status Indicator on page 4-29.
V.Glove Box on page 3-37.
1-3
Page 10 of 448
Initial Drive Information
This section provides a brief overview about some of
the important features that may or may not be on your
specific vehicle.
For more detailed information, refer to each of the
features which can be found later in this owner manual.
Remote Keyless Entry (RKE)
System
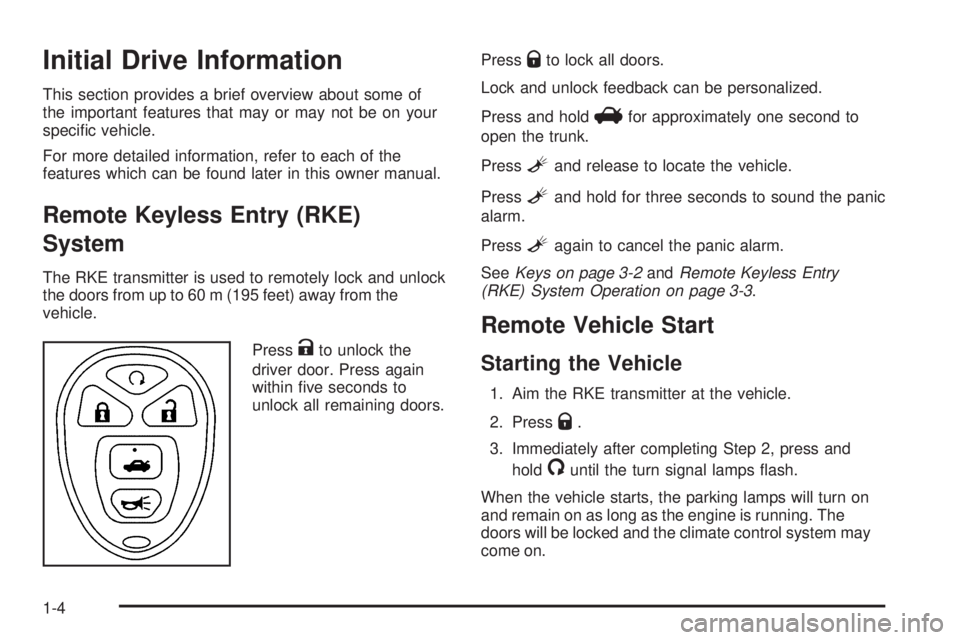
The RKE transmitter is used to remotely lock and unlock
the doors from up to 60 m (195 feet) away from the
vehicle.
Press
Kto unlock the
driver door. Press again
within five seconds to
unlock all remaining doors.Press
Qto lock all doors.
Lock and unlock feedback can be personalized.
Press and hold
Vfor approximately one second to
open the trunk.
Press
Land release to locate the vehicle.
Press
Land hold for three seconds to sound the panic
alarm.
Press
Lagain to cancel the panic alarm.
SeeKeys on page 3-2andRemote Keyless Entry
(RKE) System Operation on page 3-3.
Remote Vehicle Start
Starting the Vehicle
1. Aim the RKE transmitter at the vehicle.
2. Press
Q.
3. Immediately after completing Step 2, press and
hold
/until the turn signal lamps flash.
When the vehicle starts, the parking lamps will turn on
and remain on as long as the engine is running. The
doors will be locked and the climate control system may
come on.
1-4
Page 110 of 448

Q(Lock):Press to lock all the doors. The interior
lamps turn off after all of the doors are closed. If enabled
through the Driver Information Center (DIC), the
remote lock feedback can be programmed to have the
horn chirp and/or the turn signals flash to confirm
locking. See “LOCK HORN” and “LIGHT FLASH” under
DIC Vehicle Personalization on page 4-47.
Pressing
Qmay also arm the content theft-deterrent
system. SeeContent Theft-Deterrent on page 3-16.
K(Unlock):Press to unlock the driver door. IfKis
pressed again within five seconds, all remaining
doors unlock. The interior lamps turn on and stay on for
20 seconds or until the ignition is turned on. If enabled
through the DIC, the remote unlock feedback can
be programmed to have the horn chirp and/or the turn
signals flash to confirm unlocking. See “UNLOCK
HORN” and “LIGHT FLASH” underDIC Vehicle
Personalization on page 4-47.
The high-beam headlamps, parking lamps, and back-up
lamps may turn on when
Kis pressed. See “EXT
(Exterior) LIGHTS” underDIC Vehicle Personalization
on page 4-47.
Pressing
Kon the RKE transmitter disarms the content
theft-deterrent system. SeeContent Theft-Deterrent
on page 3-16.
V(Remote Trunk Release):Press and hold for
approximately one second to open the trunk. The trunk
will open using the transmitter when the vehicle
speed is less than 3 km/h (2 mph), when the ignition is
off, or when the vehicle shift lever is in P (Park).
L(Vehicle Locator/Panic Alarm):Press to locate
the vehicle. The horn sounds three times and the
headlamps and turn signals flash three times.
Press and hold
Lfor approximately three seconds to
sound the panic alarm. The horn sounds and the
headlamps and turn signals flash for 30 seconds.
Press
Lagain to cancel the panic alarm.
Programming Transmitters to the
Vehicle
Only RKE transmitters programmed to the vehicle
will work. If a transmitter is lost or stolen, a replacement
can be purchased and programmed through your
dealer/retailer. When the replacement transmitter is
programmed to the vehicle, all remaining transmitters
must also be programmed. Any lost or stolen transmitters
no longer work once the new transmitter is programmed.
Each vehicle can have up to four transmitters
programmed to it.
3-4
Page 112 of 448

The remote start feature needs to be reset after your
vehicle’s engine is started two times using the
transmitter’s remote start button. To reset the remote
start feature, insert the vehicle’s key into the ignition
switch and turn it to ON/RUN. SeeIgnition Positions on
page 3-20for information regarding the ignition
positions on your vehicle.
If your vehicle has the remote start feature, the RKE
transmitter functions will have an increased range
of operation. However, the range may be less while the
vehicle is running.
There are other conditions which can affect the
performance of the transmitter, seeRemote Keyless
Entry (RKE) System on page 3-3for additional
information.
/(Remote Start):This button will be on the
RKE transmitter if you have remote start.
To start the vehicle using the remote start feature:
1. Aim the transmitter at the vehicle.
2. Press and release the transmitter’s lock button,
then immediately press and hold the transmitter’s
remote start button until the vehicle’s turn signal
lamps flash.
When the vehicle starts, the parking lamps will turn
on and remain on while the engine is running.3. If it is the first remote start since the vehicle has been
driven, repeat these steps, while the engine is still
running, to extend the engine running time by
10 minutes. Remote start can be extended one time.
After entering the vehicle during a remote start, insert
and turn the key to ON/RUN to drive the vehicle.
The engine will shut off automatically after 10 minutes,
unless a time extension has been done or the
vehicle’s key is inserted into the ignition switch and
turned to ON/RUN.
To manually shut off a remote start:
•Aim the RKE transmitter at the vehicle and press
and release the remote start button.
•Turn on the hazard warning flashers.
•Turn the ignition switch ON/RUN and then
LOCK/OFF.
The parking lamps will turn off to indicate the engine
is off.
Your vehicle’s engine can be started two times, per
ignition cycle, using the transmitter’s remote start
feature.
If the remote start procedure is used again before the
first 10 minute time frame has ended, the first 10 minutes
will immediately expire and the second 10 minute time
frame will start.
3-6
Page 115 of 448

Door Ajar Reminder
A chime will sound and the DOOR AJAR message will
display if one of the doors is not fully closed. This
happens when the ignition is on and the shift lever is
moved out of P (Park) or N (Neutral). SeeDIC Warnings
and Messages on page 4-42.
Delayed Locking
This feature lets the driver to delay the locking of the
vehicle. It will not operate with the key in the ignition.
SeeLockout Protection on page 3-11.
Press the driver’s power door lock switch or the Remote
Keyless Entry (RKE) transmitter lock button once.
With the key removed from the ignition and the driver’s
door open, the following will occur:
•Three chimes will sound to signal the delay.
•All doors will lock and the turn signals will flash
once five seconds after the last door has been
closed.
•The horn will chirp if the horn chirp feature is
enabled. SeeDIC Operation and Displays on
page 4-40.If a door is opened before the five seconds has ended,
the doors will not lock until five seconds after all
doors are closed.
If the power door lock switch or the transmitter lock
button is pressed twice when leaving the vehicle, the
doors will lock immediately.
If the power door unlock switch or the transmitter unlock
button is pressed, the doors will unlock immediately
and do not lock automatically after the doors are closed.
This feature is turned on at the factory but may be
turned off through the Driver Information Center (DIC).
SeeDIC Vehicle Personalization on page 4-47.
Automatic Door Lock
Your vehicle is programmed at the factory to lock all
doors automatically when the following are met:
•All doors are closed.
•The ignition is on.
•The shift lever is moved out of P (Park).
This feature cannot be disabled.
If someone needs to exit the vehicle once the doors are
locked, have that person use the manual lock knob
or power door unlock switch.
3-9
Page 151 of 448
Instrument Panel Overview...............................4-3
Hazard Warning Flashers................................4-3
Horn .............................................................4-3
Tilt and Telescopic Steering Wheel...................4-3
Turn Signal/Multifunction Lever.........................4-4
Turn and Lane-Change Signals........................4-4
Headlamp High/Low-Beam Changer..................4-5
Flash-to-Pass.................................................4-5
Windshield Wipers..........................................4-5
Windshield Washer.........................................4-6
Cruise Control................................................4-7
Headlamps..................................................4-10
Headlamps on Reminder................................4-10
Headlamps Off in Park..................................4-11
Delayed Headlamps......................................4-11
Daytime Running Lamps (DRL).......................4-11
Automatic Headlamp System..........................4-12
Fog Lamps ..................................................4-12
Instrument Panel Brightness...........................4-13
Courtesy Lamps...........................................4-13
Dome Lamps ...............................................4-13
Entry/Exit Lighting.........................................4-13
Parade Dimming...........................................4-14
Reading Lamps............................................4-14Trunk Lamp.................................................4-14
Electric Power Management...........................4-14
Battery Run-Down Protection..........................4-15
Accessory Power Outlet(s).............................4-15
Climate Controls............................................4-16
Climate Control System.................................4-16
Automatic Climate Control System...................4-20
Outlet Adjustment.........................................4-24
Warning Lights, Gages, and Indicators............4-24
Instrument Panel Cluster................................4-25
Speedometer and Odometer..........................
.4-26
Trip Odometer..............................................4-26
Tachometer.................................................4-26
Safety Belt Reminders...................................4-27
Airbag Readiness Light..................................4-28
Passenger Airbag Status Indicator...................4-29
Charging System Light..................................4-30
Brake System Warning Light..........................4-30
Antilock Brake System (ABS) Warning Light.....4-31
Traction Off Light..........................................4-32
Electronic Stability Control Indicator Light.........4-32
Engine Coolant Temperature Warning Light......4-33
Engine Coolant Temperature Gage..................4-33
Section 4 Instrument Panel
4-1
Page 153 of 448

Instrument Panel Overview
Hazard Warning Flashers
|(Hazard Warning Flasher):Press this button
located on the instrument panel, to make the front and
rear turn signal lamps flash on and off. This warns
others that you are having trouble.
Press
|again to turn the flashers off.
Horn
Press near or on the horn symbols on the steering
wheel pad to sound the horn.
Tilt and Telescopic Steering Wheel
A tilt and telescope wheel lets the steering wheel
be adjusted.
The lever is located on the left side of the steering
wheel column.To adjust the steering wheel:
1. Pull the lever down.
2. Move the steering wheel up or down or backward
or forward into a comfortable position.
3. Pull the lever up to lock the steering wheel in place.
Do not adjust the steering wheel while driving.
4-3
Page 154 of 448
Turn Signal/Multifunction Lever
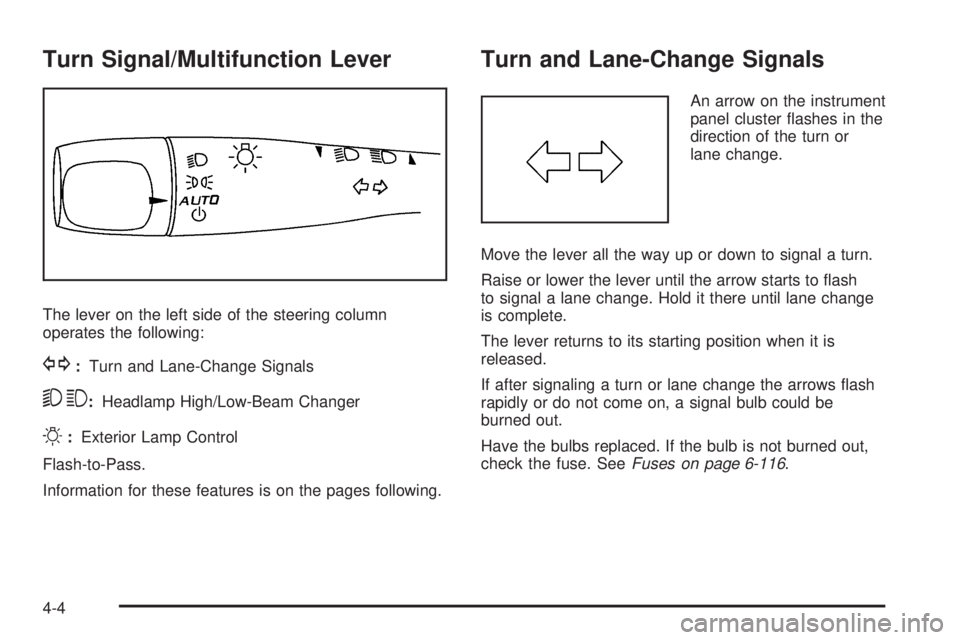
The lever on the left side of the steering column
operates the following:
G:Turn and Lane-Change Signals
53:Headlamp High/Low-Beam Changer
O:Exterior Lamp Control
Flash-to-Pass.
Information for these features is on the pages following.
Turn and Lane-Change Signals
An arrow on the instrument
panel cluster flashes in the
direction of the turn or
lane change.
Move the lever all the way up or down to signal a turn.
Raise or lower the lever until the arrow starts to flash
to signal a lane change. Hold it there until lane change
is complete.
The lever returns to its starting position when it is
released.
If after signaling a turn or lane change the arrows flash
rapidly or do not come on, a signal bulb could be
burned out.
Have the bulbs replaced. If the bulb is not burned out,
check the fuse. SeeFuses on page 6-116.
4-4
Page 155 of 448

Headlamp High/Low-Beam Changer
To change the headlamps from low beam to high
beam, push the turn signal/multifunction lever away
from you.
This instrument panel cluster light
3comes on if the
high beam lamps are turned on while the ignition is
in ON/RUN.
To change the headlamps from high beam to low beam,
pull the turn signal lever toward you.
Flash-to-Pass
This feature lets the high-beam headlamps be used to
signal a driver in front of you that you want to pass.
Pull the turn signal/multifunction lever toward you until
the high-beam headlamps come on, then release
the lever to turn them off.
Windshield Wipers
The windshield wiper lever is on the right side of the
steering wheel.
Move the lever to control the windshield wipers.
9(Off):Turns the windshield wipers off.
&(Intermittent; Speed Sensitive Wipers):For
intermittent or speed sensitive operation. The amount of
delay time varies between wiping cycles due to the
delay setting selected or the speed of the vehicle. As
vehicle speed is increased or decreased, the wiper
interval also increases or decreases.
4-5
Page 161 of 448

Headlamps Off in Park
This feature works when the ignition is in the ON/RUN
position and it is dark outside. To turn the headlamps
off when it is dark outside but keep other exterior lights
on, turn the exterior lamp control to the parking lamp
position.
To turn on the headlamps along with the other lamps
when it is dark outside, turn the exterior lamp control to
the AUTO or headlamp position.
This function does not work for vehicles first sold in
Canada.
Delayed Headlamps
The delayed headlamps feature keeps the headlamps
on for 20 seconds after the key is turned to LOCK/OFF,
then the headlamps automatically turn off.
To override the 20 second delayed headlamp feature
while it is active turn the turn signal/multifunction
lever up one position and then back to AUTO.
Daytime Running Lamps (DRL)
Daytime Running Lamps (DRL) can make it easier for
others to see the front of your vehicle during the
day. Fully functional DRL are required on all vehicles
first sold in Canada. The vehicle has a light sensor
on top of the instrument panel that controls the DRL.
Do not cover this sensor or the head lamps will be
on when they are not needed.
The DRL system makes the low-beam headlamps come
on at a reduced brightness when the following
conditions are met:
•The ignition is on.
•The exterior lamps control is in AUTO.
•The exterior lamps control is in the parking lamps
only position (This applies only to vehicles that
are first sold in Canada).
•The light sensor detects daytime light.
•The parking brake is released or the vehicle is not
in P (Park).
When the DRL system is on, the taillamps, sidemarker
lamps, parking lamps, and instrument panel lights
are not on unless you turn the exterior lamps control to
the parking lamp position.
The regular headlamp system should be turned on
when they are needed.
4-11