set clock PONTIAC G8 2009 Owners Manual
[x] Cancel search | Manufacturer: PONTIAC, Model Year: 2009, Model line: G8, Model: PONTIAC G8 2009Pages: 356, PDF Size: 1.83 MB
Page 119 of 356
Infotainment
Audio System(s)
Audio System(s).................6-1
Setting the Clock................6-2
Radio(s).............................6-3
Using an MP3...................6-20
XM Radio Messages.........6-24
Bluetooth®........................6-25
Theft-Deterrent Feature.....6-35
Audio Steering Wheel
Controls..........................6-36
Radio Reception...............6-36
Fixed Mast Antenna..........6-37
XM™ Satellite Radio
Antenna System..............6-37
Audio System(s)
Determine which radio the vehicle
has and become familiar with
its features.
{CAUTION
This system provides you with far
greater access to audio stations
and song listings. Giving extended
attention to entertainment tasks
while driving can cause a crash
and you or others can be injured
or killed. Always keep your eyes
on the road and your mind on the
drive — avoid engaging in
extended searching while driving.Keeping your mind on the drive is
important for safe driving. See
Defensive Driving on page 8-16.
Here are some ways in which you
can help avoid distraction while
driving.
Familiarize yourself with all of
its controls
Familiarize yourself with its
operation.
Set up your audio system by
presetting your favorite radio
stations, setting the tone,
and adjusting the speakers.
Then, when driving conditions
permit, you can tune to your
favorite radio stations using the
presets and steering wheel
controls if the vehicle has them.
Infotainment 6-1
Page 120 of 356
Notice:Before adding any sound
equipment to your vehicle, such
as an audio system, CD player,
CB radio, mobile telephone, or
two-way radio, make sure that it
can be added by checking with
your dealer/retailer. Also, check
federal rules covering mobile
radio and telephone units. If
sound equipment can be added, it
is very important to do it properly.
Added sound equipment may
interfere with the operation of your
vehicle’s engine, radio, or other
systems, and even damage them.
Your vehicle’s systems may
interfere with the operation of
sound equipment that has been
added.
The vehicle has Retained Accessory
Power (RAP), and the audio system
can be played after the ignition is
turned off. SeeRetained Accessory
Power (RAP) on page 8-3for more
information.Setting the Clock
Radio with Single CD Player
The time and date can be adjusted
when the radio is either on or
off, press
Gto display the date.
To adjust the time and date:
1. Press and hold
Guntil the
display shows the Set Clock
screen and the hour display
�ashes.
2. Turn the volume knob to adjust
the hour.
3. Press the volume knob and the
minute display will �ash to
adjust the minutes.
4. Turn the volume knob to adjust
the minutes.
5. Repeat these steps to adjust the
month, date, and year.
6. Press
Gto save the settings.
If no adjustments are made for
eight seconds, the radio will
automatically save the settings.
Radio with Six-Disc CD Player
The time and date can be adjusted
when the radio is either on or
off, press
Gto display the date.
To adjust the time and date:
1. Press and hold
Gfor more than
two seconds to display the
Options menu.
2. Turn the MENU knob to highlight:
Hour, Minute, Date, Month,
and Year.
3. Highlight Hour and Press the
MENU knob.
4. Turn the MENU knob to adjust
the hours.
5. Press the MENU knob to return
to the Options menu.
6. Repeat steps 2 through 5 to
adjust the minutes, date, month,
and year.
7. Press
Gto save the settings.
If no adjustments are made for
eight seconds, the radio will
automatically save the settings.
6-2 Infotainment
Page 158 of 356
9(Fan Control):Turn clockwise
or counterclockwise to increase or
decrease the fan speed. Turn the
knob all the way counterclockwise
to turn the system off.
Temperature Control:Turn
clockwise or counterclockwise to
increase or decrease the
temperature inside the vehicle.
Air Delivery Mode Control:Turn
the knob to change the current
air�ow mode.
Select from the following:
0(Vent):Air is directed to the
instrument panel outlets.
1(Bi-Level):Air is divided
between the instrument panel
outlets and the �oor outlets.
d(Floor):Air is directed to the
�oor outlets with some air directed to
the windshield and side window
outlets.
4(Defog):Air is directed to the
windshield, �oor outlets, and
side window vents. Use this mode
to clear the windows of fog or
moisture and warm the passengers.
5(Defrost):Air is directed to
the windshield, with some air
directed to the side window vents.
Use this mode to quickly remove fog
or frost from the windshield.
When defrost is selected, the air
conditioning turns on automatically to
improve defrosting performance. In
this mode the air conditioning cannot
be turned off and the recirculation
mode cannot be turned on.
Air Conditioning
#(Air Conditioning):Press to
turn on or off. An indicator comes on
when the air conditioning is on.
The fan must be on to use the air
conditioning.The air conditioning cannot be
turned off in defrost mode. If
#is
pressed, the indicator light
�ashes three times and the air
conditioning stays on.
For quick cool down on hot days,
select the following settings
together:
1. Press
#to turn on the air
conditioning.
2. Press
/to turn on the
recirculation.
3. Select the coolest temperature
and highest fan speed.
4. Open the windows brie�y to
let hot air escape and then
close them.
5. Once the vehicle’s interior cools
down, turn off the recirculation,
and select
0. This maintains the
best comfort level during
extended driving.
7-2 Climate Controls
Page 161 of 356
2. Adjust the temperature to a
comfortable setting between
72°F (22°C) and 75°F (24°C).
Choosing the coldest or warmest
temperature setting will not cause
the system to heat or cool any
faster.
3. Let the system stabilize for a
few minutes.
4. Adjust the air outlets or
temperature.
In cold weather, the system starts in
the recirculation mode with the fan
off. As the engine warms up, warm
air is directed to the �oor outlets,
before automatically changing to
bi-level mode with a reduced fan
speed.
Do not cover the solar sensor
located in the center of the
instrument panel, near the
windshield. For more information
on the solar sensor, see “Sensors”
later in this section.Manual Operation
+A−(Fan Control):Press + or−
to increase or decrease the fan
speed. The fan speed and indicator
appears in the display.
The climate control system sets the
fan speed automatically. When the
fan speed is adjusted the system
goes into semi-automatic operation.
Press the AUTO button to return to
automatic operation.
Temperature Control:The
temperature can be adjusted
separately for the driver and the
passenger. Turn the temperature
controls clockwise or
counterclockwise to increase or
decrease the temperature.
The temperature can be set
between 63°F (17°C) and
176°F (30°C). A setting between
72°F (22°C) and 75°F (24°C)
is recommended.The temperature settings for each
side are shown in the display.
If the temperature control is past
86°F (30°C), the display shows
H (hottest). Turning it past
63°F (17°C), shows C (coolest).
The EXT TEMP (Exterior
Temperature) can be displayed in
Fahrenheit (°F) or Celsius (°C).
SeeDIC Vehicle Customization on
page 4-31.
ZONE:Press to set the climate
control to single-zone (SZ) mode or
dual-zone (DZ) mode. SZ or DZ
appears in the display when a mode
is set.
Single-Zone (SZ) Mode:All zones
are set to the same temperature.
The temperature is shown in
the display. Turn the ZONE control
to set the temperature.
Climate Controls 7-5
Page 223 of 356
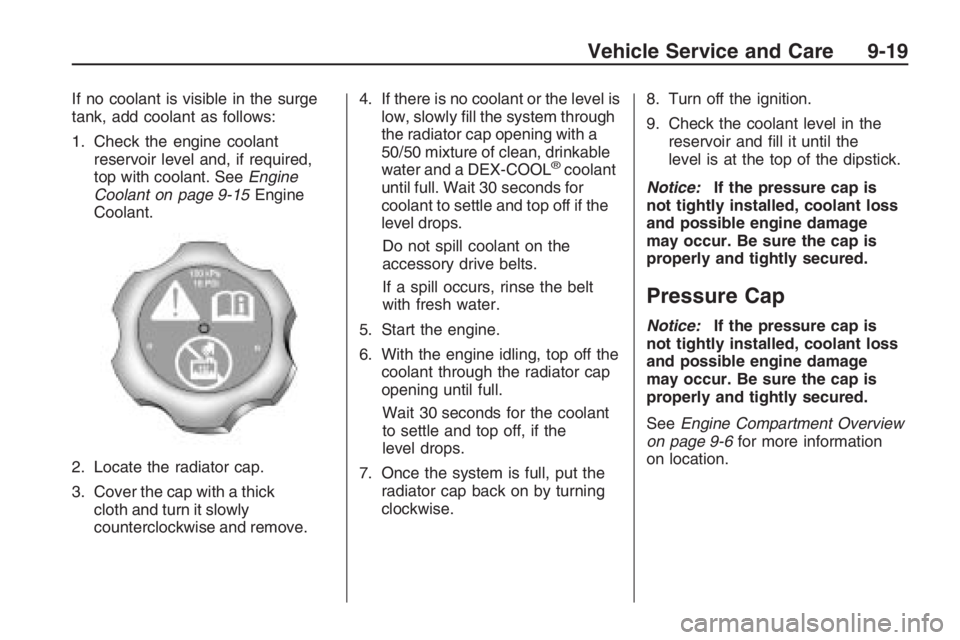
If no coolant is visible in the surge
tank, add coolant as follows:
1. Check the engine coolant
reservoir level and, if required,
top with coolant. SeeEngine
Coolant on page 9-15Engine
Coolant.
2. Locate the radiator cap.
3. Cover the cap with a thick
cloth and turn it slowly
counterclockwise and remove.4. If there is no coolant or the level is
low, slowly �ll the system through
the radiator cap opening with a
50/50 mixture of clean, drinkable
water and a DEX-COOL
®coolant
until full. Wait 30 seconds for
coolant to settle and top off if the
level drops.
Do not spill coolant on the
accessory drive belts.
If a spill occurs, rinse the belt
with fresh water.
5. Start the engine.
6. With the engine idling, top off the
coolant through the radiator cap
opening until full.
Wait 30 seconds for the coolant
to settle and top off, if the
level drops.
7. Once the system is full, put the
radiator cap back on by turning
clockwise.8. Turn off the ignition.
9. Check the coolant level in the
reservoir and �ll it until the
level is at the top of the dipstick.
Notice:If the pressure cap is
not tightly installed, coolant loss
and possible engine damage
may occur. Be sure the cap is
properly and tightly secured.
Pressure Cap
Notice:If the pressure cap is
not tightly installed, coolant loss
and possible engine damage
may occur. Be sure the cap is
properly and tightly secured.
SeeEngine Compartment Overview
on page 9-6for more information
on location.
Vehicle Service and Care 9-19
Page 347 of 356
A
Accessories and
Modi�cations...................... 9-3
Accessory Power Outlets........ 4-9
Adding Equipment to Your
Airbag-Equipped Vehicle....1-32
Additives, Fuel.....................8-36
Add-On Electrical
Equipment.......................9-36
Air Cleaner/Filter, Engine.......9-11
Air Conditioning...............7-1, 7-4
Airbag
Passenger Status
Indicator.......................4-14
Readiness Light................4-13
System, Replacing Parts
After a Crash................1-33
Airbag System.....................1-20
Adding Equipment to Your
Airbag-Equipped
Vehicle........................1-32
Check.............................1-33
How Does an Airbag
Restrain?.....................1-25Airbag System (cont.)
Passenger Sensing
System........................1-27
Servicing Your
Airbag-Equipped
Vehicle........................1-31
What Makes an Airbag
In�ate?........................1-25
What Will You See After
an Airbag In�ates?........1-25
When Should an Airbag
In�ate?........................1-23
Where Are the Airbags?.....1-22
Antenna, Fixed Mast............6-37
Antenna, XM™ Satellite
Radio Antenna System......6-37
Antilock Brake
System (ABS)..................8-18
Antilock Brake, System
Warning Light...................4-16
Appearance Care
Chemical Paint
Spotting.....................9-102
Exterior Cleaning..............9-98Appearance Care (cont.)
Finish Damage...............9-102
Interior Cleaning...............9-95
Sheet Metal Damage.......9-102
Underbody Maintenance . . . 9-102
Appointments, Scheduling
Service...........................12-8
Audio System........................ 6-1
Audio Steering Wheel
Controls.......................6-36
Fixed Mast Antenna..........6-37
Radio Reception...............6-36
Setting the Clock................ 6-2
Theft-Deterrent Feature......6-35
XM™ Satellite Radio
Antenna System............6-37
Audio System(s).................... 6-3
Automatic Climate Control
System............................. 7-4
Automatic Headlamp
System............................. 5-2
Automatic Transmission
Operation.......................... 8-6
INDEX i-1
Page 348 of 356
B
Battery...............................9-28
Run-Down Protection.......... 5-4
Bluetooth
®..........................6-25
Brake Fluid.........................9-25
Brakes...............................9-25
System Warning Light.......4-15
Braking...............................8-17
Break-In, New Vehicle............ 8-2
Bulb Replacement................9-31
Front Turn Signal Lamps . . . 9-33
Halogen Bulbs..................9-31
Headlamp Aiming..............9-28
Headlamps and Parking
Lamps .........................9-31
License Plate Lamps.........9-35
Replacement Bulbs...........9-35
Taillamps.........................9-34
Buying New Tires.................9-59
C
Calibration..........................2-16
California Fuel.....................8-35
California Perchlorate
Materials Requirements....... 9-3California Proposition 65
Warning............................ 9-3
Canadian Owners..................... ii
Capacities and
Speci�cations...................10-2
Carbon
Monoxide........2-10, 8-14, 8-27
Care, Safety Belts................1-19
Cautions and Notices............... iii
CD, MP3 ............................6-20
Center Console
Storage Area..................... 3-1
Chains, Tire........................9-65
Charging System Light..........4-15
Check
Engine Lamp...................4-18
Chemical Paint Spotting......9-102
Child Restraints
Child Restraint Systems.....1-39
Infants and Young
Children.......................1-36
Lower Anchors and
Tethers for Children.......1-42
Older Children..................1-34
Securing..................1-48, 1-50
Where to Put the
Restraint......................1-40Cleaning
Exterior...........................9-98
Interior............................9-95
Underbody Maintenance . . . 9-102
Climate Control System.......... 7-1
Automatic.......................... 7-4
Outlet Adjustment............... 7-9
Clock, Setting........................ 6-2
Collision Damage Repair.....12-10
Compact Spare Tire.............9-83
Compass............................2-16
Compressor Kit, Tire
Sealant...........................9-67
Content Theft-Deterrent.........2-13
Control of a Vehicle..............8-17
Convenience Net................... 3-2
Coolant
Engine............................9-15
Engine Temperature Gage . . . 4-17
Cooling System...................9-13
Cruise Control....................... 4-5
Cupholders........................... 3-1
i-2 INDEX
Page 353 of 356
Online Owner Center............12-3
OnStar, Privacy..................12-17
OnStar
®System, see
OnStar®Manual...............4-35
Outlet Adjustment.................. 7-9
Outlets
Accessory Power................ 4-9
Outside
Convex Mirror..................2-18
Power Mirrors..................2-17
Owner Checks and
Services..........................11-9
Owner Checks, Service.......... 9-5
Owners, Canadian.................... ii
P
Paint, Damage...................9-102
Park
Shifting Into.....................8-12
Shifting Out of..................8-13
Park Brake..........................8-11
Parking
Over Things That Burn......8-14Parking (cont.)
Parking Your Vehicle............8-14
Passenger Airbag Status
Indicator..........................4-14
Passenger Sensing
System...........................1-27
Passing..............................8-23
Perchlorate Materials
Requirements, California...... 9-3
Perimeter Lighting.................. 5-4
Phone
Bluetooth
®.......................6-25
Power
Door Locks........................ 2-9
Electrical System..............9-36
Retained Accessory (RAP).... 8-3
Seat................................. 1-2
Steering Fluid...................9-21
Windows.........................2-15
Pressure Cap......................9-19
Privacy.............................12-16
Event Data Recorders.....12-16
Navigation System..........12-17
OnStar..........................12-17
Radio Frequency
Identi�cation................12-17
R
Radio Frequency
Identi�cation
(RFID), Privacy...............12-17
Radio(s)............................... 6-3
Radios
Reception........................6-36
Setting the Clock................ 6-2
Theft-Deterrent.................6-35
Reading Lamps..................... 5-4
Rear Door Security Locks....... 2-9
Rear Heated Seats................ 1-5
Rear Seat Operation.............. 1-5
Rearview Mirrors..................2-16
Reclining Seatbacks............... 1-3
Recommended Fluids and
Lubricants......................11-12
Recreational Vehicle Towing....9-89
Remote Keyless Entry
(RKE) System.................... 2-3
Remote Keyless Entry
(RKE) System, Operation..... 2-4
Remote Vehicle Start............. 2-6
Removing the Flat Tire and
Installing the Spare Tire.....9-77
INDEX i-7
Page 354 of 356
Removing the Spare Tire
and Tools........................9-76
Replacement Bulbs..............9-35
Replacing LATCH System
Parts After a Crash...........1-47
Reporting Safety Defects
Canadian Government.....12-14
General Motors...............12-14
United States
Government................12-14
Restraint System Check
Replacing Airbag System
Parts After a Crash........1-33
Replacing Safety Belt
System Parts After a
Crash..........................1-19
Retained Accessory Power
(RAP)............................... 8-3
Roadside
Assistance Program..........12-6
Rocking Your Vehicle to
Get it Out ........................8-30
Routing, Engine Drive Belt . . . 11-14
Running the Vehicle While
Parked............................8-15S
Safety Belt Reminders..........4-12
Safety Belts.......................... 1-5
Care of ...........................1-19
Check.............................1-18
How to Wear Safety
Belts Properly................. 1-8
Lap-Shoulder Belt.............1-14
Replacing Parts After a
Crash..........................1-19
Safety Belt Extender.........1-18
Safety Belt Use During
Pregnancy....................1-18
Scheduled Maintenance........11-4
Seats
Head Restraints................. 1-4
Heated Seats - Rear........... 1-5
Lumbar Adjustment............. 1-2
Power Seats...................... 1-2
Rear Seat Operation........... 1-5
Reclining Seatbacks............ 1-3
Securing Child
Restraints................1-48, 1-50
Security Light......................4-20Service................................ 9-2
Accessories and
Modi�cations.................. 9-3
Adding Equipment to the
Outside of the Vehicle..... 9-4
California Perchlorate
Materials Requirements.... 9-3
California Proposition 65
Warning......................... 9-3
Doing Your Own Work........ 9-4
Engine Soon Lamp...........4-18
Owner Checks................... 9-5
Publications Ordering
Information.................12-15
Service, Scheduling
Appointments...................12-8
Servicing Your
Airbag-Equipped Vehicle....1-31
Setting the Clock................... 6-2
Sheet Metal Damage..........9-102
Shifting Into Park.................8-12
Shifting Out of Park..............8-13
Signals, Turn and
Lane-Change..................... 4-7
i-8 INDEX