light PONTIAC GRAND-AM 1993 Owners Manual
[x] Cancel search | Manufacturer: PONTIAC, Model Year: 1993, Model line: GRAND-AM, Model: PONTIAC GRAND-AM 1993Pages: 306, PDF Size: 15.39 MB
Page 4 of 306
How to Use this Manual
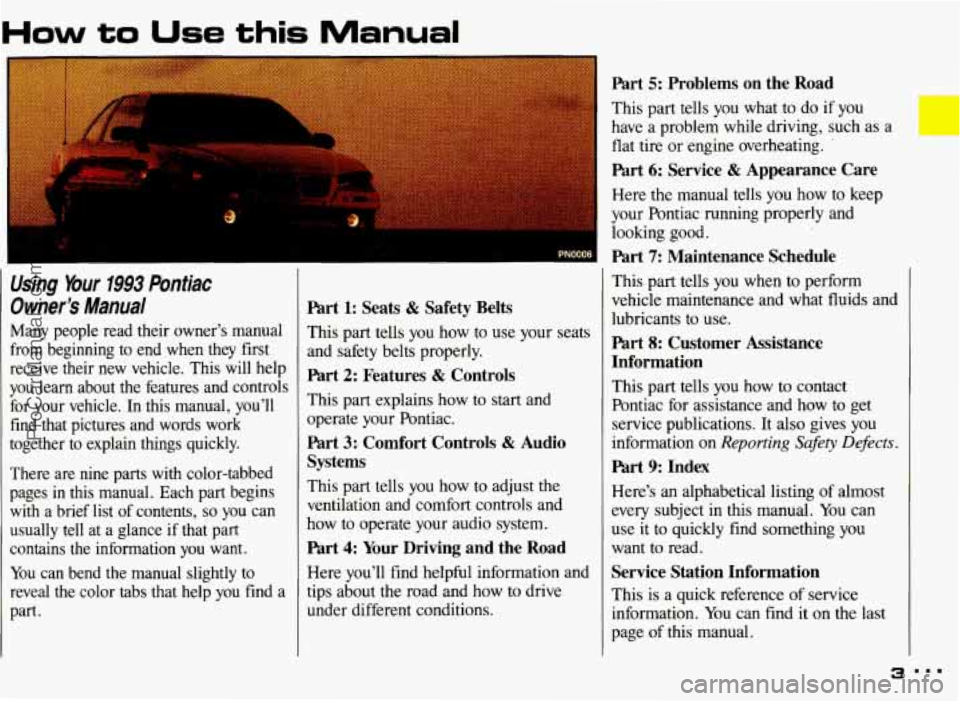
Using Your 1993 Pontiac
Owner’s Manual
Many people read their owner’s manual
from beginning to end when they first
receive their new vehicle. This will help
you learn about the features and controls
for your vehicle. In this manual, you’ll
find that pictures and words work
together to explain things quickly.
There are nine parts with color-tabbed
pages
in this manual. Each part begins
with a brief list of contents,
so you can
usually tell at a glance if that part
contains the information you want.
You can bend the manual slightly to
reveal the color tabs that help you find a
part.
Part 1: Seats & Safety Belts
This part tells you how to use your seats
and safety belts properly.
Part 2: Features & Controls
This part explains how to start and
operate your Pontiac.
Part 3: Comfort Controls & Audio
Systems
This part tells you how to adjust the
ventilation and comfort controls and
how to operate your audio system.
Part 4: Your Driving and the Road
Here you’ll find helpful information and
tips about the road and how to drive
under different conditions.
Part 5: Problems on the Road
This part tells you what to do if you
have a problem while driving, such as
a
flat tire or engine overheating. ’
Part 6: Service & Appearance Care
Here the manual tells you how to keep
your Pontiac running properly and
looking good.
Part 7: Maintenance Schedule
This part tells you when to perform
vehicle maintenance and what fluids and
lubricants
to use.
Part 8: Customer Assistance
Information
This part tells you how to contact
Pontiac for assistance and how to get
service publications. It also gives you
information on
Reporting Safety Defects.
Part 9: Index
Here’s an alphabetical listing of almost
every subject in this manual. You can
use
it to quickly find something you
want to read.
Service Station Information
This is a quick reference of service
information. You can find it
on the last
page
of this manual.
3
ProCarManuals.com
Page 6 of 306
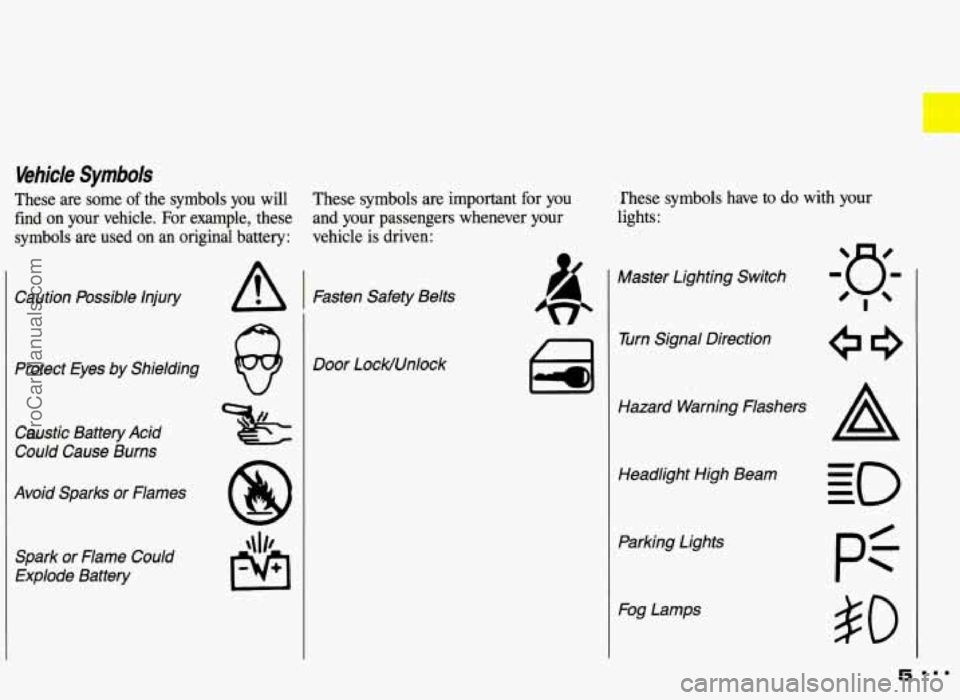
Vehicle Symbols
These are some of the symbols you will These
symbols are important for you
find on your vehicle. For example, these and your passengers whenever your
symbols are used on an original battery: vehicle
is driven:
Caution Possible Injury
Protect Eyes by Shielding
Caustic Battery Acid
Could Cause Burns
Avoid Sparks or Flames
Spark or Flame
Could
Explode Battery
@
Door LocWUnlock
rhese symbols have to do with your
lights:
Turn Signal Direction
Hazard Warning Flashers Headlight High Beam
Parking Lights
Fog Lamps
5
ProCarManuals.com
Page 7 of 306
How to Use this Manual
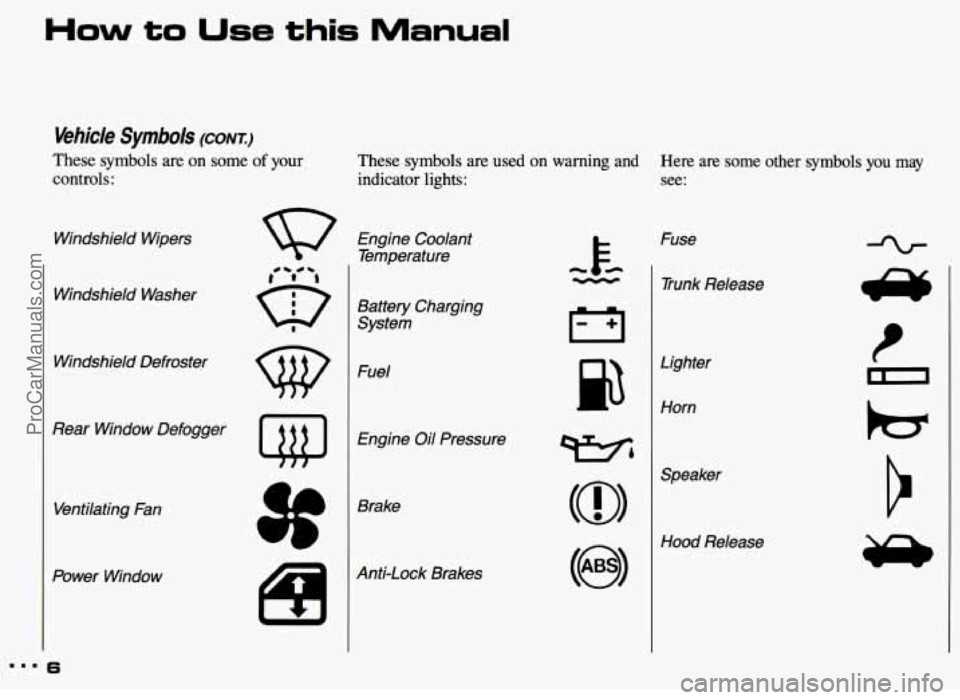
Vehicle Symbols (CONT.:)
These symbols are on some of your
controls:
Windshield Wipers
Windshield Washer
Windshield Defroster
Rear Window Defogger
Ventilating Fan
Power Window
These symbols are used on warning and
Here are some other symbols you may
indicator lights: see:
Engine Coolant
Temperature
Battery Charging
System
Fuel
Engine Oil Pressure
Brake
Anti-Lock Brakes Fuse
(0)
Speaker
(@I
Hood Release
... 6
ProCarManuals.com
Page 14 of 306

Don’t let anyone ride where
they can’t wear a safety belt
properly.
If you are in a crash and
you’re not wearing a safety belt,
your injuries can be
much worse.
You can hit things inside the
vehicle or be ejected from it. You
can be seriously injured or killed.
In the same crash, you might not
be if you are buckled up. Always
fasten your safety belt, and check
that your passengers’ belts are fastened properly too. This figure lights up when
you
turn the
key to
Run or Start when your safety
belt isn’t buckled, and you’ll hear a
chime, too. It’s the reminder to buckle
up. In many states and Canadian
provinces, the law says to wear safety
belts. Here’s why:
They work.
You never know if you’ll be in a crash.
If you do have a crash, you don’t know
if it will be a bad one.
A few crashes are very mild. In them,
you won’t get hurt even if you’re not
buckled up.
And some crashes can be so
serious, like being hit by a train, that
even buckled up a person wouldn’t
survive. But most crashes are in
between. In many of them, people who
buckle up can survive and sometimes walk away. Without belts they could be
badly hurt or killed.
After
25 years of safety belts in vehicles,
the facts are clear. In most crashes
buckling up does matter.
. . a lot!
13
ProCarManuals.com
Page 18 of 306

r
Safety Belt Warning Llght
When the key is turned to Run or Start,
a chime will come on for about eight
seconds to remind people to fasten their
safety belts, unless the driver’s safety
belt is buckled. The safety belt light
will
also come on and stay on for about a
minute. If the driver’s belt
is buckled,
neither the chime nor the light
will
come on.
A
If your s&ty belt light ever
comes on or stays on after the
hnt doors are closed and the
driver‘s belt is buckled, We your
vehicle €ked.
If you don’t, you might not have
the protection you’d need in a
crash.
I How to Wear Safety Belts
31
T
si
Properly-Adults
~~
his section is only for people of adult
ze.
i There are special things to
1 how about safety belts and
children, And there are different
des for babies and smaller
children, If a child will be riding
in your Pontiac, see the Idex
under Children aptd Sufety Belts.
Eollow those rules for everyone’s
protection.
First, you’ll want to know which
restraint systems your vehicle has.
We’ll
start with the driver position.
’17 ...
ProCarManuals.com
Page 44 of 306
Here you can learn about the
many standard and optional features
on your Pontiac. and information on
starting. shifting and braking
. Also
explained are the instrument panel
and the warning systems that tell
you
if everything is working
properly-and what to do
if you have
a problem
.
Part 2
Features & Controls
Keys .............................. ............................ 44
GloveBox ....................................................... 50
StartingYourEngine
............................................... 52
LOC
ks ........................................................... 45
Ignitionswitch
.................................................... 51
Engine Block Heater
............................................... 56
Shifting the Transaxle
.............................................. 57
ShiftingIntoPark
.................................................. 64
Turn SignaVHeadlight Beam Lever .................................... 69
Cruisecontrol .................................................... 70
Lightcontrols
.................................................... 74
Interior Lights
.................................................... 76
Windshield Wipers
................................................. 79
Windshield Washer ................................................ 80
Mirrors .......................................................... 81
Ashtray and Lighter ................................................ 85
Warning Lights, Gages and Indicators .................................. 91
ParkingBrake
.................................................... 63
Windows
........................................................ 68
Sunvisors
....................................................... 82
InstrumentPanel
.................................................. 86
ProCarManuals.com
Page 47 of 306
Features & Controls
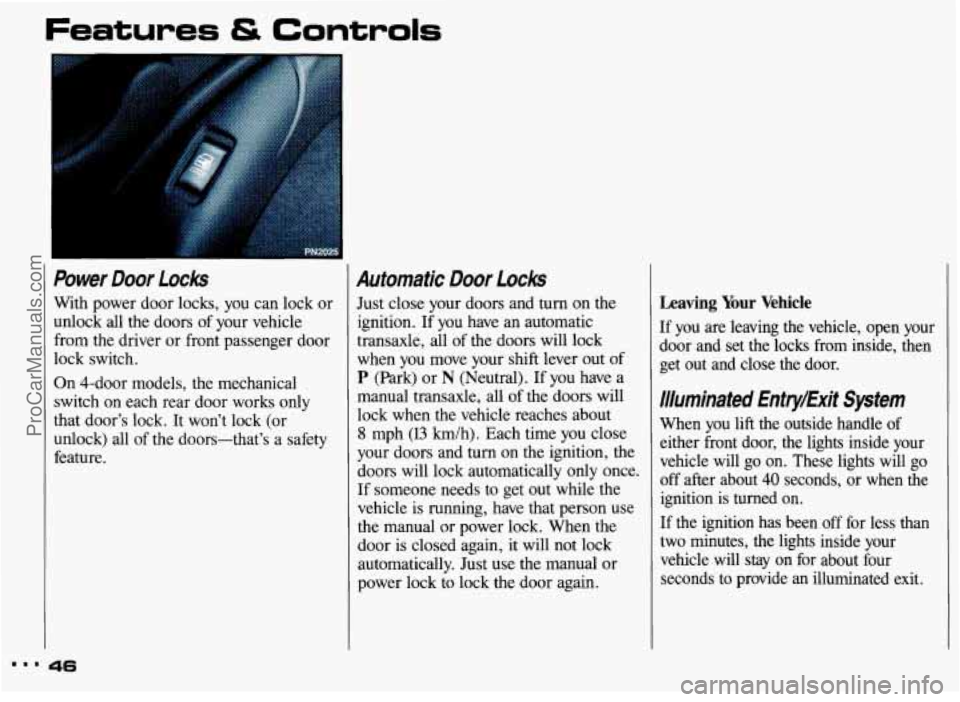
Power Door Locks
With power door locks, you can lock or
unlock all the doors of your vehicle
from the driver or front passenger door
lock switch.
On 4-door models, the mechanical
switch on each rear door works only
that door’s lock. It won’t lock (or
unlock) all of the doors-that’s a safety
feature.
Automatic Door Locks
Just close your doors and turn on the
ignition. If you have an automatic
transaxle, all of the doors will lock
when
you move your shift lever out of
P (Park) or N (Neutral). If you have a
manual transaxle, all of the doors will
lock when the vehicle reaches about
8 mph (13 km/h). Each time you close
your doors and
turn on the ignition, the
doors will lock automatically only once.
If someone needs to get out while the
vehicle is running, have that person use
the manual or power lock. When the
door is closed again, it will not lock
automatically. Just use the manual or
power lock to lock the door again.
Leaving Your Vehicle
If you are leaving the vehicle, open your
door and set the locks from inside, then
get out and close the door.
Illuminated Entry/Exit System
When you lift the outside handle of either front door, the lights inside your
vehicle will go on. These lights will go
off after about
40 seconds, or when the
ignition is turned on.
If the ignition has been off for less than
two minutes, the lights inside your
vehicle will stay on for about four
seconds to provide
an illuminated exit.
ProCarManuals.com
Page 50 of 306
Parking at Night: Park in a lighted
spot, close all windows and lock your
vehicle. Remember to keep your valuables out of sight. Put them in a
storage area, or take them with you.
Parking Lots: If you park in a lot where
someone will be watching your vehicle,
it’s best to lock it up and take your keys.
But what if you have to leave your
ignition key? What if you have to leave something valuable in your vehicle?
Put your valuables in a storage area,
Activate the remote trunk release
Lock the glove box.
Lock all the doors except the driver’s.
Then take the door key with you.
like your trunk
or glove
box.
lockout feature.
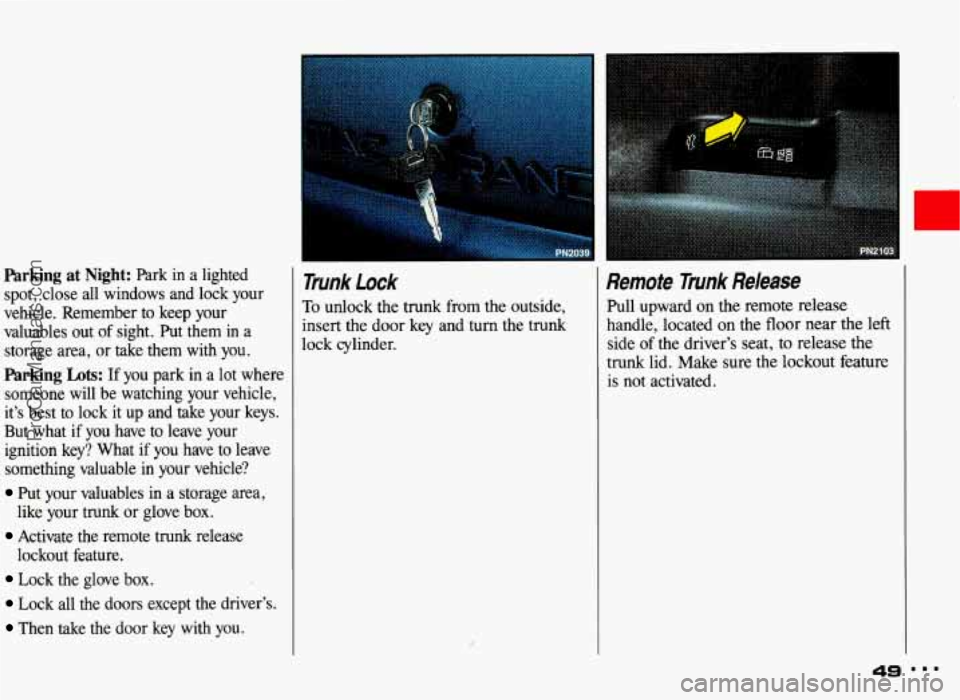
Trunk Lock
To unlock the trunk from the outside,
insert the door key and
turn the trunk
lock cylinder.
Remote Trunk Release
Pull upward on the remote release
handle, located on the floor near the left
side of the driver’s seat, to release the
trunk lid. Make sure the lockout feature
is not activated.
ProCarManuals.com
Page 52 of 306
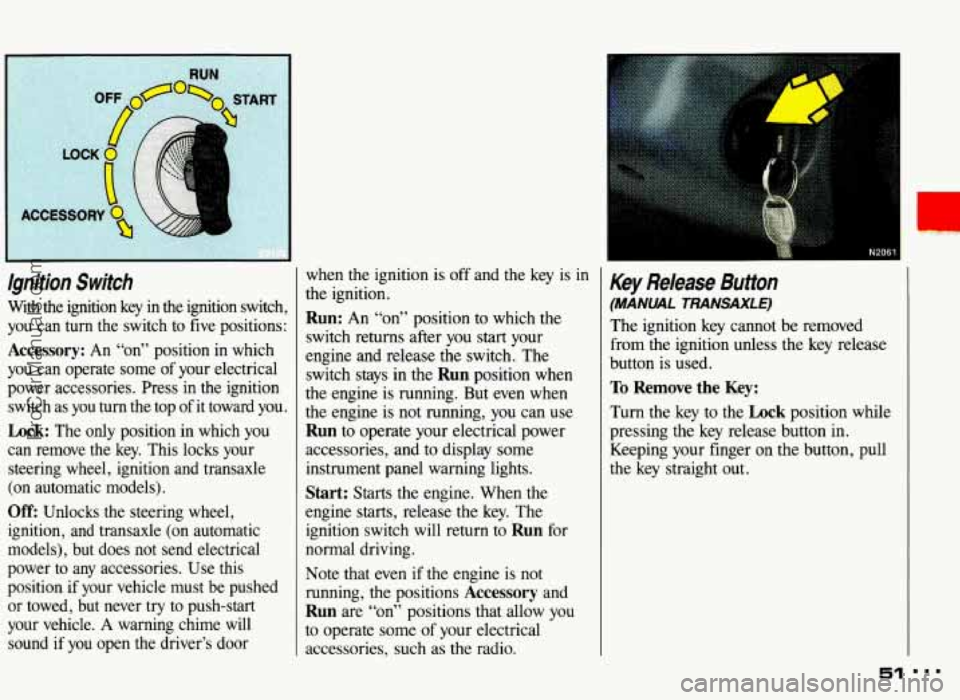
lgnition Switch
With the ignition key in the ignition switch,
you can turn the switch
to five positions:
Accessory: An “~n” position in which
you can operate some of your electrical
power accessories. Press in the ignition
switch as you turn the top of it toward you.
Lock: The only position in which you
can remove the key. This locks your
steering wheel, ignition and transaxle
(on automatic models).
Off: Unlocks the steering wheel,
ignition, and transaxle (on automatic
models), but does not send electrical
power to any accessories. Use this
position if your vehicle must be pushed
or towed, but never try to push-start
your vehicle.
A warning chime will
sound if
you open the driver’s door when
the ignition is
off and the key is in
the ignition.
Run: An “on” position to which the
switch returns after you
start your
engine and release the switch. The
switch stays in the
Run position when
the engine is running. But even when
the engine is not running,
you can use
Run to operate your electrical power
accessories, and
to display some
instrument panel warning lights.
Start: Starts the engine. When the
engine starts, release the key. The
ignition switch will return to
Run for
normal driving.
Note that even if the engine is not
running, the positions
Accessory and
Run are “on” positions that allow you
to operate some of your electrical
accessories, such
as the radio.
Key Release Button
(MANML TRANSAXLE)
The ignition key cannot be removed
from the ignition unless the key release
button is used.
To Remove the Key:
Turn the key to the Lock position while
pressing the key release button in.
Keeping your finger on the button, pull
the key straight out.
51 ...
ProCarManuals.com
Page 63 of 306

Features & Controls
Shift Light (MANUAL TRANSAXLE)
If you have a manual transaxle, you have
a SHIFT light. This light will show you
when to shift to the next higher gear for
best fuel economy.
When this light comes
on, you can shift
to the next higher gear if weather, road
and traffic conditions let you. For the
best fuel economy, accelerate slowly and
shift when the light comes on.
While you accelerate, it is normal for
the light to go on and off if you quickly
change the position of the accelerator.
Ignore the
SHIFT light when you
downshift.
Shift Speeds (MANUAL TRANSAXLE)
This chart shows when to shift to the
next higher gear for best fuel economy.
Acceleration Shift Speeds for 2.3L
OHC and 2.3L High Output Quad 4
Engines (Codes 3 and A):
Ist to 2nd 15 mph (24 km/h)
2nd to 3rd 25 mph (40 km/h)
3rd to 4th 40 mph
(64 km/h)
4th to 5th 45 mph (72 km/h)
If your speed drops below 20 mph
(32 km/h), or if the engine is not
running smoothly, you should downshift
to the next lower gear. You may have to
downshift two or more gears to keep the
engine running smoothly or for good
performance.
If you skip more than one gear
when you downshift, or
if you race
the engine when
you downshift,
you can damage the clutch
or
transaxle.
ProCarManuals.com