change time PONTIAC GRAND AM 1998 Owners Manual
[x] Cancel search | Manufacturer: PONTIAC, Model Year: 1998, Model line: GRAND AM, Model: PONTIAC GRAND AM 1998Pages: 370, PDF Size: 16.11 MB
Page 3 of 370
GENERAL MOTORS, GM, the GM Emblem,
PONTIAC, the PONTIAC Emblem and the name
GRAND AM are registered trademarks of General
Motors Corporation.
This manual includes the latest information at the time it was printed.
We reserve the right to make changes in the
product after that time without further notice. For vehicles first sold in Canada, substitute the name
“General Motors
of Canada Limited” for Pontiac
Division whenever
it appears in this manual.
Please keep this manual in your vehicle,
so it will be
there
if you ever need it when you’re on the road. If you
sell the vehicle, please leave this manual in it so the new
owner can use it.
Litho
in U.S.A.
Part No. 10296282 A First Edition
WE SUPPORT VOLUNTARY TECHNICIAN
CERTIFICATION THROUGH
National Institute for
AUTOMOTIVE SERVICE EXCELLENCE
We support voluntary
technician certification.
For Canadian Owners Who Prefer a
French Language Manual:
Aux propriCtaires canadiens: Vous pouvez vous
procurer un exemplaire de ce guide en fraqais chez
votre concessionaire
ou au:
DGN Marketing Services Ltd.
1500 Bonhill Rd.
Mississauga, Ontario
L5T IC7
@Copyright General Motors Corporation
1997
All Rights Reserved
Page 68 of 370
Keyless Entry System
If your vehicle has this option, you can lock and unlock
your doors or unlock your
trunk from about 3 feet (1 m)
up to
30 feet (9 m) away using the remote keyless entry
transmitter supplied with your vehicle.
In addition, the system illuminates the interior lamps for
a set period of time. The keyless entry system consists
of a receiver, which is located
in the vehicle, and two
hand-held transmitters.
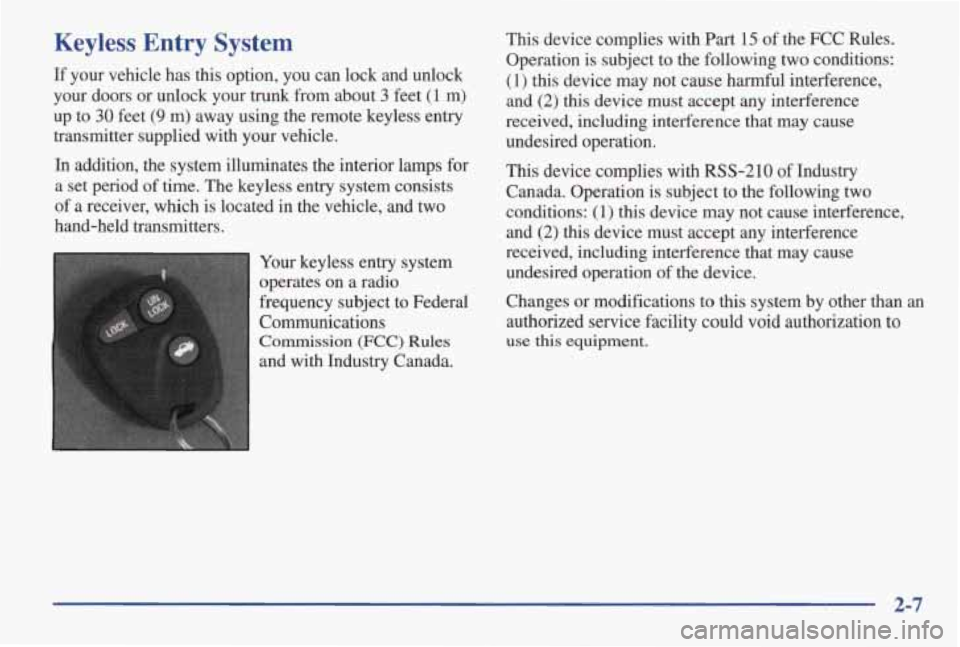
Your keyless entry system
operates on a radio
frequency subject to Federal
Communications
Commission (FCC) Rules
and with Industry Canada. This
device complies with
Part 15 of the FCC Rules.
Operation is subject to the following two conditions:
(1) this device may not cause harmful interference,
and
(2) this device must accept any interference
received, including interference that may cause undesired operation.
This device complies with RSS-210 of Industry
Canada. Operation is subject to the following two
conditions:
(1) this device may not cause interference,
and
(2) this device must accept any interference
received, including interference that may cause
undesired operation of the device.
Changes or modifications to
this system by other than an
authorized service facility could void authorization to
use this equipment.
2-7
Page 70 of 370

Matching Transmitter(s) To Your Vehicle
Each keyless entry transmitter is coded to prevent
another transmitter from unlocking
your vehicle. If a
transmitter is lost or stolen, a replacement can be
purchased through your dealer. Remember to bring any remaining transmitters with you when you
go to your
dealer. When the dealer matches the replacement
transmitter to your vehicle, any remaining transmitters
must also be matched. Once
your dealer has coded the
new transmitter, the lost transmitter will not unlock your
vehicle. Each vehicle can have only four transmitters
matched to it.
You
can match your transmitter to as many 1998
General Motors vehicles as you own, as long as they
have the same keyless
entry system. Contact your dealer
for assistance with this.
Battery Replacement
Under normal use, the battery in your keyless entry
transmitter should last about two years.
You
can tell the battery is weak if the transmitter won’t
work at the normal range in any location.
If you have to
get close to your vehicle before the transmitter works,
it’s probably time to change
the battery.
NOTICE:
When replacing the battery, use care not to touch
any of the circuitry. Static from your body
transferred to these surfaces may damage
the transmitter.
2-9
Page 78 of 370
Starting Your 2.4 Liter Engine
1. With your foot off the accelerator pedal, turn your
ignition key
to START. When the engine starts, let
go of the key. The idle speed will go down as your
engine warms up.
I I
NOTICE:
Holding your key in START for longer than
15 seconds at a time will cause your battery to be
drained much sooner. And the excessive heat can
damage your starter motor.
2. If the engine doesn’t start right away, and if the
weather is
very cold (below -20” F or -29” C),
push the accelerator pedal about one-quarter of the
way down while you
turn the key to START. Do this
until the engine starts. As soon as it does, let go of
the key.
3. If your engine still won’t start (or starts but then stops),
it could
be flooded with too much gasoline. Try
pushing your accelerator pedal all the way to the floor
and holding it there as you hold the key in START for
a
maximum of 15 seconds. This clears the extra
gasoline
from the engine. If the engine still won’t start
or starts briefly but then stops again, repeat step 1 or 2,
depending on temperature. When the engine starts,
release the key and the accelerator pedal.
NOTICE:
Your engine is designed to work with the
electronics in your vehicle.
If you add electrical
parts or accessories, you could change the way
the engine operates. Before adding electrical
equipment, check with your dealer.
If you don’t,
If you ever have to have your vehicle towed, see
the part of this manual that tells how to do it
without damaging your vehicle. See “Towing
Your Vehicle” in the Index.
~ your engine might not perform properly.
2-17
Page 79 of 370

Starting Your 3100 Engine
1. Without pushing the accelerator pedal, turn your
ignition key to START. When the engine starts, let
go
of the key. The idle speed will go down as your
engine gets warm.
NOTICE:
Holding your key in START for longer than
15 seconds at a time will cause your battery to be
drained much sooner. And the excessive heat can
damage your starter motor.
2. If your engine won’t start (or starts but then stops), it
could be
flooded with too much gasoline. Try
pushing your accelerator pedal all the way to the
floor and
holding it there as you hold the key in
START for up to 15 seconds. This clears the extra
gasoline
from the engine.
NOTICE:
Your engine is designed to work with the
electronics
in your vehicle. If you add electrical
parts
or accessories, you could change the way
the engine operates. Before adding electrical
equipment, check with
your dealer. If you don’t,
your engine
might not perform properly.
If you ever have to have your vehicle towed, see
the part of this manual that tells how to do it
without damaging your vehicle. See “Towing
Your Vehicle” in the Index.
2-18
Page 96 of 370
’hrn and Lane Change Signals
The turn signal has two upward (for right) and two
downward (for left) positions. These positions allow you
to signal a turn
or a lane change.
To signal a turn, move the lever all the way up or down.
When the turn is finished, the lever will return
automatically.
An arrow on the instrument
panel will flash in the direction of the turn
or
lane change.
To signal a lane change, just raise or lower the lever
until the arrow starts to flash. Hold
it there until you
complete your lane change. The lever will return by
itself when you release it.
A warning chime signal will come on if you have left
your turn signal on for more than 3/4 mile
(1 km).
As you signal a turn or a lane change, if the arrows flash
rapidly, a signal bulb may be burned out and other
drivers won’t see your turn signal. If
a bulb is burned out, replace it to help avoid an
accident. If the arrows don’t
go on at all when you
signal a turn, check the fuse (see “Fuses
and Circuit
Breakers’’ in the Index).
If the arrows still do not flash,
have your Pontiac Dealer service department check
the
bulb in the instrument panel.
Headlamp Highhow Beam
To change the headlamps
from low beam to high
or
high to low, pull the turn
signal lever all the way
toward
you.
Then release it. When the high beams are on, a light on
the instrument panel also will be on.
The headlamp higMow beam indicator may flash if the
Daytime Running Lamps
(Dm) system is experiencing
a problem or
if a headlamp is malfunctioning.
2-35
Page 133 of 370
Comfort Controls Temperature Knob
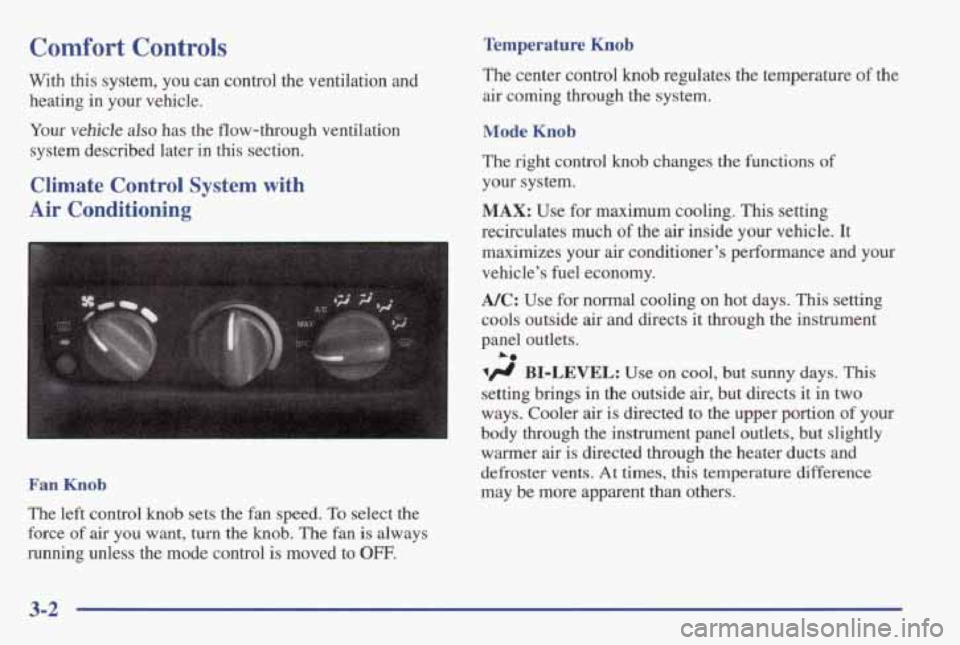
With this system, you can control the ventilation and heating
in your vehicle. The
center control knob regulates the temperature of the
air coming through
the system.
Your
vehicle also has the flow-through ventilation Mode Knob
system described later in this section.
Climate Control System with your system.
Air Conditioning MAX: Use for maximum cooling. This setting
The right control knob changes
the functions
of
recirculates much of the air inside your vehicle. It
maximizes your air conditioner’s performance and your
vehicle’s fuel economy.
A/C: Use for normal cooling on hot days. This setting
cools outside
air and directs it through the instrument
panel outlets.
A0
BI-LEVEL: Use on cool, but sunny days. This
setting brings in the outside air, but directs it in two
ways. Cooler
air is directed to the upper portion of your
body through the instrument panel outlets, but slightly
Fan Knob
The left control knob sets the fan speed. To select the
force
of air you want, turn the knob. The fan is always
running unless the mode control
is moved to OFF.
warher airis directed through the heater ducts and
defroster vents. At times,
this temperature difference
may be more apparent than others.
3-2
Page 149 of 370
FWD (6): Press and hold this button to quickly advance
within a track. You will hear sound at a reduced volume.
The display will show elapsed time.
RECALL: Press this button to see what track is
currently playing. Press
RECALL again within
five seconds to see how long the track has been
playing. When
a new track starts to play, the track
number will also appear. Press
RECALL a third time
and the time
of day will be displayed.
AM-FM: Press this button to play the radio when a disc
is playing. The disc will stop but remain in the player.
CD/l?LAE Press this button to change to the disc
function when the radio is on.
EJECT: Press this button to remove the disc or stop the
disc and switch to
the radio. EJECT will work with the
radio
off.
Remote Cassette Tape Player (If Equipped)
Playing a Cassette Tape
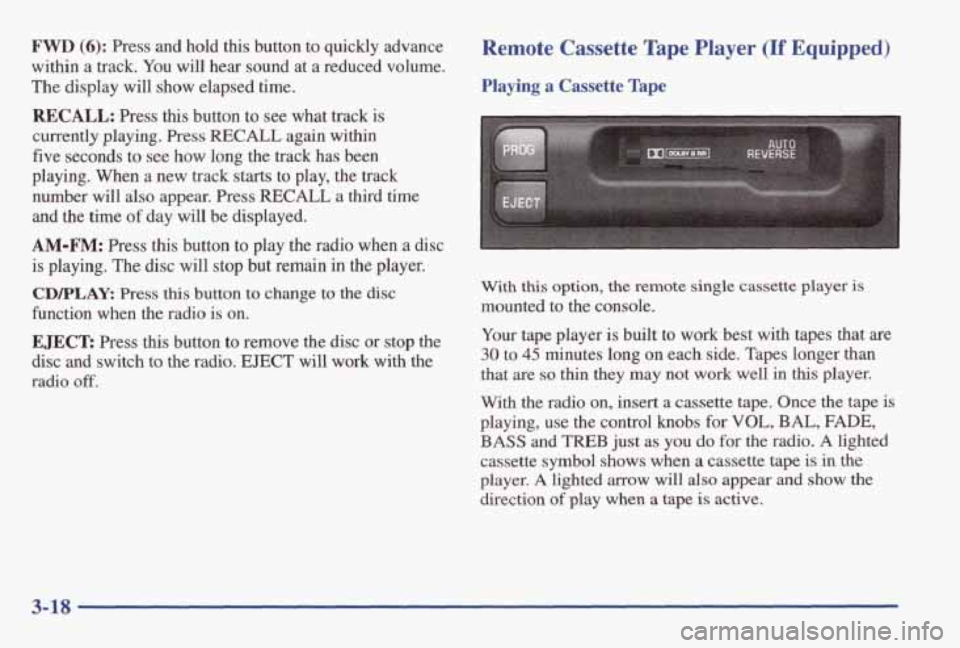
With this option, the remote single cassette player is
mounted to the console.
Your tape player
is built to work best with tapes that are
30 to 45 minutes long on each side. Tapes longer than
that are
so thin they may not work well in this player.
With the radio on, insert a cassette tape. Once the tape
is
playing, use the control knobs for VOL, BAL, FADE,
BASS and TREB just as you do for the radio. A lighted
cassette symbol
shows when a cassette tape is in the
player. A lighted arrow will also appear and show the
direction of play
when a tape is active.
3-18
Page 166 of 370
Remember: Anti-lock doesn’t change the time you need to get your foot up to the brake pedal or always decrease
stopping distance.
If you get too close to the vehicle in
front of you, you won’t have time to apply your brakes
if that vehicle suddenly slows or stops. Always leave
enough room up ahead to stop, even though you have
anti-lock brakes.
Using Anti-Lock
Don’t pump the brakes. Just hold the brake pedal down
firmly and let anti-lock work for you. You may feel a
slight brake pedal pulsation
or notice some noise, but
this is normal.
Enhanced Traction System
If your vehicle has the optional four-speed automatic
transaxle,
it also has an Enhanced Traction System
(ETS) that limits wheel spin. This is especially useful in
slippery road conditions. The system operates only if it
senses that one
or both of the front wheels are spinning
or beginning to lose traction. When this happens, the
system reduces engine power and may also upshift the
transaxle
to limit wheel spin.
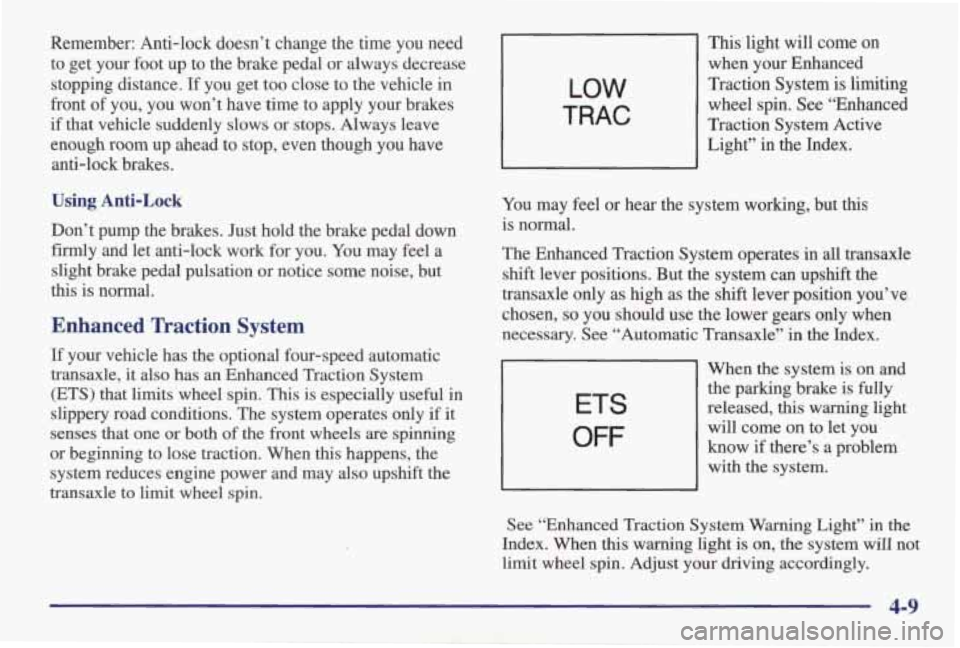
LOW
TRAC
This light will come on
when your Enhanced
Traction System
is limiting
wheel spin. See “Enhanced
Traction System Active
Light” in the Index.
You may
feel or hear the system working, but this
is normal.
The Enhanced Traction System operates
in all transaxle
shift lever positions. But the system can upshift the
transaxle only as high
as the shift lever position you’ve
chosen,
so you should use the lower gears only when
necessary. See “Automatic Transaxle” in the Index.
ETS
OFF
When the system is on and
the parking brake is fully
released,
this warning light
will come on to let you
know
if there’s a problem
with the system.
See “Enhanced Traction System
Warning Light” in the
Index. When
this warning light is on, the system will not
limit wheel spin. Adjust your driving accordingly.
4-9
Page 171 of 370
Do not get too close to the vehicle you want to
pass while you’re awaiting an opportunity. For one
thing, following too closely reduces your area of
vision, especially if you’re following a larger
vehicle. Also, you won’t have adequate space
if the
vehicle ahead suddenly slows or stops. Keep back a
reasonable distance.
0 When it looks like a chance to pass is coming up,
start to accelerate but stay
in the right lane and don’t
get too close. Time
your move so you will be
increasing speed as the time comes
to move into the
other lane.
If the way is clear to pass, you will have a
“running
start’’ that more than makes up for the
distance you would lose by dropping back. And
if
something happens to cause you to cancel your pass,
you need only slow down and drop back again and
wait for another opportunity.
If other cars are lined up to pass a slow vehicle, wait
your turn. But take care that someone isn’t trying to
pass you
as you pull out to pass the slow vehicle.
Remember to glance over your shoulder and check
the blind spot.
Check your mirrors, glance over your shoulder, and
start your
left lane change signal before moving out
0
0
0
of the right lane to pass. When you are far enough
ahead
of the passed vehicle to see its front in your
inside mirror, activate your right lane change signal
and move back into the right lane. (Remember that
your right outside mirror is convex. The vehicle you
just passed may seem to be farther away from
you
than it really is.)
Try not to pass more than one vehicle at a time
on two-lane roads. Reconsider before passing the
next vehicle.
Don’t overtake a slowly moving vehicle too rapidly.
Even though the brake lamps are not flashing, it may
be slowing down or starting to turn.
If you’re being passed, make it easy for the
following driver
to get ahead of you. Perhaps you
can ease a
little to the right.
Loss of Control
Let’s review what driving experts say about what
happens when the three control systems (brakes, steering and acceleration)
don’t have enough friction where the
tires meet the road to do what the driver has asked.
In any emergency, don’t give up. Keep trying to steer and
constantly seek an escape route or area of less danger.
4-14