heating PONTIAC GRAND AM 1998 Owners Manual
[x] Cancel search | Manufacturer: PONTIAC, Model Year: 1998, Model line: GRAND AM, Model: PONTIAC GRAND AM 1998Pages: 370, PDF Size: 16.11 MB
Page 72 of 370
Trunk Remote Trunk Release
To unlock the trunk from the outside, insert the key and
turn the trunk lock cylinder.
1 A CAUTION:
It can be dangerous to drive with the trunk lid
open because carbon monoxide
(CO) gas can
come into your vehicle.
You can’t see or smell
CO. It can cause unconsciousness and even death.
If you must drive with the trunk lid open or if
electrical wiring or other cable connections must
pass through the seal between the body and the
trunk lid:
Make sure all windows are shut.
lbrn the fan on your heating or cooling
system
to its highest speed with the setting on
VENT. That will force outside air into your
vehicle. See “Comfort Controls” in the Index.
instrument panel, open them all the way.
0 If you have air outlets on or under the
See “Engine Exhaust” in the Index.
a
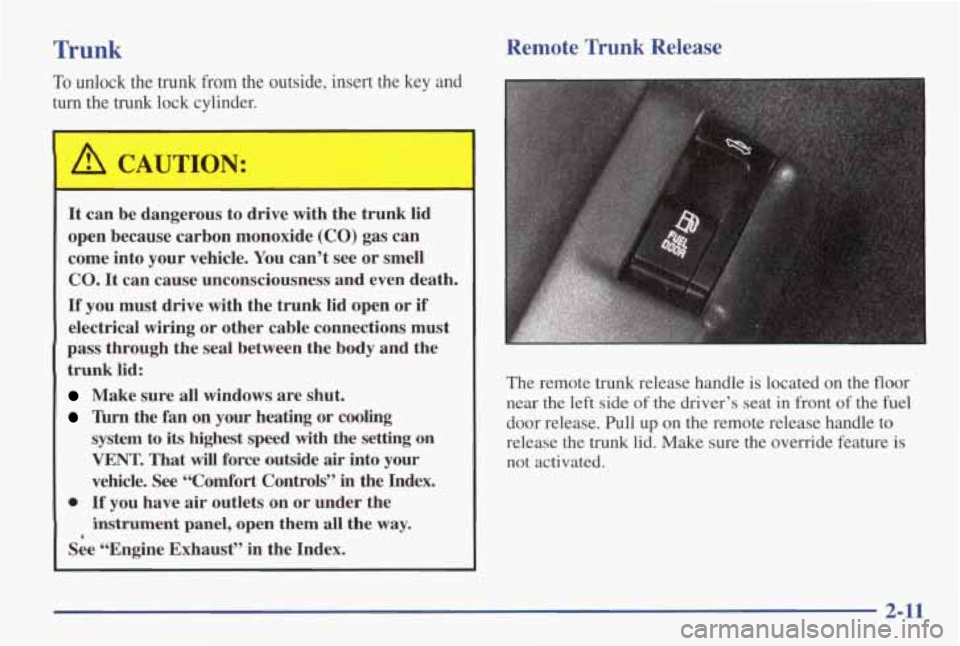
The remote trunk release handle is located on the floor
near the
left side of the driver’s seat in front of the fuel
door release. Pull up on the remote release handle
to
release the trunk lid. Make sure the override feature is
not activated.
2-11
Page 110 of 370
Sunglasses Storage
Place your sunglasses in the open area located above
you in the overhead console, or front compartment in
the center console.
Center Console Cupholder
The console provides space for holding cups or soft
drinks.
Rear Seat Cupholder
There are cupholders on the underside of the front
storage armrest lid for the
rear passengers to use. Open
the lid completely to use the cupholders.
Convenience Net (If Equipped)
Your vehicle may have a convenience net. You’ll see it
just inside the back wall of the
trunk.
Put small loads, like grocery bags, behind the net. It can
help keep them from falling over during sharp
turns or
quick starts and stops.
The net isn’t for larger, heavier loads. Store them in the
trunk as far forward as you can.
You can unhook the net so that it will lie flat when
you’re not using it.
Ashtrays and Cigarette Lighter
(If Equipped)
To use the lighter, just push it in all the way and let go.
When it’s ready, it
will pop back out by itself.
NOTICE:
Don’t hold a cigarette lighter in with your hand
while it is heating.
If you do, it won’t be able to
back away from the heating element when it’s ready. That can make it overheat, damaging the
lighter and the heating element.
To clean the center console ashtray, remove the ashtray
and empty it. The ashtray can be placed in the rear
cupholder for
the rear passengers to use. The ashtray can
also be placed inside the center console for storage.
When the ashtray
is removed, you can also use this tray
as a cupholder.
2-49
Page 122 of 370
Enhanced Traction System Active Light
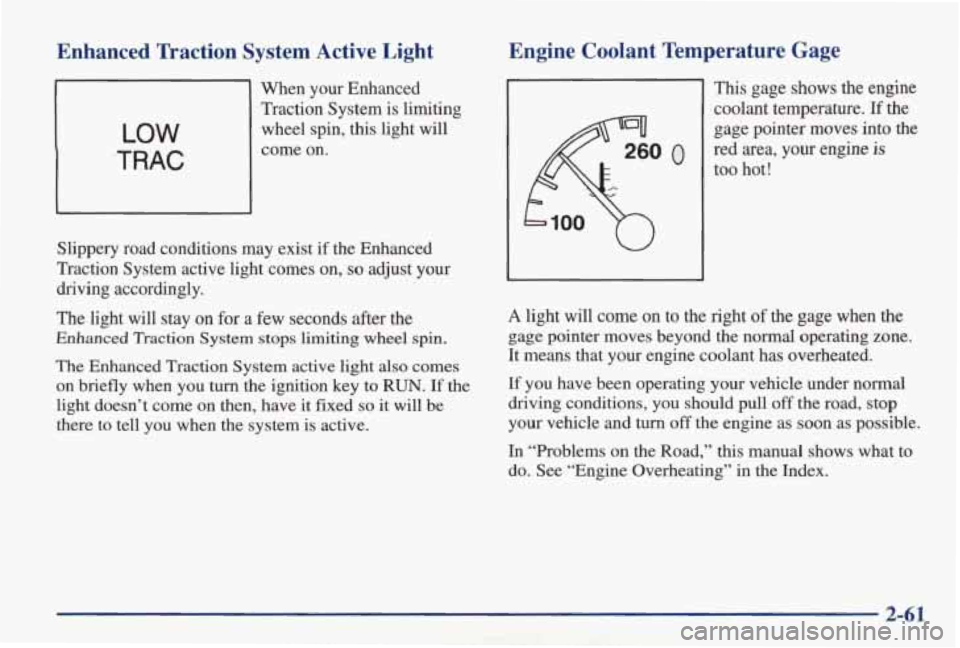
When your Enhanced Traction System is limiting wheel spin,
this light will LOW
.TRAC
come on.
Slippery road conditions may exist if the Enhanced
Traction System active light comes on,
so adjust your
driving accordingly.
The light will stay on for a few seconds after the
Enhanced Traction System stops limiting wheel spin.
The Enhanced Traction System active light also comes
on briefly when you
turn the ignition key to RUN. If the
light doesn’t come on then, have it fixed
so it will be
there to tell you when the system is active.
Engine Coolant Temperature Gage
This gage shows the engine
coolant temperature.
If the
gage pointer moves into the
too hot!
red area, your engine
is
A light
will come on to the right of the gage when the
gage pointer moves beyond the normal operating zone.
It means that your engine coolant has overheated.
If you have been operating your vehicle under normal
driving conditions, you should pull
off the road, stop
your vehicle and turn off the engine as soon as possible.
In “Problems on the Road,” this manual shows what to
do. See “Engine Overheating” in the Index.
2-61
Page 123 of 370
Low Coolant Warning Light
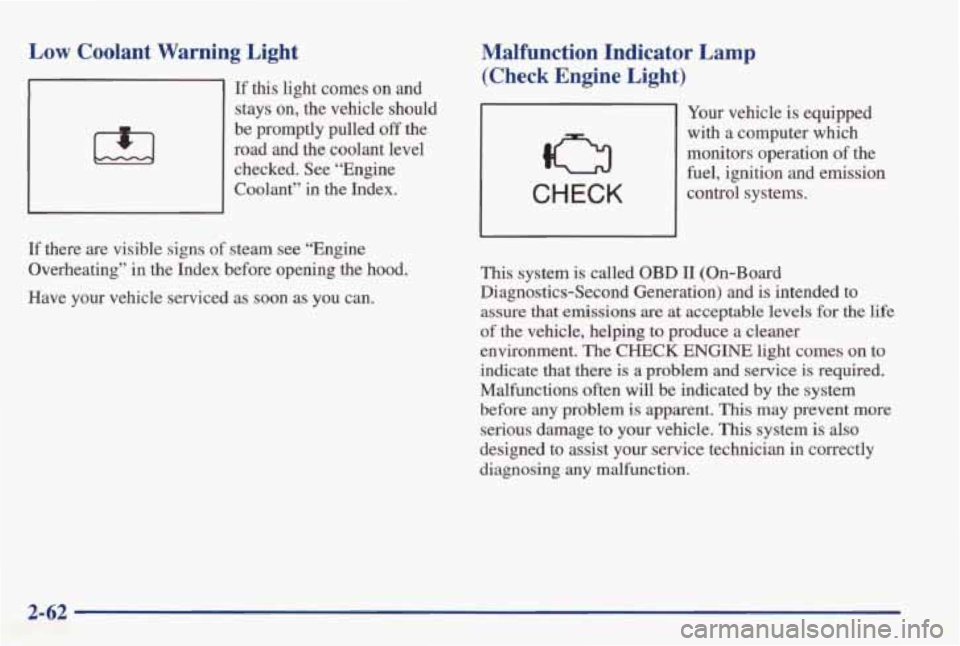
If this light comes on and
stays on, the vehicle should
be promptly pulled
off the
road and the coolant level checked. See “Engine
Coolant”
in the Index.
Malfunction Indicator Lamp
(Check Engine Light)
CHECK
Your vehicle is equipped
with a computer which
monitors operation of the
fuel, ignition and emission
control systems.
If there are visible signs of steam see “Engine
Overheating’’
in the Index before opening the hood.
Have your vehicle serviced as soon
as you can.
This system is called OBD 11 (On-Board
Diagnostics-Second Generation) and is intended to
assure that emissions are at acceptable levels for
the life
of the vehicle, helping to produce a cleaner
environment. The
CHECK ENGINE light comes on to
indicate that there is a problem
and service is required.
Malfunctions often will be indicated by the system
before any problem
is apparent. This may prevent more
serious damage to
your vehicle. This system is also
designed to assist your service technician
in correctly
diagnosing
any malfunction.
2-62
Page 132 of 370
Section 3 Comfort Controls and Audio Systems
In this section, you’ll find out how to operate the comfort control and audio systems offered w\
ith your vehicle. Be
sure to read about the particular systems supplied with your v\
ehicle.
3-2
3-2
3-3
3-4
3-4
3-5
3-6
3-7
3-7
3-7
3-7
3-9
Comfort Controls
Climate Control System
with
Air Conditioning
Air Conditioning
Heating
Defrosting and Defogging
Rear Window Defogger
(If Equipped)
Ventilation System
Audio Systems
Setting the Clock for
AM-FM Stereo
Setting the Clock for
All Systems Except
AM-EM Stereo
AM-FM Stereo
AM-FM Stereo with Cassette Tape Player
(If Equipped)
3-12
3-
16
3-18
3-20
3-22
3-23
3-23
3-24
3-25 3-25
3-25
AM-FM Stereo with Cassette Tape Player and
Equalizer
(If Equipped)
AM-FM Stereo with Compact Disc Player and
Equalizer (If Equipped)
Remote Cassette Tape Player
(If Equipped)
Theft-Deterrent Feature Audio Steering Wheel Controls
(If Equipped)
Understanding Radio Reception
Tips About
Your Audio System
Care of Your Cassette Tape Player
Care
of Your Compact Discs
Care
of Your Compact Disc Player
Fixed Mast Antenna
Page 133 of 370
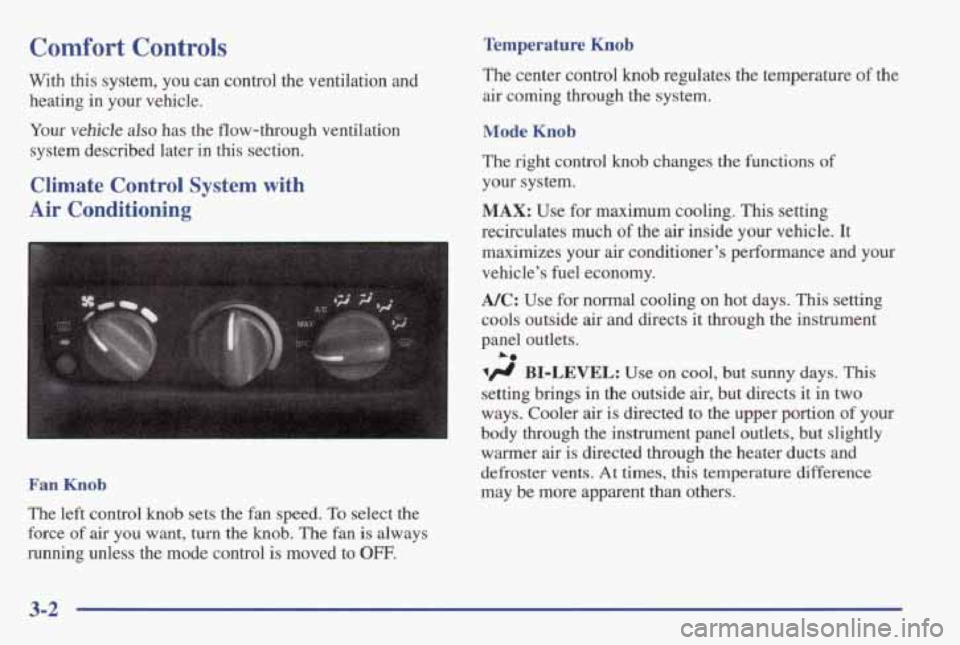
Comfort Controls Temperature Knob
With this system, you can control the ventilation and heating
in your vehicle. The
center control knob regulates the temperature of the
air coming through
the system.
Your
vehicle also has the flow-through ventilation Mode Knob
system described later in this section.
Climate Control System with your system.
Air Conditioning MAX: Use for maximum cooling. This setting
The right control knob changes
the functions
of
recirculates much of the air inside your vehicle. It
maximizes your air conditioner’s performance and your
vehicle’s fuel economy.
A/C: Use for normal cooling on hot days. This setting
cools outside
air and directs it through the instrument
panel outlets.
A0
BI-LEVEL: Use on cool, but sunny days. This
setting brings in the outside air, but directs it in two
ways. Cooler
air is directed to the upper portion of your
body through the instrument panel outlets, but slightly
Fan Knob
The left control knob sets the fan speed. To select the
force
of air you want, turn the knob. The fan is always
running unless the mode control
is moved to OFF.
warher airis directed through the heater ducts and
defroster vents. At times,
this temperature difference
may be more apparent than others.
3-2
Page 134 of 370
Am
/J VENT: Use when outside temperatures are mild,
and little heating or cooling
is needed. Airflow is
through the instrument panel outlets. Set the center
control knob to the temperature desired.
‘fl HEATER: This setting brings heated air through
the heater ducts, and some through the windshield
defroster vents.
If you have the optional engine coolant heater (engine
block heater) and use it during cold weather, 0°F
(- 18 O C) or lower, your heating system will more quickly
provide heat because the engine coolant is already
warmed. See “Engine Coolant Heater” in the Index.
v# BLEND: This setting divides airflow equally
between the heater ducts and the windshield defroster vents.
w.
DEFROST This setting directs air through the
windshield defroster vents located on top of the
instrument panel.
Air Conditioning
On very hot days, open the windows long enough
to let hot, inside air escape. This reduces the time it
takes for your vehicle to cool down, which should help
fuel economy.
For quick cool-down on very hot days, use
MAX with
the temperature knob all the way in the blue area.
If the
setting is used for long periods of time, the air in your
vehicle may become too dry.
For normal cooling on hot days, use
A/C with the
temperature knob in the blue area. The system will bring
in outside air and cool it.
On cool but sunny days, the sun may warm your upper
body,
but your lower body may not be warm enough.
You can use BI-LEVEL with the temperature knob in
the middle. The system will bring in outside air and
direct it to your upper body, while sending slightly warmed air to your lower body. You may notice this
temperature difference more at some times than
at others.
3-3
Page 135 of 370
Heating Defrosting and Defogging
Turning the right control knob to HEATER and the
center CUR^^ knob to the right sends some heated air
through the heater ducts toward your feet, and some
through the defroster
vents.
VENT and HEATER are economical positions because
the air conditioner compressor doesn’t run in these
two
settings. This reduces engine load, resulting in improved
fuel economy. If either setting fails to keep you
comfortable, or causes your windows to fog up, turn the
right control
knob to one of the air conditioning
positions,
or to DEFROST.
If you have the optional engine coolant heater (engine
block heater) and
use it during cold weather, 0°F
(- 1 8 O C) or lower, your heating system will more quickly
provide
heat because the engine coolant is already
warmed. See “Engine Coolant Heater” in the Index.
To defrost the windshield, turn all three control knobs to
the far right.
The
DEFROST setting directs air through the defroster
vents located on top
of the instrument panel.
To warm passengers while keeping the windows clean,
use
BLEND.
To defog the side windows, turn the right control knob
to
BI-LEVEL and the fan control knob to HIGH. Aim
the side vents toward the side windows. For increased
airflow
to the side vents, close the center vents.
3-4
Page 137 of 370

Ventilation System
Use when outside temperatures are mild, and little heating or cooling is needed.
Turn the right knob to
VENT. Airflow is directed through the instrument panel
outlets. Set the center
knob to the temperature desired.
Your vehicle’s flow-through ventilation system supplies
outside
air into the vehicle when it is moving. Outside
air will also enter the vehicle when the heater or the air
conditioning fan is running.
Adjust the direction
of
airflow by moving the
Ventilation Tips
0
0
0
Keep the hood and front air inlet free of ice, snow or
any other obstruction (such as leaves). The heater
and defroster will work far better, reducing the
chance
of fogging the inside of your windows.
When
you enter a vehicle in cold weather, turn the
fan control knob to the highest position for
a few
moments before driving
off. This helps clear the
intake ducts
of snow and moisture, and reduces the
chance of fogging the inside of your windows.
Keep the air path under the front seats clear of
objects. This helps air to circulate throughout
your vehicle.
3-6
Page 198 of 370
Driving On Grades
Reduce speed and shift to a lower gear before you start
down a long or steep downgrade.
If you don’t shift
down, you might have to use your brakes
so much that
they would get hot and no longer work well.
On a long uphill grade, use the highest gear possible.
If you cannot maintain posted speeds, driving at a
lower speed may help avoid overheating your engine
and transaxle.
Parking on Hills
You really should not park your vehicle, with a trailer
attached, on a hill. If something goes wrong, your rig
could start to move. People can be injured, and both
your vehicle and the trailer can be damaged.
But if you ever have to park your rig on a hill, here’s
how to do it:
1. Apply your regular brakes, but don’t shift into
2. Have someone place chocks under the trailer wheels.
3. When the wheel chocks are in place, release the
regular brakes until the chocks absorb the load.
4. Reapply the regular brakes. Then apply your parking
brake, and then shift to PARK (P),
or REVERSE (R)
for a manual transaxle.
5. Release the regular brakes.
PARK
(P) yet, or into
a gear for a manual transaxle.
4-41