oil change PONTIAC GRAND AM 2003 Owners Manual
[x] Cancel search | Manufacturer: PONTIAC, Model Year: 2003, Model line: GRAND AM, Model: PONTIAC GRAND AM 2003Pages: 354, PDF Size: 16.3 MB
Page 108 of 354
Section 3 Instrument Panel
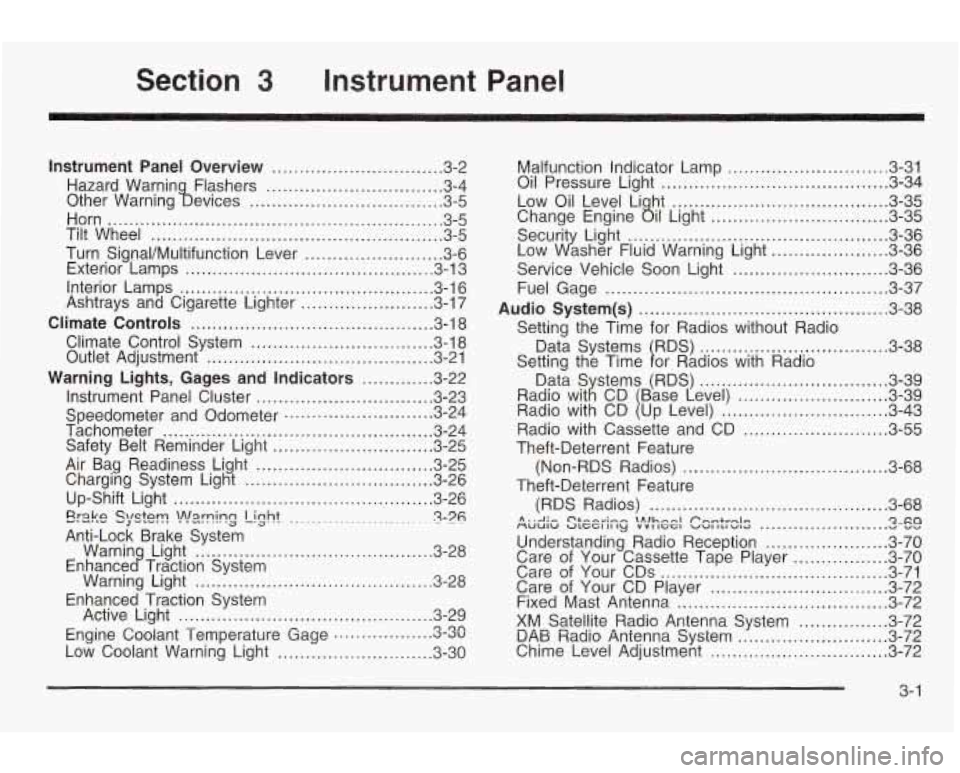
Instrument Panel Overview ............................... 3.2
Hazard Warnin Flashers
................................ 3.4
Other Warning !bevices
................................... 3.5
Horn
............................................................. 3.5
Tilt Wheel
..................................................... 3.5
Turn Signal/Multifunction Lever
......................... 3.6
Exterior Lamps
............................................. 3.13
Interior Lamps
.............................................. 3.16
Ashtrays and Cigarette Lighter
........................ 3.17
Climate Controls
............................................ 3.18
Climate Control System
................................. 3.18
Outlet Adjustment
......................................... 3.21
Warning Lights, Gages and Indicators
............. 3-22
Instrument Panel Cluster
................................ 3.23
Speedometer and Odometer
........................... 3.24
Tachometer
................................................. 3.24
Safety Belt Reminder Light
............................. 3.25
Air Bag Readiness Light ................................ 3.25
Charging System Light
.................................. 3.26
Up-Shift Light
............................................... 3.26
Erake QlQtT! -J -.-. !n!=lrning Light ........................ ~ 3-76 .
Warnin Light ........................................... 3-28
Warning Light
........................................... 3.28
Active Light
.............................................. 3.29
Low Coolant Warning Light
............................ 3.30
Anti-Lock
Brake System
Enhance
c? Traction System
Enhanced Traction System
Engine Coolant Temperature Gage
3.3~ rl on ..................
Malfunction Indicator Lamp ............................. 3.31
Oil Pressure Light
......................................... 3.34
Low Oil Level Li ht
....................................... 3.35
Securit Light:
............................................... 3-36
Service Vehicle Soon Light
............................ 3-36
Fuel Gage
................................................... 3-37
Audio System(s)
............................................. 3-38
Data Systems RDS)
.................................. 3-38
Change Engine
ail Light ................................ 3-35
Low dsher Fluid Warning Light
..................... 3-36
Setting the Time for Radios without Radio
Setting the Time
1 or Radios with Radio 3-39
........................... 3-39
.............................. 3-43
Radio with Cassette and CD
.......................... 3-55
Theft-Deterrent Feature
Theft-Deterrent Feature (Non-RDS Radios)
..................................... 3-68
(RDS Radios)
........................................... 3-68
MUUIW ULCCI II ly VVI IGGI VU1 ILI WIG v vv A . .A .- C'&-A~;~~ \Alhnnl Pnmtrnlrr Qxa .......................
Understanding Radio Reception ...................... 3-70
Care of Your Cassette Tape Player
................. 3-70
Care of Your CDs ......................................... 3-71
Care of Your CD Player
................................ 3-72
Fixed Mast Antenna ...................................... 3-72
XM Satellite Radio Antenna System
................ 3-72
DAB Radio Antenna System 3-11 Chime Level Adjustment ................................ 3-72
n Tn ...........................
3- 1
Page 142 of 354
Low Oil Level Light
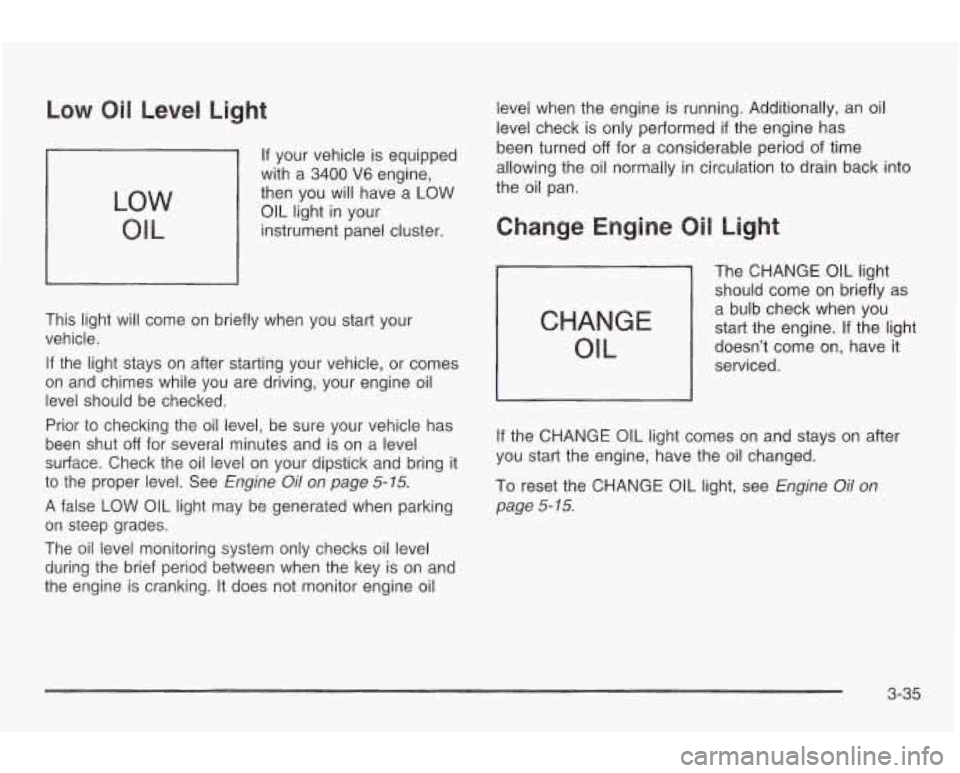
LOW
OIL
If your vehicle is equipped
with a
3400 V6 engine,
then you will have a
LOW
OIL light in your
instrument panel cluster.
This light will come on briefly when you start your
vehicle.
If the light stays on after starting your vehicle, or comes
on and chimes while you are driving, your engine oil
level should be checked.
Prior to checking the oil level, be sure your vehicle has
been shut
off for several minutes and is on a level
surface. Check the oil level on your dipstick and bring it
to the proper level. See Engine Oil on page 5-15.
A false LOW OIL light may be generated when parking
on steep grades.
The oil level monitoring system only checks oil level
during the brief period between when the key is on and
the engine is cranking.
It does not monitor engine oil level
when the engine is running. Additionally, an oil
level check is only performed
if the engine has
been turned
off for a considerable period of time
allowing the
oil normally in circulation to drain back into
the oil pan.
CHANGE
OIL
The CHANGE OIL light
should come on briefly as
a bulb check when you start the engine. If the light
doesn’t come on, have it
serviced.
If the CHANGE OIL light comes on and stays on after
you start the engine, have the oil changed.
To reset the CHANGE
OIL light, see Engine oil On
page
5- 15.
3-35
Page 241 of 354
What Kind of Engine Oil to Use
Oils recommended for your vehicle can be identified by
looking for the starburst symbol.
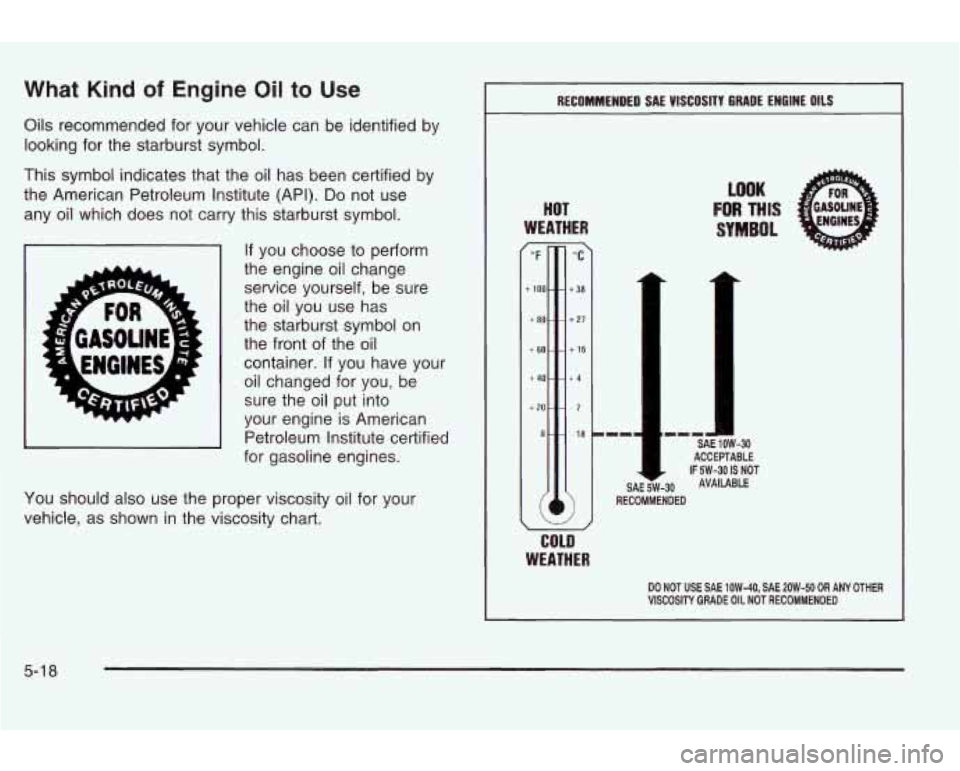
This symbol indicates that the oil has been certified by
the American Petroleum Institute (API). Do not use
any oil which does not carry this starburst symbol.
If you choose to perform
the engine oil change
service yourself, be sure
the
oil you use has
the starburst symbol on the front of the oil
container.
If you have your
oil changed for you, be
sure the oil put into
your engine is American
Petroleum Institute certified
for gasoline engines.
You should also
use the proper viscosity oil for your
vehicle, as shown in the viscosity chart.
RECOMMENDED SAE VISCOSITY GRADE ENGINE OILS
HOT
WEATHER
I_ t 20
-.
LOOK
FOR MIS
SYMBOL
ACCEPTABLE
COLD
WEATHER
DO NOT USE SAE 1OW-40, SAE 2OW-50 OR ANY OTHER
VlSCOSlN GRADE OIL NOT RECOMMENDED
5-1 8
Page 242 of 354
As in the chart shown previously, SAE 5W-30 is the
only viscosity grade recommended for your vehicle. You
should look for and use only oils which have the API
Starburst symbol and which are also identified as
SAE 5W-30. If you cannot find such SAE 5W-30 oils,
you can use an SAE IOW-30 oil which has the API
Starburst symbol,
if it's going to be 0°F (-18°C)
or above. Do not use other viscosity grade oils, such as
SAE
IOW-40 or SAE 20W-50 under any conditions.
Notice: Use only engine oil with the American
Petroleum Institute Certified For Gasoline Engines
starburst symbol. Failure to use the recommended
oil can result in engine damage not covered by
your warranty.
GM Goodwrench@ oil meets all the requirements for
your vehicle.
If you are in an area of extreme cold, where the
temperature falls below -20°F
(-29"C), it is
recommended that you use either an SAE 5W-30
synthetic oil or an SAE OW-30 oil. Both will provide
easier cold starting and better protection for your engine
at extremely low temperatures.
Engine Oil Additives
Don't add anything to your oil. The recommended oils
with the starburst symbol are ail you will need for
good performance and engine protection.
When to Change Engine Oil (GNI Oil
Life SystemTM)
Your vehicle has a computer system that lets you know
when to change the engine oil and filter. This is
based on engine revolutions and engine temperature,
and not on mileage. Based on driving conditions,
the mileage at which an oil change will be indicated can
vary considerably. For the oil life system
to work
properly, you must reset the system every time the oil
is
changed.
When the system has calculated that oil life has been
diminished, it will indicate that an oil change is
necessary. A CHANGE OIL light will come on. Change
your oil as soon as possible within the next two
times you stop for fuel.
It is possible that, if you are
driving under the best conditions, the
oil life system may
not indicate that an
oil change is necessary for over a
year. However, your engine oil and filter must be
changed at least once a year and at this time the system
must be reset. It is also important to check vour oil
regularly and keep
it at the proper level.
If the system is ever reset accidentally, you must
change your oil at 3,000 miles
(5 000 km) since your
last oil change. Remember
to reset the oil life system
whenever the oil
is changed.
5-1 9
Page 243 of 354
How to Reset the Change Oil Light
The GM Oil Life SystemTM calculates when to change
your engine oil and filter based on vehicle use. Anytime
your oil is changed, reset the system
so it can
calculate when the next oil change is required.
If a
situation occurs where you change your oil prior
to a
CHANGE OIL light being turned on, reset the system.
After changing the engine oil, the system must be reset.
To reset the oil life indicator, do the following steps:
1. With the ignition key in ON (a short time after
turning
off the engine), press the RESET button
located in the driver’s side instrument panel
fuse block. See “Instrument Panel Fuse Block”
under
Fuses and Circuit Breakers on page 5-81.
2. When the CHANGE OIL light starts to flash, press
and hold the RESET button again.
The reset is complete when you hear the chimes and
the CHANGE OIL light goes out.
If your vehicle is equipped with a 2.2L L4 ECOTEC
engine, it has a unique oil filter element. When
reinstalling the filter cap do not exceed
18 Ib ft (25 N*m ).
Inspect the condition of the O-ring and replace if
damaged.
What to Do with Used Oil
Used engine oil contains certain elements that may be
unhealthy for your skin and could even cause cancer.
Don’t let used oil stay on your skin for very long. Clean
your skin and nails with soap and water, or a
good
hand cleaner. Wash or properly dispose of clothing or
rags containing used engine oil. See the manufacturer’s
warnings about the use and disposal of oil products.
Used oil can be a threat
to the environment. If you
change your own oil, be sure to drain all the oil from the
filter before disposal. Never dispose of oil by putting it
in the trash, pouring it on the ground, into sewers, or into
streams or bodies of water. Instead, recycle it by
taking it to a place that collects used oil. If you have a
problem properly disposing of your used oil, ask
your dealer, a service station or a local recycling center
for help.
See your dealer for additional information.
5-20
Page 245 of 354
Automatic Transaxle Fluid
It is not necessary to check the transaxle fluid level. A
transaxle fluid leak is the only reason for fluid loss.
If a leak occurs, take the vehicle to the dealership
service department and have it repaired as soon as
possible. You may also have your fluid level checked by
your dealer or service center when you have your oil
changed.
Change both the fluid and filter every
50,000 miles
(83 000 km) if the vehicle is mainly driven under one or
more of these conditions:
In heavy city traffic where the outside temperature
In hilly or mountainous terrain.
When doing frequent trailer towing.
0 Uses such as found in taxi, police or delivery
regularly reaches
90°F (32°C) or
higher.
service. If
you do not use your vehicle under any of these
conditions, the fluid and filter do not require changing.
Notice: We recommend you use only fluid labeled
DEXRON@-Ill, because fluid with that label
is
made especially for your automatic transaxle.
Damage caused by fluid other than DEXRON@-Ill is
not covered
by your new vehicle warranty.
Manual Transaxle Fluid
It is not necessary to check the transaxle fluid level. A
transaxle fluid leak is the only reason for fluid loss.
If a leak occurs, take the vehicle to the dealership
service department and have it repaired as soon as
possible. You may also have your fluid level checked by
your dealer or service center when you have your oil
changed. See
Part D: Recommended Fluids and
Lubricants
on page 6-15 for the proper fluid to use.
5-22
Page 247 of 354
A 50/50 mixture of clean, drinkable water and
DEX-COOL@ coolant will:
Give freezing protection down to -34°F (-37°C).
Give boiling protection up to 265°F (129°C).
Protect against rust and corrosion.
Help keep the proper engine temperature.
Let the warning lights and gages work as they
should.
Notice: When adding coolant, it is important that
you use only DEX-COOL@ (silicate-free) coolant.
If coolant other than DEX-COOL
is added to
the system, premature engine, heater core or radiator corrosion may result.
In addition, the engine
coolant will require change sooner
-- at 30,000 miles
(50,000 km) or 24 months, whichever occurs first.
Damage caused by the use of coolant other
than DEX-COOL@ is not covered by your new vehicle
warranty.
What to Use
Use a mixture of one-half clean, drinkable water and
one-half DEX-COOL@ coolant which won’t damage
aluminum
parts. If you use this coolant mixture,
you don’t need to add anything else.
Adding only plain water to your cooling
system can be dangerous. Plain water, or
some other liquid such as alcohol, can boil
before the proper coolant mixture will. Your
vehicle’s coolant warning system is set for the
proper coolant mixture. With plain water or the
wrong mixture, your engine could get too hot
but you wouldn’t get the overheat warning.
Your engine could catch fire and you or others could be burned. Use a
50/50 mixture of clean,
drinkable water and the proper coolant.
Notice: If you use an improper coolant mixture,
your engine could overheat and be badly damaged.
The repair cost wouldn’t be covered by your
warranty.
Too much water in the mixture can freeze
and crack the engine, radiator, heater core and
other parts.
5-24
Page 290 of 354
Rust or dirt on the wheel, or on the parts to
which
it is fastened, can make the wheel nuts
become
lccse after a time. The wheel could
come
off and cause an accident. When you
change a wheel, remove any rust or dirt from
the places where the wheel attaches to the
vehicle.
In an emergency, you can use a cloth
or
a paper towel to do this; but be sure to use
a scraper or wire brush later, if you need to,
to
get all the rust or dirt off.
1
Never use oil or grease on studs or nuts. If
could fall
off, causing a serious accident.
..-.. -I, +L- -..+- -:-k& ---- I ---- \I ____. ... L--I I YWU UW, lilt llUL3 Illlyllb GWIIIC; IWUDC;. IUUi VVIlGel
I I
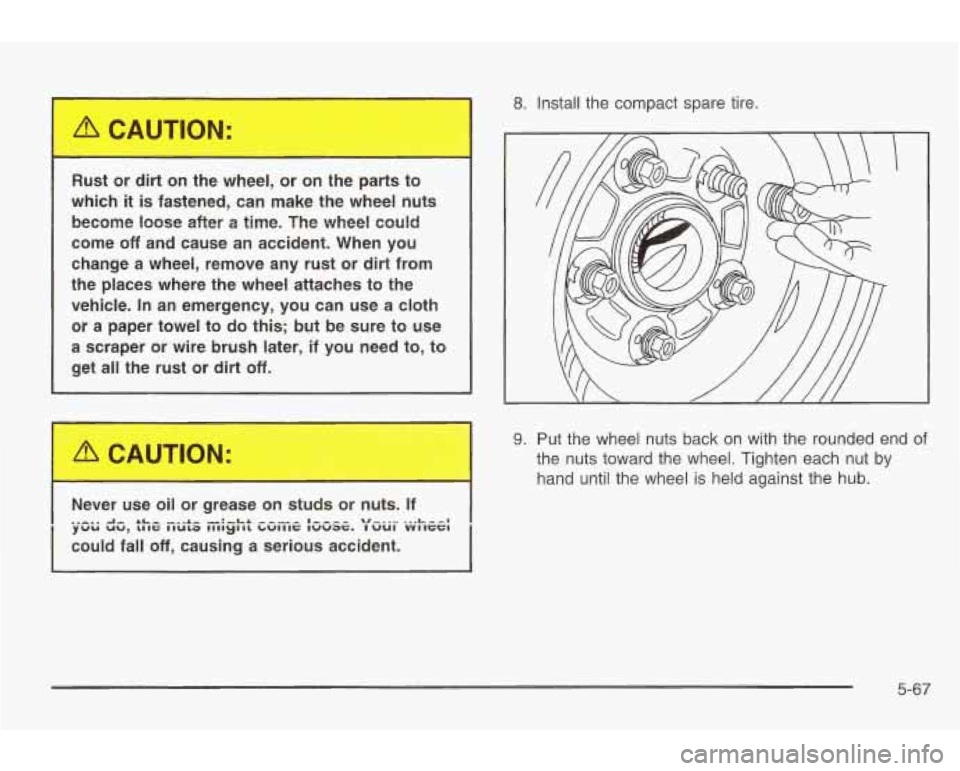
8. Install the compact spare tire.
9. Put the wheel nuts back on with the rounded end of
the nuts toward the wheel. Tighten each nut by
hand until the wheel is held against the hub.
5-67
Page 296 of 354
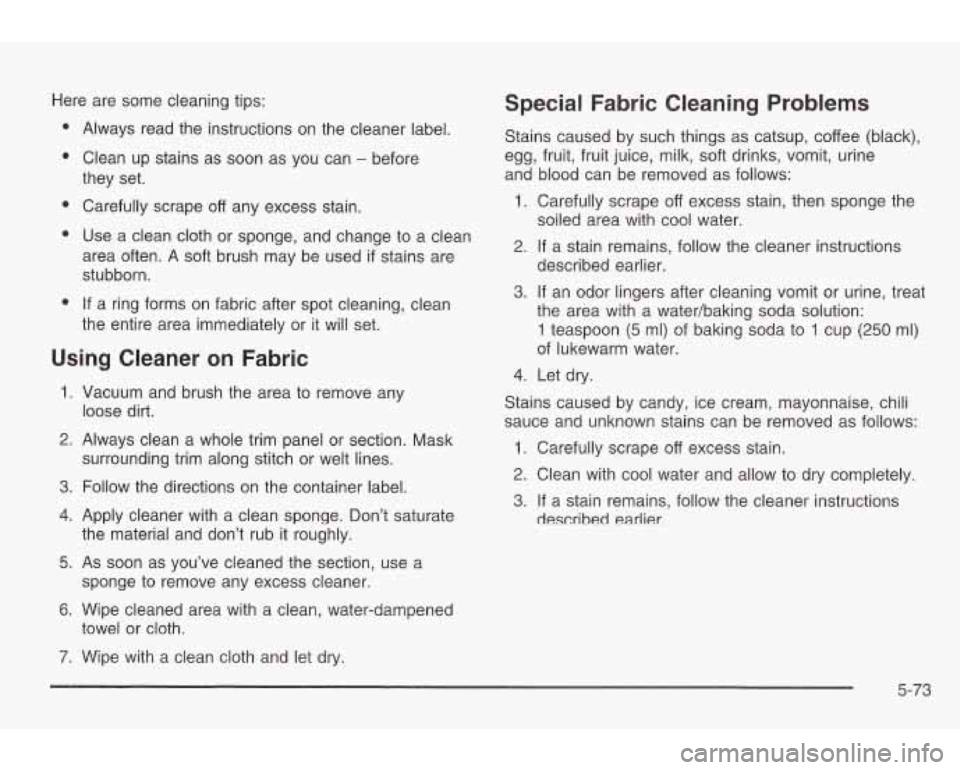
Here are some cleaning tips:
e
e
e
e
e
Always read the instructions on the cleaner label.
Clean up stains as soon as you can
- before
they set.
Carefully scrape
off any excess stain.
Use a clean cloth or sponge, and change
to a clean
area often. A soft brush may be used
if stains are
stubborn.
If a ring forms on fabric after spot cleaning, clean
the entire area immediately or it will set.
Usina Cleaner on Fabric
1.
2.
3.
4.
5.
6.
7.
v
Vacuum and brush the area to remove any
loose dirt.
Always clean a whole trim panel or section. Mask
surrounding trim along stitch or welt lines.
Follow the directions on the container label.
Apply cleaner with a clean sponge. Don’t saturate
the material and don’t rub it roughly.
As soon as you’ve cleaned the section, use a
sponge
to remove any excess cleaner.
Wipe cleaned area with a clean, water-dampened
towel or cloth.
Wipe with a clean cloth and let dry.
Special Fabric Cleaning Problems
Stains caused by such things as catsup, coffee (black),
egg, fruit, fruit juice, milk, soft drinks, vomit, urine
and blood can be removed as follows:
1. Carefully scrape off excess stain, then sponge the
2. If a stain remains, follow the cleaner instructions
3. If an odor lingers after cleaning vomit or urine, treat
soiled area with cool water.
described earlier.
the area with a water/baking soda solution:
1 teaspoon (5 ml) of baking soda to 1 cup (250 ml)
of lukewarm water.
4. Let dry.
Stains caused by candy, ice cream, mayonnaise, chili
sauce and unknown stains can be removed as follows:
1. Carefully scrape off excess stain.
2. Clean with cool water and allow to dry completely.
3. If a stain remains, follow the cleaner instructions
described earlier.
5-73
Page 313 of 354
Maintenance Schedule
Introduction
I
IMPORTANT:
KEEP ENGINE OIL
AT THE PROPER
LWEL AND CHANGE AS
RECOMMENDED
Have you purchased the GM Protection Plan? The Plan
supplements your new vehicle warranties. See your
Warranty and Owner Assistance booklet or your dealer
for details.
Your Vehicle and the Environment
Proper vehicle maintenance not only helps to keep your
vehicle in good working condition, but also helps the
environment.
All recommended maintenance procedures
are important. Improper vehicle maintenance can
even affect the quality of the air we breathe. Improper
fluid levels or the wrong tire inflation can increase
the level of emissions from your vehicle. To help protect
our environment, and
to keep your vehicle in good
condition, please maintain your vehicle properly.
Maintenance Requirements
Maintenance intervals, checks, inspections and
recommended fluids and lubricants as prescribed in this
manual are necessary to keep your vehicle in good
working condition. Any damage caused by failure
to follow recommended maintenance may not be
covered by warranty.
6-2