radio PONTIAC GRAND AM 2003 Owners Manual
[x] Cancel search | Manufacturer: PONTIAC, Model Year: 2003, Model line: GRAND AM, Model: PONTIAC GRAND AM 2003Pages: 354, PDF Size: 16.3 MB
Page 72 of 354
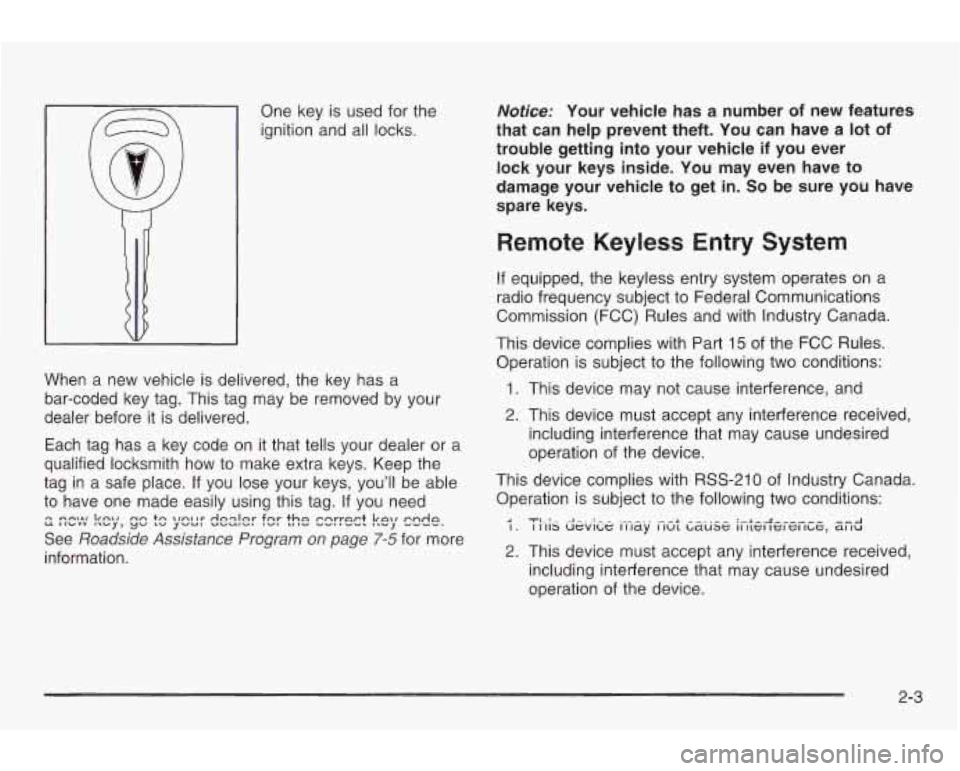
One key is used for the
ignition and all locks.
When a new vehicle is delivered, the key has a
bar-coded key tag. This tag may be removed by your
dealer before it is delivered.
Each tag has a key code on it that tells your dealer or a
qualified locksmith how to make extra keys. Keep the
tag in a safe place.
If you lose your keys, you’ll be able
to have one made easily using this tag.
If you need
See
Roadside Assistance Program on page 7-5 for more
information.
u IIUYV i\uy, yu L” yvu, U”Ul”l ‘)I nn\ht bnx! mn tn IInrlr rlnqlnr fzy th~ yrye~t kn
cndn ”‘J
Notice: Your vehicle has a number of new features
that can help prevent theft. You can have a lot
of
trouble getting into your vehicle if you ever
lock your keys inside. You may even have to
damage your vehicle to get in.
So be sure you have
spare keys.
Remote Keyless Entry System
If equipped, the keyless entry system operates on a
radio frequency subject to Federal Communications
Commission (FCC) Rules and with Industry Canada.
This device complies with Part
15 of the FCC Rules.
Operation is subject to the following two conditions:
1. This device may not cause interference, and
2. This device must accept any interference received,
including interference that may cause undesired
operation of the device.
This device complies with
RSS-210 of Industry Canada.
Operation is subject to the following two conditions:
A TI.!- ^I-..:-- .--A --..-- :.-*-.A ^_^I^^ --A I. I I 113 uevt~e 11 ~dy I lut L~U~G 11 I~~;IIGI GI ILG, a1 IU
2. This device must accept any interference received,
including interference that may cause undesired
operation of the device.
2-3
Page 88 of 354

A warning chime will sound if you open the driver’s door
when the ignition is
off and the key is in the ignition.
Notice: If your key seems stuck in OFF and
you can’t turn it, be sure you are using the correct
key; if
so, is it all the way in? Turn the key only
with your hand. Using
a tool to force it could break
the key or the ignition switch.
If none of this
works, then your vehicle needs service.
B (ACCESSORY): This position unlocks the transaxle.
It also lets you use things like the radio and windshield
wipers when the engine is not running. To use
ACCESSORY, turn the key clockwise to the first
position. Use this position
if your vehicle must be pushed
or towed, but never try to push-start your vehicle.
C (ON): This position is where the key returns to after
you start your engine and release the key. The
ignition switch stays in ON when the engine is running.
But even when the engine is not running, you can
use ON to operate your electrical accessories and to
display some instrument panel warning lights.
Retained Accessory Power (RAP)
Your vehicle is equipped with a Retained Accessory
Power (RAP) feature which will allow the radio to
continue to work up to
10 minutes after the ignition is
turned to
OFF.
Your radio will work when the ignition key is in ON or
ACCESSORY. Once the key is turned from ON to
OFF,
the radio will continue to work up to 10 minutes or
until the driver’s door is opened.
Starting Your Engine
Automatic Transaxle
Move your shift lever to PARK (P) or NEUTRAL (N).
Your engine won’t start in any other position
- that’s a
safety feature. To restart when you’re already moving,
use NEUTRAL (N) only.
Notice: Don’t try to shift to PARK (P) if your
vehicle
is moving. If you do, you could damage the
transaxie.
shift to PARK (Pj oniy when your
vehicle
is stopped.
D (START): This position starts the engine. When the
engine starts, release the key. The ignition switch
will return to ON for normal driving.
2-1 9
Page 108 of 354
Section 3 Instrument Panel
Instrument Panel Overview ............................... 3.2
Hazard Warnin Flashers
................................ 3.4
Other Warning !bevices
................................... 3.5
Horn
............................................................. 3.5
Tilt Wheel
..................................................... 3.5
Turn Signal/Multifunction Lever
......................... 3.6
Exterior Lamps
............................................. 3.13
Interior Lamps
.............................................. 3.16
Ashtrays and Cigarette Lighter
........................ 3.17
Climate Controls
............................................ 3.18
Climate Control System
................................. 3.18
Outlet Adjustment
......................................... 3.21
Warning Lights, Gages and Indicators
............. 3-22
Instrument Panel Cluster
................................ 3.23
Speedometer and Odometer
........................... 3.24
Tachometer
................................................. 3.24
Safety Belt Reminder Light
............................. 3.25
Air Bag Readiness Light ................................ 3.25
Charging System Light
.................................. 3.26
Up-Shift Light
............................................... 3.26
Erake QlQtT! -J -.-. !n!=lrning Light ........................ ~ 3-76 .
Warnin Light ........................................... 3-28
Warning Light
........................................... 3.28
Active Light
.............................................. 3.29
Low Coolant Warning Light
............................ 3.30
Anti-Lock
Brake System
Enhance
c? Traction System
Enhanced Traction System
Engine Coolant Temperature Gage
3.3~ rl on ..................
Malfunction Indicator Lamp ............................. 3.31
Oil Pressure Light
......................................... 3.34
Low Oil Level Li ht
....................................... 3.35
Securit Light:
............................................... 3-36
Service Vehicle Soon Light
............................ 3-36
Fuel Gage
................................................... 3-37
Audio System(s)
............................................. 3-38
Data Systems RDS)
.................................. 3-38
Change Engine
ail Light ................................ 3-35
Low dsher Fluid Warning Light
..................... 3-36
Setting the Time for Radios without Radio
Setting the Time
1 or Radios with Radio 3-39
........................... 3-39
.............................. 3-43
Radio with Cassette and CD
.......................... 3-55
Theft-Deterrent Feature
Theft-Deterrent Feature (Non-RDS Radios)
..................................... 3-68
(RDS Radios)
........................................... 3-68
MUUIW ULCCI II ly VVI IGGI VU1 ILI WIG v vv A . .A .- C'&-A~;~~ \Alhnnl Pnmtrnlrr Qxa .......................
Understanding Radio Reception ...................... 3-70
Care of Your Cassette Tape Player
................. 3-70
Care of Your CDs ......................................... 3-71
Care of Your CD Player
................................ 3-72
Fixed Mast Antenna ...................................... 3-72
XM Satellite Radio Antenna System
................ 3-72
DAB Radio Antenna System 3-11 Chime Level Adjustment ................................ 3-72
n Tn ...........................
3- 1
Page 121 of 354

The DRL system will make your low-beam headlamps
come on at a reduced brightness when the following
conditions are met:
The ignition is on.
the exterior lamps control is in AUTO or the parking
the light sensor detects daytime light,
lamps
only position.
the parking brake is released, and
0 the shift lever is not in PARK (P) on vehicles with
When the DRL system is on, the taillamps, sidemarker
lamps, parking lamps and instrument panel lights
will not be illuminated unless you have turned the
exterior lamps control
to the parking lamp position.
As with any vehicle, you should turn on the regular
headlamp system when you need it.
an automatic transaxle only.
Automatic Headlamp System
When it
is dark enough outside, your automatic
headlamp system will turn on your headlamps at the
normal brightness along with other lamps such as
the taillamps, sidemarker, parking lamps and the
instrument panel lights. The radio lights will also be dim. Your
vehicle is equipped with a light sensor on the top
of the instrument panel under the defroster grill, so
be sure it is not covered which will cause the
automatic headlamp system
to be on whenever the
ignition is on.
The automatic headlamp system may also be on when
driving through a parking garage, heavy overcast
weather or a tunnel. This is normal.
There is a delay in the transition between the daytime
and nighttime operation
of the DRL and the automatic
headlamp systems
so that driving under bridges or
bright overhead street lights does not affect the system.
The DRL and automatic headlamp systems will only
be affected when the light sensor sees a change
in lighting lasting longer than this delay.
To idle your vehicle with the automatic headlamp
system
off, set the parking brake while the ignition is off.
Then start the vehicle. The automatic headlamp
system will stay
off until you release the parking brake.
As with any vehicle, you should turn on the regular
headlamps when you need them.
3-1 4
Page 133 of 354
The air bag readiness light should flash for a few
seconds when you turn the ignition key to
ON. If the
light doesn’t come on then, have it fixed
so it will
be ready to warn you
if there is a problem.
Charging System Light
The charging system light
will come on when you
turn on the ignition, but the
II engine is not running, as
a check to show you
it
is working.
When the engine is running, the light should go out.
If it stays on, or comes on while you are driving and you
hear a chime, you may have a problem with the
electrical charging system. It could indicate that you have a loose generator drive belt or another electrical
problem. Have it checked right away. Driving while
this light is on could drain your battery. If
you must drive a short distance with the light on, be
certain to turn
off all your accessories, such as the radio
and air conditioner.
Up-Shift Light
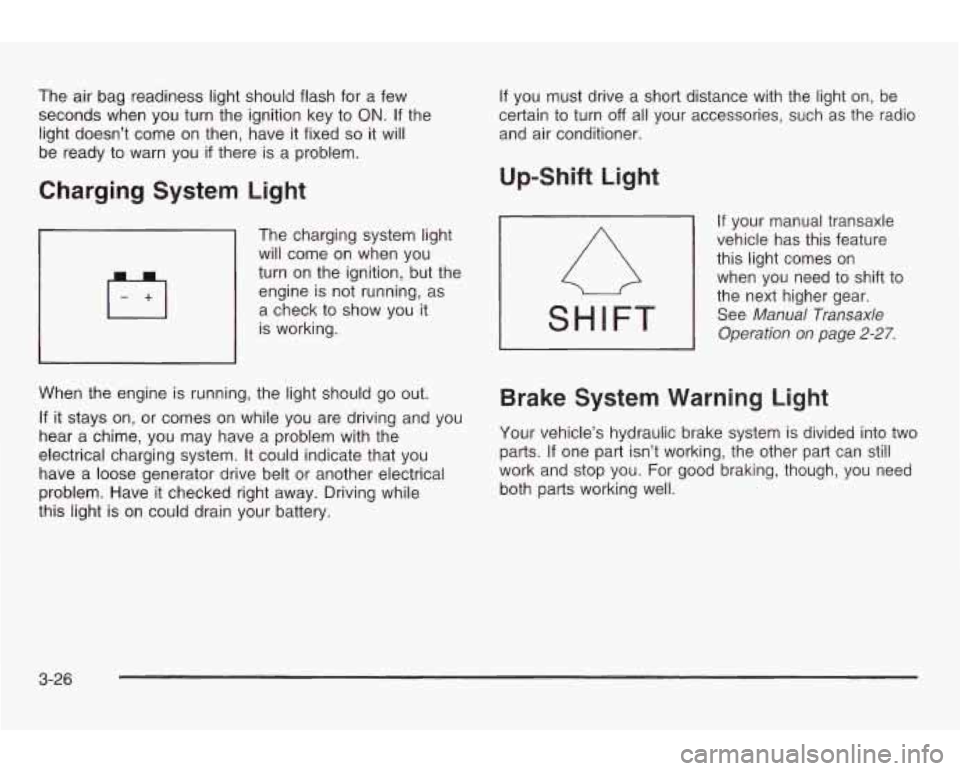
If your manual transaxle
vehicle has this feature
this light comes on
when you need to shift to
the next higher gear.
See
Manual Transaxle
Operation on page
2-27.
Brake System Warning Light
Your vehicle’s hydraulic brake system is divided into two
parts. If one part isn’t working, the other part can still
work and stop you.
For good braking, though, you need
both parts working well.
3-26
Page 145 of 354
Audio System(s)
Notice: Before you add any sound equipment to
your vehicle
- like a tape player, CB radio, mobile
telephone or two-way radio
- be sure you can
add what you want. If you can, it’s very important to
do
it properly. Added sound equipment may
interfere with the operation of your vehicle’s engine,
Delphi Electronics radio or other systems, and
even damage them. Your vehicle’s systems may interfere with the operation of sound equipment that
has been added improperly.
So, before adding sound equipment, check with
your dealer and be sure to check federal rules
covering mobile radio and telephone units. Your
audio system has been designed to operate easily
and to give years of listening pleasure. You
will get
the most enjoyment out of it
if you acquaint yourself
with it first. Find out what your audio system can do and
how to operate
all of its controls to be sure you’re
getting the most out of the advanced engineering that
went into it.
Your vehicle has
a feature called Retained Accessory
Power (RAP). With RAP, you can play your audio
system even after the ignition is turned
off. See Retained
Accessory Power under
Ignition Positions on page 2-18.
Setting the Time for Radios
without Radio Data Systems (RDS)
Press and hold the HR or MIN arrow for two seconds.
Then press the HR arrow until the correct hour appears
on the display. Press and hold the
MIN arrow until
the correct minute appears. The time may be set with
the ignition on or
off.
3-38
Page 146 of 354
Setting the Time for Radios with
Radio Data Systems
(RDS)
Press and hold HR or MIN for two seconds. Then press
and hold HR until the correct hour appears on the
display. AM will also appear. Press and hold
MlN until
the correct minute appears on the display. The time may
be set with the ignition on or
off.
To synchronize the time with an FM station broadcasting
Radio Data System (RDS) information, press and
hold
HR and MIN at the same time for two seconds until
UPDATED appears on the display. If the time is not
available from the station,
NO UPDATE will appear on
the display instead.
RDS time is broadcast once a minute. Once you have
tuned
to an RDS broadcast station, it may take a
few minutes before pressing and holding the HR and
MIN buttons will result in an update to the time.
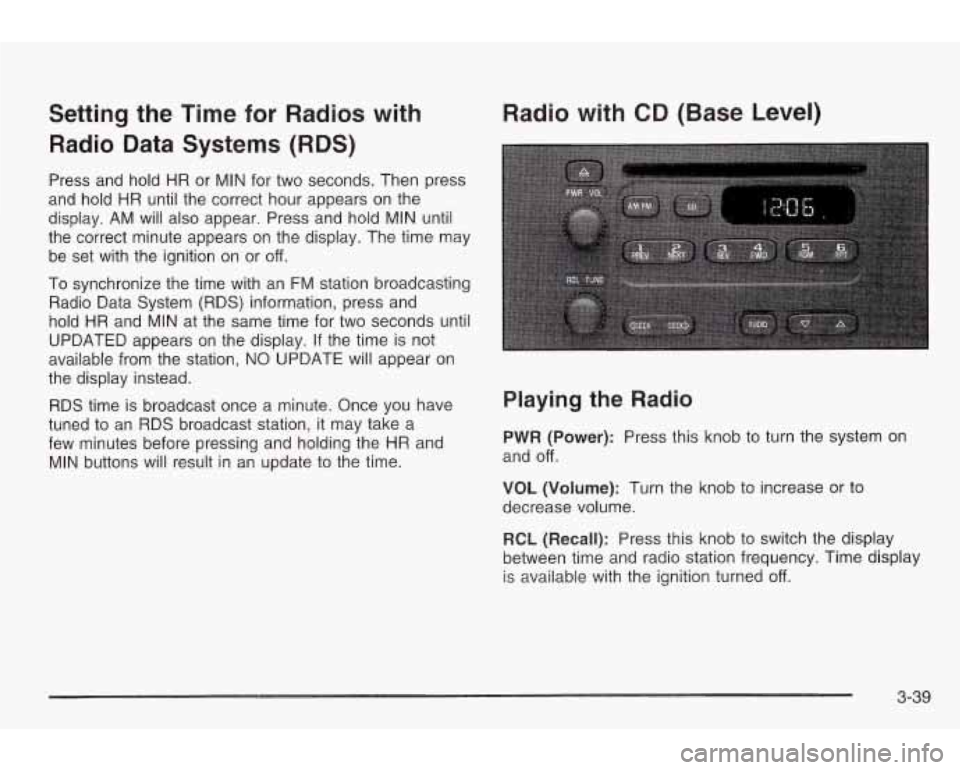
Radio with CD (Base Level)
Playing the Radio
PWR (Power): Press this knob to turn the system on
and
off.
VOL (Volume): Turn the knob to increase or to
decrease volume.
RCL (Recall): Press this knob
to switch the display
between time and radio station frequency. Time display
is available with the ignition turned
off.
3-39
Page 147 of 354
Finding a Station Setting Preset Stations
AM FM: Press this button to switch between AM, FMI
and FM2. The display will show your selection.
TUNE: Turn this knob to choose radio stations.
a SEEK D : Press the right or the left arrow to tune
to the next or to the previous station and stay there.
To scan stations, press and hold one of the SEEK
arrows for two seconds until you hear a beep. The radio
will go to a station, play for a few seconds and flash
the station frequency, then go on to the next station.
Press one of the SEEK arrows again to stop scanning.
To scan preset stations, press and hold one
of the
SEEK arrows for more than four seconds until you hear
two beeps. The radio will go to the first preset station
stored on your pushbuttons, play for a few seconds and
flash the station frequency, then go on to the next
preset station. Press one of the SEEK arrows again to
stop scanning presets.
The radio will seek and scan only to stations that are in
the selected band and only to those with a strong
signal. The
six numbered pushbuttons let you return
to your
favorite stations. You can set up to
18 stations (six AM,
six FMI and six
FM2) by performing the following
steps:
1. Turn the radio on.
2. Press AM FM to select AM, FMI or FM2.
3. Tune in the desired station.
4. Press and hold one of the six numbered
pushbuttons until you hear a beep. Whenever you
press that numbered pushbutton, the station
you set will return.
5. Repeat the steps for each pushbutton.
Setting the Tone (Bassnreble)
AUDIO: To adjust the bass or the treble, press and
release the AUDIO button repeatedly until BAS or TRE
appears on the display. Then press and hold the up
or the down arrow to increase or to decrease. If a station
is weak or noisy, you may want to decrease the
treble.
To adjust bass or treble to the middle position, select
BAS or TRE. Then press and hold the AUDIO button for
more than two seconds until you hear a beep.
B and
a zero or T and a zero will appear on the display.
3-40
Page 148 of 354
To adjust both tone controls and both speaker controls
to the middle position, first end out of audio mode
by pressing another button, causing the radio to perform
that function, or by waiting five seconds for the display
to return to time of day. Then press and hold the AUDIO
button for more than two seconds until you hear a
beep.
CEN will appear on the display.
Adjusting the Speakers (Balance/Fade)
AUDIO: To adjust the balance between the right
and the left speakers, press and release the AUDIO
button until
BAL appears on the display. Then press and
hold the up or the down arrow to move the sound
toward the right or the left speakers.
To adjust the fade between the front and rear speakers,
press and release the AUDIO button until FAD
appears on the display. Then press and hold the up or
the down arrow
to move the sound toward the front
or the rear speakers.
To adjust balance or fade to the middle position, select
than two seconds until you hear a beep.
L and a zero
or
F and a zero will appear on the display.
n A I rn n TI- -- -._-I I- -1-1 n I ~n~n I-.. DHL UI rnu. I II~II peas CAI IU I iuiu HWUIU IUI 111u1e
To adjust both tone controls and both speaker controls
to the middle position, first end out of audio mode
by pressing another button, causing the radio
to perform
that function, or by waiting five seconds for the display
to return to time of day. Then press and hold AUDIO for
more than two seconds until you hear a beep.
CEN
will appear on the display.
Radio Messages
CAL (Calibration): Your audio system has been
calibrated for your vehicle from the factory.
If CAL
appears on the display it means that your radio has not
been configured properly for your vehicle and must
be returned
to the dealership for service.
LOC (Locked): This message is displayed when the
THEFTLOCK@ system has locked up. You must return
to the dealership for service.
Playing a Compact Disc
Insert a disc partway into the slot, label side up. The
display will show CD. If you want
to insert a compact
disc with the ignition
off, first press RCL or the eject
button.
mInw,-.v 1.,;11 311 ;+ Thn A;nn ehnallA knmim .-~lo~t;mm Thn tJlCdy&l VVlll pull I1 II 1. I IIG U13b JIlVUlU UGYII I pluyll 13. I (IC.
If an error appears on the display, see ‘Compact Disc
Messages” later in this section.
3-4 1
Page 149 of 354
1 PREV (Previous): Press this pushbutton to go to the
previous track
if the current track has been playing
for less than eight seconds.
If pressed when the current
track has been playing for more than eight seconds,
it will go to the beginning of the current track. The track
number will appear on the display. If you hold the
pushbutton or press
it more than once, the player will
continue moving back through the disc.
2 NEXT: Press this pushbutton to go to the next track.
The track number will appear on the display.
If you
hold the pushbutton or press
it more than once,
the player will continue moving forward through the disc.
3 REV (Reverse): Press and hold this pushbutton to
reverse quickly within a track. Release it to play
the passage. The display will show elapsed time while
reversing.
4 FWD (Forward): Press and hold this pushbutton to
advance quickly within a track. Release
it to play
the passage. The display will show elapsed time while
forwarding.
5 RDM (Random): Press this pushbutton to hear the
tracks in random, rather than sequential, order. RDM will
, appear on the display. Press RDM again to turn off
-'s: random play. OFF will appear on the display.
c
R
f
6 RPT (Repeat): Press this pushbutton once to hear a
track over again. RPT
will appear on the display.
The current track will continue to repeat. Press RPT
again
to turn off repeated play. OFF will appear on the
display.
a SEEK D : Press the right or the left arrow to go to
the next or to the previous track. The track number
will appear on the display.
RCL (Recall): Press this knob to see the current track
number or how long the current track has been
playing.
AM FM: Press this button to play the radio when a disc
is in the player. The disc will stop but remain in the
player.
CD: With a compact disc in the player and the radio
playing, press this button
to play the compact disc. CD
will appear on the display.
A (Eject): Press this button to eject a CD. Eject may
be activated with either the ignition or radio
off. CDs
may be loaded with the radio and ignition
off if this
button is pressed first.