wheel PONTIAC GRAND AM 2004 Workshop Manual
[x] Cancel search | Manufacturer: PONTIAC, Model Year: 2004, Model line: GRAND AM, Model: PONTIAC GRAND AM 2004Pages: 364, PDF Size: 2.48 MB
Page 299 of 364

{CAUTION:
Rust or dirt on the wheel, or on the parts to
which it is fastened, can make the wheel nuts
become loose after a time. The wheel could
come off and cause an accident. When you
change a wheel, remove any rust or dirt from
the places where the wheel attaches to the
vehicle. In an emergency, you can use a cloth
or a paper towel to do this; but be sure to use
a scraper or wire brush later, if you need to, to
get all the rust or dirt off.
{CAUTION:
Never use oil or grease on studs or nuts. If
you do, the nuts might come loose. Your wheel
could fall off, causing a serious accident.8. Install the compact spare tire.
9. Put the wheel nuts back on with the rounded end of
the nuts toward the wheel. Tighten each nut by
hand until the wheel is held against the hub.
5-73
Page 300 of 364

10. Lower the vehicle by turning the wheel wrench
counterclockwise. Lower the jack completely.
11. Tighten the wheel nuts
firmly in a crisscross
sequence, as shown.
{CAUTION:
Incorrect wheel nuts or improperly tightened
wheel nuts can cause the wheel to come loose
and even come off. This could lead to an
accident. Be sure to use the correct wheel
nuts. If you have to replace them, be sure to
get new GM original equipment wheel nuts.
Stop somewhere as soon as you can and have
the nuts tightened with a torque wrench to the
proper torque specication. See “Capacities
and Specications” in the Index for wheel nut
torque specication.
Notice:Improperly tightened wheel nuts can lead
to brake pulsation and rotor damage. To avoid
expensive brake repairs, evenly tighten the wheel
nuts in the proper sequence and to the proper
torque specication. See “Capacities and
Specications” in the index for the wheel nut torque
specication.
Notice:Wheel covers will not t on your compact
spare. If you try to put a wheel cover on the compact
spare, you could damage the cover or the spare.
5-74
Page 303 of 364

Compact Spare Tire
Although the compact spare tire was fully inflated when
your vehicle was new, it can lose air after a time.
Check the inflation pressure regularly. It should be
60 psi (420 kPa).
After installing the compact spare on your vehicle, you
should stop as soon as possible and make sure
your spare tire is correctly inflated. The compact spare
is made to perform well at speeds up to 65 mph
(105 km/h) for distances up to 3,000 miles (5 000 km),
so you can finish your trip and have your full-size
tire repaired or replaced where you want. Of course, it’s
best to replace your spare with a full-size tire as
soon as you can. Your spare will last longer and be in
good shape in case you need it again.Notice:When the compact spare is installed, don’t
take your vehicle through an automatic car wash
with guide rails. The compact spare can get caught
on the rails. That can damage the tire and wheel,
and maybe other parts of your vehicle.
Don’t use your compact spare on other vehicles.
And don’t mix your compact spare tire or wheel with
other wheels or tires. They won’t fit. Keep your spare tire
and its wheel together.
Notice:Tire chains won’t t your compact spare.
Using them can damage your vehicle and can
damage the chains too. Don’t use tire chains on
your compact spare.
5-77
Page 309 of 364

Cleaning Aluminum Wheels
Keep your wheels clean using a soft clean cloth with
mild soap and water. Rinse with clean water. After
rinsing thoroughly, dry with a soft clean towel. A wax
may then be applied.
The surface of these wheels is similar to the painted
surface of your vehicle. Do not use strong soaps,
chemicals, abrasive polishes, abrasive cleaners,
cleaners with acid, or abrasive cleaning brushes on
them because you could damage the surface. Do not
use chrome polish on aluminum wheels.
Do not take your vehicle through an automatic car wash
that has silicone carbide tire cleaning brushes. These
brushes can also damage the surface of these wheels.
Cleaning Tires
To clean your tires, use a stiff brush with tire cleaner.
Notice:Using petroleum-based tire dressing
products on your vehicle may damage the paint
nish and/or tires. When applying a tire dressing,
always wipe off any overspray from all painted
surfaces on your vehicle.
Sheet Metal Damage
If your vehicle is damaged and requires sheet metal
repair or replacement, make sure the body repair shop
applies anti-corrosion material to parts repaired or
replaced to restore corrosion protection.
Original manufacturer replacement parts will provide the
corrosion protection while maintaining the warranty.
Finish Damage
Any stone chips, fractures or deep scratches in the
finish should be repaired right away. Bare metal
will corrode quickly and may develop into major repair
expense.
Minor chips and scratches can be repaired with touch-up
materials avaliable from your dealer. Larger areas of
finish damage can be corrected in your dealer’s
body and paint shop.
5-83
Page 311 of 364

Description Usage
Chrome and Wire Wheel
CleanerRemoves dirt and grime
from chrome wheels and
wire wheel covers.
Finish EnhancerRemoves dust,
fingerprints, and surface
contaminants. Spray on
wipe off.
Swirl Remover PolishRemoves swirl marks, fine
scratches and other light
surface contamination.
Cleaner WaxRemoves light scratches
and protects finish.
Foaming Tire Shine Low
GlossCleans, shines and
protects in one easy step,
no wiping necessary.Description Usage
Wash Wax ConcentrateMedium foaming
shampoo. Cleans and
lightly waxes.
Biodegradable and
phosphate free.
Spot LifterQuickly and easily
removes spots and stains
from carpets, vinyl and
cloth upholstery.
Odor EliminatorOdorless spray odor
eliminator used on fabrics,
vinyl, leather and carpet.
See your General Motors parts department for these
products. SeeRecommended Fluids and Lubricants
on page 6-12.
5-85
Page 315 of 364

Instrument Panel Fuse Block
(Passenger’s Side)
Your vehicle may not be equipped with all the fuses and
features listed.
Fuse Usage
INST LPS Interior Lamp Dimming
CRUISE SW
LPSSteering Wheel Cruise Control
Switch Lamps
CRUISE SWSteering Wheel Cruise Control
Switches
Fuse Usage
HVAC
BLOWERHVAC Blower Motor
CRUISE Cruise Control
FOG LPS Fog Lamps
INT LPS Interior Courtesy Lamps
RADIO BATT Radio, XM™ Satellite Radio/DAB
SUNROOF Power Sunroof
Circuit Breaker Usage
PWR WNDW Power Windows
Relay Usage
FOG LPS Fog Lamps
5-89
Page 319 of 364

Capacities (cont’d)
ApplicationCapacities
English Metric
Manual Transaxle
Complete Overhaul1.8 quarts 1.7 L
Wheel Nut Torque 100 lb-ft 140Y
†ECOTEC™
SeeRecommended Fluids and Lubricants on page 6-12.
Engine Specications
Engine VIN Code Transaxle Spark Plug Gap
2.2L L4 † FAutomatic
Manual0.042 inch (1.06 mm)
3400 V6 EAutomatic
Manual0.060 inch (1.52 mm)
5-93
Page 327 of 364
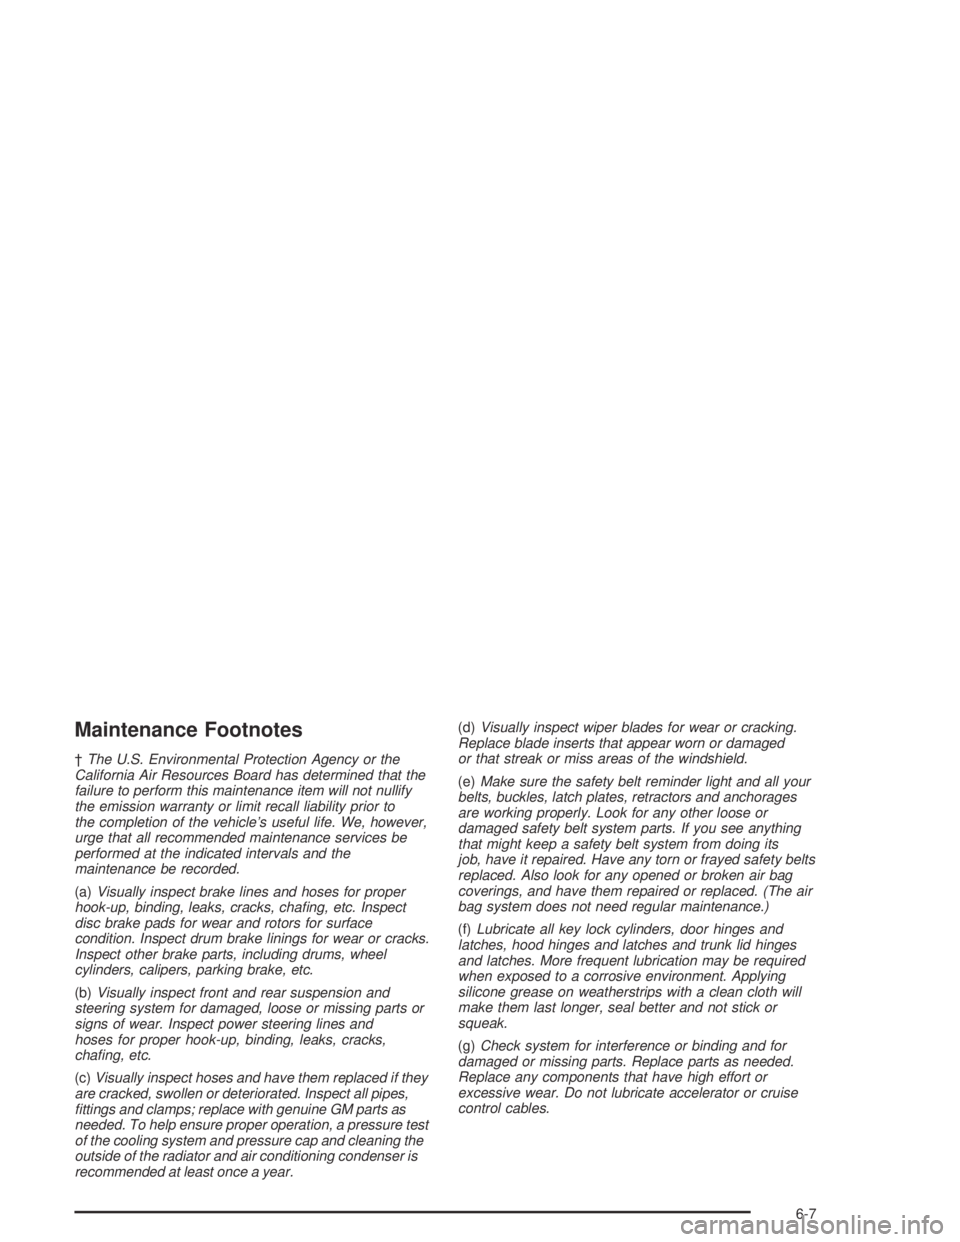
Maintenance Footnotes
†The U.S. Environmental Protection Agency or the
California Air Resources Board has determined that the
failure to perform this maintenance item will not nullify
the emission warranty or limit recall liability prior to
the completion of the vehicle’s useful life. We, however,
urge that all recommended maintenance services be
performed at the indicated intervals and the
maintenance be recorded.
(a)Visually inspect brake lines and hoses for proper
hook-up, binding, leaks, cracks, chafing, etc. Inspect
disc brake pads for wear and rotors for surface
condition. Inspect drum brake linings for wear or cracks.
Inspect other brake parts, including drums, wheel
cylinders, calipers, parking brake, etc.
(b)Visually inspect front and rear suspension and
steering system for damaged, loose or missing parts or
signs of wear. Inspect power steering lines and
hoses for proper hook-up, binding, leaks, cracks,
chafing, etc.
(c)Visually inspect hoses and have them replaced if they
are cracked, swollen or deteriorated. Inspect all pipes,
fittings and clamps; replace with genuine GM parts as
needed. To help ensure proper operation, a pressure test
of the cooling system and pressure cap and cleaning the
outside of the radiator and air conditioning condenser is
recommended at least once a year.(d)Visually inspect wiper blades for wear or cracking.
Replace blade inserts that appear worn or damaged
or that streak or miss areas of the windshield.
(e)Make sure the safety belt reminder light and all your
belts, buckles, latch plates, retractors and anchorages
are working properly. Look for any other loose or
damaged safety belt system parts. If you see anything
that might keep a safety belt system from doing its
job, have it repaired. Have any torn or frayed safety belts
replaced. Also look for any opened or broken air bag
coverings, and have them repaired or replaced. (The air
bag system does not need regular maintenance.)
(f)Lubricate all key lock cylinders, door hinges and
latches, hood hinges and latches and trunk lid hinges
and latches. More frequent lubrication may be required
when exposed to a corrosive environment. Applying
silicone grease on weatherstrips with a clean cloth will
make them last longer, seal better and not stick or
squeak.
(g)Check system for interference or binding and for
damaged or missing parts. Replace parts as needed.
Replace any components that have high effort or
excessive wear. Do not lubricate accelerator or cruise
control cables.
6-7
Page 341 of 364

Canada – Customer Assistance
General Motors of Canada Limited
Customer Communication Centre, 163-005
1908 Colonel Sam Drive
Oshawa, Ontario L1H 8P7
1-800-263-3777 (English)
1-800-263-7854 (French)
1-800-263-3830 (For Text Telephone
devices (TTYs))
Roadside Assistance: 1-800-268-6800
Overseas – Customer Assistance
Please contact the local General Motors Business Unit.
Mexico, Central America and
Caribbean Islands/Countries
(Except Puerto Rico and U.S. Virgin
Islands) – Customer Assistance
General Motors de Mexico, S. de R.L. de C.V.
Customer Assistance Center
Paseo de la Reforma # 2740
Col. Lomas de Bezares
C.P. 11910, Mexico, D.F.
01-800-508-0000
Long Distance: 011-52-53 29 0 800
GM Mobility Program for Persons
with Disabilities
This program, available to
qualified applicants, can
reimburse you up to $1,000
toward eligible aftermarket
driver or passenger
adaptive equipment you
may require for your vehicle
(hand controls, wheelchair/
scooter lifts, etc.).
This program can also provide you with free resource
information, such as area driver assessment centers and
mobility equipment installers. The offer is available for
a limited period of time from the date of vehicle
purchase/lease. For more details, or to determine your
vehicle’s eligibility, see your GM dealer or call the
GM Mobility Assistance Center at 1-800-323-9935. Text
telephone (TTY) users, call 1-800-833-9935.
GM of Canada also has a Mobility Program. Call
1-800-GM-DRIVE (463-7483) for details. All TTY users
call 1-800-263-3830.
7-5
Page 349 of 364
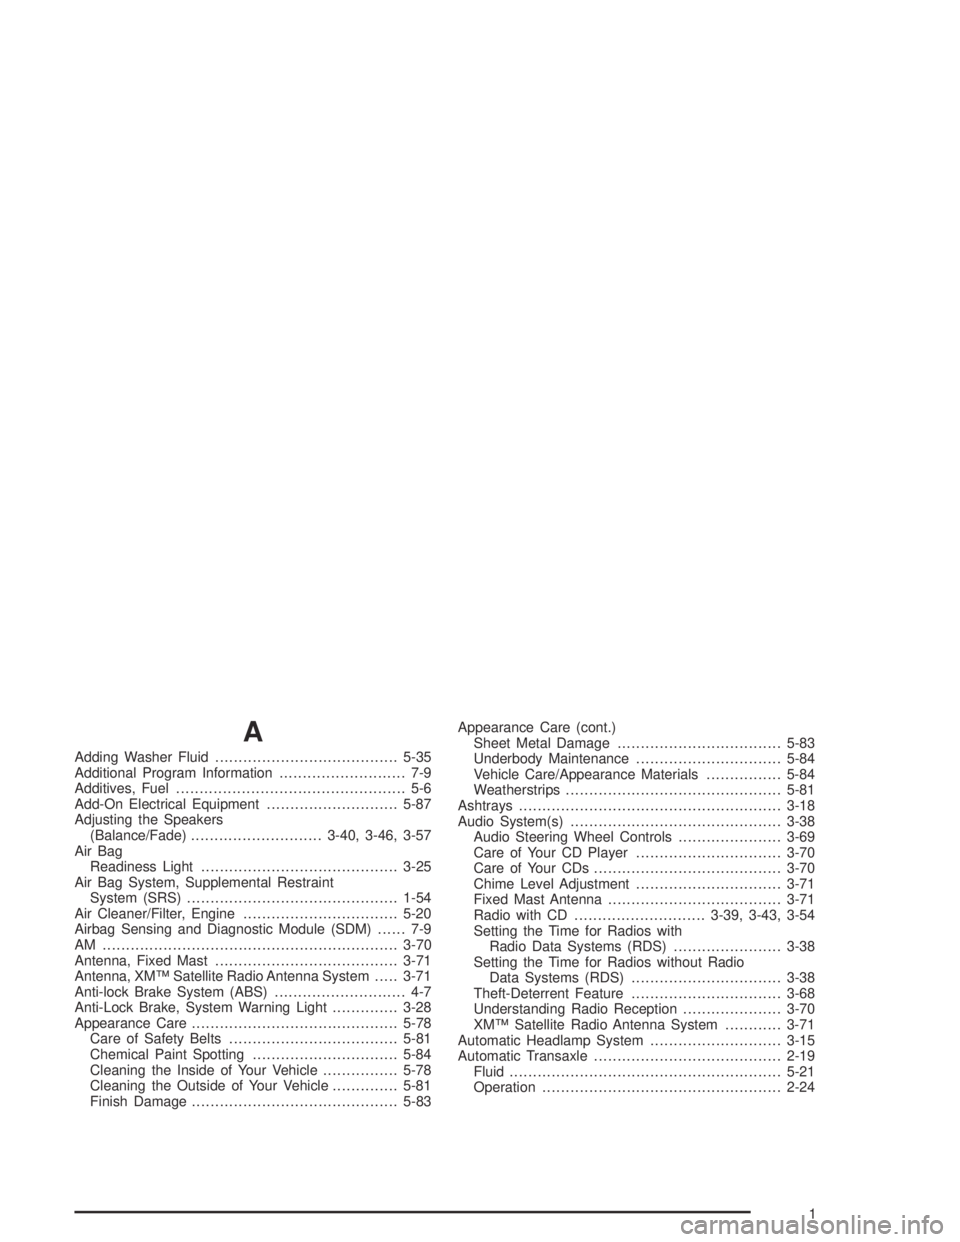
A
Adding Washer Fluid.......................................5-35
Additional Program Information........................... 7-9
Additives, Fuel................................................. 5-6
Add-On Electrical Equipment............................5-87
Adjusting the Speakers
(Balance/Fade)............................3-40, 3-46, 3-57
Air Bag
Readiness Light..........................................3-25
Air Bag System, Supplemental Restraint
System (SRS).............................................1-54
Air Cleaner/Filter, Engine.................................5-20
Airbag Sensing and Diagnostic Module (SDM)...... 7-9
AM ...............................................................3-70
Antenna, Fixed Mast.......................................3-71
Antenna, XM™ Satellite Radio Antenna System.....3-71
Anti-lock Brake System (ABS)............................ 4-7
Anti-Lock Brake, System Warning Light..............3-28
Appearance Care............................................5-78
Care of Safety Belts....................................5-81
Chemical Paint Spotting...............................5-84
Cleaning the Inside of Your Vehicle................5-78
Cleaning the Outside of Your Vehicle..............5-81
Finish Damage............................................5-83Appearance Care (cont.)
Sheet Metal Damage...................................5-83
Underbody Maintenance...............................5-84
Vehicle Care/Appearance Materials................5-84
Weatherstrips..............................................5-81
Ashtrays........................................................3-18
Audio System(s).............................................3-38
Audio Steering Wheel Controls......................3-69
Care of Your CD Player...............................3-70
Care of Your CDs........................................3-70
Chime Level Adjustment...............................3-71
Fixed Mast Antenna.....................................3-71
Radio with CD............................3-39, 3-43, 3-54
Setting the Time for Radios with
Radio Data Systems (RDS).......................3-38
Setting the Time for Radios without Radio
Data Systems (RDS)................................3-38
Theft-Deterrent Feature................................3-68
Understanding Radio Reception.....................3-70
XM™ Satellite Radio Antenna System............3-71
Automatic Headlamp System............................3-15
Automatic Transaxle........................................2-19
Fluid..........................................................5-21
Operation...................................................2-24
1