headlamp PONTIAC GRAND PRIX 1998 Owners Manual
[x] Cancel search | Manufacturer: PONTIAC, Model Year: 1998, Model line: GRAND PRIX, Model: PONTIAC GRAND PRIX 1998Pages: 402, PDF Size: 17.96 MB
Page 84 of 402
1 ~ r: 3te Driver’s Door and All Door Unlock
When you press UNLOCK on the remote keyless entry
transmitter, only the driver’s door
will unlock. If you
press UNLOCK again within five seconds,
all the doors
will unlock. If you would like all doors to unlock the
first time you press
UNLOCK, see “Locks and Lighting
Choices”
in the Index. If your vehicle is equipped with
the Content Theft-Deterrent system, the
UNLOCK
button on the remote keyless entry transmitter will
disarm the system (see “Content Theft-Deterrent” in
the Index for more details).
Remote Trunk Release
Press the trunk symbol on your remote keyless entry
transmitter to open your
trunk. The transaxle must be in
PARK (P) for this feature to operate.
Remote Alarm (If Equipped)
When you press the horn button on the remote keyless
entry transmitter, your vehicle’s headlamps
will flash
and the horn will sound.
This will allow you to attract
attention,
if needed.
Remote LocWnlock Confirmation (If Equipped)
This feature provides feedback to the holder of the
remote keyless entry transmitter that a command has
been received
by the keyless entry receiver. To signal
that a command has been received, the headlamps will
flash and the horn
will sound briefly. To program the
various modes available, see “Locks
and Lighting
Choices” in the Index.
2-9
Page 89 of 402

Content Theft-Deterrent
(If Equipped)
If your vehicle has’this option, it has a theft-deterrent
alarm system.
A red light located on top of your instrument panel (near
the center
of the vehicle, next to the windshield) will
flash slowly when the system is armed.
While armed, the doors will not unlock with the power
lock switch. The
alarm will go off if someone damages
the vehicle, tampers with the trunk lock, enters the
vehicle (without using the remote keyless
entry
transmitter or key to unlock the doors), or turns the
ignition on. Your
horn will sound and your headlamps
will
flash for up to two minutes. The system will also
cut off the fuel supply, preventing the vehicle from
being driven.
Arming with the Power Lock Switch
Your alarm system will arm when you use either the
power lock switch to lock the doors while any door is
open and the key is removed from the ignition (if you
would like to
turn off the power door lock switch
arming, see “Locks and Lighting Choices” in the Index).
The security light flashes quickly to let you know when
the system is ready
to arm with the power door switches.
The security light will stop flashing
and stay on when
you press the rear of the power lock switch, to let you
know the system is arming. After all doors are closed
and locked, the security light will begin flashing at a
very slow rate to let you know the system is armed.
2-14
Page 90 of 402
Arming with the Remote Keyless
Entry Transmitter
Your alarm system will arm when you use your remote
keyless entry transmitter to lock the doors after the key
is removed from the ignition. The security light will turn
on to let you know the system is arming. After all doors
are closed and locked, the security light will begin
flashing at
a very slow rate to let you know the system
is armed.
Arming Confirmation
If remote unlock confirmation is on (see “Locks and
Lighting Choices” in the Index), your headlamps will
flash briefly to let you know when your alarm system.
has armed.
Disarming with the Remote Keyless
Entry Transmitter
Your alarm system will disarm when you use your
remote keyless entry transmitter to unlock
the doors.
The security light will stop flashing to let you know the
system
is disarmed.
Disarming with Your Key
Your alarm system will disarm when you use your key
to unlock the doors. The security light will stop flashing
to let you
know the system is disarmed. If you would
like your key
to disarm the alarm system, see “Locks
and Lighting Choices” in the Index.
Nuisance Alarms
If you experience nuisance alarms (alarms which are
not caused by
the opening of a door and are not
desirable), you may need to reduce the damage
detection sensitivity.
Try programming your Content
Theft-Deterrent to mode
1 (see “Locks and Lighting
Choices” in the Index).
If you continue to experience
nuisance alarms,
you may want to try turning off
damage detection by programming your Content
Theft-Deterrent to mode
2 (see “Locks and Lighting
Choices” in the Index).
If you are still having trouble with nuisance alarms, you
can
turn off the Content Theft-Deterrent system by
programming your Content Theft-Deterrent to mode
3
(see “Locks and Lighting Choices” in the Index).
See your dealer or a qualified technician
for service.
Page 109 of 402
Tilt Steering Wheel
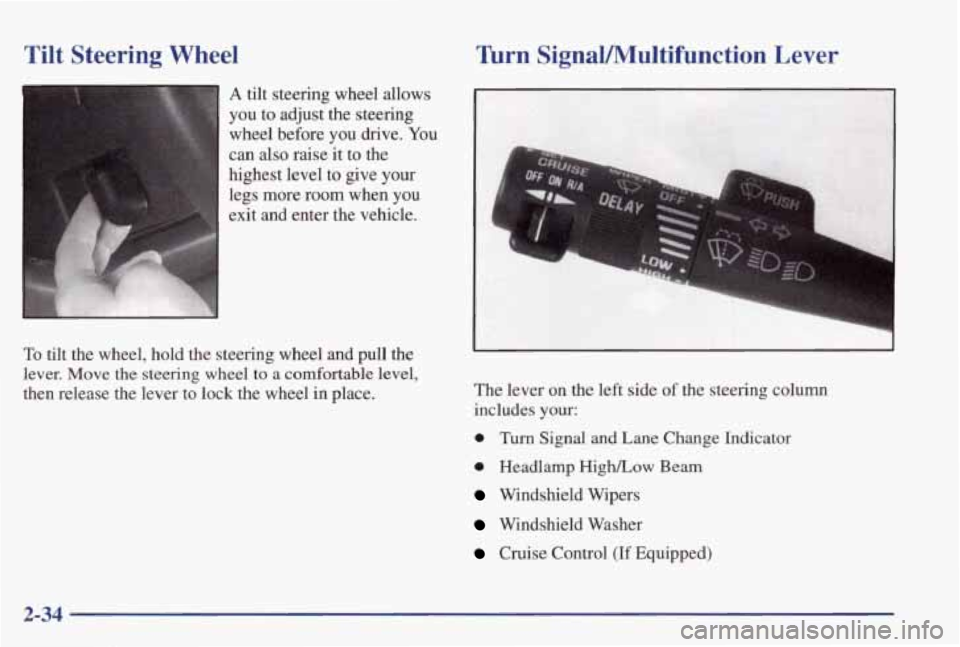
A tilt steering wheel allows
you to adjust the steering
wheel before you drive. You
can
also raise it to the
highest level to give your
legs more room when you
exit and enter the vehicle.
To tilt the wheel, hold the steering wheel and pull the
lever. Move the steering wheel to a comfortable level,
then release the lever to lock the wheel
in place.
&rn SignaVMultifunction Lever
--
--I
The lever on the left side of the steering column
includes
your:
0 Turn Signal and Lane Change Indicator
0 Headlamp HighLow Beam
Windshield Wipers
Windshield Washer
Cruise Control (If Equipped)
2-34
Page 110 of 402
firn Signal and Lane Change Indicator
The turn signal has two upward (for right) and two
downward (for left) positions. These positions allow you
to signal a turn or a lane change.
To signal a turn, move the lever all the way up or
down. When the turn is finished, the lever will
return automatically.
An arrow
on the instrument
panel will flash in the
direction of the turn or
lane change.
7 I
A
To signal a lane change, just raise or lower the lever
until the arrow starts to flash. Hold it there until you
complete your lane change. The lever will return by
itself when you release it.
As you signal a turn or a lane change, if the arrow
flashes faster than normal,
a signal bulb may be burned
out and other drivers won’t see your turn signal. If
a bulb is burned out, replace it to help avoid an
accident.
If the arrows don’t go on at all when you
signal a turn, check for burned-out bulbs and then check
the fuse (see “Fuses and Circuit Breakers” in the Index).
A chime will sound if you leave your turn
signal on for
more than
3/4 mile (1.2 km).
Headlamp High/Low Beam Changer
To change your headlamps
from low
beam to high
beam, or high to low, pull the multifunction lever
all
the way toward you. Then
release it.
When the high beams are on, a light on the instrument
panel also will be on.
Flash-to-Pass Feature
When your headlamps are off, pull the lever toward you
to momentarily switch on the high beams (to signal
that
you are going to pass). When you release the lever, they
will turn
off.
2-35
Page 115 of 402
Ending Cruise Control
There are two ways to turn off the cruise control:
Step lightly on the brake pedal; OR
0 Move the cruise switch to OW.
Erasing Cruise Speed Memory
When you turn off the cruise control or the ignition, or
shift into PARK (P) or NEUTRAL (N), your cruise
control set speed memory is erased.
Exterior Lamps
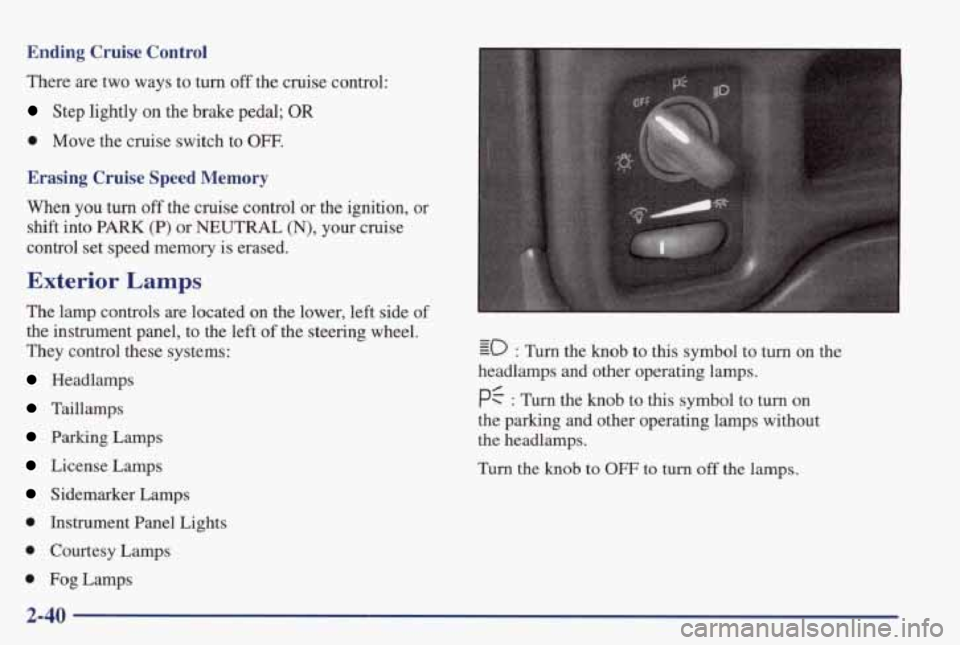
The lamp controls are located on the lower, left side of
the instrument panel, to the left of the steering wheel.
They control these systems:
Headlamps
Taillamps
Parking Lamps
License Lamps
Sidemarker Lamps
0 Instrument Panel Lights
0 Courtesy Lamps
0 Fog Lamps
- - =c) : Turn the knob to this symbol to turn on the
headlamps and other operating lamps.
pf : Turn the knob to this symbol to turn on
the parking and other operating lamps without
the headlamps.
Turn the knob to OFF to turn off the lamps.
Page 116 of 402
Daytime Running Lamps
Daytime Running Lamps (DRL) can make it easier for
others to see the front
of your vehicle during the day.
DRL can be helpful in many different driving
conditions, but they can be especially helpful in the
short periods after dawn and before sunset.
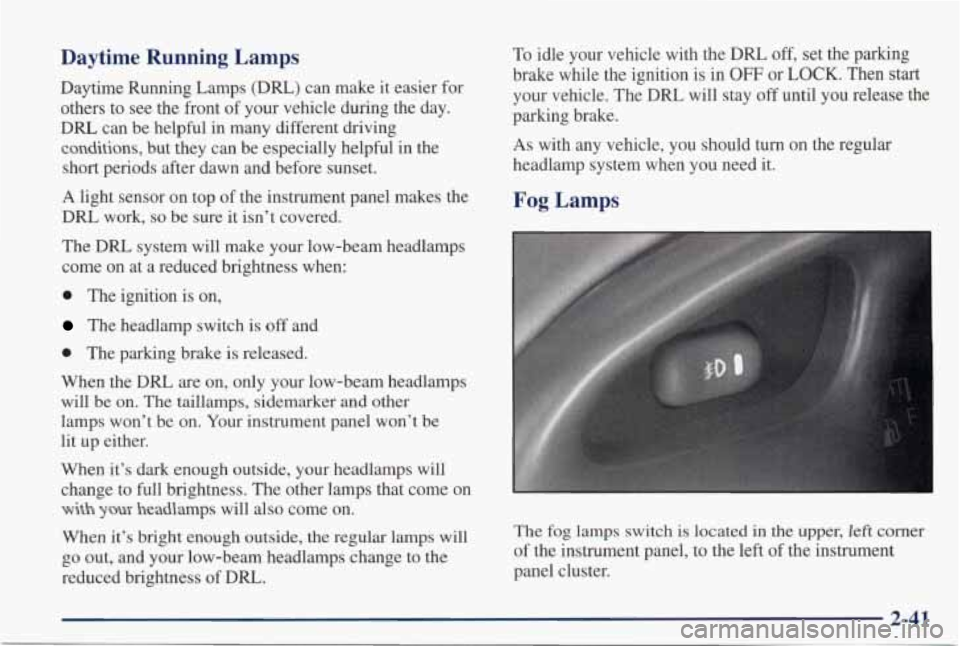
A light sensor on top of the instrument panel makes the
DRL work, so be sure it isn’t covered.
The DRL system will make your low-beam headlamps
come on at a reduced brightness when:
0 The ignition is on,
The headlamp switch is off and
0 The parking brake is released.
When the DRL are on, only your low-beam headlamps
will be on. The taillamps, sidemarker and other
lamps won’t be on. Your instrument panel won’t be lit up either.
When it’s dark enough outside, your headlamps will
change to full brightness. The other lamps that come
on
with your headlamps will also come on.
When it’s bright enough outside,
the regular lamps will
go out, and your low-beam headlamps change to the
reduced brightness of DRL.
To idle your vehicle with the DRL off, set the parking
brake while the ignition is
in OFF or LOCK. Then start
your vehicle. The DRL will stay off until you release the
parking brake.
As with any vehicle, you should turn on the regular
headlamp system when you need it.
Fog Lamps
The fog lamps switch is located in the upper, left comer
of the instrument panel, to the left of the instrument
panel cluster.
Page 117 of 402
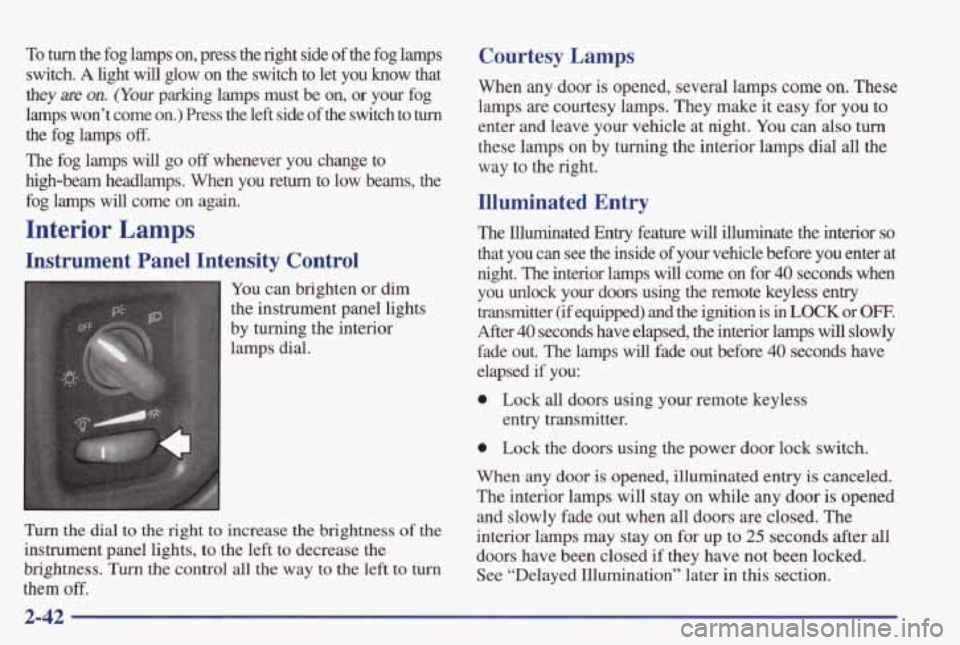
To turn the fog lamps on, press the right side of the fog lamps
switch.
A light will glow on the switch to let you know that
they are on. (Your parking lamps must be on, or your fog
lamps won’t come
on.) Press the left side of the switch to turn
the fog lamps off.
The fog lamps will go off whenever you change to
high-beam headlamps. When you return
to low beams, the
fog lamps will come on again.
Interior Lamps
Instrument Panel Intensity Control
You can brighten or dim
the instrument panel lights
by turning the interior
lamps
dial.
Turn the dial to the right to increase the brightness of the
instrument panel lights, to the left to decrease the
brightness.
Turn the control all the way to the left to turn
them off.
Courtesy Lamps
When any door is opened, several lamps come on. These
lamps are courtesy lamps. They make it easy for you
to
enter and leave your vehicle at night. You can also turn
these lamps on by turning the interior lamps dial all the
way to the right.
Illuminated Entry
The Illuminated Entry feature will illuminate the interior so
that you can see the inside of your vehicle before you enter at
night. The interior lamps will come on for
40 seconds when
you unlock
your doors using the remote keyless entry
transmitter
(ifequipped) and the ignition is in LOCK or OFF.
After 40 seconds have elapsed, the interior lamps will slowly
fade out. The lamps
will fade out before 40 seconds have
elapsed
if you:
0 Lock all doors using your remote keyless
0 Lock the doors using the power door lock switch.
When any door is opened, illuminated entry is canceled.
The interior lamps will stay on while any
door is opened
and slowly fade out when all doors are closed. The
interior lamps may stay
on for up to 25 seconds after all
doors have been closed if they have not been locked.
See “Delayed Illumination” later
in this section.
entry transmitter.
Page 124 of 402
Remote Drivc Unlock Control
Your vehicle comes with this feature set in mode 2. To
change the factory setting while in the programming mode, do the following:
1. Press UNLOCK on the remote keyless
entry transmitter.
2. Count the number of chimes you hear. The number
of chimes tells you which mode your vehicle is set
for. You change the mode by pressing
UNLOCK again.
that matches
the mode you want.
3. Repeat Step 2 until you hear the number of chimes
Mode 1: Remote All Doors Unlock (When you press
UNLOCK on your remote keyless entry transmitter, all
doors will unlock.)
Mode 2: Remote Driver’s Door and All Doors Unlock
(When you press UNLOCK on
your remote keyless
entry transmitter once, the driver’s door will unlock.
If
you press UNLOCK again within five seconds, all doors
will unlock.)
Remote LocWUnlock Confirmation
Your vehicle comes with this feature set in mode 4. TO
change the factory setting while in the programming
mode do the following:
1. Press the LOCK button on the remote keyless
entry transmitter.
2. Count the number of chimes you hear. The number
of chimes tells you which mode your vehicle is set
for. You change the mode by pressing LOCK
on
your remote keyless entry transmitter again.
3. Repeat Step 2 until you hear the number of chimes
that matches the mode you want.
This feature provides feedback to the driver when the
vehicle receives a lockhnlock command from the
remote keyless entry transmitter. The
fsllowing modes
may be selected:
Mode 1: Off (Remote lock and unlock confirmation
are disabled.)
Mode 2: Remote Lock Confirmation with Exterior
Lamps Only Remote Lock Confirmation:
When you use the remote keyless entry transmitter to
lock your vehicle, your headlamps will flash briefly
to let you
know your command is received.
Page 125 of 402
e Remote Unlock Confirmation: When you use the
remote keyless entry
transmitter to unlock your vehicle
or open your trunk, your headlamps will flash briefly
to let you
know when your command is received.
Mode 3: Remote Lock Confirmation with Exterior
Lamps and
Horn
Remote Lock Confirmation: When you use the remote
keyless
entry transmitter to lock your vehicle, the horn
will sound briefly and your headlamps will flash
briefly to let you
know your command is received.
Remote Unlock Confmnation: When you use the
remote keyless entry transmitter to unlock your vehicle
or open your
trunk, your headlamps will flash briefly
to let you
know your command is received.
Mode 4: Remote Lock Confirmation with Exterior
Lights and
Horn (on second LOCK press)
Remote Lock Confirmation: When you use the
remote keyless entry transmitter to lock your vehicle,
your headlamps will flash briefly to let you
know
your command is received. The horn will sound
briefly and the headlamps will flash briefly
if you
press the LOCK button again within five seconds.
remote keyless entry
transmitter to unlock your vehicle
e Remote Unlock Confirmation: When you use the or open your
trunk, your headlamps will flash briefly
to let you know your command is received.
Content Theft-Deterrent
Your vehicle comes with this feature set in mode 4. To
change the factory setting while in the programming
mode, do the following:
1. Turn the parking lamps on, then off.
2. Count the number of chimes you hear. The number
of chimes tells you which mode your vehicle is set
for. You change the mode by turning the parking
lamps on, then
off again.
3. Repeat Step 2 until you hear the number of chimes
that matches the mode you want.
Mode 1: Damage Detection with Reduced Sensitivity
(If anyone seriously damages your vehicle, tampers with
the trunk lock or opens a door while your Content
Theft-Deterrent system is armed,
an alarm will sound
and your headlamps will flash for up to two minutes).
Mode 2: Damage Detection Off (If anyone tampers with
your
trunk lock or opens a door while your Content
Theft-Deterrent system is armed,
an alarm will sound
and your headlamps will flash for up to two minutes.)
Mode 3: All Off (Your Content Theft-Deterrent system
is always disarmed.)
2-50