AUX PONTIAC GRAND PRIX 2004 Owners Manual
[x] Cancel search | Manufacturer: PONTIAC, Model Year: 2004, Model line: GRAND PRIX, Model: PONTIAC GRAND PRIX 2004Pages: 432, PDF Size: 2.99 MB
Page 203 of 432

wSCANx:Press and hold one of the arrows for
more than two seconds until SCAN and the track
number appear on the display and you hear a beep.
The disc will go to the next track, play for a few seconds,
then go on to the next track. Press this button again
to stop scanning.
RCL (Recall):Press this knob to see how long the
current track has been playing. To change the default
on the display (track and elapsed time), press the knob
until you see the display you want, then hold the
knob until the display ¯ashes. The selected display will
now be the default. While elapsed time is showing,
CD TIME will appear on the display.
BAND:Press this button to listen to the radio when a
CD is playing. The inactive CD will remain safely
inside the radio for future listening.
CD AUX (Auxiliary):Press this button to play a
compact disc when listening to the radio. CD will appear
on the display when a compact disc is loaded.
Z(Eject):Press this button to eject a CD. Eject may
be activated with either the ignition or radio off. CDs
may be loaded with the radio and ignition off if this
button is pressed ®rst.
Compact Disc Messages
CHECK CD:If this message appears on the radio
display and the disc comes out, it could be for one of
the following reasons:
·You're driving on a very rough road. When the road
becomes smoother, the disc should play.
·The disc is dirty, scratched, wet, or upside down.
·The air is very humid. If so, wait about an hour
and try again.
·There may have been a problem while burning
the CD.
·The label may be caught in the CD player.
If the CD is not playing correctly, for any other reason,
try a known good CD.
If any error occurs repeatedly or if an error can not be
corrected, contact your dealer. If your radio displays
an error message, write it down and provide it to your
dealer when reporting the problem.
3-99
Page 228 of 432

3. Once the light stops ¯ashing and turns green,
load a disc. Insert the disc partway into the slot,
label side up. The player will pull the disc in.
Once the disc is loaded, the light will begin ¯ashing
again. Once the light stops ¯ashing and turns
green you can load another disc. The disc player
takes up to six discs. Do not try to load more
than six.
To load more than one disc but less than six, complete
Steps 1 through 3. When you have ®nished loading
discs, with the radio on or off, press the LOAD side of
the LOAD CD button to cancel the loading function.
The radio will begin to play the last CD loaded.
When a disc is inserted, the CD symbol will be
displayed. If more than one disc has been loaded, a
number for each disc will be displayed. If you select an
equalization setting for your disc, it will be activated
each time you play a disc.
If the radio is on or off, the last disc loaded will begin to
play automatically.
As each new track starts to play, the track number will
appear on the display.Playing a Speci®c Loaded
Compact Disc
For every CD loaded, a number will appear on the radio
display. To play a speci®c CD, ®rst press the CD AUX
button to start playing a CD. Then press the numbered
pushbutton that corresponds to the CD you want to
play. A small bar will appear under the CD number that
is playing, and the track number will appear.
If an error appears on the radio display, see ªCompact
Disc Messagesº later in this section.
LOAD CD
Z(Eject):Pressing the CD eject side of
this button will eject a single disc or multiple discs.
To eject the disc that is currently playing, press
and release this button. To eject multiple discs, press
and hold this button for two seconds. You will hear
a beep and the light will ¯ash to let you know when a
disc is being ejected.
REMOVE CD will be displayed. You can now remove
the disc. If the disc is not removed, after 25 seconds,
the disc will be automatically pulled back into the
receiver. If you try to push the disc back into the
receiver, before the 25 second time period is complete,
the receiver will sense an error and will try to eject
the disc several times before stopping.
3-124
Page 382 of 432

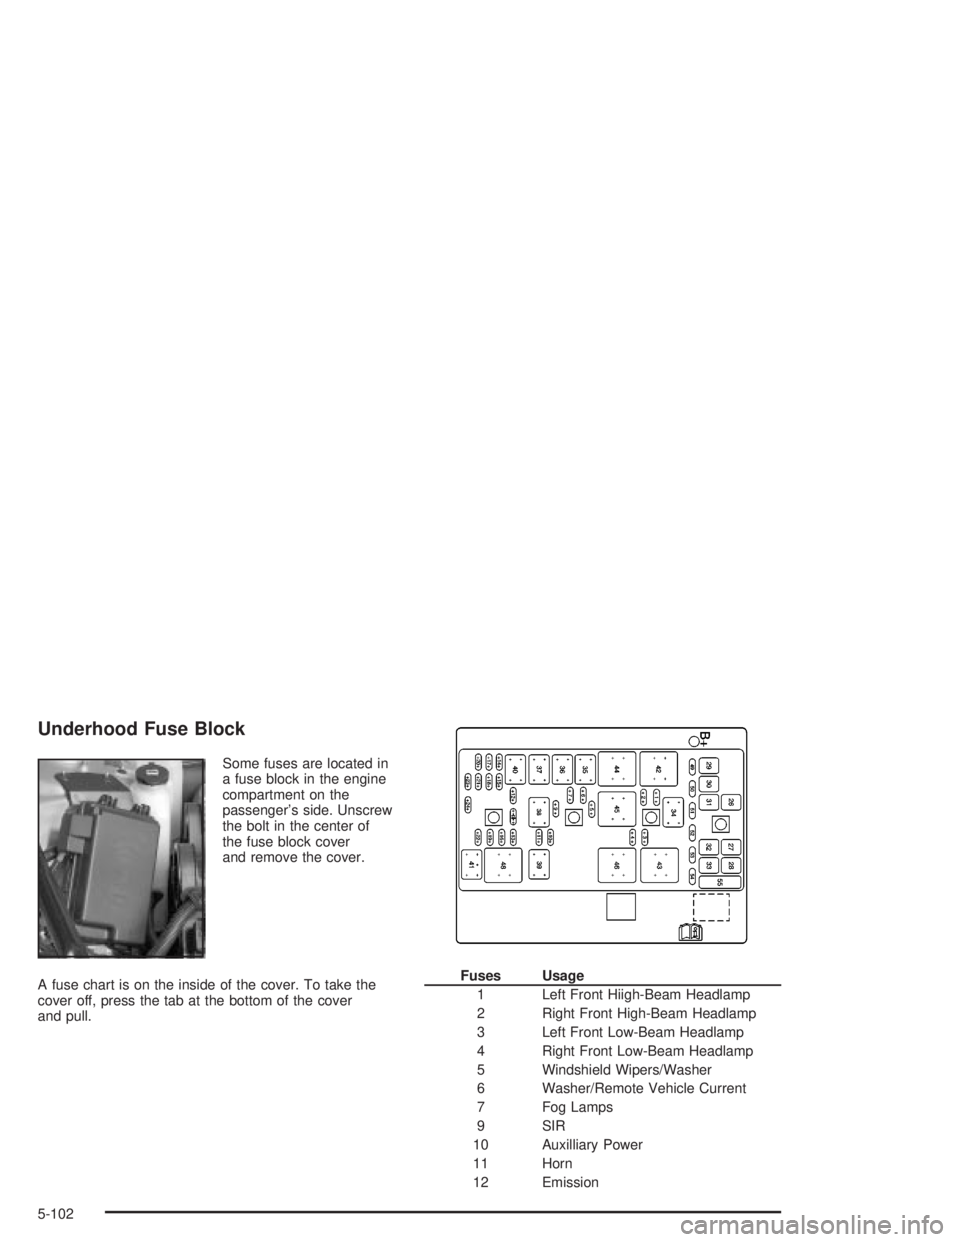
Underhood Fuse Block
Some fuses are located in
a fuse block in the engine
compartment on the
passenger's side. Unscrew
the bolt in the center of
the fuse block cover
and remove the cover.
A fuse chart is on the inside of the cover. To take the
cover off, press the tab at the bottom of the cover
and pull.
Fuses Usage
1 Left Front Hiigh-Beam Headlamp
2 Right Front High-Beam Headlamp
3 Left Front Low-Beam Headlamp
4 Right Front Low-Beam Headlamp
5 Windshield Wipers/Washer
6 Washer/Remote Vehicle Current
7 Fog Lamps
9 SIR
10 Auxilliary Power
11 Horn
12 Emission
5-102
Page 384 of 432

Capacities and Speci®cations
Please refer toPart D: Recommended Fluids and Lubricants on page 6-16for more information.
Capacities and Speci®cations
ApplicationCapacities
English Metric
Air Conditioning Refrigerant R134a 2.4 lbs 1.1 kg
Automatic Transaxle
Pan Removal and Replacement
After Complete Overhaul7.4 quarts
10.0 quarts7.0 L
9.5 L
When draining/replacing converter or auxiliary cooler, more ¯uid may be needed.
Cooling System Including Reservoir
3800 V6 (Code K)
3800 V6 Supercharged (Code 1)11.2 quarts
11.2 quarts10.6 L
10.6 L
Engine Oil with Filter
3800 V6 (Code K)
3800 V6 Supercharged (Code 1)4.3 quarts
4.3 quarts4.1 L
4.1 L
Fuel Tank 17.0 gallons 64.0 L
Wheel Nut Torque 100 ft lb 140Y
All capacities are approximate. When adding ¯uid, be sure to ®ll to the appropriate level, as recommended in this
manual. Recheck ¯uid level after ®lling. See
Part D: Recommended Fluids and Lubricants on page 6-16for more
information.
5-104