maintenance schedule PONTIAC GRAND PRIX 2004 Owners Manual
[x] Cancel search | Manufacturer: PONTIAC, Model Year: 2004, Model line: GRAND PRIX, Model: PONTIAC GRAND PRIX 2004Pages: 432, PDF Size: 2.99 MB
Page 1 of 432
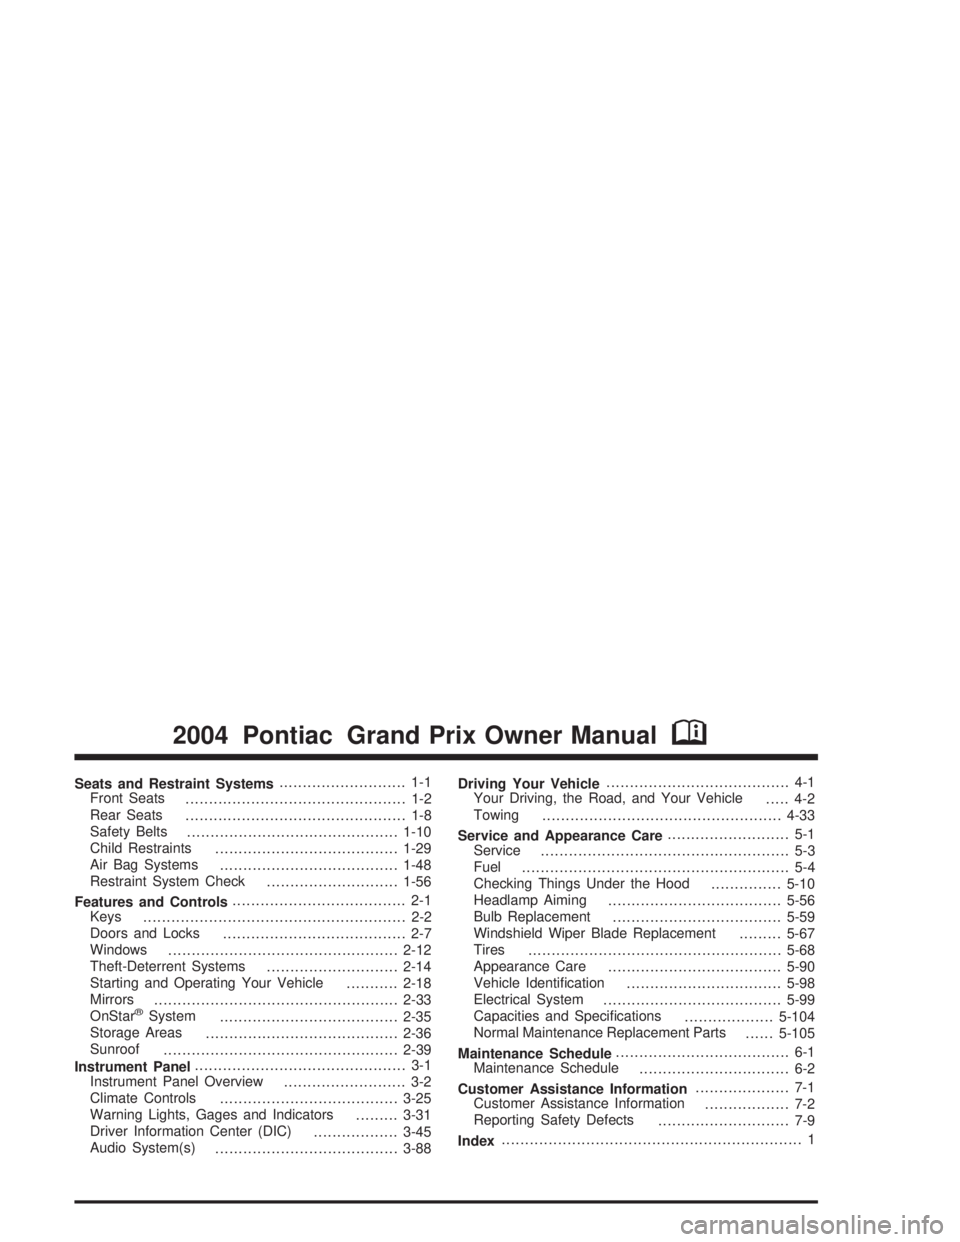
Seats and Restraint Systems........................... 1-1
Front Seats
............................................... 1-2
Rear Seats
............................................... 1-8
Safety Belts
.............................................1-10
Child Restraints
.......................................1-29
Air Bag Systems
......................................1-48
Restraint System Check
............................1-56
Features and Controls..................................... 2-1
Keys
........................................................ 2-2
Doors and Locks
....................................... 2-7
Windows
.................................................2-12
Theft-Deterrent Systems
............................2-14
Starting and Operating Your Vehicle
...........2-18
Mirrors
....................................................2-33
OnStar
žSystem
......................................2-35
Storage Areas
.........................................2-36
Sunroof
..................................................2-39
Instrument Panel............................................. 3-1
Instrument Panel Overview
.......................... 3-2
Climate Controls
......................................3-25
Warning Lights, Gages and Indicators
.........3-31
Driver Information Center (DIC)
..................3-45
Audio System(s)
.......................................3-88Driving Your Vehicle....................................... 4-1
Your Driving, the Road, and Your Vehicle
..... 4-2
Towing
...................................................4-33
Service and Appearance Care.......................... 5-1
Service
..................................................... 5-3
Fuel
......................................................... 5-4
Checking Things Under the Hood
...............5-10
Headlamp Aiming
.....................................5-56
Bulb Replacement
....................................5-59
Windshield Wiper Blade Replacement
.........5-67
Tires
......................................................5-68
Appearance Care
.....................................5-90
Vehicle Identi®cation
.................................5-98
Electrical System
......................................5-99
Capacities and Speci®cations
...................5-104
Normal Maintenance Replacement Parts
......5-105
Maintenance Schedule..................................... 6-1
Maintenance Schedule
................................ 6-2
Customer Assistance Information.................... 7-1
Customer Assistance Information
.................. 7-2
Reporting Safety Defects
............................ 7-9
Index................................................................ 1
2004 Pontiac Grand Prix Owner ManualM
Page 133 of 432
Outlet Adjustment
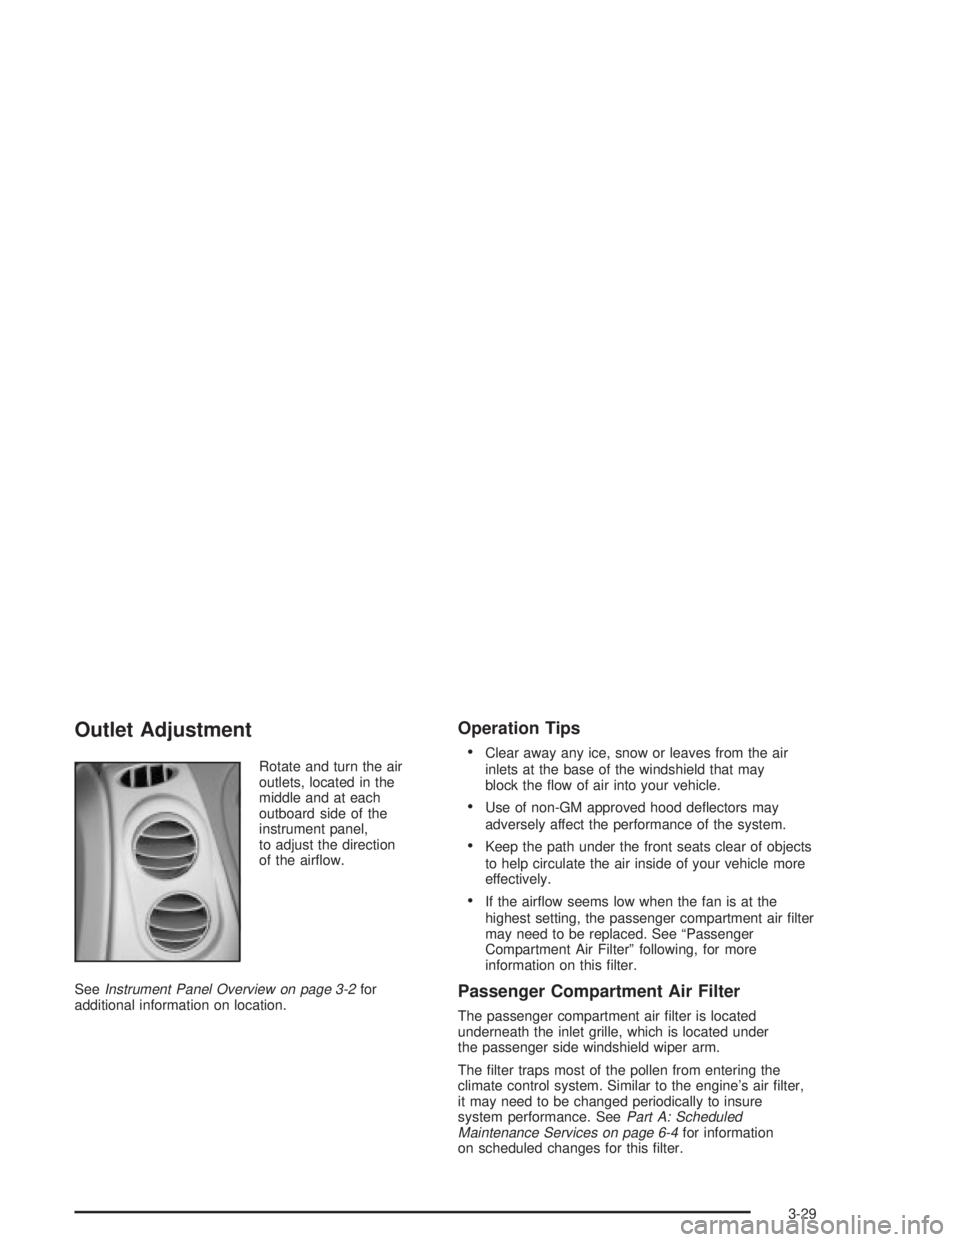
Rotate and turn the air
outlets, located in the
middle and at each
outboard side of the
instrument panel,
to adjust the direction
of the air¯ow.
See
Instrument Panel Overview on page 3-2for
additional information on location.
Operation Tips
·
Clear away any ice, snow or leaves from the air
inlets at the base of the windshield that may
block the ¯ow of air into your vehicle.
·Use of non-GM approved hood de¯ectors may
adversely affect the performance of the system.
·Keep the path under the front seats clear of objects
to help circulate the air inside of your vehicle more
effectively.
·If the air¯ow seems low when the fan is at the
highest setting, the passenger compartment air ®lter
may need to be replaced. See ªPassenger
Compartment Air Filterº following, for more
information on this ®lter.
Passenger Compartment Air Filter
The passenger compartment air ®lter is located
underneath the inlet grille, which is located under
the passenger side windshield wiper arm.
The ®lter traps most of the pollen from entering the
climate control system. Similar to the engine's air ®lter,
it may need to be changed periodically to insure
system performance. See
Part A: Scheduled
Maintenance Services on page 6-4for information
on scheduled changes for this ®lter.
3-29
Page 280 of 432
Maintenance When Trailer Towing
Your vehicle will need service more often when you're
pulling a trailer. SeePart A: Scheduled Maintenance
Services on page 6-4for more information. Things that
are especially important in trailer operation are automatic
transaxle ¯uid (don't over®ll), engine oil, drive belts,
cooling system and brake system. Each of these is
covered in this manual, and the Index will help you ®nd
them quickly. If you're trailering, it's a good idea to review
this information before you start your trip.
Check periodically to see that all hitch nuts and bolts
are tight.
Engine Cooling When Trailer Towing
Your cooling system may temporarily overheat during
severe operating conditions. SeeEngine Overheating
on page 5-29.
4-44
Page 304 of 432
Automatic Transaxle Fluid
When to Check and Change
A good time to check your automatic transaxle ¯uid
level is when the engine oil is changed.
Change both the ¯uid and ®lter every 50,000 miles
(83 000 km) if the vehicle is mainly driven under one or
more of these conditions:
·In heavy city traffic where the outside temperature
regularly reaches 90ÉF (32ÉC) or higher.
·In hilly or mountainous terrain.
·When doing frequent trailer towing.
·Uses such as found in taxi, police or delivery
service.
If you do not use your vehicle under any of these
conditions, change the ¯uid and ®lter at
100,000 miles (166 000 km).
See
Part A: Scheduled Maintenance Services on
page 6-4.
How to Check
Because this operation can be a little difficult, you may
choose to have this done at the dealership service
department.
If you do it yourself, be sure to follow all the instructions
here, or you could get a false reading on the dipstick.
Notice:Too much or too little ¯uid can damage
your transaxle. Too much can mean that some of the
¯uid could come out and fall on hot engine or
exhaust system parts, starting a ®re. Too little ¯uid
could cause the transaxle to overheat. Be sure
to get an accurate reading if you check your
transaxle ¯uid.
Wait at least 30 minutes before checking the transaxle
¯uid level if you have been driving:
·When outside temperatures are above 90ÉF (32ÉC).
·At high speed for quite a while.
·In heavy traffic ± especially in hot weather.
·While pulling a trailer.
5-24
Page 306 of 432
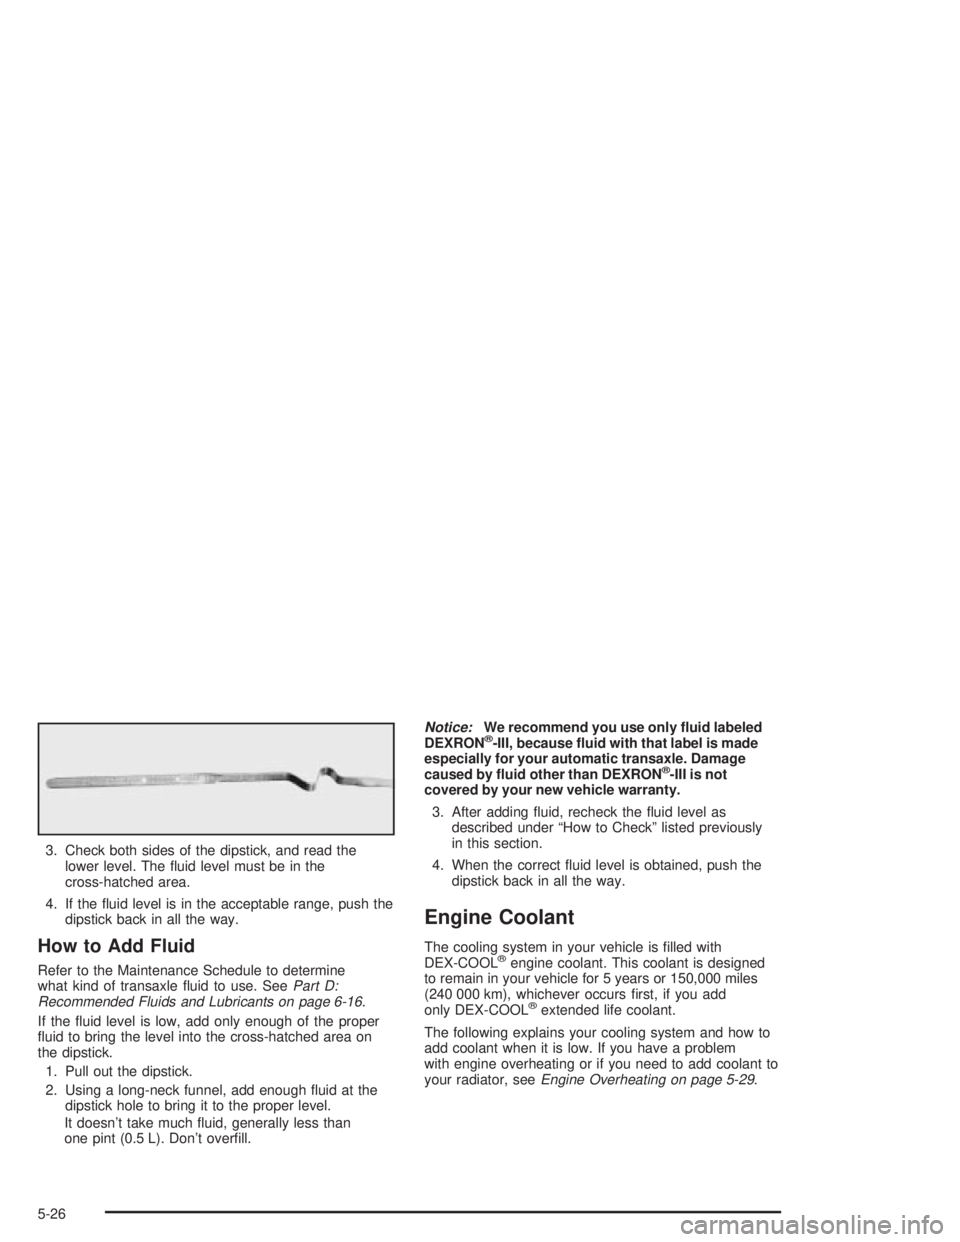
3. Check both sides of the dipstick, and read the
lower level. The ¯uid level must be in the
cross-hatched area.
4. If the ¯uid level is in the acceptable range, push the
dipstick back in all the way.
How to Add Fluid
Refer to the Maintenance Schedule to determine
what kind of transaxle ¯uid to use. SeePart D:
Recommended Fluids and Lubricants on page 6-16.
If the ¯uid level is low, add only enough of the proper
¯uid to bring the level into the cross-hatched area on
the dipstick.
1. Pull out the dipstick.
2. Using a long-neck funnel, add enough ¯uid at the
dipstick hole to bring it to the proper level.
It doesn't take much ¯uid, generally less than
one pint (0.5 L). Don't over®ll.
Notice:We recommend you use only ¯uid labeled
DEXRONž-III, because ¯uid with that label is made
especially for your automatic transaxle. Damage
caused by ¯uid other than DEXRON
ž-III is not
covered by your new vehicle warranty.
3. After adding ¯uid, recheck the ¯uid level as
described under ªHow to Checkº listed previously
in this section.
4. When the correct ¯uid level is obtained, push the
dipstick back in all the way.
Engine Coolant
The cooling system in your vehicle is ®lled with
DEX-COOLžengine coolant. This coolant is designed
to remain in your vehicle for 5 years or 150,000 miles
(240 000 km), whichever occurs ®rst, if you add
only DEX-COOL
žextended life coolant.
The following explains your cooling system and how to
add coolant when it is low. If you have a problem
with engine overheating or if you need to add coolant to
your radiator, see
Engine Overheating on page 5-29.
5-26
Page 347 of 432
Windshield Wiper Blade
Replacement
Remove and replace a windshield wiper by following
these steps:
1. Put the ignition in ACCESSORY and turn the
windshield wipers on.
2. Stop the windshield wipers when they are in the
upright position by turning the key to the off position.
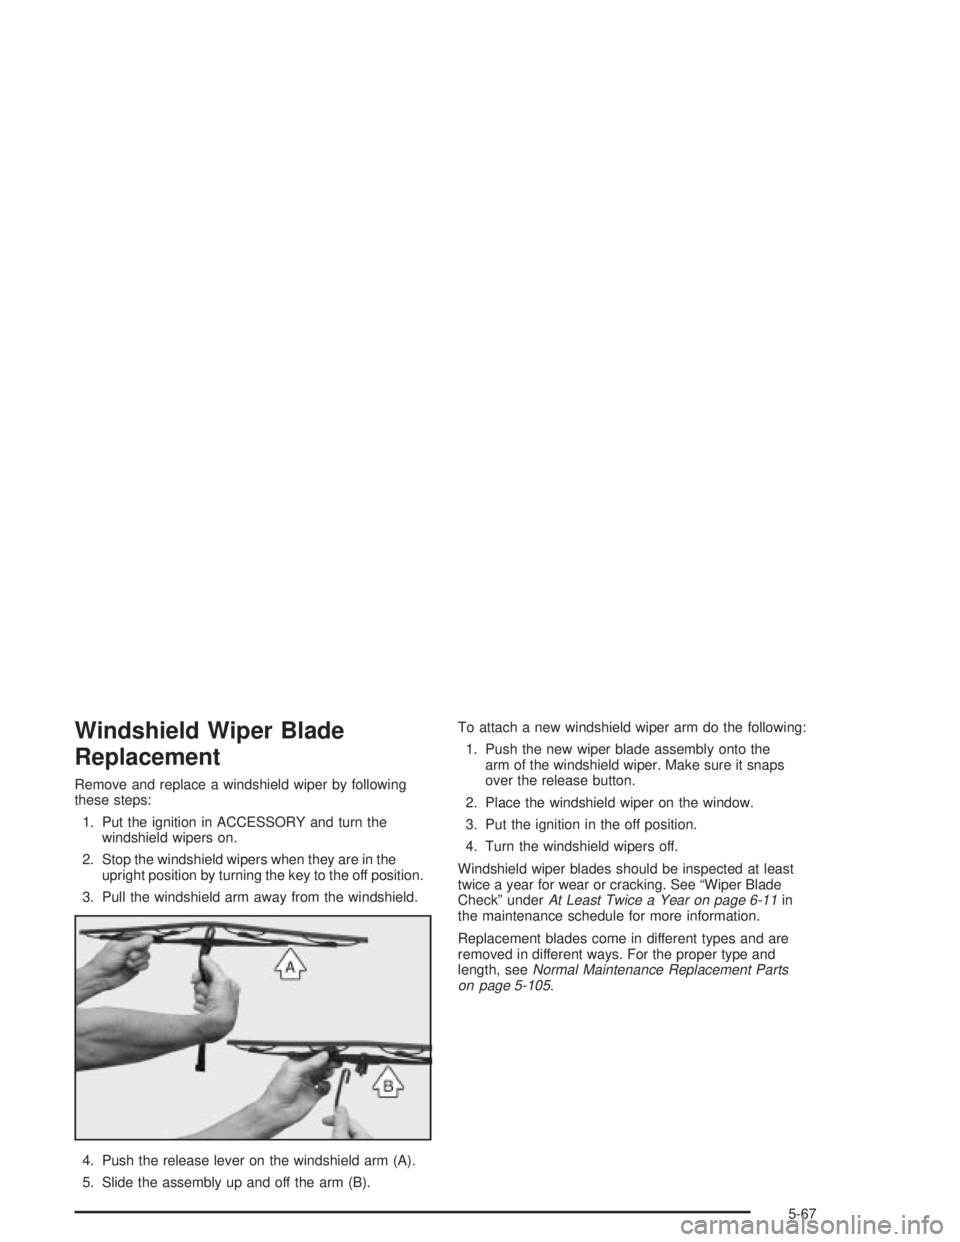
3. Pull the windshield arm away from the windshield.
4. Push the release lever on the windshield arm (A).
5. Slide the assembly up and off the arm (B).To attach a new windshield wiper arm do the following:
1. Push the new wiper blade assembly onto the
arm of the windshield wiper. Make sure it snaps
over the release button.
2. Place the windshield wiper on the window.
3. Put the ignition in the off position.
4. Turn the windshield wipers off.
Windshield wiper blades should be inspected at least
twice a year for wear or cracking. See ªWiper Blade
Checkº under
At Least Twice a Year on page 6-11in
the maintenance schedule for more information.
Replacement blades come in different types and are
removed in different ways. For the proper type and
length, see
Normal Maintenance Replacement Parts
on page 5-105.
5-67
Page 351 of 432
Tire Inspection and Rotation
Tires should be rotated every 7,500 miles (12 500 km).
Any time you notice unusual wear, rotate your tires
as soon as possible and check wheel alignment. Also
check for damaged tires or wheels. See
When It Is Time
for New Tires on page 5-72andWheel Replacement
on page 5-75for more information.
The purpose of regular rotation is to achieve more
uniform wear for all tires on the vehicle. The ®rst rotation
is the most important. See ªPart A: Scheduled
Maintenance Services,º in Section 6, for scheduled
rotation intervals.
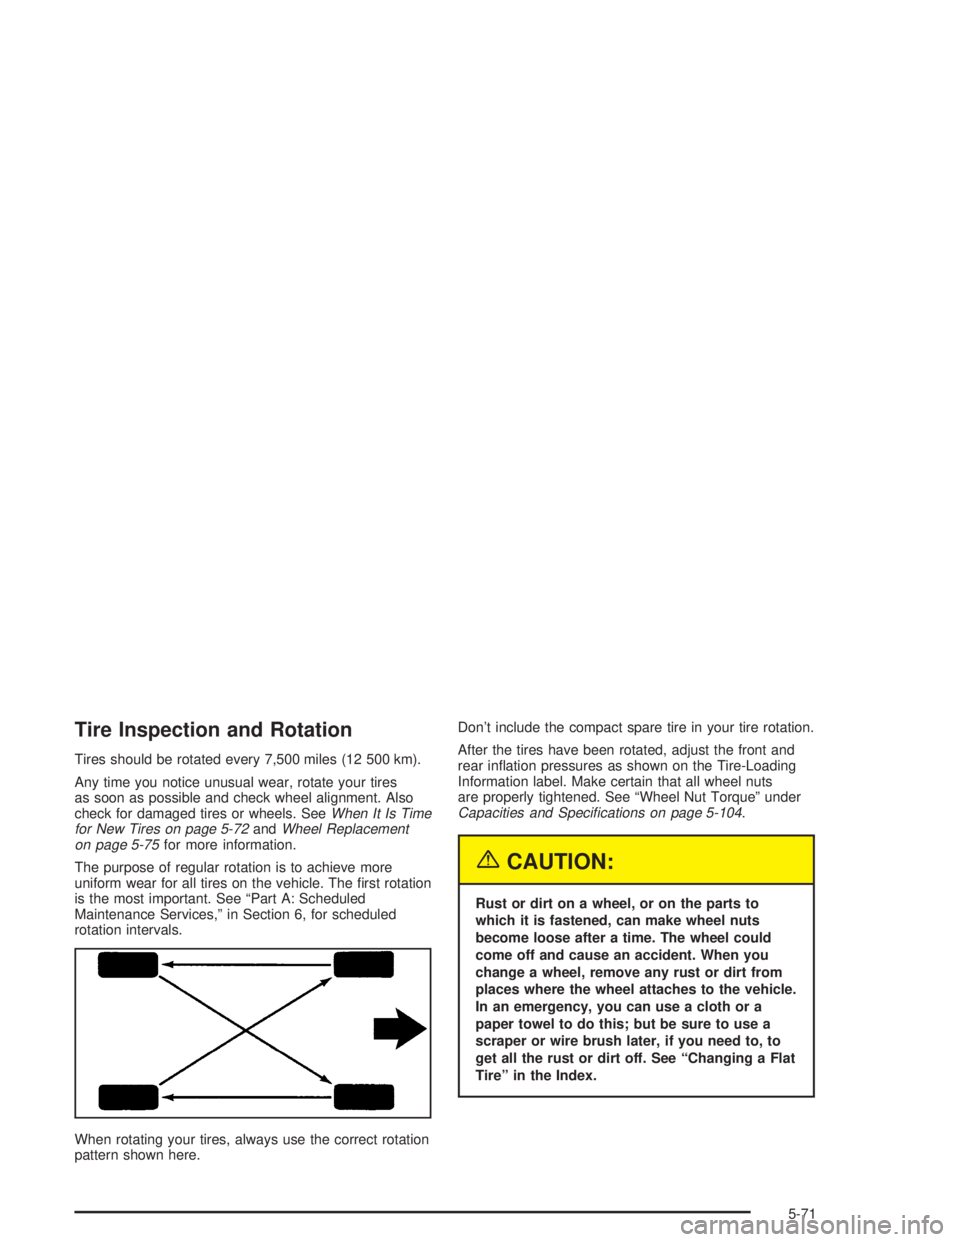
When rotating your tires, always use the correct rotation
pattern shown here.Don't include the compact spare tire in your tire rotation.
After the tires have been rotated, adjust the front and
rear in¯ation pressures as shown on the Tire-Loading
Information label. Make certain that all wheel nuts
are properly tightened. See ªWheel Nut Torqueº under
Capacities and Speci®cations on page 5-104.
{CAUTION:
Rust or dirt on a wheel, or on the parts to
which it is fastened, can make wheel nuts
become loose after a time. The wheel could
come off and cause an accident. When you
change a wheel, remove any rust or dirt from
places where the wheel attaches to the vehicle.
In an emergency, you can use a cloth or a
paper towel to do this; but be sure to use a
scraper or wire brush later, if you need to, to
get all the rust or dirt off. See ªChanging a Flat
Tireº in the Index.
5-71
Page 387 of 432
Maintenance Schedule......................................6-2
Introduction...................................................6-2
Maintenance Requirements..............................6-2
Your Vehicle and the Environment....................6-2
How This Section is Organized.........................6-3
Part A: Scheduled Maintenance Services...........6-4
Using Your Maintenance Schedule....................6-4
Scheduled Maintenance...................................6-5
Part B: Owner Checks and Services................6-10
At Each Fuel Fill..........................................6-10
At Least Once a Month.................................6-10
At Least Twice a Year...................................6-11At Least Once a Year...................................6-11
Part C: Periodic Maintenance Inspections.........6-14
Steering, Suspension and Front Drive Axle
Boot and Seal Inspection............................6-14
Exhaust System Inspection............................6-14
Fuel System Inspection..................................6-14
Engine Cooling System Inspection...................6-15
Throttle System Inspection.............................6-15
Brake System Inspection................................6-15
Part D: Recommended Fluids and Lubricants. . . .6-16
Part E: Maintenance Record...........................6-17
Section 6 Maintenance Schedule
6-1
Page 388 of 432
Maintenance Schedule
Introduction
Important: Keep engine oil at the proper level and
change as recommended.
Have you purchased the GM Protection Plan? The Plan
supplements your new vehicle warranties. See your
Warranty and Owner Assistance booklet or your dealer
for details.
Maintenance Requirements
Maintenance intervals, checks, inspections and
recommended ¯uids and lubricants as prescribed in this
manual are necessary to keep your vehicle in good
working condition. Any damage caused by failure
to follow scheduled maintenance may not be covered by
warranty.
Your Vehicle and the Environment
Proper vehicle maintenance not only helps to keep your
vehicle in good working condition, but also helps the
environment. Improper vehicle maintenance can
even affect the quality of the air we breathe. Improper
¯uid levels or the wrong tire in¯ation can increase
the level of emissions from your vehicle. To help protect
our environment, and to keep your vehicle in good
condition, be sure to maintain your vehicle properly.
6-2
Page 389 of 432
How This Section is Organized
This maintenance schedule is divided into ®ve parts:
ªPart A: Scheduled Maintenance Servicesºexplains
what to have done and how often. Some of these
services can be complex, so unless you are technically
quali®ed and have the necessary equipment, you should
let your GM dealer's service department do these jobs.
Your GM dealer has GM-trained and supported service
people that will perform the work using genuine GM parts.
{CAUTION:
Performing maintenance work on a vehicle can
be dangerous. In trying to do some jobs, you
can be seriously injured. Do your own
maintenance work only if you have the
required know-how and the proper tools and
equipment for the job. If you have any doubt,
have a quali®ed technician do the work.If you want to get the service information, see
Service
Publications Ordering Information on page 7-10.
ªPart B: Owner Checks and Servicesºtells you what
should be checked and when. It also explains what
you can easily do to help keep your vehicle in good
condition.
ªPart C: Periodic Maintenance Inspectionsºexplains
important inspections that your dealer's service
department can perform for you.
ªPart D: Recommended Fluids and Lubricantsºlists
some recommended products necessary to help
keep your vehicle properly maintained. These products,
or their equivalents, should be used whether you do
the work yourself or have it done.
ªPart E: Maintenance Recordºis a place for you to
record and keep track of the maintenance performed on
your vehicle. Keep your maintenance receipts. They
may be needed to qualify your vehicle for warranty
repairs.
6-3