cruise control PONTIAC GRAND PRIX 2005 Owners Manual
[x] Cancel search | Manufacturer: PONTIAC, Model Year: 2005, Model line: GRAND PRIX, Model: PONTIAC GRAND PRIX 2005Pages: 444, PDF Size: 2.6 MB
Page 107 of 444
Instrument Panel Overview...............................3-4
Hazard Warning Flashers................................3-5
Other Warning Devices...................................3-6
Horn.............................................................3-6
Tilt Wheel.....................................................3-6
Turn and Lane-Change Signals........................3-7
Headlamp High/Low-Beam Changer..................3-8
Flash-to-Pass.................................................3-8
Windshield Wiper Lever...................................3-9
Cruise Control..............................................3-10
Exterior Lamps.............................................3-14
Headlamps on Reminder................................3-15
Daytime Running Lamps (DRL).......................3-15
Fog Lamps..................................................3-16
Exterior Lighting Battery Saver........................3-17
Interior Lamps..............................................3-17
Instrument Panel Brightness...........................3-17
Courtesy Lamps...........................................3-18
Entry Lighting...............................................3-18
Delayed Entry Lighting...................................3-18
Delayed Exit Lighting.....................................3-19
Front Reading Lamps....................................3-19
Overhead Console Reading Lamps.................3-19
Rear Assist Handle Reading Lamps................3-19Battery Run-Down Protection..........................3-20
Head-Up Display (HUD).................................3-20
Accessory Power Outlets...............................3-24
Ashtrays and Cigarette Lighter........................3-25
Climate Controls............................................3-26
Climate Control System.................................3-26
Dual Automatic Climate Control System...........3-29
Outlet Adjustment.........................................3-33
Passenger Compartment Air Filter...................3-33
Warning Lights, Gages, and Indicators............3-35
Instrument Panel Cluster................................3-36
Speedometer and Odometer...........................3-37
Tachometer.................................................3-37
Safety Belt Reminder Light.............................3-38
Airbag Readiness Light..................................3-38
Up-Shift Light...............................................3-39
Brake System Warning Light..........................3-40
Anti-Lock Brake System Warning Light.............3-41
Traction Control System (TCS) Warning Light......3-42
Enhanced Traction System Warning Light.........3-42
Engine Coolant Temperature Warning Light......3-43
Engine Coolant Temperature Gage..................3-43
Malfunction Indicator Lamp.............................3-44
Section 3 Instrument Panel
3-1
Page 108 of 444
Oil Pressure Light.........................................3-47
Fog Lamp Light............................................3-47
Cruise Control Light......................................3-48
Highbeam On Light.......................................3-48
Fuel Gage...................................................3-48
Driver Information Center (DIC).......................3-49
DIC Controls and Displays
(Base Level DIC).......................................3-49
DIC Controls and Displays
(Uplevel DIC with Trip Computer)................3-57
DIC Warnings and Messages.........................3-69
Audio System(s).............................................3-92
Setting the Time...........................................3-93
Radio with CD (Base Level)...........................3-93Radio with CD (MP3)..................................3-104
Radio with Six-Disc CD................................3-118
Navigation/Radio System..............................3-132
Theft-Deterrent Feature................................3-132
Audio Steering Wheel Controls......................3-133
Radio Reception.........................................3-134
Care of Your CDs.......................................3-134
Care of Your CD Player...............................3-134
Backglass Antenna......................................3-134
XM™ Satellite Radio Antenna System............3-135
Chime Level Adjustment...............................3-135
Section 3 Instrument Panel
3-2
Page 111 of 444
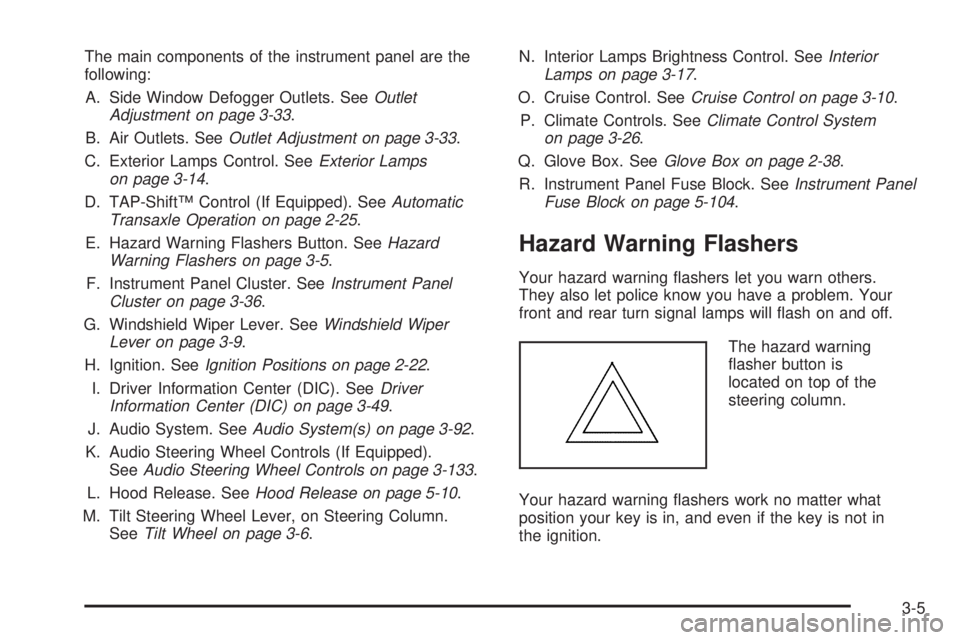
The main components of the instrument panel are the
following:
A. Side Window Defogger Outlets. SeeOutlet
Adjustment on page 3-33.
B. Air Outlets. SeeOutlet Adjustment on page 3-33.
C. Exterior Lamps Control. SeeExterior Lamps
on page 3-14.
D. TAP-Shift™ Control (If Equipped). SeeAutomatic
Transaxle Operation on page 2-25.
E. Hazard Warning Flashers Button. SeeHazard
Warning Flashers on page 3-5.
F. Instrument Panel Cluster. SeeInstrument Panel
Cluster on page 3-36.
G. Windshield Wiper Lever. SeeWindshield Wiper
Lever on page 3-9.
H. Ignition. SeeIgnition Positions on page 2-22.
I. Driver Information Center (DIC). SeeDriver
Information Center (DIC) on page 3-49.
J. Audio System. SeeAudio System(s) on page 3-92.
K. Audio Steering Wheel Controls (If Equipped).
SeeAudio Steering Wheel Controls on page 3-133.
L. Hood Release. SeeHood Release on page 5-10.
M. Tilt Steering Wheel Lever, on Steering Column.
SeeTilt Wheel on page 3-6.N. Interior Lamps Brightness Control. SeeInterior
Lamps on page 3-17.
O. Cruise Control. SeeCruise Control on page 3-10.
P. Climate Controls. SeeClimate Control System
on page 3-26.
Q. Glove Box. SeeGlove Box on page 2-38.
R. Instrument Panel Fuse Block. SeeInstrument Panel
Fuse Block on page 5-104.
Hazard Warning Flashers
Your hazard warning �ashers let you warn others.
They also let police know you have a problem. Your
front and rear turn signal lamps will �ash on and off.
The hazard warning
�asher button is
located on top of the
steering column.
Your hazard warning �ashers work no matter what
position your key is in, and even if the key is not in
the ignition.
3-5
Page 116 of 444

About 30 seconds after the wipers are on, the
headlamps, taillamps, and instrument panel lighting will
come on, and the Driver Information Center (DIC)
back lighting will decrease to the night time mode. About
ten seconds after the wipers are turned off, all the
lamps will go back to the AUTO (Automatic) mode.
Windshield Washer
{CAUTION:
In freezing weather, do not use your washer
until the windshield is warmed. Otherwise the
washer �uid can form ice on the windshield,
blocking your vision.
The windshield washer button is located at the end of
the windshield wiper lever.
K(Washer Fluid):Press this button to activate the
washer �uid to spray onto the windshield. The wipers
will run for a few cycles to clear the windshield. For more
wash cycles, press and hold the button.If the vehicle is low on washer �uid, the LOW WASHER
FLUID message will appear on the Driver Information
Center (DIC) display. See “LOW WASHER FLUID”
underDIC Warnings and Messages on page 3-69for
more information.
Cruise Control
{CAUTION:
Cruise control can be dangerous where you
cannot drive safely at a steady speed. So, do
not use your cruise control on winding roads
or in heavy traffic.
Cruise control can be dangerous on slippery
roads. On such roads, fast changes in tire
traction can cause needless wheel spinning,
and you could lose control. Do not use cruise
control on slippery roads.
3-10
Page 117 of 444
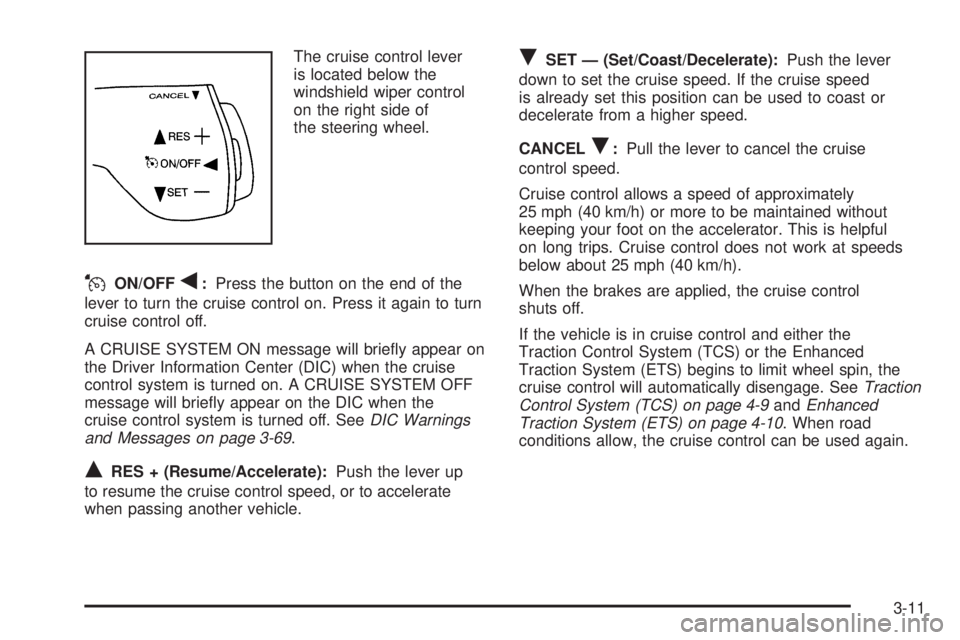
The cruise control lever
is located below the
windshield wiper control
on the right side of
the steering wheel.
JON/OFFq:Press the button on the end of the
lever to turn the cruise control on. Press it again to turn
cruise control off.
A CRUISE SYSTEM ON message will brie�y appear on
the Driver Information Center (DIC) when the cruise
control system is turned on. A CRUISE SYSTEM OFF
message will brie�y appear on the DIC when the
cruise control system is turned off. SeeDIC Warnings
and Messages on page 3-69.
QRES + (Resume/Accelerate):Push the lever up
to resume the cruise control speed, or to accelerate
when passing another vehicle.
RSET — (Set/Coast/Decelerate):Push the lever
down to set the cruise speed. If the cruise speed
is already set this position can be used to coast or
decelerate from a higher speed.
CANCEL
R:Pull the lever to cancel the cruise
control speed.
Cruise control allows a speed of approximately
25 mph (40 km/h) or more to be maintained without
keeping your foot on the accelerator. This is helpful
on long trips. Cruise control does not work at speeds
below about 25 mph (40 km/h).
When the brakes are applied, the cruise control
shuts off.
If the vehicle is in cruise control and either the
Traction Control System (TCS) or the Enhanced
Traction System (ETS) begins to limit wheel spin, the
cruise control will automatically disengage. SeeTraction
Control System (TCS) on page 4-9andEnhanced
Traction System (ETS) on page 4-10. When road
conditions allow, the cruise control can be used again.
3-11
Page 118 of 444
Setting Cruise Control
{CAUTION:
If you leave your cruise control on when you
are not using cruise, you might hit a button
and go into cruise when you do not want to.
You could be startled and even lose control.
Keep the cruise control switch off until you
want to use cruise control.
1. Push the button at the end of the cruise control
lever to turn the cruise control on.
2. Accelerate to the desired speed.
3. Push down on the cruise control lever and release
it. This will set the speed in cruise control.
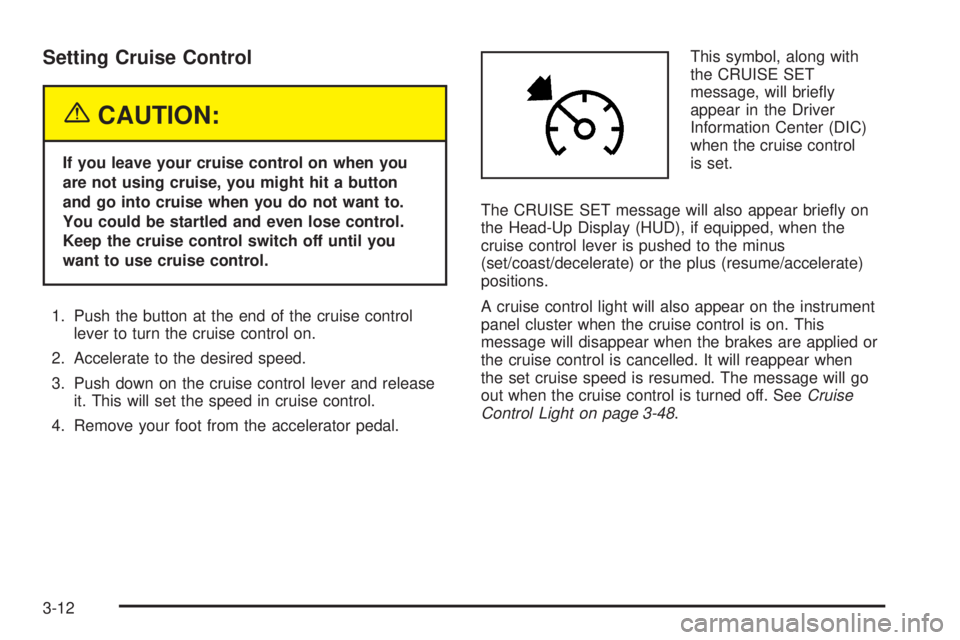
4. Remove your foot from the accelerator pedal.This symbol, along with
the CRUISE SET
message, will brie�y
appear in the Driver
Information Center (DIC)
when the cruise control
is set.
The CRUISE SET message will also appear brie�y on
the Head-Up Display (HUD), if equipped, when the
cruise control lever is pushed to the minus
(set/coast/decelerate) or the plus (resume/accelerate)
positions.
A cruise control light will also appear on the instrument
panel cluster when the cruise control is on. This
message will disappear when the brakes are applied or
the cruise control is cancelled. It will reappear when
the set cruise speed is resumed. The message will go
out when the cruise control is turned off. SeeCruise
Control Light on page 3-48.
3-12
Page 119 of 444
Resuming a Set Speed
If the cruise control is set at a desired speed and then
the brakes are applied, the cruise control shuts off.
But the cruise control does not need to be reset.
Once the vehicle is traveling approximately 25 mph
(40 km/h) or more, the cruise control lever can be
pushed upward toward the plus (resume/accelerate)
position to return to the preset cruise speed.
The vehicle will return to and stay at the preset cruise
speed. If the cruise control lever is pushed up and
held toward the plus (resume/accelerate) position, the
vehicle speed will increase until the lever is released or
the brakes are applied. Do not continue to hold the
lever in the plus (resume/accelerate) position, unless
a faster speed is desired.
Increasing Speed While Using
Cruise Control
There are two ways to go to a higher speed:
Use the accelerator pedal to get to the higher
speed. Push up on the cruise control lever toward
the plus (resume/accelerate) position, then
release the lever and take your foot off the
accelerator pedal. The vehicle will now cruise at
the higher speed.
Push up and hold the cruise control lever toward
the plus (resume/accelerate) position until the
vehicle reaches the desired speed. Then release
the cruise control lever. To increase the vehicle’s
speed in very small amounts, push up brie�y on the
cruise control lever and release it. Each time this
is done, the vehicle will speed up approximately
one mph (1.6 km/h).
The acceleration feature will only work after the cruise
control speed has been set by pushing the cruise control
lever down to the set position.
Reducing Speed While Using
Cruise Control
There are two ways to reduce the vehicle’s speed while
using cruise control:
Push the cruise control lever downward toward the
minus (set/coast/decelerate) position until a lower
speed is reached, then release it.
To slow down in very small amounts, push the
cruise control lever downward toward the minus
(set/coast/decelerate) position brie�y. Each time this
is done, the vehicle will slow down approximately
one mph (1.6 km/h).
3-13
Page 120 of 444
Passing Another Vehicle While Using
Cruise Control
Use the accelerator pedal to increase the vehicle’s
speed. When you take your foot off the pedal, the vehicle
will slow down to the cruise control speed set earlier.
Using Cruise Control on Hills
How well the cruise control will work on hills depends
upon the vehicle’s speed, its load, and the steepness of
the hills. When going up steep hills, the accelerator pedal
might have to be used in order to maintain the vehicle’s
speed. When going downhill, the brakes might have to be
applied, or the transaxle might have to be shifted to a
lower gear to keep the vehicle’s speed down. Doing
either of these things will take the vehicle out of cruise.
It may be better not to use the cruise control if the brakes
constantly have to be applied, or the vehicle continuously
needs to be shifted to a lower gear.
Cancelling Cruise Control
To cancel a cruise control session, pull the cruise
control lever forward, or step lightly on the brake pedal.
Doing either of these things will only end the current
cruise control session, but the set speed will be retained
in memory.
Push the button at the end of the cruise control lever to
turn the system off.
Erasing Speed Memory
When the cruise control or the ignition is turned off, the
cruise control set speed memory is erased.
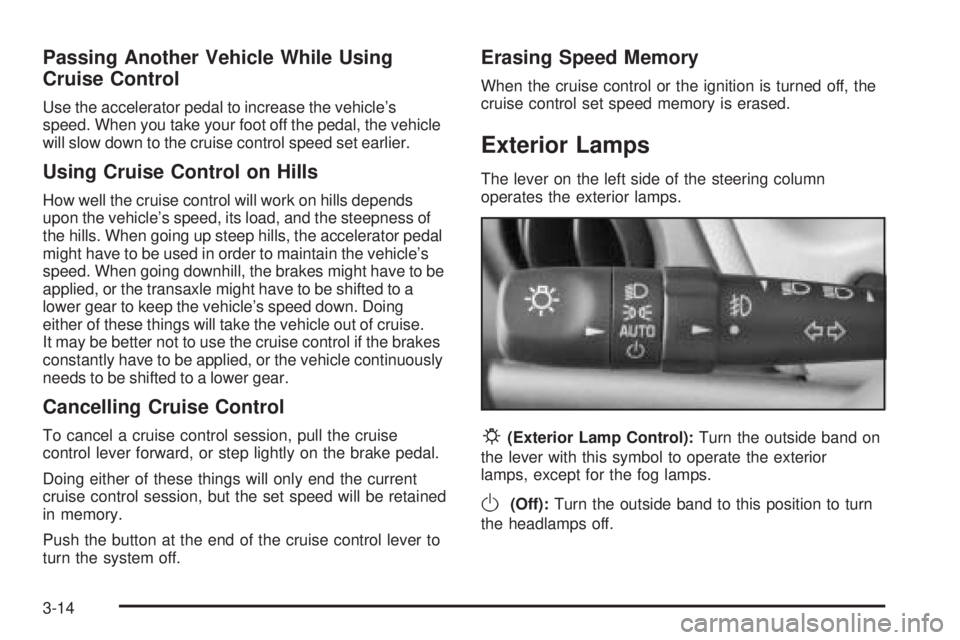
Exterior Lamps
The lever on the left side of the steering column
operates the exterior lamps.
P(Exterior Lamp Control):Turn the outside band on
the lever with this symbol to operate the exterior
lamps, except for the fog lamps.
O(Off):Turn the outside band to this position to turn
the headlamps off.
3-14
Page 127 of 444
The HUD information can be displayed in one of three
languages, English, French, or Spanish. The
speedometer reading and other numerical values can
be displayed in either English or metric units.
The language selection and the units of measurement
are changed through the trip computer in the Driver
Information Center (DIC). See “Options” under
DIC Controls and Displays (Base Level DIC) on
page 3-49orDIC Controls and Displays (Uplevel DIC
with Trip Computer) on page 3-57.
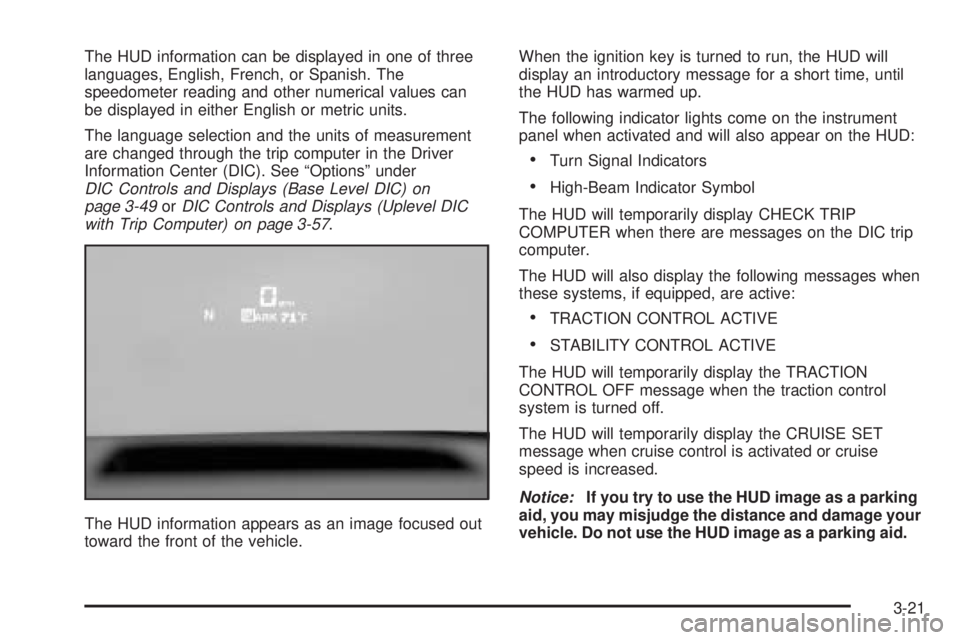
The HUD information appears as an image focused out
toward the front of the vehicle.When the ignition key is turned to run, the HUD will
display an introductory message for a short time, until
the HUD has warmed up.
The following indicator lights come on the instrument
panel when activated and will also appear on the HUD:
Turn Signal Indicators
High-Beam Indicator Symbol
The HUD will temporarily display CHECK TRIP
COMPUTER when there are messages on the DIC trip
computer.
The HUD will also display the following messages when
these systems, if equipped, are active:
TRACTION CONTROL ACTIVE
STABILITY CONTROL ACTIVE
The HUD will temporarily display the TRACTION
CONTROL OFF message when the traction control
system is turned off.
The HUD will temporarily display the CRUISE SET
message when cruise control is activated or cruise
speed is increased.
Notice:If you try to use the HUD image as a parking
aid, you may misjudge the distance and damage your
vehicle. Do not use the HUD image as a parking aid.
3-21
Page 154 of 444

Cruise Control Light
This light, if equipped,
comes on whenever you
set your cruise control.
The light will go out when the cruise control is turned off.
SeeCruise Control on page 3-10for more information.
Highbeam On Light
This light comes on
whenever the high-beam
headlamps are on.
See “Headlamp High/Low-Beam Changer” under
Exterior Lamps on page 3-14for additional information.
Fuel Gage
The fuel gage shows
about how much fuel
is left in the fuel tank
when the ignition is on.
When the indicator nears empty, there is still a little fuel
left, but you should get more soon.
Here are four things owners usually ask about the fuel
gage. All these situations are normal and do not
indicate a problem with the fuel gage:
At the gas station the pump shuts off before the
gage reads full.
It takes more or less fuel to �ll up than the gage
indicates. For example, the gage reads half full, but it
took more or less than half the tank’s capacity to �ll it.
The gage pointer may move while cornering, braking
or speeding up.
The gage may not indicate full when the ignition is
turned off.
3-48