warning PONTIAC GTO 2005 Owners Manual
[x] Cancel search | Manufacturer: PONTIAC, Model Year: 2005, Model line: GTO, Model: PONTIAC GTO 2005Pages: 318, PDF Size: 2.06 MB
Page 1 of 318

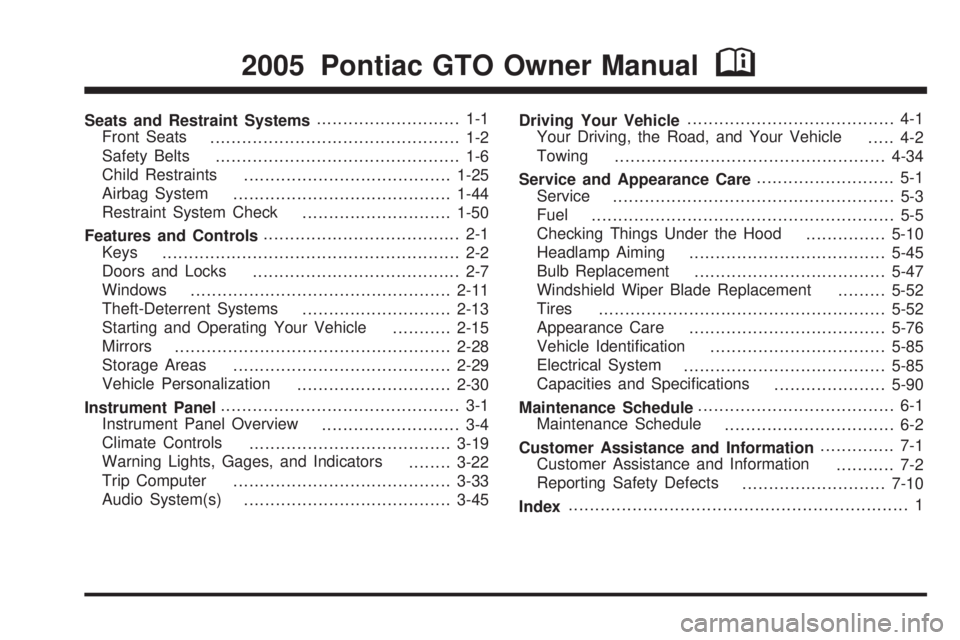
Seats and Restraint Systems........................... 1-1
Front Seats
............................................... 1-2
Safety Belts
.............................................. 1-6
Child Restraints
.......................................1-25
Airbag System
.........................................1-44
Restraint System Check
............................1-50
Features and Controls..................................... 2-1
Keys
........................................................ 2-2
Doors and Locks
....................................... 2-7
Windows
.................................................2-11
Theft-Deterrent Systems
............................2-13
Starting and Operating Your Vehicle
...........2-15
Mirrors
....................................................2-28
Storage Areas
.........................................2-29
Vehicle Personalization
.............................2-30
Instrument Panel............................................. 3-1
Instrument Panel Overview
.......................... 3-4
Climate Controls
......................................3-19
Warning Lights, Gages, and Indicators
........3-22
Trip Computer
.........................................3-33
Audio System(s)
.......................................3-45Driving Your Vehicle....................................... 4-1
Your Driving, the Road, and Your Vehicle
..... 4-2
Towing
...................................................4-34
Service and Appearance Care.......................... 5-1
Service
..................................................... 5-3
Fuel
......................................................... 5-5
Checking Things Under the Hood
...............5-10
Headlamp Aiming
.....................................5-45
Bulb Replacement
....................................5-47
Windshield Wiper Blade Replacement
.........5-52
Tires
......................................................5-52
Appearance Care
.....................................5-76
Vehicle Identification
.................................5-85
Electrical System
......................................5-85
Capacities and Specifications
.....................5-90
Maintenance Schedule..................................... 6-1
Maintenance Schedule
................................ 6-2
Customer Assistance and Information.............. 7-1
Customer Assistance and Information
........... 7-2
Reporting Safety Defects
...........................7-10
Index................................................................ 1
2005 Pontiac GTO Owner ManualM
Page 3 of 318

Safety Warnings and Symbols
There are a number of safety cautions in this book. We
use a box and the word CAUTION to tell about things
that could hurt you if you were to ignore the warning.
{CAUTION:
These mean there is something that could hurt
you or other people.
In the caution area, we tell you what the hazard is.
Then we tell you what to do to help avoid or reduce the
hazard. Please read these cautions. If you do not,
you or others could be hurt.You will also find a circle
with a slash through it in
this book. This safety
symbol means “Do Not,”
“Do Not do this” or “Do Not
let this happen.”
iii
Page 4 of 318

Vehicle Damage Warnings
Also, in this manual you will find these notices:
Notice:These mean there is something that could
damage your vehicle.
A notice tells about something that can damage the
vehicle. Many times, this damage would not be covered
by your vehicle’s warranty, and it could be costly. But
the notice will tell what to do to help avoid the damage.
When you read other manuals, you might see
CAUTION and NOTICE warnings in different colors
or in different words.
There are also warning labels on the vehicle. They use
the same words, CAUTION or NOTICE.
Vehicle Symbols
The vehicle has components and labels that use
symbols instead of text. Symbols are shown along with
the text describing the operation or information
relating to a specific component, control, message,
gage, or indicator.
If you need help figuring out a specific name of a
component, gage, or indicator, reference the
following topics:
•Seats and Restraint Systems in Section 1
•Features and Controls in Section 2
•Instrument Panel Overview in Section 3
•Climate Controls in Section 3
•Warning Lights, Gages, and Indicators in Section 3
•Audio System(s) in Section 3
•Engine Compartment Overview in Section 5
iv
Page 73 of 318

How to Detect a Tamper Condition
The exterior turn signals should flash twice when
returning to your vehicle and pressing UNLOCK on the
key. If they flash three times, an attempted break-in
has occurred while the vehicle was armed. If you wish
to find out what set the alarm off, turn the ignition on
and look at the trip computer display for the ALARM
ACTIVATED message being shown. See “Trip Computer
Warning Messages” underTrip Computer on page 3-33.
The ALARM ACTIVATED message will be displayed
first for one second, followed by the trigger point
screens. The trigger point screens will also be displayed
for one second. If more than one trigger point has
been activated, the display will show each trigger point
screen in sequence for one second, returning back
to the ALARM ACTIVATED screen. The alarm screens
will be shown in a continuous cycle until the trip
computer MODE button is pressed. The center display
then reverts to the last screen shown prior to the
ignition being off.
The possible trigger points are the following:
•The hood has been opened.
•The trunk has been opened.
•One of the doors has been opened.
•Hot wiring of the vehicle was attempted (ignition on
without key inserted).
Starting and Operating Your
Vehicle
New Vehicle Break-In
Notice:Your vehicle does not need an elaborate
break-in. But it will perform better in the long run if
you follow these guidelines:
Keep your speed at 55 mph (88 km/h) or less for
the �rst 500 miles (805 km).
Do not drive at any one speed, fast or slow,
for the �rst 500 miles (805 km). Do not make
full-throttle starts.
Avoid making hard stops for the �rst 200 miles
(322 km) or so. During this time your new brake
linings are not yet broken in. Hard stops with
new linings can mean premature wear and
earlier replacement. Follow this breaking-in
guideline every time you get new brake linings.
2-15
Page 74 of 318

Ignition Positions
The key can be turned to
one of three positions
while in the ignition switch.
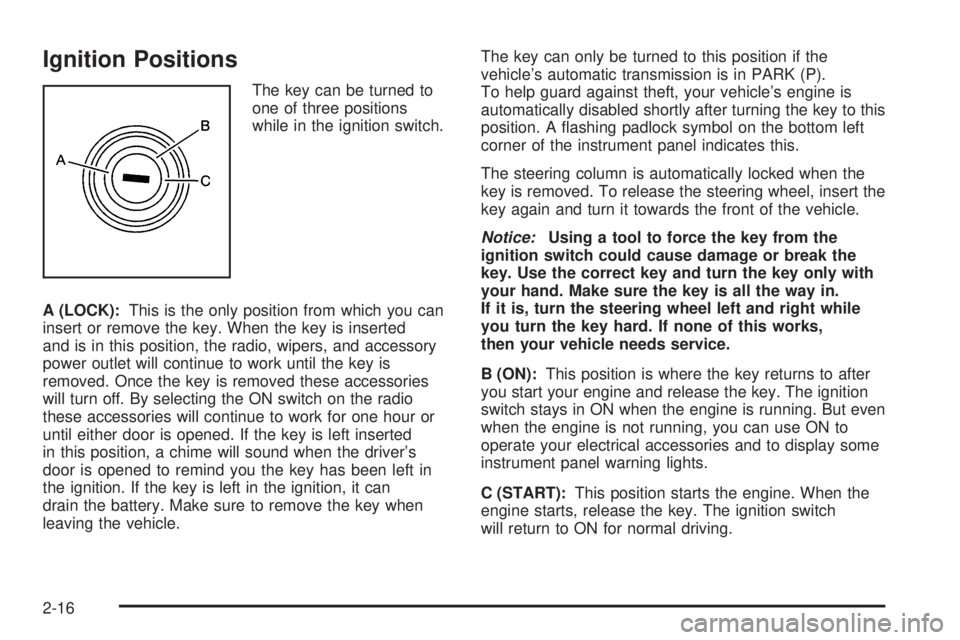
A (LOCK):This is the only position from which you can
insert or remove the key. When the key is inserted
and is in this position, the radio, wipers, and accessory
power outlet will continue to work until the key is
removed. Once the key is removed these accessories
will turn off. By selecting the ON switch on the radio
these accessories will continue to work for one hour or
until either door is opened. If the key is left inserted
in this position, a chime will sound when the driver’s
door is opened to remind you the key has been left in
the ignition. If the key is left in the ignition, it can
drain the battery. Make sure to remove the key when
leaving the vehicle.The key can only be turned to this position if the
vehicle’s automatic transmission is in PARK (P).
To help guard against theft, your vehicle’s engine is
automatically disabled shortly after turning the key to this
position. A flashing padlock symbol on the bottom left
corner of the instrument panel indicates this.
The steering column is automatically locked when the
key is removed. To release the steering wheel, insert the
key again and turn it towards the front of the vehicle.
Notice:Using a tool to force the key from the
ignition switch could cause damage or break the
key. Use the correct key and turn the key only with
your hand. Make sure the key is all the way in.
If it is, turn the steering wheel left and right while
you turn the key hard. If none of this works,
then your vehicle needs service.
B (ON):This position is where the key returns to after
you start your engine and release the key. The ignition
switch stays in ON when the engine is running. But even
when the engine is not running, you can use ON to
operate your electrical accessories and to display some
instrument panel warning lights.
C (START):This position starts the engine. When the
engine starts, release the key. The ignition switch
will return to ON for normal driving.
2-16
Page 81 of 318

After shifting to FOURTH (4), you may downshift to a
lower gear if you prefer.
Notice:Forcing the shift lever into any gear except
FOURTH (4) when the 1 TO 4 SHIFT light comes
on may damage the transmission. Shift only from
FIRST (1) to FOURTH (4) when the light comes on.
This light will come on when:
•The engine coolant temperature is higher than
169°F (76°C),
•you are going 15 to 19 mph (24 to 31 km/h) and
•you are 21 percent throttle or less.
SeeOne-to-Four Shift Light (Manual Transmission) on
page 3-26andTrip Computer on page 3-33for more
information.
Parking Brake
To set the parking brake, pull up on the parking brake
handle without pressing the release button. If the ignition
is on, the brake system warning light will come on.
SeeBrake System Warning Light on page 3-27.
To release the parking brake, hold the regular brake
pedal down. Pull the parking brake handle up until you
can press the release button. Hold the release button
in as you move the brake handle all the way down.
Notice:Driving with the parking brake on can
overheat the brake system and cause premature
wear or damage to brake system parts. Verify that
the parking brake is fully released and the brake
warning light is off before driving.
2-23
Page 89 of 318

Entering Programming Mode
The vehicle programming mode is accessed through the
Options Menu. To access the Options Menu, do one
of the following:
•When the vehicle is
stopped, hold down the
MODE button while
turning the ignition
from LOCK to ON.
The MODE button is
located on the instrument
panel, to the right of
the instrument panel
cluster. The Options
Menu will then display.
•When the vehicle has been started, the system
check completed, and the vehicle speed is less
than 6 mph (10 km/h), the Options Menu will display
for three seconds.
If the vehicle speed exceeds 6 mph (10 km/h),
the Options Menu will disappear, and the display
will return to the previous trip computer function.
The programming mode is not accessible if an alarm
warning has been activated or a warning symbol on
the instrument panel cluster has been triggered.
RQ(Programming Mode Selection):When the
Options Menu is displayed, use the trip computer up or
down arrows to enter the programming mode.
There are help screens available to assist you in
understanding the feature that you are adjusting. If a
menu item is selected and the screen is left for
more than five seconds before making a selection, a
help screen displays to inform you how to operate
the selected feature.
2-31
Page 95 of 318

Instrument Panel Overview...............................3-4
Hazard Warning Flashers................................3-6
Other Warning Devices...................................3-6
Horn.............................................................3-6
Tilt Wheel.....................................................3-6
Turn Signal/Multifunction Lever.........................3-7
Turn and Lane-Change Signals........................3-8
Headlamp High/Low-Beam Changer..................3-8
Flash-to-Pass.................................................3-9
Windshield Wipers..........................................3-9
Windshield Washer.......................................3-10
Cruise Control..............................................3-10
Exterior Lamps.............................................3-13
Headlamps..................................................3-13
Daytime Running Lamps (DRL).......................3-14
Automatic Headlamp System..........................3-14
Fog Lamps..................................................3-15
Instrument Panel Brightness...........................3-15
Courtesy Lamps...........................................3-15
Dome Lamp.................................................3-16
Entry Lighting...............................................3-16
Front Reading Lamps....................................3-16
Trunk Lamp.................................................3-16
Battery Run-Down Protection..........................3-16
Accessory Power Outlets...............................3-17
Ashtrays and Cigarette Lighter........................3-18Climate Controls............................................3-19
Climate Control System.................................3-19
Outlet Adjustment.........................................3-21
Warning Lights, Gages, and Indicators............3-22
Instrument Panel Cluster................................3-23
Speedometer...............................................3-24
Tachometer.................................................3-24
Safety Belt Reminder Light.............................3-24
Airbag Readiness Light..................................3-25
Charging System Light..................................3-26
One-to-Four Shift Light
(Manual Transmission)...............................3-26
Brake System Warning Light..........................3-27
Anti-Lock Brake System Warning Light.............3-27
Engine Coolant Temperature Gage..................3-28
Malfunction Indicator Lamp.............................3-28
Security Light...............................................3-31
Fog Lamp Light............................................3-31
Highbeam On Light.......................................3-31
Daytime Running Lamps (DRL)
Indicator Light...........................................3-32
Fuel Gage...................................................3-32
Trip Computer................................................3-33
Section 3 Instrument Panel
3-1
Page 99 of 318

The main components of the instrument panel are the following:
A. Side Outlets. SeeOutlet Adjustment on page 3-21.
B. Exterior Lamp Controls. SeeInstrument Panel
Brightness on page 3-15andExterior Lamps on
page 3-13.
C. Instrument Panel Cluster. SeeInstrument Panel
Cluster on page 3-23.
D. Windshield Wiper Lever. SeeWindshield Wipers on
page 3-9.
E. Trip Computer Control. SeeTrip Computer on
page 3-33.
F. Outlets. SeeOutlet Adjustment on page 3-21.
G. Hazard Warning Flasher Button. SeeHazard
Warning Flashers on page 3-6.
H. Climate Controls. SeeClimate Control System on
page 3-19.
I. Audio System Controls. SeeAudio System(s) on
page 3-45.J. Cruise Control Lever. SeeCruise Control on
page 3-10.
K. Audio Steering Wheel Controls. SeeAudio Steering
Wheel Controls on page 3-56.
L. Tilt Wheel. SeeTilt Wheel on page 3-6.
M. Horn. SeeHorn on page 3-6.
N. Ignition Switch. SeeIgnition Positions on page 2-16.
O. Shift Lever. SeeAutomatic Transmission Operation
on page 2-18orManual Transmission Operation
on page 2-21.
P. Cupholders. SeeCupholder(s) on page 2-29.
Q. Power Window Switches. SeePower Windows on
page 2-12.
R. Parking Brake. SeeParking Brake on page 2-23.
S. Glove Box. SeeGlove Box on page 2-29.
3-5
Page 100 of 318

Hazard Warning Flashers
Your hazard warning flashers let you warn others. They
also let police know you have a problem. Your front
and rear turn signal lamps will flash on and off.
The hazard warning
flasher button is located
near the center of the
instrument panel.
Your hazard warning flashers work no matter what
position your key is in, and even if the key is not in.
Press the button to make the front and rear turn signal
lamps flash on and off. Press the button again to
turn the flashers off.
When the hazard warning flashers are on, your turn
signals will not work.
Other Warning Devices
If you carry reflective triangles, you can set them up at
the side of the road about 300 feet (100 m) behind
your vehicle.
Horn
Press near or on the horn symbols on your steering
wheel pad to sound the horn.
Tilt Wheel
A tilt wheel allows you to adjust the steering wheel
before you drive. You can raise the steering wheel to
the highest level to give your legs more room when you
enter and exit the vehicle.
The lever that allows you to tilt the steering wheel is
located under the steering column.
3-6