light PONTIAC PONTIAC 1995 Owner's Guide
[x] Cancel search | Manufacturer: PONTIAC, Model Year: 1995, Model line: PONTIAC, Model: PONTIAC PONTIAC 1995Pages: 354, PDF Size: 17.27 MB
Page 127 of 354
Mode Knob
The right knob has several settings to control the
direction
of air flow. For each setting, set the
temperature to a comfortable setting.
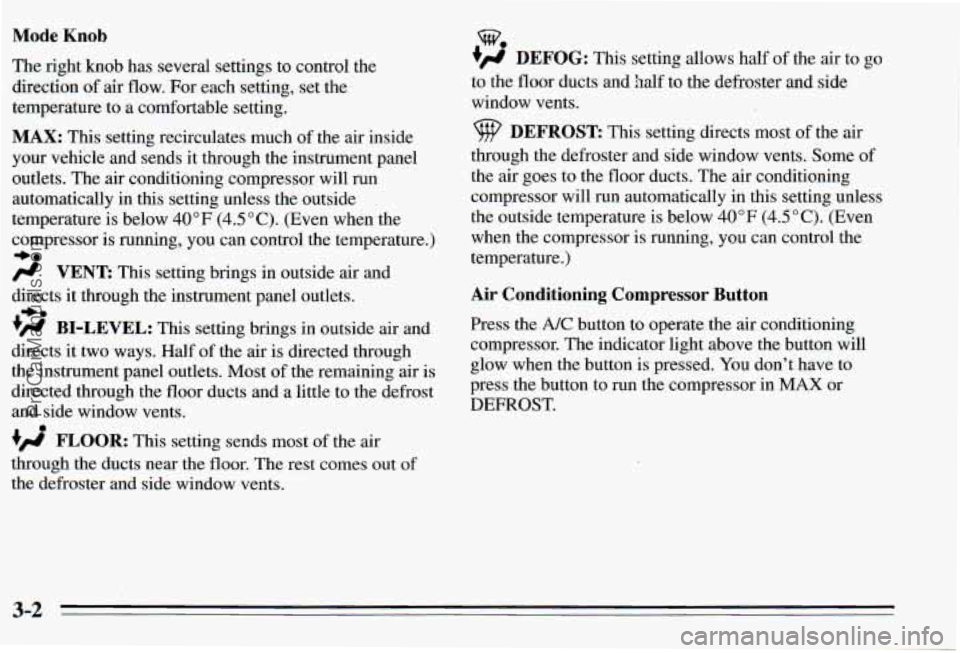
MAX: This setting recirculates much of the air inside
your vehicle and sends
it through the instrument panel
outlets. The air conditioning compressor will run
automatically in this setting unless the outside
temperature is below 40°F (4.5"C). (Even when the
compressor
is running, you can control the temperature.)
-be
/.I VENT This setting brings in outside air and
directs it through the instrument panel outlets.
+' BI-LEVEL: This setting brings in outside air and
directs it two ways. Half of the air is directed through
the instrument panel outlets. Most of the remaining air is
directed through the floor ducts and
a little to the defrost
and side window vents.
FLOOR: This setting sends most of the air
through the ducts near the floor. The rest comes out
of
the defroster and side window vents.
+e
%
+)d DEFOG: This setting allows half of the air to go
to the floor ducts and
half to the defroster and side
window vents.
9 DEFROST: This setting directs most of the air
through the defroster and side window vents. Some of
the air goes to the floor ducts. The air conditioning
compressor will run automatically in this setting unless
the outside temperature
is below 40°F (4.5"C). (Even
when the compressor is running, you can control the
temperature.)
Air Conditioning Compressor Button
Press the A/C button to operate the air conditioning
compressor. The indicator light above the button will
glow when the button is pressed.
You don't have to
press the button to run the compressor in
MAX or
DEFROST.
3-2
ProCarManuals.com
Page 128 of 354
Air Conditioning Heating
On very hot days, open the
windows long enough to
let hot inside air escape. This reduces the time the
compressor has
to run, which should help fuel economy.
For quick cool-down on very hot days,
use MAX with
the temperature knob all the way in the blue area.
If this
setting is used for long periods
of time, the air in your
vehicle may become too dry.
For normal cooling on hot days, use
VENT with the
temperature hob in the blue area and the
A/C button
pushed
in. The system will bring in outside air and cool it.
On cool but sunny days, the sun may warm your upper
body, but your lower body may not be warm enough.
You can use BI-LEVEL with the temperature knob in
the middle and the
A/C button pushed in. The system
will bring in outside air and direct it to your upper body,
while sending slightly warmed air to your lower body.
You may notice this temperature difference more at
some times than others. On
cold days use
FLOOR with the temperature knob all
the way in the red area. The system will bring in outside
air, heat
it and send it to the floor ducts.
If your vehicle has an engine coolant heater, you can use
it to help your system provide warm
air faster when it’s
cold outside (0°F (-lS0C) or lower).
An engine coolant
heater warms the coolant your engine and heating
system use to provide heat. See “Engine Coolant
Heater” in the Index.
Ventilation
For mild outside temperatures when little heating or
cooling is needed, use VENT
to direct outside air
through your vehicle. Your vehicle also has the
flow-through ventilation system described later in this
section.
Defogging and Defrosting Windows
Your system has two settings for clearing the front and
side windows. To defrost the windows quickly, use
DEFROST with the temperature knob all the way in the
red area. To warm passengers while keeping the
windows clean, use DEFOG.
3-3
ProCarManuals.com
Page 132 of 354
Optional AM/F” Stereo Radios
If your Pontiac has a radio with a cassette tape player,
a compact disc player or a graphic equalizer, the
instructions below will explain how to use the radio.
For other features, see the instructions
for the feature
your radio has.
Playing the Radio
Push POWER to turn the system on or off.
VOL: Turn this knob clockwise to increase volume.
Turn it counterclockwise to decrease volume.
RECALL: Press this button briefly to recall the station
being played or the clock display.
If you press the button
when the ignition
is off, the clock will show for a few
seconds.
Finding a Station
AMm: Press this button to get AM, FMl or FM2.
The display shows your selection.
TUNE: Press this knob lightly so it extends. Turn it to
choose radio stations. Push the knob back in when
you’re not using
it.
SEEK: Press the up or down arrow to go to the next
higher
or lower station.
Presets: The six pushbuttons let you return to your
favorite stations. You can set up to
18 stations (6 AM,
6 FM1 and 6 FM2).
1. Press AMRM to select the band.
2. Find the station you want.
3. Press and hold one of the six numbered butt S.
4. The sound will mute. When it returns and SET
appears on the display, release the button.
Whenever you press that numbered button, the station
you set will return.
Adjusting the Speakers
BAL: Press this knob lightly so it extends. Turn the
knob
to move the sound to the left or right speakers. The
middle position is
a detent and balances the speakers.
FADE: Press the knob lightly so it extends. Turn the
knob to move the sound to the front or rear speakers.
The middle position is
a detent and balances the
speakers.
Push the knob back in when you’re not using
it.
3-7
ProCarManuals.com
Page 137 of 354
Entering a Code Unlocking the System
1.
2.
3.
4.
5.
6.
7.
8.
9.
Write down any number from 000 to 1999. This is
your code.
Turn the ignition to ACC or
RUN.
Turn the radio off.
Press the
1 and 4 preset buttons at the same time and
hold until
“- - -” shows-on the display.
You now have only 15 seconds between each of the
following steps.
Press MIN and
“000” will appear on the display.
Press
MIN again and hold until the last two digits of
your code appear.
Press and hold
HR until the first digit or digits of
your code appear.
Press
A” after you make sure the code matches
the one you wrote down. “rEP” will appear on the
display, meaning you should repeat Steps
5 through 7.
After you repeat the steps, press A”. SEC
should appear on the display, meaning your system is
secured.
If your ignition is off, the THEmZOCK
indicator light on the radio face will flash.
Store the paper with your code written on it in
a safe
place (not in your vehicle).
If battery power is removed €or any reason, LOC will
appear on
the display when power is reapplied. You will
need to enter your code to unlock the system. You have
only 15 seconds between each of the following steps.
1. Turn the ignition on. LOC will appear on the display.
2. Press MIN and “000” will appear on the display.
3. Press MIN again and hold until the last two digits of
4. Press and hold HR until the first digit or digits of
your code appear.
your
code appear.
5. Press AM/FM after you make sure the code matches
the one you wrote down.
SEC should appear on the
display, meaning you can now use your system, and.
it is secured. If LOC appears, you entered the wrong
code and the system is still locked.
If you enter the wrong code eight times, InOP will
appear on the display. You will have to wait an hour
with the ignition on before you can try again. When you
try again, you will only have
three chances to enter the
correct code before InOP appears.
If you lose or forget your code and cannot unlock the
system, contact you dealer.
3-12
ProCarManuals.com
Page 140 of 354
Care of Your Cassette Tape Player
A tape player that is not cleaned regularly is subject to
reduced sound quality, ruining the cassette,
or damaging
the mechanism. Tape cassettes that are not properly
stored in their plastic cases away from contaminants,
direct sunlight, and extreme heat may not operate
properly and could cause premature failure
of the tape
player.
Your tape player should be cleaned with every
50 hours
of use to provide optimum performance. Your radio may
display Cln to indicate that you have used your tape
player for
50 hours without resetting the tape clean
timer. If you notice a reduction in sound quality,
regardless of when the tape player was last cleaned, try
playing a different cassette to see if the tape or the tape
player is at fault. If the second cassette results in no
improvement in sound quality, try cleaning the tape
player.
Proper tape player cleaning should be done with a
scrubbing action, nonabrasive cleaner cassette. This is a
wet-type cleaning system that uses a cleaning cassette
with pads which scrub the tape head as the hubs of the
cleaner cassette turn.
To properly clean your tape player,
follow the instructions with the cleaning cassette. If you
use this type
of cleaner, the radio may display an error
and eject the cartridge. This
is normal and is the result
of an added feature in the tape player that detects broken
tapes.
If an error occurs, you will need to insert the
cleaning cassette at least three times to thoroughly clean the tape player.
You may prefer to use a non-scrubbing action, wet-type
cleaner.
This type of cleaner uses a fabric belt to clean
the tape head.
This type of cleaner cassette will not
cause an error, but it may not clean the tape player as
thoroughly as the scrubbing type cleaner.
A scrubbing action cleaner is available through your
dealer
(GM Part No. 12344600).
Cassettes are subject to wear and the sound quality may
degrade over time. Always verify that the cassette tape is in good condition and the tape player is clean before
obtaining service
on your tape player.
Care of Your Compact Discs
Handle discs carefully. Store them in their original cases
or other protective cases and away from direct sunlight
and dust. If the surface of a disc is soiled, dampen a
clean, soft cloth in a mild, neutral detergent solution and
clean it, wiping from the center to the edge.
Be sure never to touch the signal surface when handling
discs. Pick up discs by grasping the outer edges or the
edge of the hole and the outer edge.
3-15
ProCarManuals.com
Page 141 of 354
Fixed Mast Antenna
The fixed mast antenna can withstand most car washes
without being damaged.
If the mast should ever become
slightly bent, you can straighten it out by hand. If the
mast is badly bent, as it might be by vandals, you should
replace it.
Check
every once in a while to be sure the mast is still
tightened to the fender.
Power Antenna Mast Care
Your power antenna will look its best and work well if
it’s cleaned from time to time.
TO clean the antenna
mast:
1. Turn on the ignition and radio to raise the antenna.
2. Dampen a clean cloth with mineral spirits or
equivalent solvent.
3. Wipe .e cloth over the mast sections, removing any
4. Wipe dry with a clean cloth.
dirt.
5. Make the antenna go up and down by turning the
radio or ignition off and on.
6. Then repeat if necessary.
I NOTICE:
Don’t lubricate the power antenna. Lubrication
could damage
it.
1 NOTICE:
Before entering an automatic car wash, turn off
your radio to make the power antenna go down.
This will prevent the mast from possibly getting
damaged. If the antenna does not go down when
you turn the radio
off, it may be damaged or
need to be cleaned. In either case, lower the
antenna by hand by carefully pressing the
antenna
down.
If the mast portion of your antenna is damaged, you can
easily replace it. See your retailer for a replacement kit
and follow the instructions in the kit.
3-16
ProCarManuals.com
Page 150 of 354
I
260L 0 0 instrument panel will come
And this
light on the
R p M x1 000 on briefly when you start
your vehicle.
When you start your vehicle, or when you begin to drive
away, you may hear a momentary motor or clicking
noise. And you may even notice that your brake pedal moves a little while this is going on.
This is the ABS
system testing itself.
If there’s a problem with the
anti-lock brake system, the anti-lock brake system
warning light will stay on or flash.
See “Anti-Lock Brake System Warning Light” in the
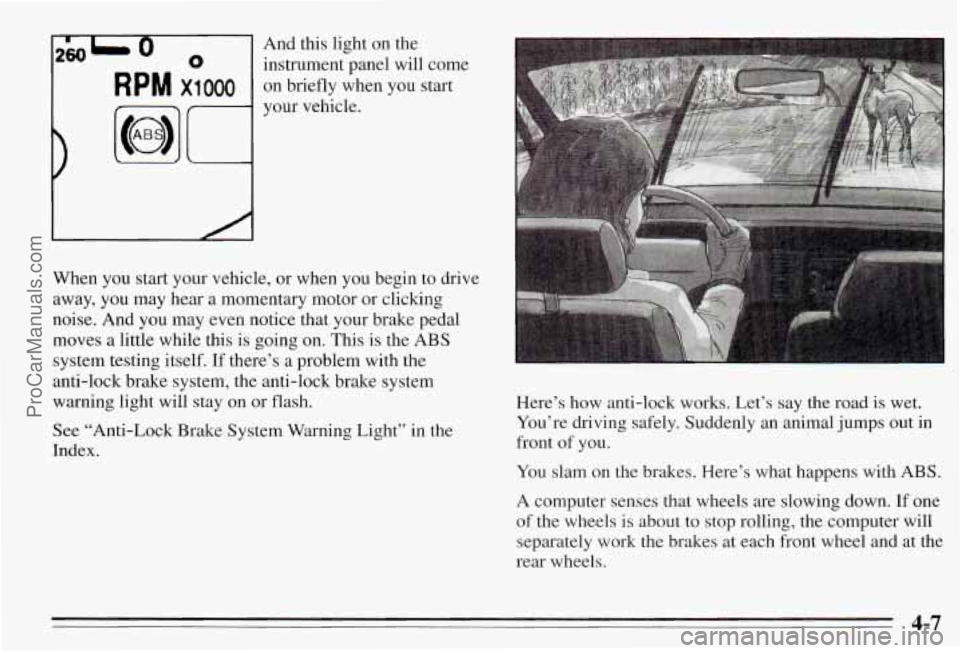
Index. Here’s how anti-lock works. Let’s say the road
is wet.
You’re driving safely. Suddenly an animal jumps out
in
front of you.
You slam on the brakes. Here’s what happens with
ABS.
A computer senses that wheels are slowing down. If one
of the wheels is about
to stop rolling, the computer will
separately work the brakes at each front wheel and at the
rear wheels.
~~
4-7
ProCarManuals.com
Page 151 of 354
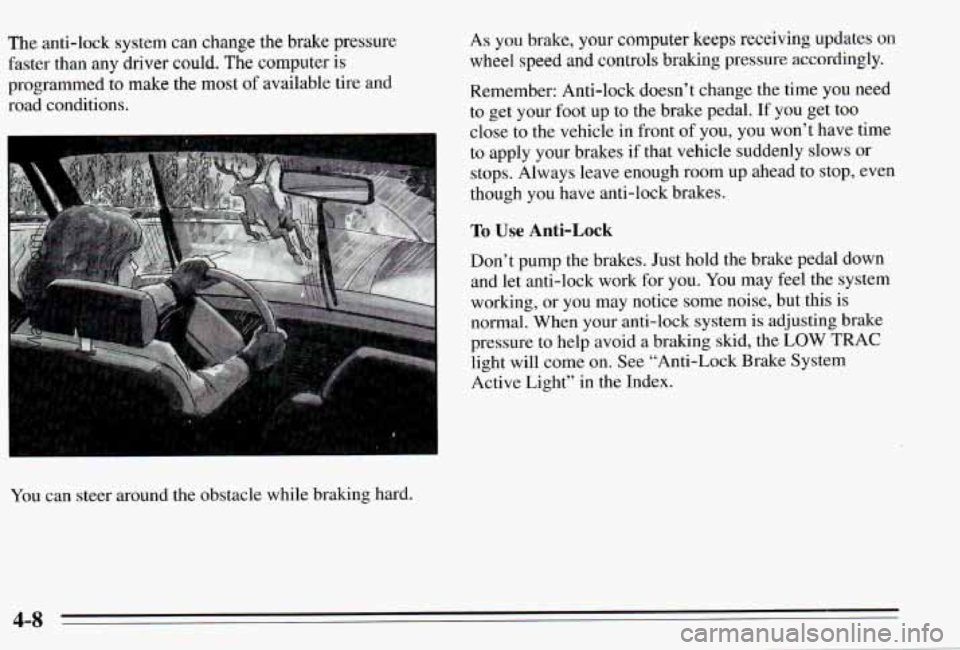
The anti-lock system can change the brake pressure
faster than any driver could.
The computer is
programmed to make the most of available tire and
road conditions.
You can steer around
the obstacle while braking hard.
As you brake, your computer keeps receiving updates on
wheel speed and controls
braking pressure accordingly.
Remember: Anti-lock doesn’t change the time
you need
to get your foot up to the brake pedal.
If you get too
close to the vehicle in front
of you, you won’t have time
to apply your brakes if that vehicle suddenly slows or stops. Always leave enough room up ahead to stop, even
though you have anti-lock brakes.
To Use Anti-Lock
Don’t pump the brakes. Just hold the brake pedal down and let anti-lock work for you. You may feel the system
working, or you may notice some noise, but this is
normal. When your anti-lock system is adjusting brake
pressure to help avoid a braking skid, the
LOW TRAC
light will come on. See “Anti-Lock Brake System
Active Light” in the Index.
4-8
ProCarManuals.com
Page 154 of 354
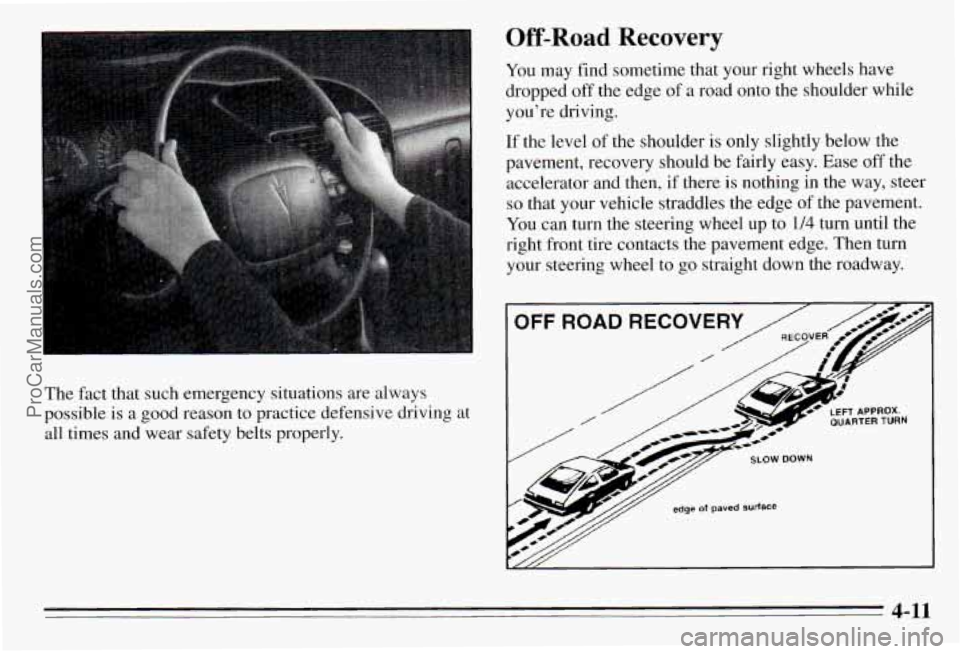
The fact that such emergency situations are always
possible
is a good reason to practice defensive driving at
all times and wear safety belts properly.
Off-Road Recovery
You may find sometime that your right wheels have
dropped off the edge of a road onto the shoulder while
you’re driving.
If the level
of the shoulder is only slightly below the
pavement, recovery should be fairly easy. Ease off the
accelerator and then, if there is nothing in the way, steer
so that your vehicle straddles the edge of the pavement.
You can turn the steering wheel up to 1/4 turn until the
right front tire contacts the pavement edge. Then turn
your steering wheel to go straight down the roadway.
4-11
ProCarManuals.com
Page 156 of 354
0 Check your mirrors, glance over your shoulder, and
start your left lane change signal before moving out
of the right lane to pass. When you are far enough
ahead of the passed vehicle to see its front in your
inside mirror, activate your right lane change signal
and move back into the right lane. (Remember that
your right outside mirror is convex. The vehicle you
just passed may seem to be farther away from you
than it really
is.)
Try not to pass more than one vehicle at a time on
two-lane roads. Reconsider before passing the next
vehicle.
Don’t overtake a slowly moving vehicle too rapidly.
Even though the brake lights are not flashing,
it may
be slowing down or starting to turn.
If you’re being passed, make it easy for the
following driver to get ahead of you. Perhaps you
can ease a little to the right.
Loss of Control
Let’s review what driving experts say about what
happens when the three control systems (brakes, steering
and acceleration) don’t have enough friction where the
tires meet the road to do what the driver has asked.
In any emergency, don’t give up. Keep trying to steer
and constantly seek an escape route or area of less
danger.
Skidding
In a skid, a driver can lose control of the vehicle.
Defensive drivers avoid most skids by taking reasonable
care suited to existing conditions, and by not
“overdriving” those conditions. But skids are always
possible.
The three types of skids correspond to your Pontiac’s
three control systems. In the braking skid your wheels
aren’t rolling.
In the steering or cornering skid, too
much speed or steering in a curve causes tires to slip and
lose cornering force. And in the acceleration skid too
much throttle causes the driving wheels to spin.
A cornering skid and an acceleration skid are best
handled by easing your foot off the accelerator pedal.
4-13
ProCarManuals.com