light PONTIAC PONTIAC 1995 Workshop Manual
[x] Cancel search | Manufacturer: PONTIAC, Model Year: 1995, Model line: PONTIAC, Model: PONTIAC PONTIAC 1995Pages: 354, PDF Size: 17.27 MB
Page 238 of 354
Brakes
Brake Master Cylinder
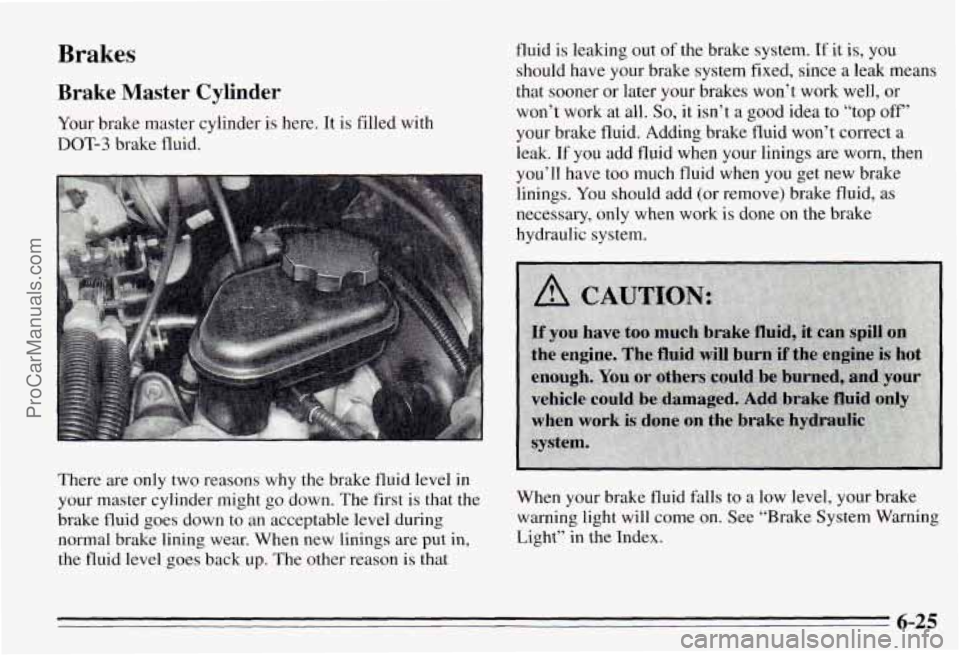
Your brake master cylinder is here. It is filled with
DOT-3 brake fluid.
There are only two reasons why the brake fluid level
in
your master cylinder might go down. The first is that the
brake fluid goes down to an acceptable level during
normal brake lining wear. When new linings are put in,
the fluid level goes back up. The other reason is that fluid is leaking out
of the brake system. If
it is, you
should have your brake system fixed, since a leak means
that sooner or later your brakes won’t work well, or
won’t work at all.
So, it isn’t a good idea to “top off’
your brake fluid. Adding brake fluid won’t correct a
leak.
If you add fluid when your linings are worn, then
you’ll have
too much fluid when you get new brake
linings.
You should add (or remove) brake fluid, as
necessary, only when work
is done on the brake
hydraulic system.
When your brake fluid falls
to a low level, your brake
warning light will come on. See “Brake System Warning
Light” in the Index.
6-25
ProCarManuals.com
Page 240 of 354

Some driving conditions or climates may cause a brake
squeal when the brakes are first applied or lightly
applied. This does not mean something is wrong with
your brakes.
Brake linings should always be replaced as complete
axle sets.
Brake Pedal Travel
See your dealer if the brake pedal does not return to
normal height, or
if there is a rapid increase in pedal
travel. This could be a sign
of brake trouble.
Brake Adjustment
Every time you make a moderate brake stop, your disc
brakes adjust for wear.
If you rarely make a moderate or
heavier stop, then your brakes might not adjust correctly.
If you dnve in that way, then -- very carefully -- make
a few moderate brake stops about every 1,000 miles
(1 600 km), so your brakes will adjust properly.
Replacing Brake System Parts
The braking system on a modern vehicle is complex.
Its many parts have to be
of top quality and work well
together
if the vehicle is to have really good braking.
Vehicles we design and test have top-quality
GM brake
parts in them, as your Pontiac does when it is new.
When you replace parts
of your braking system -- for
example, when your brake linings wear down
and you
have to have new ones put in
-- be sure you get new
genuine
GM replacement parts. If you don’t, your
brakes may no longer work properly.
For example, if
someone puts in brake linings that are wrong for your
vehicle, the balance between your front and rear brakes
can change
-- for the worse. The braking performance
you’ve come to expect can change in many other ways
if
someone puts in the wrong replacement brake parts.
6-27
ProCarManuals.com
Page 243 of 354
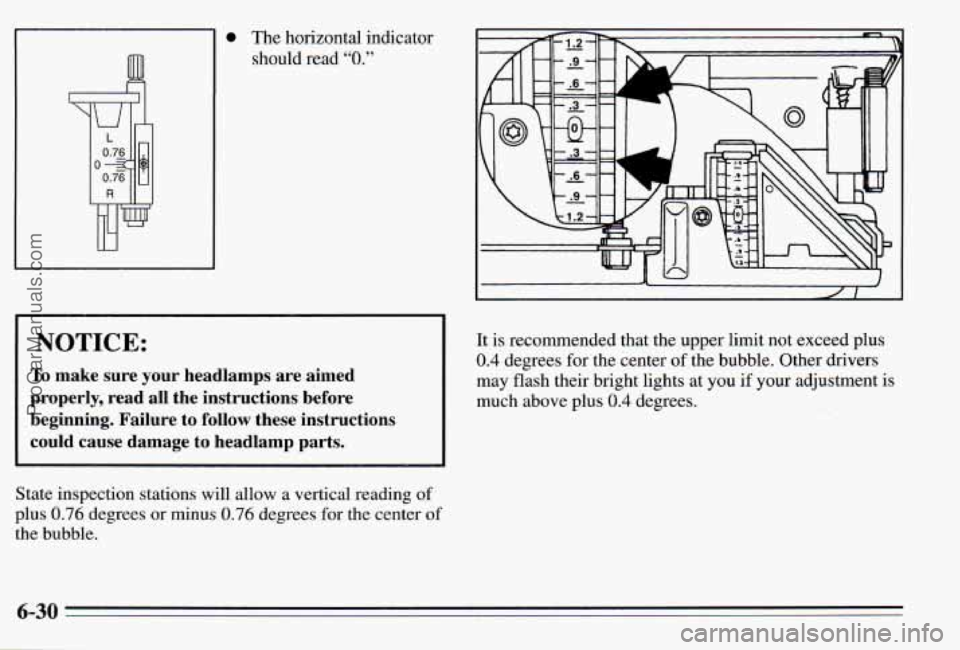
0 The horizontal indcator
should read
“0.”
I NOTICE:
To make sure your headlamps are aimed
properly, read all the instructions before
beginning. Failure to follow these instructions
could cause damage to headlamp parts.
~ ~ ~~
State inspection stations will allow a vertical reading of
plus 0.76 degrees or minus 0.76 degrees for the center of
the bubble.
It is recommended that the upper limit not exceed plus
0.4 degrees for the center of the bubble. Other drivers
may flash their bright lights at you
if your adjustment is
much above plus
0.4 degrees.
6-30
ProCarManuals.com
Page 268 of 354

Don’t use any of these unless this manual says you can.
In many uses, these will damage your vehicle:
Alcohol
Laundry Soap
Bleach
0 Reducing Agents
Cleaning the Inside of Your Pontiac
Use a vacuum cleaner often to get rid of dust and loose
dirt. Wipe vinyl or leather with a clean, damp cloth.
Your Pontiac dealer has two
GM cleaners, a
solvent-type spot lifter and a foam-type powdered
cleaner. They will clean normal spots and stains very
well. Do not use them on vinyl or leather.
Here are some cleaning tips:
0 Always read the instructions on the cleaner label.
Clean up stains as soon as you can -- before they set.
Use a clean cloth or sponge, and change to a clean area
often.
A soft brush may be used if stains are stubborn.
0 Use solvent-type cleaners in a well-ventilated area
only.
If you use them, don’t saturate the stain.ed area.
If a ring forms after spot cleaning, clean the entire
area immediately or it will set.
Using Foam-mpe Cleaner on Fabric
0
0
e
0
0
0
0
0
0
0
Vacuum and brush the area to remove any loose dirt.
Always clean a whole trim panel
or section. Mask
surrounding trim along stitch or welt lines.
Mix Multi-Purpose Powdered Cleaner following the
directions on the container label.
Use suds only and apply with a clean sponge.
Don’t saturate the material.
Don’t rub it roughly.
As soon as you’ve cleaned the section, use a sponge
to remove the suds.
Rinse the section with a clean, wet sponge.
Wipe
off what’s left with a slightly damp paper towel
or cloth.
Then
dry it immediately with a blow dryer or a heat lamp.
NOTICE:
Be careful. A blow dryer or a heat lamp may
scorch the fabric.
0 Wipe with a clean cloth.
6-55
ProCarManuals.com
Page 269 of 354

Using Solvent-Type Cleaner on Fabric
First, see if you have to use solvent-type cleaner at all.
Some spots and stains will clean off better with just
water and~mild soap.
If you need to use a solvent:
0 Gently scrape excess soil from the trim material
with a clean, dull knife or scraper. Use very little
cleaner, light pressure and clean cloths (preferably
cheesecloth). Cleaning should
start at the outside
of the stain, “feathering” toward the center. Keep
changing
to a clean section of the cloth.
When you clean a stain from fabric, immediately dry
the area with a blow dryer to help prevent a cleaning
ring. (See the previous
NOTICE.)
Special Cleaning Problems
Greasy or Oily Stains
Stains caused by grease, oil, butter, margarine, shoe
polish, coffee with cream, chewing gum, cosmetic
creams, vegetable oils, wax crayon, tar and asphalt can
be removed as follows:
0 Carefully scrape off excess stain.
Follow the solvent-type instructions described
Shoe polish, wax crayon, tar and asphalt will stain if
left on
a vehicle seat fabric. They should be removed
as
soon as possible. Be careful, because the cleaner
will dissolve them and may cause them to spread.
earlier.
Non-Greasy Stains
Stains
caused by catsup, coffee (black), egg, fruit, fruit
juice,
milk, soft drinks, wine, vomit, urine and blood can
be removed as follows:
0 Carefully scrape off excess stain, then sponge the
If a stain remains, follow the foam-type instructions
soiled area with
cool water.
described earlier.
6-56
ProCarManuals.com
Page 270 of 354

0 If an odor lingers after cleaning vomit or urine,
treat the area with a waterhaking soda solution:
1 teaspoon (5 ml) of baking soda to 1 cup (250 ml)
of lukewarm water.
0 If needed, clean lightly with solvent-type cleaner.
Combination Stains
Stains caused by candy, ice cream, mayonnaise, chili
sauce and unknown stains can be removed as follows:
Carefully scrape off excess stain, then clean with
cool water and allow to dry.
If a stain remains, clean it with solvent-type cleaner.
Cleaning Vinyl
Use warm water and a clean cloth.
0 Rub with a clean, damp cloth to remove dirt. You
may have to do
it more than once.
Things like tar, asphalt and shoe polish will stain if
you don’t get them off quickly. Use a clean cloth and
a
GM vinylheather cleaner.
ueaning Leather
Use a soft cloth with lukewarm water and a mild soap or
saddle
soap.
For stubborn stains, use a GM vinyl/leather cleaner.
0 Never use oils, varnishes, solvent-based or abrasive
cleaners, furniture polish or shoe polish on leather.
Soiled leather should be cleaned immediately. If dirt
is allowed to work into finish, it can harm the
leather.
Cleaning the Top of the Instrument Panel
Use only mild soap and water to clean the top surfaces
of the instrument panel. Sprays containing silicones or
waxes may cause annoying reflections in the windshield
and even make it difficult to see through the windshield
under certain conditions.
6-57 ProCarManuals.com
Page 278 of 354
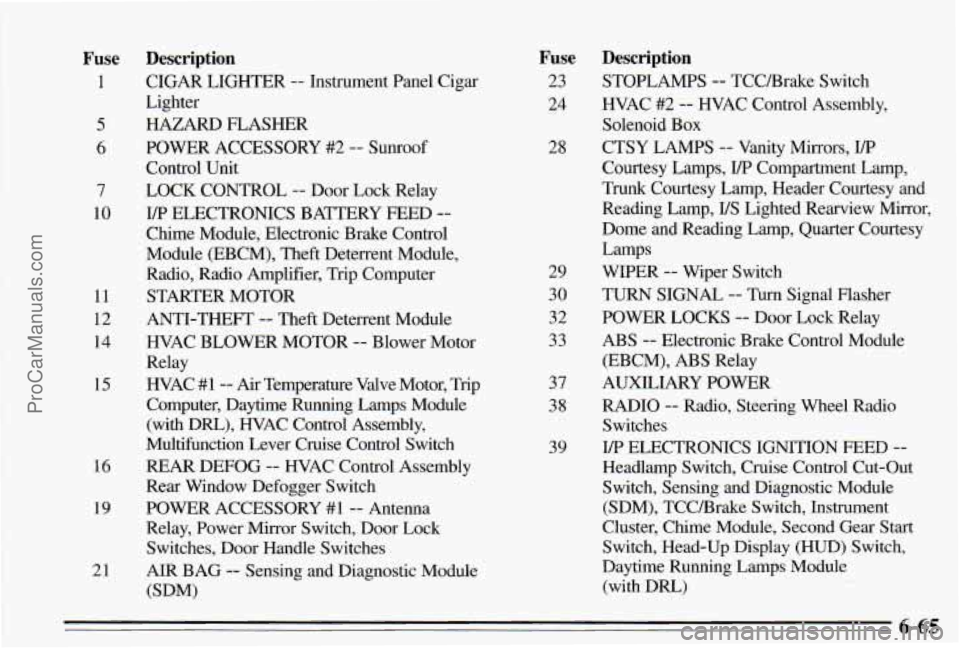
Fuse
1
5
6
7
10
11
12 14
15
16
19
21
Description
CIGAR LIGHTER -- Instrument Panel Cigar
Lighter
HAZARD FLASHER
Control Unit
LOCK CONTROL
-- Door Lock Relay
Chime Module, Electronic Brake Control
Module (EBCM), Theft Deterrent Module,
Radio, Radio Amplifier, Trip Computer
STARTER MOTOR
ANTI-THEFT
-- Theft Deterrent Module
WAC BLOWER MOTOR
-- Blower Motor
Relay
WAC
#1-- Air Temperature Valve Motor, Trip
Computer, Daytime Running Lamps Module
(with Dm), WAC Control Assembly,
Multifunction Lever Cruise Control Switch
REAR DEFOG -- WAC Control Assembly
Rear Window Defogger Switch
POWER ACCESSORY
#1 -- Antenna
Relay, Power Mirror Switch, Door Lock Switches, Door Handle Switches
AIR BAG -- Sensing and Diagnostic Module
@DM)
POWER ACCESSORY
#2 -- SUIKOO~
YP ELECTRONICS
BATTERY FEED --
Fuse
23
24
28
29
30
32
33
37
38
39
Description
STOPLAMPS -- TCCBrake Switch
HVAC #2
-- HVAC Control Assembly,
Solenoid Box
CTSY LAMPS
-- Vanity Mirrors, VP
Courtesy Lamps, I/P Compartment Lamp,
Trunk Courtesy Lamp, Header Courtesy and
Reading Lamp,
US Lighted Rearview Mirror,
Dome and Reading Lamp, Quarter Courtesy
WIPER
-- Wiper Switch
TURN SIGNAL
-- Turn Signal Flasher
POWER LOCKS
-- Door Lock Relay
ABS -- Electronic Brake Control Module
(EBCM),
ABS Relay
AUXILIARY POWER
RADIO
-- Radio, Steering Wheel Radio
Switches
Headlamp Switch, Cruise Control Cut-Out Switch, Sensing and Diagnostic Module
(SDM), TCCBrake Switch, Instrument
Cluster, Chime Module, Second Gear Start
Switch, Head-Up Display
(HUD) Switch,
Daytime Running Lamps Module
(with Dm)
Lamps
I/P ELECTRONICS IGNITION FEED --
6-65 ProCarManuals.com
Page 283 of 354

Replacement Bulbs
Exterior.Lamps Bulb- Number
Back-up .................................. 3057
Roof-Mounted
........................... 891T2
Shelf-Mounted
............................ 2355
2-Door Models
............................ H3
4-Door Models ............................ 881
2-Door Models
........................ 3057NA
4-Door Models
............................ 889
2-Door Models
...................... H4352 (U)
4-Door Models ........................... 9005
2-Door Models ...................... H435 1 (L)
4-DaorModels 9006
License Plate
................................ 194
LightBar. Front
............................ 3057
Light
Bar Panel. Rear ......................... 194
Sidemaker. Front
2-Door Models
............................. 24
4-Daor Models
.......................... 24NA
Sidemmker. Rear
............................. 194
Stop/'I'aW'hrn Signal ........................ 3057
Center High-Mounted
Stop
Fag Front Parking/Turn Signal
I Headlamp, High Beam
Headlamp. Low Beam
...........................
I
6-70 ~-
Interior Lamps Bulb Number
Ashtray .................................... 194
Center Instrument Cluster
............ 161. 194. 194R
Courtesy Dome
.................................... 561
Door
............................. 562or212-2
Instrument Panel
........................... 194
Windshield Header
................. 562 or 212-2
GloveBox
.................................. 194
Heater and Air Conditioning Control
...... T- 11.5 .O. T-
Instrument Cluster Indicator ................. PC 161
High-Beam Indicator
......................... 161
Luggage Compartment
........................ 920
Reading Dome
..................................... 24
Inside Rearview Mirror
...................... 192
RearSeat
.................................. 906
Windshield Header
.................. 562 or 212-2
Turn Signal Indicator ...................... PC161
Visor Vanity
................................. 74
ProCarManuals.com
Page 342 of 354
Section 9 Index
.
ABS ......................................... 4-6
Accessory Outlet
............................... 2-42
Adding Automatic Transaxle Fluid
..................... 6- 18
BrakeFluid
................................. 6-26
Electrical Equipment
............... 2-14,3-14, 6-63
Engine Coolant
............................... 6-20
Engineoil
.................................. 6-12
Power Steering Fluid
......................... 6-23
Windshield Washer Fluid
...................... 6-24
AimingHeadlamps
............................. 6-29
AirBag
....................................... 1-23
How Does It Restrain
......................... 1-26
How It Works
............................... 1-25
Location
................................... l-28
Readiness Light ........................ 1-24, 2-51
Servicing
................................... 1-28
What Makes It Inflate
......................... 1-26
What Will You See After It Inflates
.............. 1-27
When Should It Inflate
........................ 1-26
Aircleaner
.................................... 6-15
Air Conditioning
................................ 3-3
Air Conditioning Refrigerants
..................... 6-72
Air Conditioning with Electronic Controls ............ 3-1
SoundEquipment
............................ 3-14
Alignment and Balance. Tires
..................... 6-52
Aluminum Wheels. Cleaning
...................... 6-60
Antenna. Fixed Mast
............................ 3-16
Antenna. Power Mast Care
....................... 3-16
Antifreeze
..................................... 6-19
Anti-Lock Brake System Active Light
.............. 2-54
Anti-Lock Brake System Warning Light
......... 2-53. 4.7
Anti-Lock Brakes
............................... 4-6
Anti-Theft Feature. Theftlock
..................... 3-15
Appearance Care and Materials
.................... 6-62
Armrest. Storage
............................... 2-41
Ashtrays, Rear
................................. 2-45
Audio System, Steering Wheel Touch Controls
....... 3-17
Audio Systems
.................................. 3-5
Auto-Down Window ............................ 2-27
Automatic Door Locks
............................ 2-4
Automatic Transaxle
............................ 2-16
First Gear (1) Position
........................ 2-19
Neutral
(N) Position .......................... 2-17
Overdrive (D) Position
........................ 2-18
Park (P) Position
........................ 2-16. 7-38
Reverse (R) Position
.......................... 2-17
Second Gear (2) Position
...................... 2-19
Appearancecare
............................... 6-54
Ashtrays. Front
................................. 2-44
9-1 ProCarManuals.com
Page 343 of 354
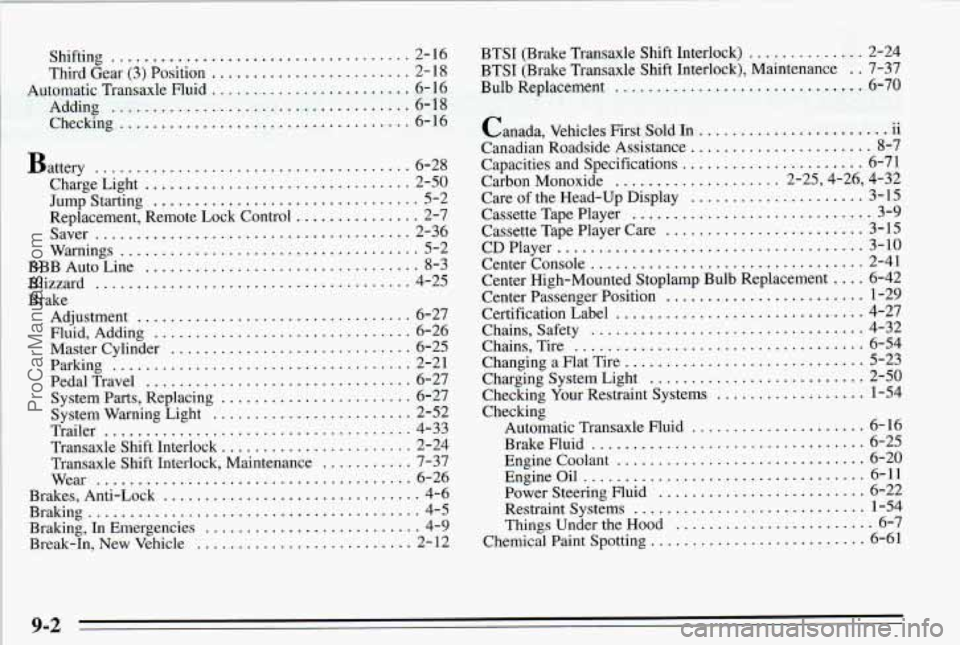
Shifting .................................... 2- 16
Third Gear (3) Position
........................ 2-18
Automatic Transaxle Fluid
........................ 6- 16
Adding
.................................... 6-18
Checking ................................... 6-16
Battery
...................................... 6-28
Charge Light
................................ 2-50
Jump Starting
................................ 5-2
Replacement. Remote Lock Control
............... 2-7
Saver
...................................... 2-36
Warnings
.................................... 5-2
BBB Auto Line
................................. 8-3
Blizzard
...................................... 4-25
Brake Adiustment
................................. 6-27
Fliid. Adding
............................... 6-26
Master Cylinder
............................. 6-25
System Parts, Replacing
....................... 6-27
System Warning Light
........................ 2-52
Trailer
..................................... 4-33
Transaxle Shift Interlock
....................... 2-24
Transaxle Shift Interlock, Maintenance
........... 7-37
Brakes, Anti-Lock
............................... 4-6
Braking
........................................ 4-5
Braking, In Emergencies
.......................... 4-9
Break-In,
New Vehicle .......................... 2-12
Parking
.................................... 2-21
PedalTravel
................................ 6-27
Wear
...................................... 6-26 BTSI (Brake Transaxle Shift Interlock)
.............. 2-24
Bulb Replacement
.............................. 6-70
BTSI (Brake Transaxle Shift InterIock). Maintenance . . 7-37
Canada. Vehicles First Sold In
11 .. .......................
Canadian Roadside Assistance ...................... 8-7
Capacities and Specifications
...................... 6-71
Carbon Monoxide
.................... 2.25.4.26. 4.32
Care
of the Head-Up Display ..................... 3-15
Cassette Tape Player
............................. 3-9
Cassette Tape Player Care ........................ 3-15
CDPlayer
..................................... 3-10
Center Console
................................. 2-41
Center High-Mounted Stoplamp Bulb Replacement
.... 6-42
Center Passenger Position
........................ 1-29
Certification Label
.............................. 4-27
Chains, Safety
................................. 4-32
Chains, Tire ................................... 6-54
Changing
a Flat Tire ............................. 5-23
Charging System Light
.......................... 2-50
Checking Your Restraint Systems
.................. 1-54
Automatic Transaxle Fluid
..................... 6-16
Engine Coolant
.............................. 6-20
EngineOil
.................................. 6-11
Power Steering Fluid
......................... 6-22
Restraint Systems
............................ 1-54
Chemical Paint Spotting
.......................... 6-61
Checking
BrakeFluid
................................. 6-25
Things Under the Hood
......................... 6-7
ProCarManuals.com