manual radio set PONTIAC PONTIAC 1996 User Guide
[x] Cancel search | Manufacturer: PONTIAC, Model Year: 1996, Model line: PONTIAC, Model: PONTIAC PONTIAC 1996Pages: 370, PDF Size: 17.69 MB
Page 146 of 370
Setting the Tone BASS:
Slide the lever to the right or left to increase or
decrease bass.
TREBLE: Slide the lever to the right or left to increase
- or decrease treble. If a station is weak or noisy, slide the
lever down to reduce the noise.
Adjusting the Speakers
BAL: Press this knob lightly so it extends. Turn it to
move the sound to the left or right speakers. Use the
middle position
to balance these speakers. Push the knob
back in when you’re not using it.
FADE: Press this knob lightly so it extends. Turn it to
middle position to balance these speakers. Push the hob
back in when you’re not using it.
playing a Compact Disc
The integral CD player can play 8 cm “single”
mini-discs. Full-size compact discs and mini-discs are
loaded in the same manner.
Insert a discl partway into the slot, label side up. The
player will pull it in. The compact disc symbol will
appear on the display.
If the ,ignition is on, but the radio
is
off, the disc will begin playing. CD will appear’on the
I move the sound to the front or rear speakers. Use the display.
If you
want to insert a disc when the ignition is
off, first press EJECT.
If you’re driving on a very rough road or if it’s very hot,
the disc may not play and E (error) and a number may
appear on the radio display. If the disc comes out, it
could be that:
The disc is upside down.
It is dirty, scratched or wet.
The air is very humid. (If so, wait about an hour and
If any error occurs repeatedly or if an error can’t be
corrected, please contact your dealer. If your radio
displays an error number, write it down and provide it to
your dealer when reporting the problem.
RECALL: Press this button to see what track is playing.
Press it again within five seconds to see how long it has
been playing (elapsed time).
The track number also
,appears when the disc is inserted, you change the
volume or when a new track starts playing.
PREV (1): Press this button or the SEEK down arrow to
go
to the start of the current track if more than eight
seconds have played. If you hold the button
or press it
more than once, the player will continue moving back
through the disc. try again.)
..
3-15 I’
ProCarManuals.com
Page 148 of 370

Finding a Station
AM-FM: Press this button to get AM, FM1 or FM2.
The display shows your selection.
TUNE: Press this knob lightly so it extends. Turn it to
choose radio stations. Push the knob back in when
you're not using it.
SEEK: Press the up or down arrow to go to the next
higher or lower station.
PUSHBUTTONS: The six numbered pushbuttons let
you return to your favorite stations. You can set up to
18 stations (six AM, six FM 1 and six Fh42).
1. Press AM-FM to select the band.
Setting the Tone
2. Find the station you want by using TUNE or SEEK.
3. Press and hold one of the six numbered buttons until
.SET appears on the display. Whenever you press that
numbered button, the stati'on you set will return.
4. Repeat the steps for each pushbutton.
EQUALIZER: A seven band equalizer is part of your
audio system. Slide the levers up to boost or down to
reduce frequency range.
Adjusting the Speakers
BAL:
Press this knob lightly so it extends. Turn it to.
move the sound to the left or right speakers.
Use the
middle position to balance these speakers. Push the knob
back in when you're not using it.
,FADE: Press this knob lightly so it extends. Tuh it to
move the sound
to the front or rear speakers. Use the
middle position to balance these speakers. Push the knob
back in when you're not using it.
Playing a Compact Disc
The integral CD player can play 8 cm "single"
mini-discs. Full-size compact discs and mini-discs
are
loaded in the same manner. /
Insert a disc partway into the slot, label side up. The
player will pull
it in. If the ignition is on, but the radio is
off, the disc will begin playing. If you want to insert a
disc when the ignition is off, first press EJECT.
ProCarManuals.com
Page 152 of 370
,Steering Wheel Controls (Option)
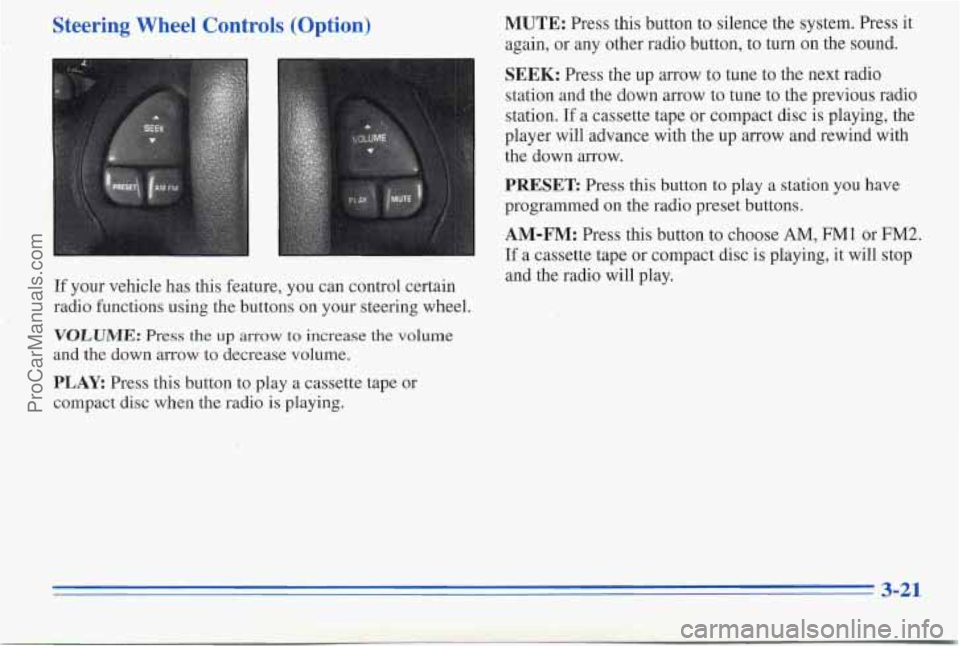
If your vehicle nas this feature, you can control certain
radio functions using the buttons on your steering wheel.
VOLUME: Press the up arrow to increase the volume
and the down arrow to decrease volume.
PLAY Press this button to play a cassette tape or
compact disc when the radio is playing.
MUTE: Press this button to silence the system. Press it
again, or any other radio button, to turn
on the sound.
SEEK: Press the up arrow to tune to the next radio
station and the down arrow to tune to the previous radio
station. If
a cassette tape or compact disc is playing, the
player will advance with the up arrow and rewind with
the down arrow.
PRESET Press this button to play a station you have
programmed on the radio preset buttons.
AM-FM: Press this button to choose AM, FM1 or FM2.
If a cassette tape or compact disc is playing, it will stop
and the radio will play.
3-21
ProCarManuals.com
Page 153 of 370

Understanding Radio Reception
FM stereo will give you the best sound. But FM signals
will reach only about
10 to 40 miles (16 to 65 h). Tall
buildings or hills can interfere with
FM signals, causing
the sound to come and
go..
AM
The range for mast tatians is greater than for FM,
especially at night. nger range, however, can
cause stations to in with each other. AM can pick
up noise from things'like storms and power lines. Try
reducing the treble to reduce this noise if you ever get it.
Tips About Your Audio System
Hearing damage from loud noise is almost undetectable
until it is too late. Your hearing can adapt to higher
volumes of sound. Sound
that seems normal can be loud
and harrrrful to your hearing Take precautions by
adjusting
the volume control on your radio to a safe
sound level before your hearing adapts to it.
To help avoid hearing loss or damage:
0 Adjust the volume control to the lowest setting.
Increase volume slowly until you hear comfortably
and clearly.
NOTICE:
Before you add any sound equipment to your
vehicle
-- like a tape player, CB radio, mobile
telephone
or two-way raclio -- be sure you can
add what you want. If you can, it's very important
to do it properly. Added sound equipment may
interfere with the operation of your vehicle's
engine, Delco radio or other systems, and even
damage them.
Your vehicle's systems may
interfere
with the operation of sound equipment
that
Ras been added'improperly.
So, before adding sound equipment, check with
your dealer and be sure to check Federal rules
covering mobile radio and telephone units. 1
3-22
ProCarManuals.com
Page 154 of 370

Care of Your Cassette Tape Player
A tape player that is not cleaned regularly can cause
reduced sound quality, ruined cassettes or a damaged
mechanism. Cassette tapes should be stored
in their
cases away from contaminants, direct sunlight and
extreme heat. If they aren't, they may not operate
properly or may cause failure of the tape player.
Your tape player should be cleaned regularly after every
50 hours of use. Your radio may display CLN, to indicate
that
you have used your tape player' for 50 hours without
resetting the kpe clean mer.
If you notice a reduction in
sound quality, try a known good cassette to see if the tape
or
the tape player is at fault. If this other cassette has no
improvement in sound quality, clean the tape player.
Cleaning may
be done with a scrubbing action,
non-abrasive cleaning cassette with pads which scrub
the tape head as the hubs of the cleaner cassette
turn. It
is normal for the cassette to eject while cleaning. Insert
the cassette at least three times to ensure thorough
cleaning.
A scrubbing action cleaning cassette is
available through your ,Pontiac dealer.
You may also choose a non-scrubbing action; wet-type
cleaner which uses a cassette with a fabric belt
to clean
the tape head. TKS type of cleaning cassette will not eject.
It may not clean
as thoroughly as the scrubbing
type cleaner.
Cassettes are subject to wear and the sound quality may
degrade over time. Always
make sure that the cassette
tape is in good condition before you have your tape
player serviced.
Care of Your Compact Discs,
Handle discs carefully. Store them in their original cases
,or other protective cases and away from direct sunlight
and dust.
If the surface of a disc is soiled, dampen a
clean, soft cloth in a mild, neutral detergent solution and
clean it, wiping from the center to the edge.
Be sure never to touch the signal surface when handling
discs. Pick up discs
by grasping the outer edges or the
edge of the hole and the outer edge. -,
Fixed Mast Antenna
I
.. r '. . .. x, '
The fixed mast antenna can withstand most car washes
without being damaged. If the mast should ever become
slightly bent, you can straighten it out by hand.
If the
mast is badly bent, as
it might be by vandals, you should
replace
it.
Check every once in a while to be sure the mast is still
tightened to the fender.
I
3-23
ProCarManuals.com
Page 196 of 370
2. Get the vehicles close enough so the jumper cables
can reach, but be sure the vehicles aren’t touching
each other. If they are, it could cause a ground
connection
you don’t want. You wouldn’t be able to
start your Pontiac, and the bad grounding could
damage the electrical systems.
You could be injured if the vehicles roll. Set the
parking brake firmly on each vehicle. Put an
automatic transaxle in
PARK (P) or a manual
transaxle in NEUTRAL
(N).
3. Turn off the ignition on both vehicles. Turn off all
lamps that aren’t needed, and radios. This will avoid
sparks and help save both batteries. And it could
save your radio!
I NOTICE.: I
If you leave your radio on, it could be badly
damaged. The repairs wouldn’t be covered by
your warranty. An
electric fan can start up even when the
t ,he
is not running and can injure you. Keep hands,
clothing and tools away from any underhood electric fan.
4. Find the positive (+) and negative (-) terminals on
each battery. Your Pontiac has a remote positive (+)
jump starting terminal. The terminal is on the same
side of the engine compartment as your battery. You
should always use the remote positive
(+) terminal
instead of the positive
(+) terminal on your battery.
To uncover the remote positive (+) terminal, Lift the
red plastic cap.
5-3
ProCarManuals.com