headlamp PONTIAC PONTIAC 1997 Owners Manual
[x] Cancel search | Manufacturer: PONTIAC, Model Year: 1997, Model line: PONTIAC, Model: PONTIAC PONTIAC 1997Pages: 419, PDF Size: 19.67 MB
Page 75 of 419

v Section 2 Features and Controls
Here you can learn about the many standard and optional features on your Pontiac, and information on starting,
shifting and braking. Also explained are the instrument panel and the warning systems that tell you if everything is
working properly
-- and what to do if you have a problem.
2-2
2-4
2-8
2- 10
2-12
2-15
2-15
2- 16
2-18
2-19
2-24
2-29
2-30
2-3 1
Important Information About Keys
Door Locks
Remote Keyless Entry Battery Replacement for RKE
Preventing Theft
of Your Vehicle
New Vehicle “Break-In”
Ignition Positions
Tips on Starting Your Engine
Using the Engine Coolant Heater
Automatic Transaxle Operation
Parking Brake Guidelines
Important Information on Engine Exhaust
Operation of Your Windows
Adjusting the Tilt Steering Wheel 2-32
2-33
2-33
2-35
2-3 8
2-39
2-40
2-5 3
2-54
2-62
2-64
2-78
2-83
Functions of the Multifunction Lever
How to Use the HighLow Beam
Headlamp Changer
Windshield Wipers and Fluid
Using Cruise Control
Exterior Lamps
Daytime Running Lamps
(DRL)
Interior Lamps
Rearview Mirrors
Storage Compartments
Instrument Panel Overview
All About Your Warning Lights and Gages
Driver Information Center
Head-Up Display
2-1
ProCarManuals.com
Page 83 of 419

Operation
3-Button Key Fob 4-Button Key Fob
Remote All Door Lock
To lock all doors, press LOCK on the key chain
transmitter (see “Power Door Locks” in the Index
for more details
on power door lock features). If your
vehicle is equipped with the Content Theft-Deterrent system, the
LOCK button may arm the system
(see “Content Theft-Deterrent” in the Index for
more details).
Remote Driver’s Door and All Door Unlock
When you press UNLOCK on the key chain transmitter,
only the driver’s door will unlock.
If you press
UNLOCK again within five seconds, all the doors will
unlock.
If you would like all doors to unlock the first
time you press UNLOCK, see “Locks and Lighting
Choices” in the Index. If your vehicle
is equipped with
the Content Theft-Deterrent system, the UNLOCK
button on the key chain transmitter will disarm the
system (see “Content Theft-Deterrent” in the Index
for more details).
Remote Trunk Release
Press the trunk symbol on your key chain transmitter to
open your trunk. The transaxle must be in PARK (P) for
this feature to operate.
Remote Alarm (If Equipped)
When you press the horn button on the key chain
transmitter, your vehicle’s headlamps will flash and the
horn will sound. This will allow you to attract attention,
if needed.
Remote Lock/Unlock Confirmation (If Equipped)
This feature provides feedback to the holder of the key
chain transmitter that a command has been received by
2-9
ProCarManuals.com
Page 84 of 419

the Remote Lock Control receiver. To signal that a
command has been received, the headlamps will flash
and the horn will sound briefly.
To program the various
modes available, see “Locks and Lighting Choices” in
the Index.
Matching Transmitter(s) To Your Vehicle
Each key chain transmitter is coded to prevent another
transmitter
from unlocking your vehicle. If a transmitter
is lost or stolen, a replacement can ble purchased through
your dealer. Remember to bring any remaining
transmitters
with you when you go to your dealer. When
the dealer matches the replacement transmitter to your
vehicle, any remaining transmitters must also be matched.
Once your dealer has coded the new transmitter, the lost
transmitter will not unlock your vehicle. Each vehicle
can
have only four transmitters matched to it,
Battery Replacement
Under normal use, the battiry in your remote keyless
entry transmitter should last about two years.
You can tell
the battery is weak if the transmitter won’t
work at the
normal range in any location. If you have to
get close to your vehicle before
the transmitter works, it’s
probably time
to change the battery.
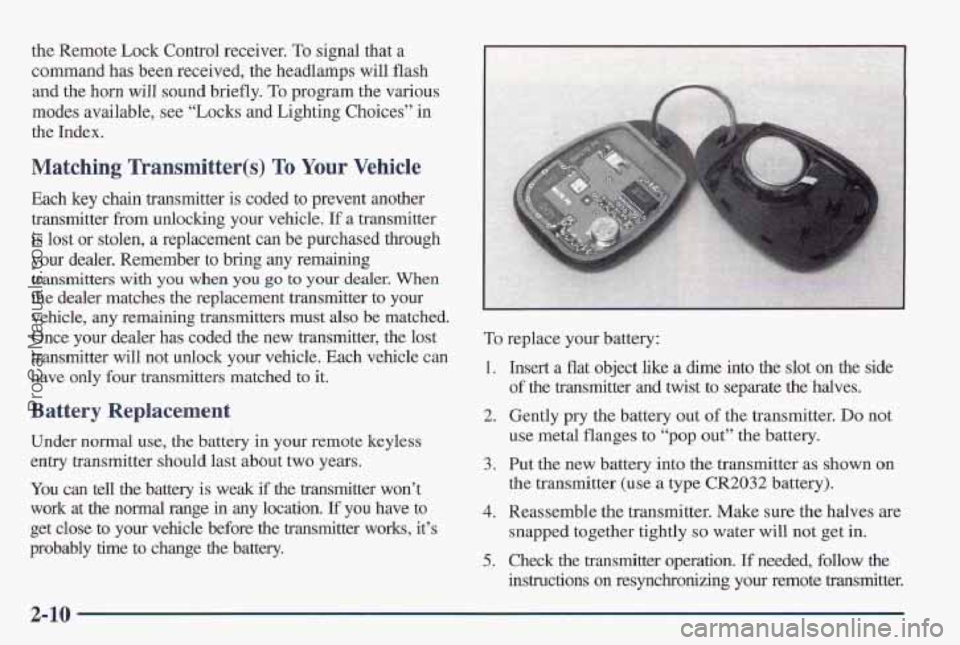
To replace your battery:
1.
2.
3.
4.
5,
Insert a flat object like a dime into the slot ‘on the side
of the trmsdtter md twist to separate the halves.
Gently
pry the battery out of the transmitter. Do not
use metal flanges to “pop out” the battery.
Put
the new battery into the transmitter as shown on
the transmitter
(use a type CR2032 battery).
Rleassemblle the transmitter. Make sure the halves are
snapped together tightly so water will not get in,
Check the transmitter operation. If needed, follow the
instructions on resynchronizing your remote transmi~r.
2-10
ProCarManuals.com
Page 87 of 419

Parking at Night
Park in a lighted spot, close all windows and lock your
vehicle. Remember to keep your valuables out of sight.
Put them in a storage area,
or take them with you.
Parking Lots
If you park in a lot where someone will be watching
your vehicle, it’s best to lock
it up and take your keys.
But what
if you have to leave your ignition key? What if
you have to leave something valuable in your vehicle?
Put your valuables in a storage area, like your trunk
or glove box.
0 Lock the glove box.
0 Lock all doors except the driver’s.
0 Give the valet key to the valet. Then take the master
key with you.
Content Theft-Deterrent (If Equipped)
If your Grand Prix has this option, it has a
theft-deterrent alarm system.
A red light located on top of your instrument panel (near
the center
of the vehicle, next to the windshield) will
flash slowly when the system is armed.
While armed, the doors will not unlock with the power
lock switch. The alarm will go
off if someone damages
the vehicle, tampers with the trunk lock, enters the
vehicle (without using the key chain transmitter or key
to unlock the doors), or turns
the ignition on. Your horn
will sound and your headlamps will flash
for up to two
minutes. The system will also cut
off the fuel supply,
preventing the vehicle
from being driven.
2-13
ProCarManuals.com
Page 88 of 419

Arming with the Power Lock Switch
Your alarm system will arm when you use either power
lock switch to lock the doors while any door is open and
the key is removed from the ignition (if you would like
to turn off the power door lock switch arming, see
“Locks and Lighting Choices”
in the Index). The
security light flashes quickly to let
you know when the
system is ready to arm with the power door switches.
The security light will
stop flashing and stay on, when
you press the rear
of the power lock switch, to let you
know the system is arming. After all doors are closed
and locked, the security light will begin flashing at a
very slow rate to let you know the system is armed.
Arming with the Key Chain Transmitter
Your alarm system will arm when you use your key chain
transmitter to lock the doors while the key is removed
from the ignition. The security light will turn on to let you
know the system is arming. After all doors are closed and locked, the security light will begin flashing
at a very slow
rate to let you know the system is armed.
Arming Confirmation
If remote unlock confirmation is on (see “Locks and Lighting
Choices” in the Index), your headlamps will flash briefly to
let you
know when your alarm system has armed.
Disarming with the Key. Chain Transmitter
Your alarm system will disarm when you use your key
chain transmitter to unlock the doors. The security light
will stop flashing
to let you know the system is disarmed.
Disarming with Your Key
Your alarm system will disarm when you use your key
to unlock the doors. The security light will stop flashing
to let
you know the system is disarmed. If you would
like your key to disarm the alarm system,
see “Locks
and Lighting Choices” in the Index.
Nuisance Alarms
If you experience nuisance alarms (alarms which are not
caused by
the opening of a door and are not desirable),
you may need to reduce the damage detection sensitivity.
Try programming your Content Theft-Deterrent to mode
1, see “Locks and Lighting Choices” in the Index. If you
continue
to experience nuisance alarms, you may want to
try turning off damage detection by programming your
Content Theft-Deterrent
to mode 2, see “Locks and
Lighting Choices”
in the Index.
If you are still having trouble with nuisance alarms, you
can turn off the Content Theft-Deterrent system by
programming your Content Theft-Deterrent to mode
3,
see “Locks and Lighting Choices” in the Index. See your
dealer
or a qualified technician for service.
2-14
ProCarManuals.com
Page 106 of 419

Wm Signal/Multifunction Lever
1
I
Turn Signal and Lane Change Indicator
The turn signal has two upward (for right) and two
downward (for left) positions. These positions allow
you
to signal a turn or a lane change.
To signal a
turn, move the lever all the way up or down.
When
the turn is finished, the lever will return automatically.
The lever
on the left side of the steering column
includes your:
Turn Signal and Lane Change Indicator
0 Headlamp High/Low Beam
0 Windshield Wipers
Windshield Washer
Cruise Control (If Equipped)
c:
I
An arrow on the instrument
panel will flash in the
direction of the turn or
lane change.
To signal
a lane change, just raise or lower the lever
until the arrow starts to flash. Hold it there until
you
complete your lane change. The lever will return by
itself when you release it.
As you signal a turn or a lane change, if the arrow
flashes faster than normal,
a signal bulb may be burned
out and other drivers won’t see your turn signal.
2-32
ProCarManuals.com
Page 107 of 419

If a bulb is burned out, replace it to help avoid an
accident.
If the arrows don’t go on at all when you
signal a turn, check for burned-out bulbs and then check
the fuse (see “Fuses and Circuit Breakers” in the Index).
A chme will sound if you leave your turn signal on for
more than
3/4 mile (1.2 km).
Headlamp HigWLow Beam
To change your headlamps
from low beam to high
beam, or high to low, pull
the multifunction lever all
the way toward you. Then
release it. When the high
beams are on, a light on the
instrument panel also will
be
on.
Flash-to-Pass
When your headlamps are off, pull the lever toward you
to momentarily switch on the high beams (to signal that
you are going to pass). When you release the lever they
will
turn off.
Windshield Wipers
You control the windshield wipers by turning the band
marked
WIPER. For a single wiping cycle, turn the band
to MIST. Hold it there until the wipers start, then let go.
The wipers will stop after one cycle. If you want more
cycles, hold the band on
MIST longer.
2-33
ProCarManuals.com
Page 112 of 419

Passing Another Vehicle While Using Cruise Control
Use the accelerator pedal to increase your speed. When
you take your foot off the pedal,
your vehicle will slow
down to the cruise control speed
you set earlier.
Using Cruise Control on Hills
How well your cruise control will work on hills depends
upon your speed, load and the steepness of the hills.
When going up steep hills,
you may have to step on the
accelerator pedal to maintain
your speed. When going
downhill, you may have to brake or shift
to a lower gear
to keep your speed down.
Of course, applying the brake
takes you out of cruise control, Many drivers find this to
be too much trouble and don't use cruise control on
steep hills.
Ending Cruise Control
There are two ways to turn off the cruise control:
Step lightly on the brake pedal; OR
Move the cruise switch to OFF.
Erasing Cruise Speed Memory
When you turn off the cruise control or the ignition, or
shift into
PARK (P) or NEUTRAL (N), your cruise
control set speed memory is erased.
Lamps
The lamp controls are located on the lower, left side of
the instrument panel, to the left
of the steering wheel.
They control these systems:
Headlamps
@ Taillamps
Parking Lamps
License Lamps
0 Sidemarker Lamps
0 Instrument Panel Lights
0 Courtesy Lamps
0 Fo'g Lamps
2-38
ProCarManuals.com
Page 113 of 419

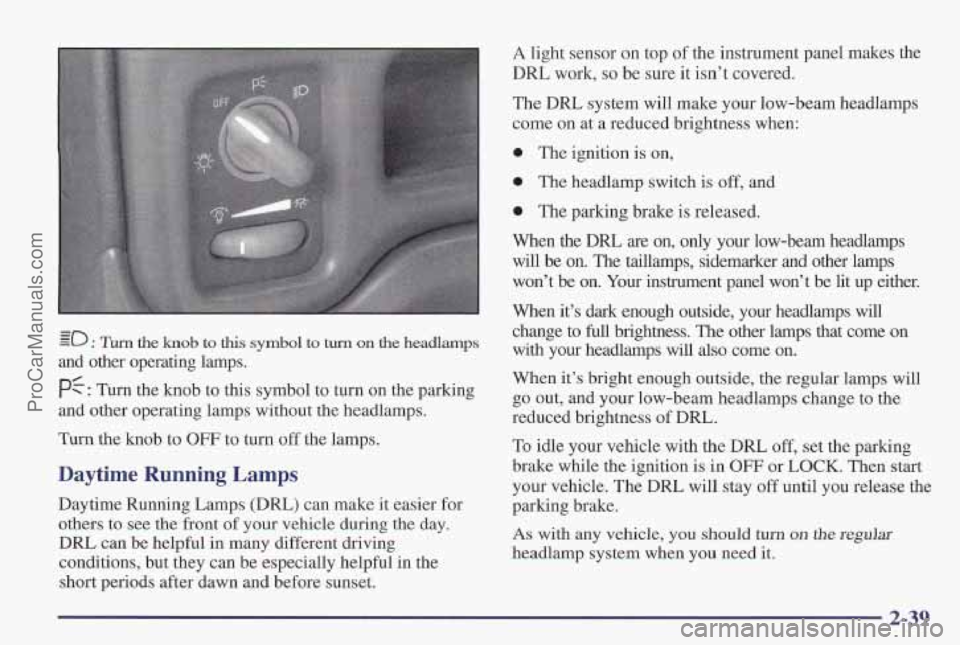
go : Turn the knob to this symbol to turn on the headlamps
and other operating lamps.
PG: Turn the knob to this symbol to turn on the parking
and other operating lamps without the headlamps.
Turn the knob to
OFF to turn off the lamps.
Daytime Running Lamps
Daytime Running Lamps (DRL) can make it easier for
others to see the front of your vehicle during the day.
DRL can be helpful in many different driving
conditions,
but they can be especially helpful in the
short periods after dawn and before sunset.
A light sensor on top of the instrument panel makes the
DRL work, so be sure it isn't covered.
The DRL system will make your low-beam headlamps
come on at a reduced brightness when:
0 The ignition is on,
0 The headlamp switch is off, and
0 The parking brake is released.
When the
DRL are on, only your low-beam headlamps
will be on. The taillamps, sidemarker and other lamps
won't be on. Your instrument panel won't be lit up either.
When it's dark enough outside, your headlamps will change to full brightness. The other lamps that come on
with your headlamps will also come on.
When it's bright enough outside, the regular lamps will
go out, and your low-beam headlamps change to the
reduced brightness of DRL.
To idle your vehicle with the DRL off, set the parking
brake while the ignition is in
OFF or LOCK. Then start
your vehicle. The DRL will stay
off until you release the
parking brake.
As with any vehicle, you should turn on the regular
headlamp system when you need it.
ProCarManuals.com
Page 114 of 419

Fog Lamps Interior Lamps
Instrument Panel Intensity Control
The fog lamps switch is located in the upper, left corner of the
instrument panel, to the left of the instrument panel cluster.
To turn the fog lamps on, press the right side of the fog
lamps switch. A light will glow on the switch to let you
know that they are on. (Your parking lamps must be on,
or
your fog lamps won’t come on.) Press the left side of
the switch to turn the fog lamps off.
You can brighten or dim the instrument panel lights by
moving the interior lamps dial. Turn the dial to the right
to increase the brightness of the instrument panel lights,
to the left to decrease the brightness. Turn the control
all the way to the left to turn them off.
The fog lamps will
go off whenever you change to
high-beam headlamps. When you return to low beams.
the fog lamps will come on again.
2-40
ProCarManuals.com