PONTIAC VIBE 2004 Owners Manual
Manufacturer: PONTIAC, Model Year: 2004, Model line: VIBE, Model: PONTIAC VIBE 2004Pages: 370, PDF Size: 2.68 MB
Page 101 of 370
Storage Areas
Glove Box
To open the glove box door, lift the latch. Always keep
the glove box door closed while driving.
Cupholder(s)
There are two ®xed cupholders located in the console
area between the two front seats. There are also
two cupholders that fold out of the rear of the console
storage unit.
Coinholder(s)
Your instrument panel has a coinholder located to the
left of the steering wheel.
Instrument Panel Storage Area
There are storage compartments located on the
instrument panel in two places. They are below the
interior/instrument panel brightness dial and below the
shift lever. Pull the top of the door toward you to open it
or for the compartment below the shift lever, push the
button to open it.
Center Console Storage Area
A storage area is located in the console between the
seats which can hold CDs, cassettes or a cell phone.
There is also an accessory power outlet located in
the storage area.
To access the upper tray of the storage area, raise the
console box lid without touching the lock release
lever. To access the lower storage area, pull up the lock
release lever while raising the lid.
Floor Mats
Your vehicle's ¯oor mat is specially designed to remain
in position under your feet and out of reach of the
accelerator pedal. The driver's side ¯oor mat is held in
place by two locator hooks.
Be sure the driver's side ¯oor mat is properly placed on
the ¯oor so that it does not block the movement of
the accelerator pedal.
2-37
Page 102 of 370
How to Remove and Replace
the Floor Mat
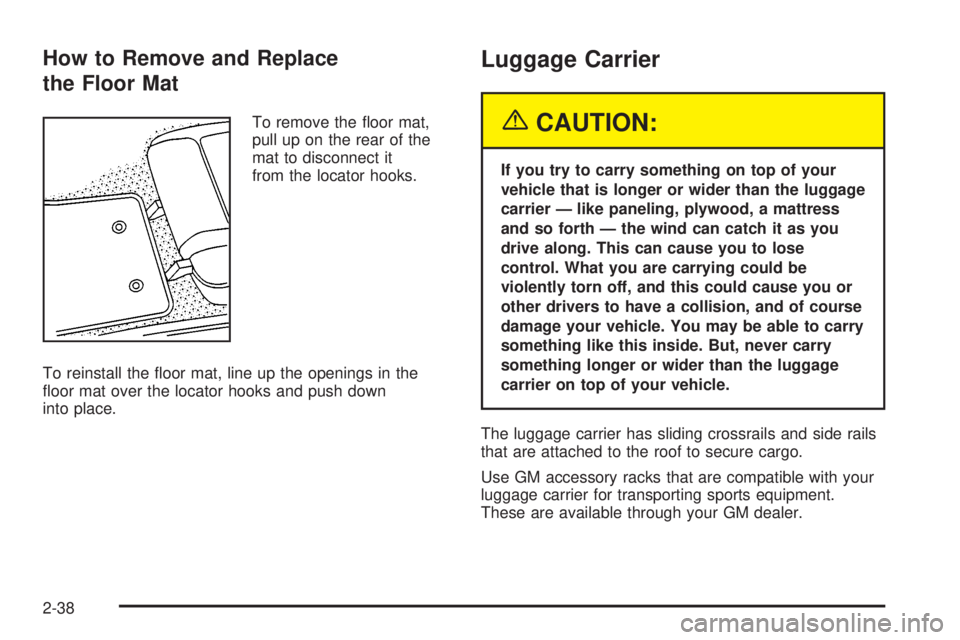
To remove the ¯oor mat,
pull up on the rear of the
mat to disconnect it
from the locator hooks.
To reinstall the ¯oor mat, line up the openings in the
¯oor mat over the locator hooks and push down
into place.
Luggage Carrier
{CAUTION:
If you try to carry something on top of your
vehicle that is longer or wider than the luggage
carrier Ð like paneling, plywood, a mattress
and so forth Ð the wind can catch it as you
drive along. This can cause you to lose
control. What you are carrying could be
violently torn off, and this could cause you or
other drivers to have a collision, and of course
damage your vehicle. You may be able to carry
something like this inside. But, never carry
something longer or wider than the luggage
carrier on top of your vehicle.
The luggage carrier has sliding crossrails and side rails
that are attached to the roof to secure cargo.
Use GM accessory racks that are compatible with your
luggage carrier for transporting sports equipment.
These are available through your GM dealer.
2-38
Page 103 of 370
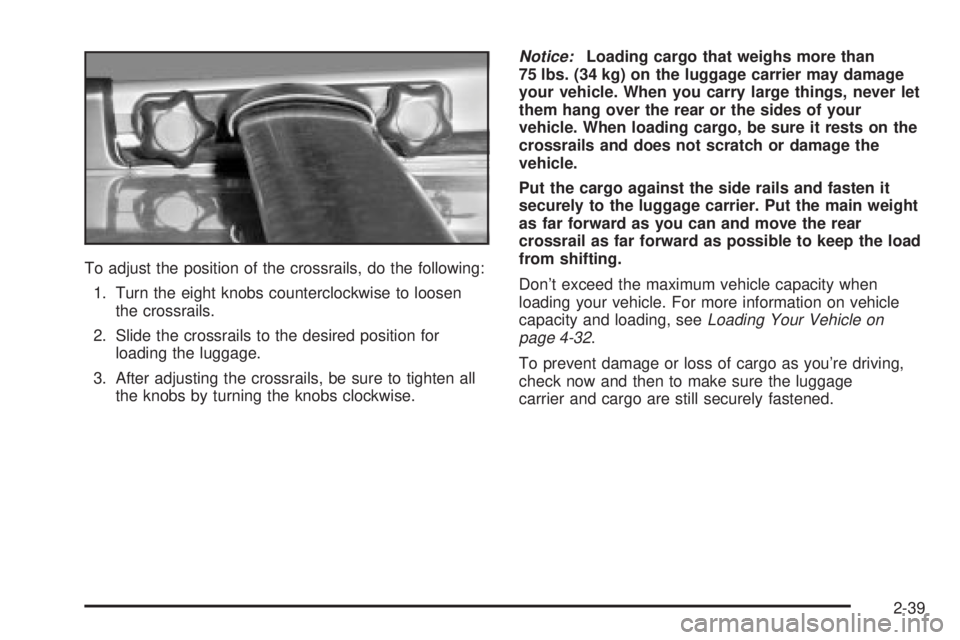
To adjust the position of the crossrails, do the following:
1. Turn the eight knobs counterclockwise to loosen
the crossrails.
2. Slide the crossrails to the desired position for
loading the luggage.
3. After adjusting the crossrails, be sure to tighten all
the knobs by turning the knobs clockwise.
Notice:Loading cargo that weighs more than
75 lbs. (34 kg) on the luggage carrier may damage
your vehicle. When you carry large things, never let
them hang over the rear or the sides of your
vehicle. When loading cargo, be sure it rests on the
crossrails and does not scratch or damage the
vehicle.
Put the cargo against the side rails and fasten it
securely to the luggage carrier. Put the main weight
as far forward as you can and move the rear
crossrail as far forward as possible to keep the load
from shifting.
Don't exceed the maximum vehicle capacity when
loading your vehicle. For more information on vehicle
capacity and loading, see
Loading Your Vehicle on
page 4-32.
To prevent damage or loss of cargo as you're driving,
check now and then to make sure the luggage
carrier and cargo are still securely fastened.
2-39
Page 104 of 370
Rear Storage Area
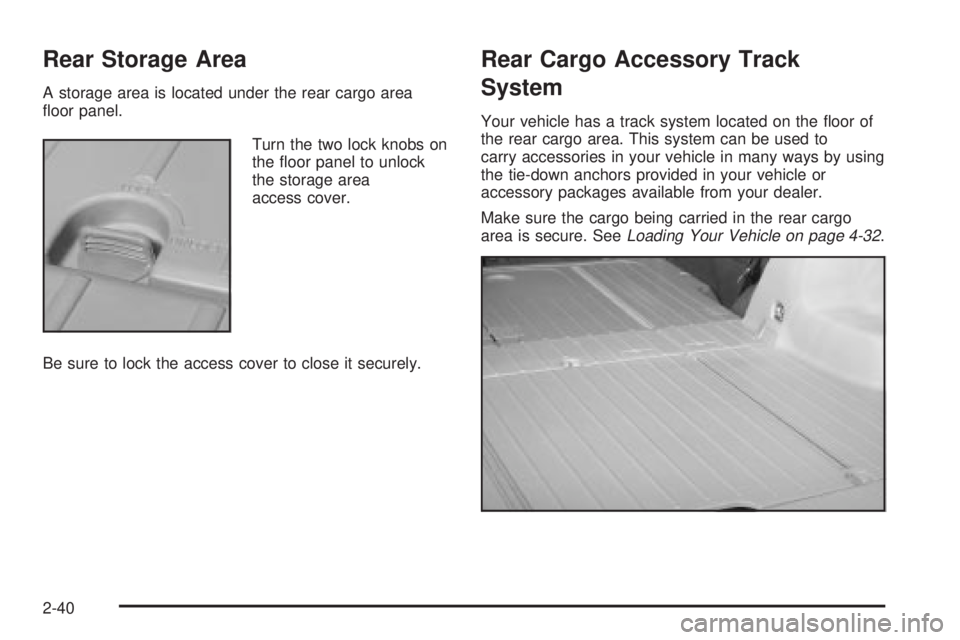
A storage area is located under the rear cargo area
¯oor panel.
Turn the two lock knobs on
the ¯oor panel to unlock
the storage area
access cover.
Be sure to lock the access cover to close it securely.
Rear Cargo Accessory Track
System
Your vehicle has a track system located on the ¯oor of
the rear cargo area. This system can be used to
carry accessories in your vehicle in many ways by using
the tie-down anchors provided in your vehicle or
accessory packages available from your dealer.
Make sure the cargo being carried in the rear cargo
area is secure. See
Loading Your Vehicle on page 4-32.
2-40
Page 105 of 370

Cargo Cover
To use the cargo cover, attach the side hooks of the
cargo cover to the upper tie down hooks located along
both sides of the rear cargo area.
{CAUTION:
An improperly stored cargo cover could be
thrown about the vehicle during a collision or
sudden maneuver. You or others could be
injured. If you remove the cover, always store
it in the proper storage location. When you put
it back, always be sure that it is securely
reattached.
Cargo Tie Downs
The tire tie-down belts are designed to secure the ¯at
tire. You can also use the belts and hooks to secure
your luggage.
There are eight tie-down hooks located in the rear of
the vehicle. The belts are located under the cargo area
¯oor panel. To use the belts, hook the ends to the
lower tie-down hooks in a criss-cross pattern across the
cargo. Pull on the belts at the buckle to tighten the
belt as needed.
2-41
Page 106 of 370
Sunroof
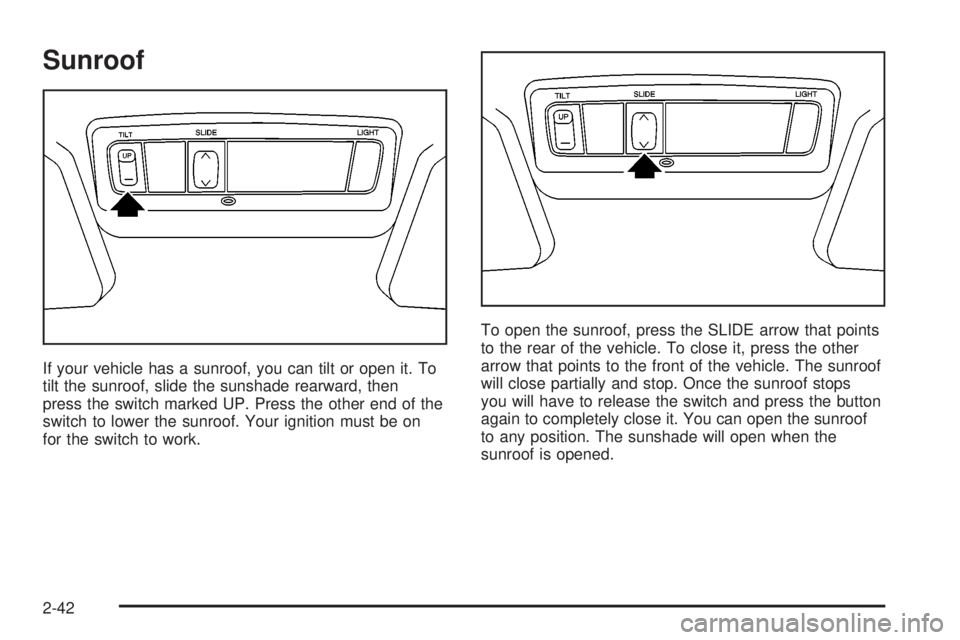
If your vehicle has a sunroof, you can tilt or open it. To
tilt the sunroof, slide the sunshade rearward, then
press the switch marked UP. Press the other end of the
switch to lower the sunroof. Your ignition must be on
for the switch to work.To open the sunroof, press the SLIDE arrow that points
to the rear of the vehicle. To close it, press the other
arrow that points to the front of the vehicle. The sunroof
will close partially and stop. Once the sunroof stops
you will have to release the switch and press the button
again to completely close it. You can open the sunroof
to any position. The sunshade will open when the
sunroof is opened.
2-42
Page 107 of 370
Instrument Panel Overview...............................3-2
Hazard Warning Flashers................................3-4
Other Warning Devices...................................3-4
Horn.............................................................3-5
Tilt Wheel.....................................................3-5
Turn Signal/Multifunction Lever.........................3-5
Exterior Lamps.............................................3-12
Interior Lamps..............................................3-14
Accessory Power Outlets...............................3-17
Power Outlet 115 Volt Alternating Current........3-18
Ashtrays and Cigarette Lighter........................3-19
Climate Controls............................................3-19
Climate Control System.................................3-19
Outlet Adjustment.........................................3-22
Passenger Compartment Air Filter...................3-23
Warning Lights, Gages and Indicators.............3-25
Instrument Panel Cluster................................3-26
Speedometer and Odometer...........................3-27
Tachometer.................................................3-28
Safety Belt Reminder Light.............................3-28
Air Bag Readiness Light................................3-30
Charging System Light..................................3-31Brake System Warning Light..........................3-31
Anti-Lock Brake System Warning Light.............3-32
Engine Coolant Temperature Gage..................3-33
Malfunction Indicator Lamp.............................3-34
Oil Pressure Light.........................................3-38
Cruise Control Light......................................3-39
Overdrive Off Light........................................3-39
Low Washer Fluid Warning Light.....................3-39
Door Ajar Light.............................................3-39
Fuel Gage...................................................3-40
Audio System(s).............................................3-41
Setting the Time...........................................3-41
Radio with CD..............................................3-42
Radio with Six-Disc CD.................................3-52
Navigation/Radio System...............................3-63
Understanding Radio Reception......................3-63
Care of Your CDs.........................................3-64
Care of Your CD Player................................3-64
Fixed Mast Antenna......................................3-64
XMŸ Satellite Radio Antenna System
(United States Only)..................................3-64
Section 3 Instrument Panel
3-1
Page 108 of 370
Instrument Panel Overview
3-2
Page 109 of 370

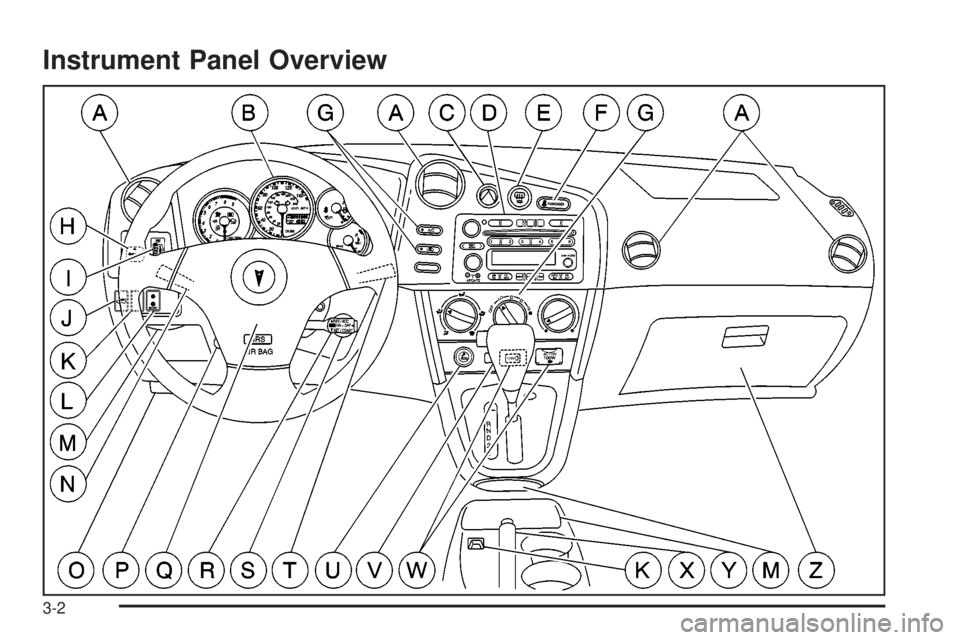
The main components of your instrument panel are the
following:
A. Air Outlets. See
Outlet Adjustment on page 3-22.
B. Instrument Panel Cluster. See
Instrument Panel
Cluster on page 3-26.
C. Hazard Warning Flasher Button. See
Hazard
Warning Flashers on page 3-4.
D. Audio System. See
Audio System(s) on page 3-41.
E. Rear Window Defogger Button. See ªRear Window
Defoggerº under
Climate Control System on
page 3-19.
F. Front Passenger Safety Belt Reminder Light. See
Safety Belt Reminder Light on page 3-28.
G. Climate Control System. See
Climate Control
System on page 3-19.
H. Power Remote Control Mirror Button. See
Outside
Remote Control Mirrors on page 2-36.
I. Instrument Panel Brightness Control. See
ªInstrument Panel Brightnessº under
Interior Lamps
on page 3-14.
J. Rear Liftglass Release Button. See
Liftgate/Liftglass
on page 2-9.
K. Coinholder. See
Coinholder(s) on page 2-37.
L. Content Theft-Deterrent Security Light. See
Content
Theft-Deterrent on page 2-13.M. Storage Compartment. See
Instrument Panel
Storage Area on page 2-37.
N. Turn Signal/Multifunction Lever. See
Turn
Signal/Multifunction Lever on page 3-5.
O. Hood Release. See
Hood Release on page 5-10.
P. Tilt Lever. See
Tilt Wheel on page 3-5.
Q. Horn. See
Horn on page 3-5.
R. Cruise Control Lever (Option). See ªCruise Controlº
under
Turn Signal/Multifunction Lever on page 3-5.
S. Ignition Switch. See
Ignition Positions on page 2-16.
T. Windshield Wiper Lever. See ªWindshield Wipersº
under
Turn Signal/Multifunction Lever on page 3-5.
U. Cigarette Lighter. See
Ashtrays and Cigarette Lighter
on page 3-19.
V. Shift Lever. See
Shifting Into Park (P) on page 2-28.
W. Power Outlet. See
Power Outlet 115 Volt Alternating
Current on page 3-18.
X. Parking Brake. See
Parking Brake on page 2-27.
Y. Center Console Storage Area. See
Center Console
Storage Area on page 2-37.
Z. Glove Box. See
Glove Box on page 2-37.
3-3
Page 110 of 370
Hazard Warning Flashers
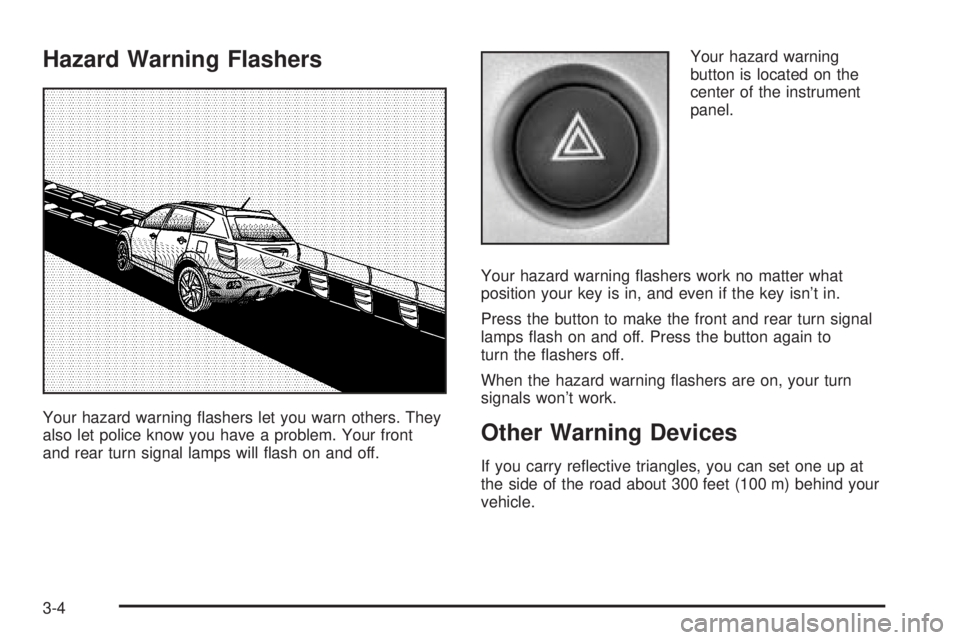
Your hazard warning ¯ashers let you warn others. They
also let police know you have a problem. Your front
and rear turn signal lamps will ¯ash on and off.Your hazard warning
button is located on the
center of the instrument
panel.
Your hazard warning ¯ashers work no matter what
position your key is in, and even if the key isn't in.
Press the button to make the front and rear turn signal
lamps ¯ash on and off. Press the button again to
turn the ¯ashers off.
When the hazard warning ¯ashers are on, your turn
signals won't work.Other Warning Devices
If you carry re¯ective triangles, you can set one up at
the side of the road about 300 feet (100 m) behind your
vehicle.
3-4