key PONTIAC VIBE 2010 Owner's Manual
[x] Cancel search | Manufacturer: PONTIAC, Model Year: 2010, Model line: VIBE, Model: PONTIAC VIBE 2010Pages: 318, PDF Size: 1.7 MB
Page 99 of 318
Brake System Warning
Light
The vehicle’s hydraulic brake
system is divided into two parts.
If one part is not working, the other
part can still work and stop the
vehicle. For good braking both
parts need to be working well.
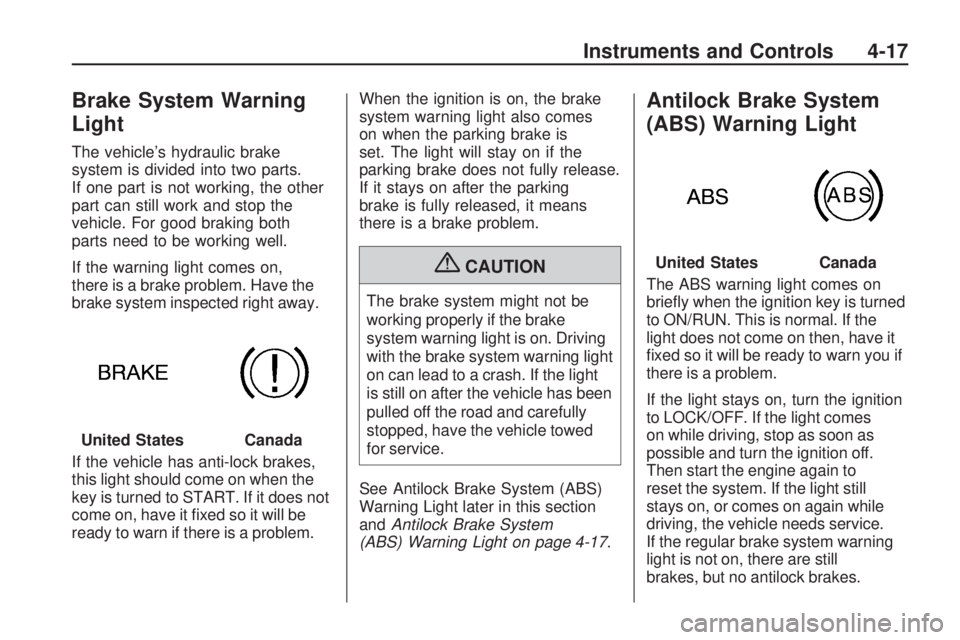
If the warning light comes on,
there is a brake problem. Have the
brake system inspected right away.
If the vehicle has anti-lock brakes,
this light should come on when the
key is turned to START. If it does not
come on, have it fixed so it will be
ready to warn if there is a problem.When the ignition is on, the brake
system warning light also comes
on when the parking brake is
set. The light will stay on if the
parking brake does not fully release.
If it stays on after the parking
brake is fully released, it means
there is a brake problem.
{CAUTION
The brake system might not be
working properly if the brake
system warning light is on. Driving
with the brake system warning light
on can lead to a crash. If the light
is still on after the vehicle has been
pulled off the road and carefully
stopped, have the vehicle towed
for service.
See Antilock Brake System (ABS)
Warning Light later in this section
and Antilock Brake System
(ABS) Warning Light on page 4-17 .
Antilock Brake System
(ABS) Warning Light
The ABS warning light comes on
briefly when the ignition key is turned
to ON/RUN. This is normal. If the
light does not come on then, have it
fixed so it will be ready to warn you if
there is a problem.
If the light stays on, turn the ignition
to LOCK/OFF. If the light comes
on while driving, stop as soon as
possible and turn the ignition off.
Then start the engine again to
reset the system. If the light still
stays on, or comes on again while
driving, the vehicle needs service.
If the regular brake system warning
light is not on, there are still
brakes, but no antilock brakes.
United States
Canada
United StatesCanada
Instruments and Controls 4-17
Page 103 of 318
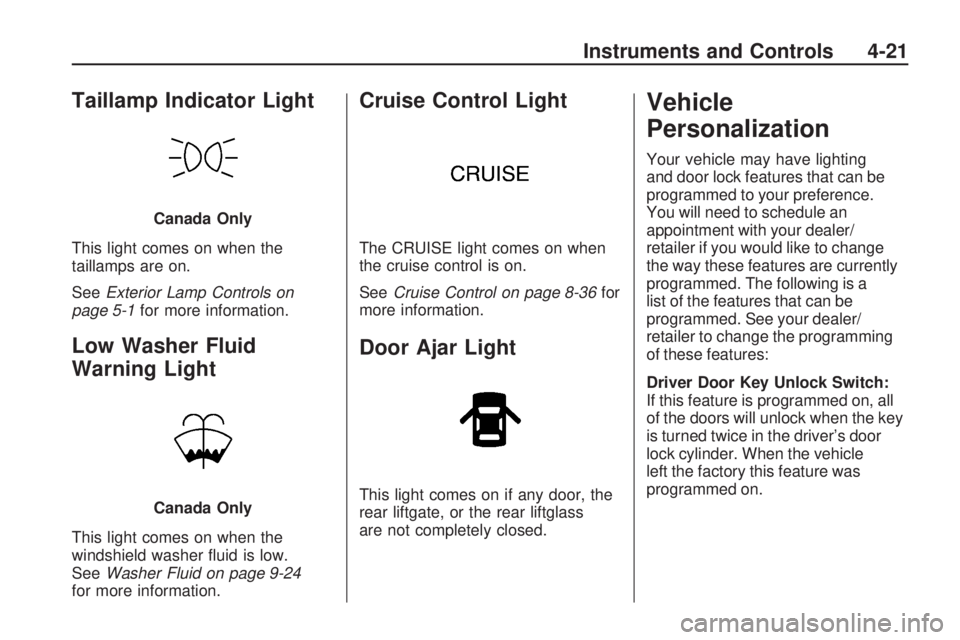
Taillamp Indicator Light
This light comes on when the
taillamps are on.
SeeExterior Lamp Controls on
page 5-1 for more information.
Low Washer Fluid
Warning Light
This light comes on when the
windshield washer fluid is low.
SeeWasher Fluid on page 9-24
for more information.
Cruise Control Light
The CRUISE light comes on when
the cruise control is on.
See Cruise Control on page 8-36 for
more information.
Door Ajar Light
This light comes on if any door, the
rear liftgate, or the rear liftglass
are not completely closed.
Vehicle
Personalization
Your vehicle may have lighting
and door lock features that can be
programmed to your preference.
You will need to schedule an
appointment with your dealer/
retailer if you would like to change
the way these features are currently
programmed. The following is a
list of the features that can be
programmed. See your dealer/
retailer to change the programming
of these features:
Driver Door Key Unlock Switch:
If this feature is programmed on, all
of the doors will unlock when the key
is turned twice in the driver’s door
lock cylinder. When the vehicle
left the factory this feature was
programmed on.
Canada Only
Canada Only
Instruments and Controls 4-21
Page 104 of 318
Courtesy Lamp Timer:This
feature allows for changing how
long the courtesy lamps stay
on when all the doors and liftgate
are closed and the key is out of
the ignition, in LOCK/OFF, or
in ACC/ACCESSORY. When the
vehicle left the factory the courtesy
lamps were programmed to stay
on for 15 seconds. This can
be changed to 7.5 seconds
or 30 seconds.
Interior Lamps when Ignition off:
If this feature is programmed on,
the interior lamps will come on when
the ignition is turned off when it is
dark outside. When the vehicle
left the factory this feature was
programmed on.
Interior Lamps on with Door
Key Unlock: If this feature is
programmed on, the interior lamps
will come on when the doors are
unlocked when it is dark outside.
When the vehicle left the factory
this feature was programmed on. Key Fob Signal:
If this feature
is programmed on, the Remote
Keyless Entry (RKE) transmitter
can be used to lock and unlock
the vehicle. When the vehicle left
the factory this feature was
programmed on.
RFA Visual Feedback: If this
feature is programmed on, the
hazard lights will flash when you
lock and unlock the vehicle with the
RKE transmitter. When the vehicle
left the factory this feature was
programmed on.
RFA All Unlock Enable: If this
feature is programmed on, pressing
the RKE unlock button twice
within three second will unlock
all of the doors. When the vehicle
left the factory this feature was
programmed on.
Remote Panic Command: If this
feature is programmed on, pressing
and holding the RKE panic button
will cause the horn to sound and the
lights to flash. When the vehicle
left the factory this feature was
programmed on. Automatic Door Locking:
If this
feature is programmed on, the doors
will automatically lock when the
vehicle is shifted out of P (Park) or
when the vehicle speed is greater
than 8 mph (13 km/h).
Automatic Door Unlocking: If this
feature is programmed on, the doors
will automatically unlock when the
vehicle is shifted into P (Park) or
when the ignition is turned off.
All Door Unlock Command: If this
feature is programmed on, the doors
will all unlock when the driver’s door
is opened.
Lock-out Timer: This feature
allows for changing how long of a
delay there is before all of the doors
lock when pressing the lock button
on the RKE transmitter. When the
vehicle left the factory the delay
was set for 1 minute. This can be
changed to 30 seconds or 2 minutes.
4-22 Instruments and Controls
Page 105 of 318
OnStar System
OnStar®System
OnStar uses several innovative
technologies and live advisors to
provide a wide range of safety,
security, information, and
convenience services. If the airbags
deploy, the system is designed to
make an automatic call to OnStar
Emergency advisors who can
request emergency services be
sent to your location. If the keys
are locked in the vehicle, call OnStar
at 1-888-4-ONSTAR to have asignal sent to unlock the doors.
OnStar Hands-Free Calling,
including 30 trial minutes good
for 60 days, is available on most
vehicles. Press the OnStar button to
have an OnStar advisor contact
Roadside Service.
OnStar service is provided subject
to the OnStar Terms and Conditions
included in the OnStar Subscriber
glove box literature.
Some services such as Remote
Door Unlock or Stolen Vehicle
Location Assistance may not be
available until the owner of the
vehicle registers with OnStar.
After the first prepaid year,
contact OnStar to select a monthly
or annual subscription payment plan.
If a payment plan is not selected,
the OnStar system and all services,
including airbag notification and
emergency services, may be
deactivated and no longer
available. For more information
visit www.onstar.com (U.S.) or
www.onstar.ca (Canada), or press
the OnStar button to speak with an
advisor.
Not all OnStar services are
available on all vehicles. To check
if this vehicle is able to provide the
services described below, or for
a full description of OnStar services
and system limitations, see the
OnStar Owner’s Guide in the glove
box or visit www.onstar.com (U.S.)
or www.onstar.ca (Canada), contact
OnStar at 1-888-4-ONSTAR
(1-888-466-7827) or TTY
1-877-248-2080, or press the
OnStar button to speak with an
OnStar advisor 24 hours a day,
7 days a week.
Instruments and Controls 4-23
Page 110 of 318
Headlamps on Reminder
A tone sounds when the ignition is
turned to LOCK/OFF, the driver door
is opened and the key is removed
from the ignition while the lamps
are on.
Headlamp High/
Low-Beam Changer
The headlamps must be on for this
feature to work.
Push the turn signal lever away
from you to turn the high beams on.
This instrument panel cluster
light
3comes on while the high
beam headlamps are on.
Pull the lever towards you to return
to low beams.
Flash-to-Pass
This feature is used to signal to the
vehicle ahead that you want to pass.
With the lever in the low-beam
position, pull the lever toward you to
momentarily switch to high-beams.
If the headlamps are on when the
lever is released, the high-beams
will return to low-beam.
Daytime Running
Lamps (DRL)
Daytime Running Lamps (DRL) can
make it easier for others to see the
front of your vehicle during the day.
Fully functional DRL are required
on all vehicles first sold in Canada. The DRL system makes the
headlamps come on at a reduced
brightness when the following
conditions are met:
•The ignition is on with the engine
running.
•The exterior lamps switch is off.
•The parking brake is released.
When the exterior lamp switch is
turned to the headlamp position, the
DRL go off and the headlamps come
on. The other lamps that come on
with the headlamps also come on.
The headlamps automatically switch
from DRL to the regular headlamps
depending on the darkness of
the surroundings. See Automatic
Headlamp System on page 5-3 .
DRL also comes on if only the
parking lamps are being used.
5-2 Lighting
Page 113 of 318
Reading Lamps
For vehicles with a sunroof, there is
a reading lamp near the sunroof
switch.
OFF:Turns the lamp off.
ON: Keeps the lamp on all the time.
Door: Turns the lamp on when
any door or the liftgate is opened.
The lamp goes off when all the side
doors and the liftgate are closed.
Lighting Features
Entry Lighting
After all the doors and liftgate are
closed, and the key is out of the
ignition, in LOCK/OFF or ACC/
ACCESSORY, the light remains
on for about 15 seconds and then
goes out, except under the following
conditions:
•The ignition is turned to ACC/
ACCESSORY or ON/RUN after
all the doors and liftgate are
closed.
•All the doors and the liftgate are
locked and the light is still on.
When any door is unlocked with the
key or Remote Keyless Entry (RKE)
system transmitter, the light comes
on for 15 seconds, even if the door is
not opened.
Battery Power Protection
The vehicle has a battery saver
feature designed to protect
the vehicle’s battery.
This feature will only work with the
dome lamp in the Door position.
When any interior lamp is left on
and the ignition is turned off, the
battery rundown protection system
automatically turns the lamp off after
20 minutes. This prevents draining of
the battery.
Lighting 5-5
Page 116 of 318

Operation
Playing the Radio
PWR VOL (Power/Volume):Press
to turn the radio on and off. Turn
the PWR VOL knob to adjust
the volume.
CLOCK: Press to adjust the time.
Setting the Clock
The date does not automatically
display. To see the date press the
CLOCK button while the radio is on. The date display times out and goes
back to the normal radio and time
display. To adjust the time and date:
1. Turn the ignition key to
ACC/ACCESSORY or ON/RUN.
2. Press the PWR VOL (Power/ Volume) knob to turn on the radio.
3. Press the CLOCK button, and the HR, MIN, MM, DD, YYYY (hour,
minute, month, day, and year)
categories display.
4. Press the button under the category to be adjusted.
5. To increase the time or date, do one of the following: turn
the TUNE ADJ (Tune/Adjust)
knob clockwise, press SEEK/
TRACK
y, press FWD(
(Forward), or continue to press
the button under the category to
be adjusted.
Radio with CD (MP3) shown, Radio with CD (Base) similar
6-2 Infotainment System
Page 150 of 318
Starting and
Operating
New Vehicle Break-In
Notice:The vehicle does not
need an elaborate break-in. But it
will perform better in the long run
if you follow these guidelines:
Do not drive at any one
constant speed, fast or slow,
for the �rst 500 miles (805 km).
Do not make full-throttle starts.
Avoid downshifting to brake or
slow the vehicle.
Avoid making hard stops for the
�rst 200 miles (322 km) or so.
During this time the new brake
linings are not yet broken in.
Hard stops with new linings
can mean premature wear and
earlier replacement. Follow this
breaking-in guideline every
time you get new brake linings.
Do not tow a trailer during
break-in. See Trailer Towing on
page 8-48 for the trailer towing
capabilities of the vehicle and
more information.
Following break-in, engine speed
and load can be gradually
increased.
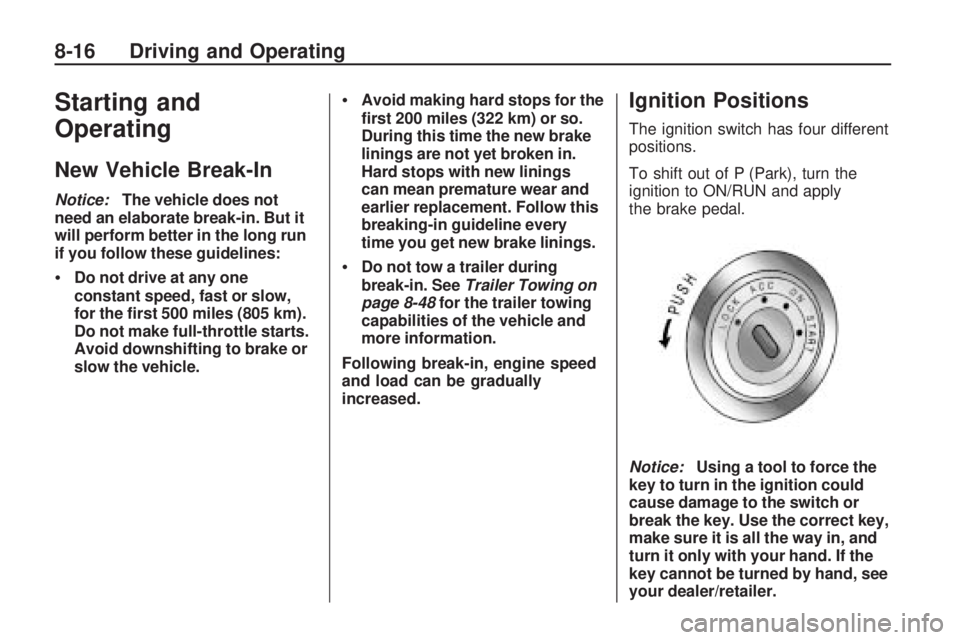
Ignition Positions
The ignition switch has four different
positions.
To shift out of P (Park), turn the
ignition to ON/RUN and apply
the brake pedal.
Notice: Using a tool to force the
key to turn in the ignition could
cause damage to the switch or
break the key. Use the correct key,
make sure it is all the way in, and
turn it only with your hand. If the
key cannot be turned by hand, see
your dealer/retailer.
8-16 Driving and Operating
Page 151 of 318

LOCK/OFF:This is the only position
from which you can remove the key.
This locks the steering wheel,
ignition and automatic transmission.
Push in the ignition switch as you
turn the key toward you.
On vehicles with an automatic
transmission, the shift lever must be
in P (Park) to turn the ignition switch
to the LOCK/OFF position.
A warning tone will sound if the driver
door is opened with the key in the
ignition.
The ignition switch can bind in the
LOCK/OFF position with your wheels
turned off center. If this happens,
move the steering wheel from right
to left while turning the key to
ACC/ACCESSORY. If this doesn’t
work, then the vehicle needs service.{CAUTION
On manual transmission vehicles,
turning the key to LOCK/OFF and
removing it will lock the steering
column and result in a loss of
ability to steer the vehicle.
This could cause a collision.
If you need to turn the engine
off while the vehicle is moving,
turn the key only to ACC/
ACCESSORY. Do not push the
key in while the vehicle is moving.
ACC/ACCESSORY: This position
provides power to some of the
electrical accessories. It unlocks the
steering wheel and ignition. To move
the key from ACC/ACCESSORY to
LOCK/OFF, push in the key and then
turn it to LOCK/OFF.
A warning tone will sound when the
driver door is opened when the
ignition is still in ACC/ACCESSORY
or LOCK/OFF and the key is in the
ignition. ON/RUN:
The ignition switch stays
in this position when the engine is
running. This position can be used
to operate the electrical accessories,
including the ventilation fan and
115 volt power outlet, as well as to
display some warning and indicator
lights. The transmission is also
unlocked in this position on
automatic transmission vehicles.
The battery could be drained
if you leave the key in the ACC/
ACCESSORY or ON/RUN position
with the engine off. You may not be
able to start the vehicle if the battery
is allowed to drain for an extended
period of time.
START: This position starts the
engine. When the engine starts,
release the key. The ignition switch
will return to ON/RUN for normal
driving.
Driving and Operating 8-17
Page 152 of 318
Retained Accessory
Power (RAP)
These vehicle accessories may be
used for less than a minute after
the engine is turned off.
•Power Windows, if equipped
•Sunroof, if equipped
The power windows and sunroof will
continue to work for less than a
minute or until either front door is
opened. The radio will work when
the key is in ON/RUN or ACC/
ACCESSORY.
Starting the Engine
Automatic Transmission
Move the shift lever to P (Park) or
N (Neutral). The engine will not
start in any other position. To restart
when you are already moving, use
N (Neutral) only. Notice:
Shifting into P (Park)
with the vehicle moving could
damage the transmission. Shift
into P (Park) only when the vehicle
is stopped.
Manual Transmission
The shift lever should be in
NEUTRAL and the parking brake
engaged. Hold the clutch pedal
to the floor and start the engine.
The vehicle will not start if the clutch
pedal is not all the way down.
Starting Procedure
1. With your foot off the accelerator pedal, turn the ignition to START.
When the engine starts, let go of
the key. The idle speed will go
down as the engine gets warm.
Vehicles equipped with
the 1.8L engine have a
Computer-Controlled Cranking
System. This feature assists in
starting the engine and protects components. If the ignition key is
turned to the START position,
and then released when the
engine begins cranking, the
engine will continue cranking for
a about 30 seconds or until the
vehicle starts. If the engine does
not start and the key is held in
START for many seconds,
cranking will be stopped after
25 seconds to prevent cranking
motor damage. To prevent gear
damage, this system also
prevents cranking if the engine is
already running. Engine cranking
can be stopped by turning the
ignition switch to ACC/
ACCESSORY or LOCK/OFF.
Vehicles equipped with
the 2.4L engine should not
be cranked for more than
30 seconds at a time. This
may overheat the starter and
wiring systems.
8-18 Driving and Operating