light PONTIAC VIBE 2010 Service Manual
[x] Cancel search | Manufacturer: PONTIAC, Model Year: 2010, Model line: VIBE, Model: PONTIAC VIBE 2010Pages: 318, PDF Size: 1.7 MB
Page 117 of 318

6. To decrease the time ordate, do one of the following:
turn the TUNE ADJ knob
counterclockwise, press
SEEK/TRACK
z, or press
REV
)(Reverse).
7. To save the settings, press the CLOCK button, or let
the display time out.
To change the time default setting
from 12 hour to 24 hour, and to
change the date default setting from
month/day/year to day/month/year:
1. Press the CLOCK button and then the button below the forward
arrow label on the display.
The 12H and 24H, and the
date MMDD (month and day)
and DDMM (day and month)
categories will display. 2. Press the button below the
12H or 24H label, and the date
MMDD (month and day) or
DDMM (day and month) label
to choose how the radio displays
the time and date.
3. To save the settings, press the CLOCK button, or let
the screen time out.
Setting the Tone
(Bass/Midrange/Treble)
To adjust the bass, midrange, and
treble:
1. Press the TUNE ADJ knob.
2. Turn the TUNE ADJ knob, orpress the button below BASS,
MID, or TREB so it is highlighted.
3. Press the TUNE ADJ knob to select BASS, MID, or TREB.
4. Turn the TUNE ADJ knob to adjust the level.
5. Press the TUNE ADJ knob to set the adjustment. EQ (Equalization):
To select
customized equalization settings:
1. Press the EQ button.
2. Press the button below the tab: POP, ROCK, COUNTRY,
TALK, JAZZ, and CLASSICAL.
Adjusting the Speakers
(Balance/Fade)
To adjust the balance or fade,
perform the following steps:
1. Press the TUNE ADJ knob.
2. Turn the TUNE ADJ knobor press the button below
BAL FADE so it is highlighted.
3. Press the TUNE ADJ knob to select the tone to adjust.
4. Turn the TUNE ADJ knob to adjust the audio balance to the
right or the left speakers and the
fade to adjust the audio volume
to the front or rear speakers.
5. Press the TUNE ADJ knob to set the adjustment.
Infotainment System 6-3
Page 122 of 318
Radio Reception
Frequency interference and static
can occur during normal radio
reception if items such as cell phone
chargers, vehicle convenience
accessories, and external electronic
devices are plugged into the
accessory power outlet. If there is
interference or static, unplug the item
from the accessory power outlet.
FM
FM signals only reach about 10 to
40 miles (16 to 65 km). Although the
radio has a built-in electronic circuit
that automatically works to reduce
interference, some static can occur,
especially around tall buildings or
hills, causing the sound to fade in
and out.
AM
The range for most AM stations is
greater than for FM, especially at
night. The longer range can cause
station frequencies to interfere
with each other. For better radio
reception, most AM radio stations
boost the power levels during the
day, and then reduce these levels
during the night. Static can also
occur when things like storms and
power lines interfere with radio
reception. When this happens, try
reducing the treble on the radio.
XM™ Satellite Radio Service
XM Satellite Radio Service
gives digital radio reception from
coast-to-coast in the 48 contiguous
United States, and in Canada. Just
as with FM, tall buildings or hills can
interfere with satellite radio signals,
causing the sound to fade in and out.
In addition, traveling or standing
under heavy foliage, bridges,
garages, or tunnels may cause loss
of the XM signal for a period of time.
Cellular Phone Usage
Cellular phone usage may cause
interference with the vehicle’s radio.
This interference may occur when
making or receiving phone calls,
charging the phone’s battery,
or simply having the phone on.
This interference can cause an
increased level of static while
listening to the radio. If static is
received while listening to the radio,
unplug the cellular phone and turn
it off.
Fixed Mast Antenna
The fixed mast antenna can
withstand most car washes without
being damaged as long as it is
securely attached to the base.
If the mast becomes slightly bent,
straighten it out by hand. If the mast
is badly bent, replace it.
Occasionally check to make sure
the antenna is tightened to its base.
If tightening is required, tighten
by hand.
6-8 Infotainment System
Page 124 of 318

(FWD REV)(Fast Forward/
Fast Reverse): Press and hold
(
to advance playback quickly within a
track. Release to resume playing the
track. Press and hold
)to reverse
playback quickly within a track.
Release to resume playing the track.
BAND: Press to listen to the radio
when a CD is playing.
CD/AUX (CD/Auxiliary): Press to
play a CD when listening to the
radio.
Press the CD/AUX button again and
the system begins playing audio from
the connected portable audio player.
If a portable audio player is not
connected, “No Aux Input Device”
displays.
See “Using the Auxiliary Input Jack”
later in this section. INFO (Information):
Press to
switch the display between the track
number, elapsed time of the track,
and the time. When the ignition is off,
press this button to display the time.
EQ (Equalization): Press to select
an equalization setting while playing
a CD. See “EQ” listed previously for
more information. If an EQ setting is
selected for a CD, it is activated each
time a CD is played.
Care of CDs
The sound quality of the CD player
can be reduced because of:
•The CD-R quality.
•The method of recording
the CD-R.
•The quality of the music that has
been recorded on the CD-R.
•The way the CD-R has been
handled. Store CD-R(s) in their original cases
or other protective cases and away
from dust and direct sunlight. The
CD player scans the bottom surface
of the disc. If the surface of a CD
is damaged, such as cracked,
broken, or scratched, the CD may
not play properly or at all. Do not
touch the bottom side of a CD while
handling it; this could damage the
surface. Pick up CDs by grasping the
outer edges or the edge of the hole
and the outer edge.
To clean a CD, use a soft lint free
cloth, or dampen a clean soft
cloth in a mild neutral detergent
solution mixed with water. Wipe the
CD from the center to the edge.
6-10 Infotainment System
Page 131 of 318
Air Conditioning
For vehicles with this feature, there
will be the following controls:
A/C (Air Conditioning):Press to
turn the air conditioning system
on or off. An indicator light shows
that it is on.
MAX A/C (Maximum Air
Conditioning): Press the A/C and
recirculation buttons at the same
time to select MAX A/C.
On hot days, open the windows to let
hot inside air escape; then close
them. The vehicle will cool quicker
and the A/C system operates more
efficiently.
Because the A/C system removes
moisture from the air, it is normal
for a small amount of water to
drip under the vehicle while idling
or just after turning the engine off.
Recirculation
?(Recirculation): Press to turn
the recirculation mode on or off.
An indicator light shows that it is on.
This mode recirculates the air inside
the vehicle and helps to heat or cool
the air more quickly. It can be used to
prevent outside air and odors from
entering the vehicle.
Press the button again to turn the
recirculation mode off and the
outside air mode on. Recirculation is
automatically turned off when the
climate control system mode knob
is turned to defog, defrost, or is
positioned between modes.
Rear Window Defogger
The rear window defogger uses a
warming grid to clear fog from the
rear window. It will only work when
the ignition is in the ON/RUN
position.
=(Rear Defogger): Press to turn
the rear window defogger on or off.
An indicator light shows that it is on.
The rear window defogger stays on
for 15 minutes. Clear any snow from
the rear window.
Notice: Do not use a razor
blade or sharp object to clear the
inside rear window. Do not adhere
anything to the defogger grid lines
in the rear glass. These actions
may damage the rear defogger.
Repairs would not be covered by
your warranty.
Climate Controls 7-3
Page 138 of 318
Braking
SeeBrake System Warning Light on
page 4-17.
Braking action involves perception
time and reaction time. Deciding
to push the brake pedal is
perception time. Actually doing
it is reaction time.
Average reaction time is about
three-fourths of a second. But
that is only an average. It might be
less with one driver and as long as
two or three seconds or more with
another. Age, physical condition,
alertness, coordination, and eyesight
all play a part. So do alcohol,
drugs, and frustration. But even in
three-fourths of a second, a vehicle
moving at 100 km/h (60 mph) travels
20 m (66 ft). That could be a lot of
distance in an emergency, so
keeping enough space between the
vehicle and others is important. And, of course, actual stopping
distances vary greatly with the
surface of the road, whether it is
pavement or gravel; the condition of
the road, whether it is wet, dry, or icy;
tire tread; the condition of the brakes;
the weight of the vehicle; and the
amount of brake force applied.
Avoid needless heavy braking. Some
people drive in spurts — heavy
acceleration followed by heavy
braking — rather than keeping
pace with traffic. This is a mistake.
The brakes might not have time to
cool between hard stops. The brakes
will wear out much faster with a lot of
heavy braking. Keeping pace with
the traffic and allowing realistic
following distances eliminates a lot of
unnecessary braking. That means
better braking and longer brake life.
If the engine ever stops while the
vehicle is being driven, brake
normally but do not pump the brakes.
If the brakes are pumped, the pedal
could get harder to push down. If the
engine stops, there will still be some
power brake assist but it will be used
when the brake is applied. Once the
power assist is used up, it can take
longer to stop and the brake pedal
will be harder to push.
Adding non-dealer/non-retailer
accessories can affect vehicle
performance. See
Accessories and
Modi�cations on page 9-3 .
Steering
If the engine stalls while driving, the
power steering assist system will
continue to operate until you are able
to stop the vehicle. If power steering
assist is lost because the electric
power steering system is not
functioning, the vehicle can be
steered but it will take more effort.
8-4 Driving and Operating
Page 140 of 318
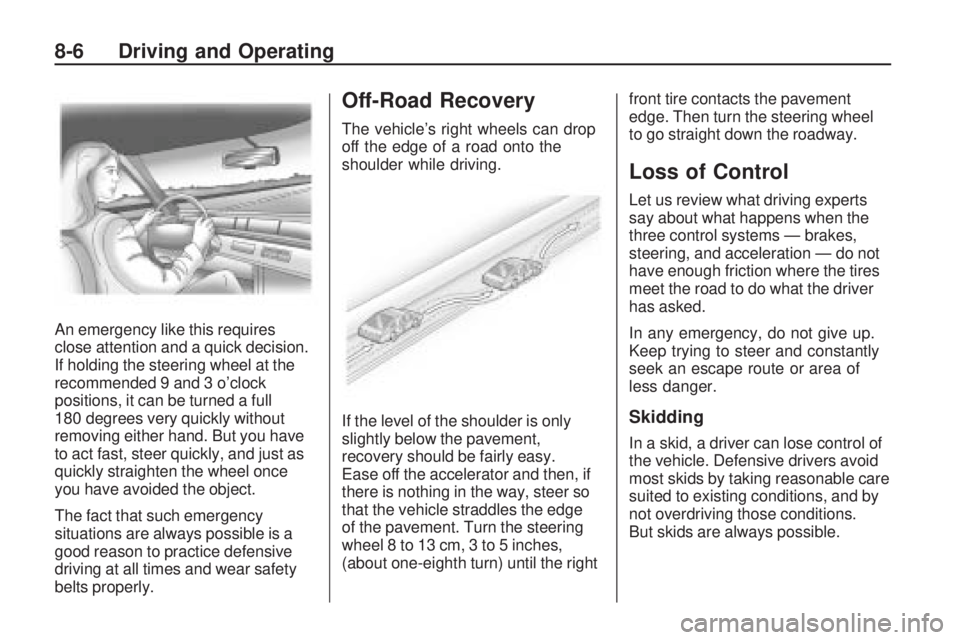
An emergency like this requires
close attention and a quick decision.
If holding the steering wheel at the
recommended 9 and 3 o’clock
positions, it can be turned a full
180 degrees very quickly without
removing either hand. But you have
to act fast, steer quickly, and just as
quickly straighten the wheel once
you have avoided the object.
The fact that such emergency
situations are always possible is a
good reason to practice defensive
driving at all times and wear safety
belts properly.
Off-Road Recovery
The vehicle’s right wheels can drop
off the edge of a road onto the
shoulder while driving.
If the level of the shoulder is only
slightly below the pavement,
recovery should be fairly easy.
Ease off the accelerator and then, if
there is nothing in the way, steer so
that the vehicle straddles the edge
of the pavement. Turn the steering
wheel 8 to 13 cm, 3 to 5 inches,
(about one-eighth turn) until the rightfront tire contacts the pavement
edge. Then turn the steering wheel
to go straight down the roadway.
Loss of Control
Let us review what driving experts
say about what happens when the
three control systems — brakes,
steering, and acceleration — do not
have enough friction where the tires
meet the road to do what the driver
has asked.
In any emergency, do not give up.
Keep trying to steer and constantly
seek an escape route or area of
less danger.
Skidding
In a skid, a driver can lose control of
the vehicle. Defensive drivers avoid
most skids by taking reasonable care
suited to existing conditions, and by
not overdriving those conditions.
But skids are always possible.
8-6 Driving and Operating
Page 141 of 318
The three types of skids correspond
to the vehicle’s three control
systems. In the braking skid, the
wheels are not rolling. In the steering
or cornering skid, too much speed or
steering in a curve causes tires to
slip and lose cornering force. And in
the acceleration skid, too much
throttle causes the driving wheels
to spin.
If the vehicle starts to slide, ease
your foot off the accelerator pedal
and quickly steer the way you want
the vehicle to go. If you start steering
quickly enough, the vehicle may
straighten out. Always be ready
for a second skid if it occurs.
Of course, traction is reduced when
water, snow, ice, gravel, or other
material is on the road. For safety,
slow down and adjust your driving to
these conditions. It is important to
slow down on slippery surfaces
because stopping distance is longer
and vehicle control more limited.While driving on a surface with
reduced traction, try your best to
avoid sudden steering, acceleration,
or braking, including reducing vehicle
speed by shifting to a lower gear.
Any sudden changes could cause
the tires to slide. You might not
realize the surface is slippery until
the vehicle is skidding. Learn to
recognize warning clues — such as
enough water, ice, or packed snow
on the road to make a mirrored
surface — and slow down when you
have any doubt.
Remember: Any Antilock Brake
System (ABS) helps avoid only the
braking skid.
Driving on Wet Roads
Rain and wet roads can reduce
vehicle traction and affect your ability
to stop and accelerate. Always drive
slower in these types of driving
conditions and avoid driving through
large puddles and deep-standing or
flowing water.
{CAUTION
Wet brakes can cause crashes.
They might not work as well in
a quick stop and could cause
pulling to one side. You could
lose control of the vehicle.
After driving through a large
puddle of water or a car/vehicle
wash, lightly apply the brake pedal
until the brakes work normally.
Flowing or rushing water creates
strong forces. Driving through
flowing water could cause your
vehicle to be carried away. If this
happens, you and other vehicle
occupants could drown. Do not
ignore police warnings and be
very cautious about trying to
drive through flowing water.
Driving and Operating 8-7
Page 145 of 318
To save fuel, run the engine for only
short periods as needed to warm the
vehicle and then shut the engine off
and close the window most of the
way to save heat. Repeat this until
help arrives but only when you feel
really uncomfortable from the cold.
Moving about to keep warm also
helps.
If it takes some time for help to
arrive, now and then when you run
the engine, push the accelerator
pedal slightly so the engine runs
faster than the idle speed. This
keeps the battery charged to restart
the vehicle and to signal for help with
the headlamps. Do this as little as
possible to save fuel.If the Vehicle is Stuck
Slowly and cautiously spin the
wheels to free the vehicle when
stuck in sand, mud, ice, or snow.
{CAUTION
If you let your vehicle’s tires spin at
high speed, they can explode, and
you or others could be injured. The
vehicle can overheat, causing an
engine compartment fire or other
damage. Spin the wheels as little
as possible and avoid going above
55 km/h (35 mph) as shown on the
speedometer.
For information about using tire
chains on the vehicle, see Tire
Chains on page 9-61 .
Rocking the Vehicle to Get
it Out
Turn the steering wheel left and
right to clear the area around the
front wheels. Turn off any traction
system. Shift back and forth between
R (Reverse) and a forward gear,
or with a manual transmission,
between 1 (First) or 2 (Second) and
R (Reverse), spinning the wheels
as little as possible. To prevent
transmission wear, wait until the
wheels stop spinning before shifting
gears. Release the accelerator pedal
while shifting, and press lightly on
the accelerator pedal when the
transmission is in gear. Slowly
spinning the wheels in the forward
and reverse directions causes a
rocking motion that could free the
vehicle. If that does not get the
vehicle out after a few tries, it might
need to be towed out. If the vehicle
does need to be towed out, see
Towing the Vehicle on page 9-73 .
Driving and Operating 8-11
Page 149 of 318
Never exceed the GVWR for the
vehicle, or the Gross Axle Weight
Rating (GAWR) for either the
front or rear axle.
And, if you do have a heavy load,
you should spread it out. See
“Steps for Determining Correct
Load Limit” earlier in this section.
{CAUTION
Do not load the vehicle any
heavier than the Gross Vehicle
Weight Rating (GVWR), or
either the maximum front or
rear Gross Axle Weight Rating
(GAWR). If you do, parts on
the vehicle can break, and it
can change the way your
vehicle handles. These could
cause you to lose control and
crash. Also, overloading can
shorten the life of the vehicle. Notice
:Overloading your
vehicle may cause damage.
Repairs would not be covered
by your warranty. Do not
overload your vehicle.
If you put things inside your
vehicle — like suitcases,
tools, packages, or anything
else — they will go as fast as the
vehicle goes. If you have to stop
or turn quickly, or if there is a
crash, they will keep going.
{CAUTION
Things you put inside your
vehicle can strike and injure
people in a sudden stop or
turn, or in a crash.
•Put things in the rear area
of your vehicle. Try to
spread the weight evenly.
If you have fold-down rear
seats, you will find four
(Continued)
CAUTION (Continued) anchors on the back wall
of your trunk. You can use
these anchors to tie down
lighter loads. They are not
strong enough for heavy
things, however, so put
them as far forward as
you can in the trunk or
rear area.
•Never stack heavier
things, like suitcases,
inside the vehicle so that
some of them are above
the tops of the seats.
•Do not leave an unsecured
child restraint in your
vehicle.
•When you carry something
inside the vehicle, secure it
whenever you can.
•Do not leave a seat folded
down unless you need to.
Driving and Operating 8-15
Page 151 of 318

LOCK/OFF:This is the only position
from which you can remove the key.
This locks the steering wheel,
ignition and automatic transmission.
Push in the ignition switch as you
turn the key toward you.
On vehicles with an automatic
transmission, the shift lever must be
in P (Park) to turn the ignition switch
to the LOCK/OFF position.
A warning tone will sound if the driver
door is opened with the key in the
ignition.
The ignition switch can bind in the
LOCK/OFF position with your wheels
turned off center. If this happens,
move the steering wheel from right
to left while turning the key to
ACC/ACCESSORY. If this doesn’t
work, then the vehicle needs service.{CAUTION
On manual transmission vehicles,
turning the key to LOCK/OFF and
removing it will lock the steering
column and result in a loss of
ability to steer the vehicle.
This could cause a collision.
If you need to turn the engine
off while the vehicle is moving,
turn the key only to ACC/
ACCESSORY. Do not push the
key in while the vehicle is moving.
ACC/ACCESSORY: This position
provides power to some of the
electrical accessories. It unlocks the
steering wheel and ignition. To move
the key from ACC/ACCESSORY to
LOCK/OFF, push in the key and then
turn it to LOCK/OFF.
A warning tone will sound when the
driver door is opened when the
ignition is still in ACC/ACCESSORY
or LOCK/OFF and the key is in the
ignition. ON/RUN:
The ignition switch stays
in this position when the engine is
running. This position can be used
to operate the electrical accessories,
including the ventilation fan and
115 volt power outlet, as well as to
display some warning and indicator
lights. The transmission is also
unlocked in this position on
automatic transmission vehicles.
The battery could be drained
if you leave the key in the ACC/
ACCESSORY or ON/RUN position
with the engine off. You may not be
able to start the vehicle if the battery
is allowed to drain for an extended
period of time.
START: This position starts the
engine. When the engine starts,
release the key. The ignition switch
will return to ON/RUN for normal
driving.
Driving and Operating 8-17